Korm , you’ve been quiet . I was looking forward to seeing your next bit . I hope my comment about water streaks didn’t put you off .
Mike
Korm , you’ve been quiet . I was looking forward to seeing your next bit . I hope my comment about water streaks didn’t put you off .
Mike
no, it didn’t put me off. what put me off was work…
(i still don’t understand that semy retired means you get half of the evenings free)
for your idea, i thought about it.
and i will try it out on some special mock up first.
because i got the suspiction, that real water might make the streaks too broad.
but alcohol or thinner come to mind.
maybe tomorrow i will have finished the interior of the other half of the tunnel.
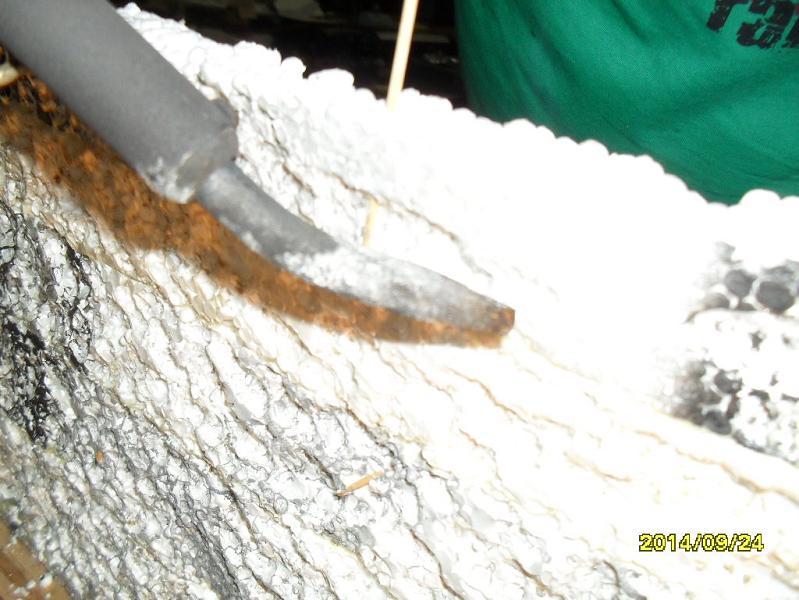
just took a soldring iron and dabbed it at the styrofoam. now i am painting that.
Looks good Korm!
Thanks for showing that , Korm .
I think you’re doing a great job . That effect using the heat radiated from the iron looks brilliant and must have taken some practice
Just remember to try a very fine streak with the thinnest brush you’ve got ; your idea of using thinners is OK , and if it doesn’t look right , try again on your practise piece then walk away . Leave it overnight and look again , you should with any luck see an improvement . That’s normal , we are our own worst critics .
Mike
PS Work can be very intrusive . What you need is a lottery win . I do too . There’s so many things I need.
thanks to both of you.
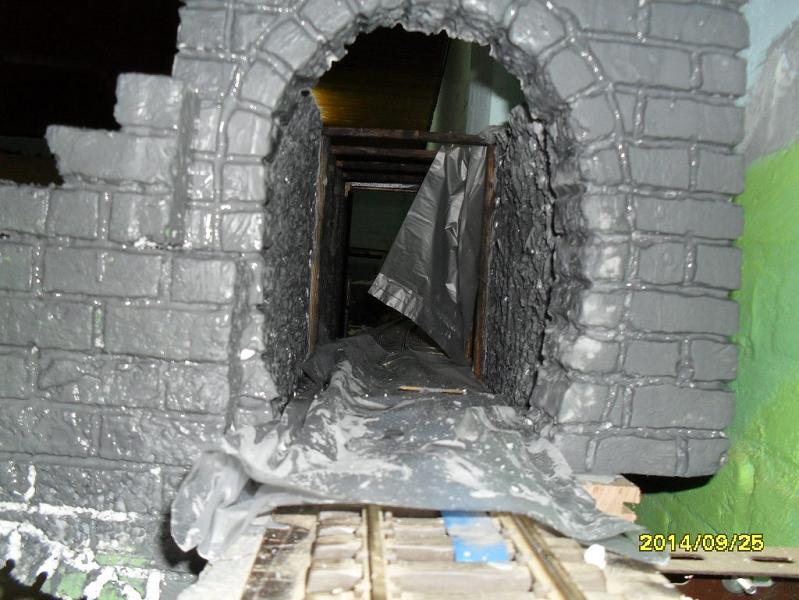
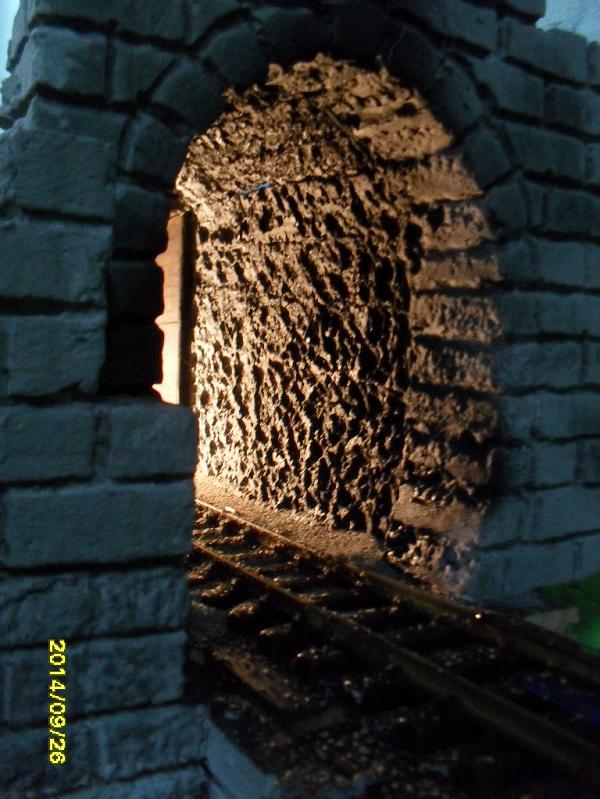
well, i could not resist:
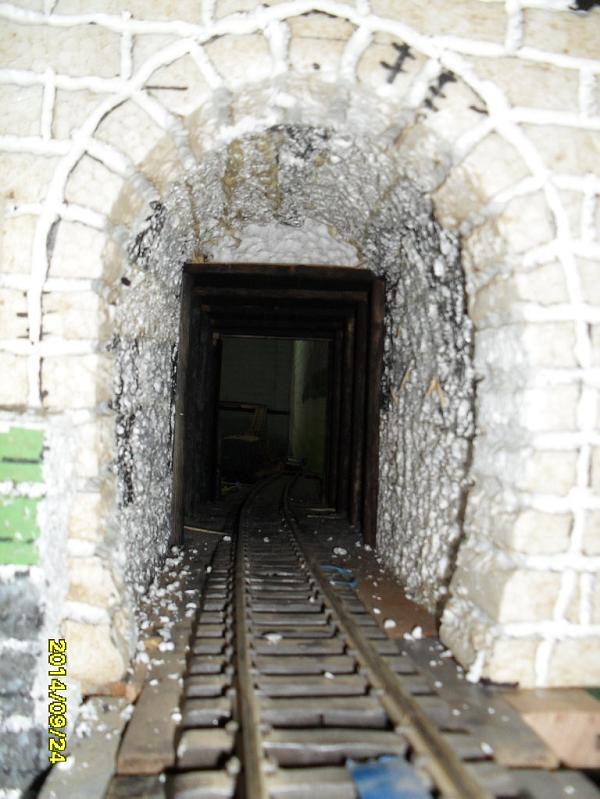
i painted with a mix of wallpaint colorizer, crackfiller and water.
in the pics it is still wet. and the tunnelroof is laying elsewhere to dry.
i expect the color to become much lighter.
when dry, i will use a dull black spraycan inside the tunnel to get the soot effect.
Marvelous! 
thanks, Joe.
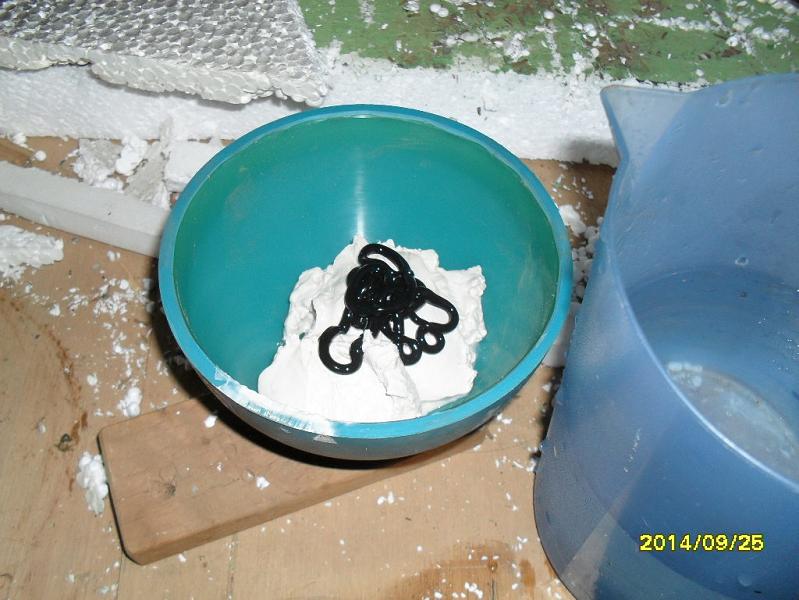
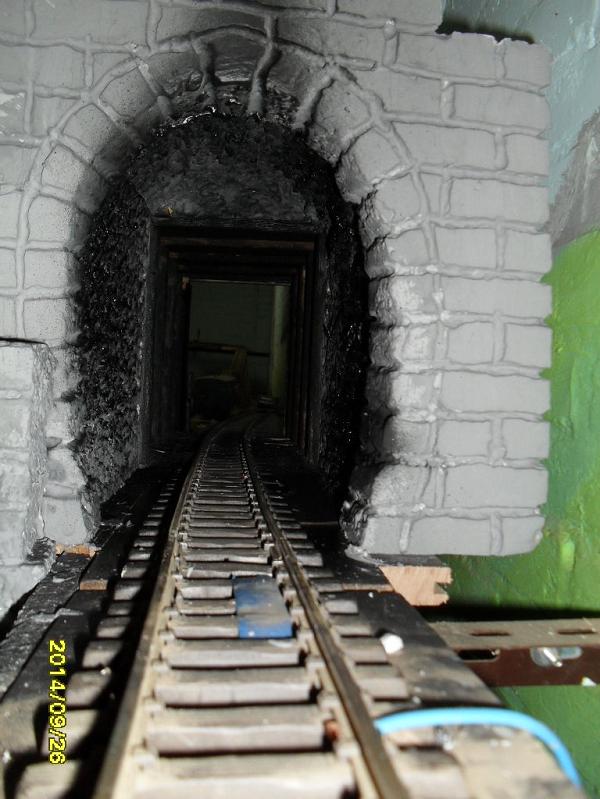
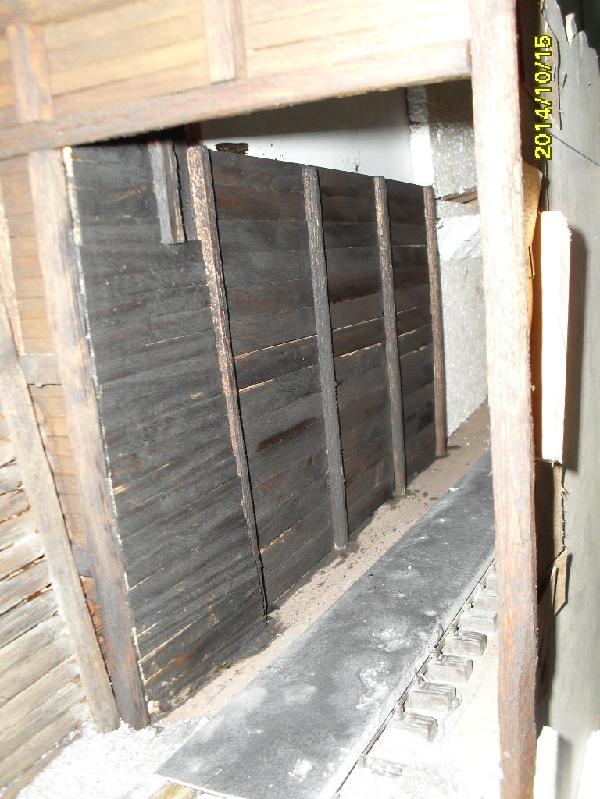
upon the dry grey i applied some dull black from a rattlecan. (first two pics)
it did not cover enough, and was still too brilliant.
so i took a spraybottle from windowcleane, and filled it with water and some of that black toner.
… and applied very much.
(third picture)
well there will be a pause in my protocol now.
because if i do not come up with some new, weird ideas, the next two tunnels will not be worth to be protocoled.
Korm , that’s brilliant . I want one . Quite atmospheric .
Mike
Looks grand in that last photo with the light, texture is as important as color.
Korm,
Very real looking!
thank you all for the kind remarks!

Love it Korm !
That came out great Korm, nicely done.
thank you both, Sean and Vic.
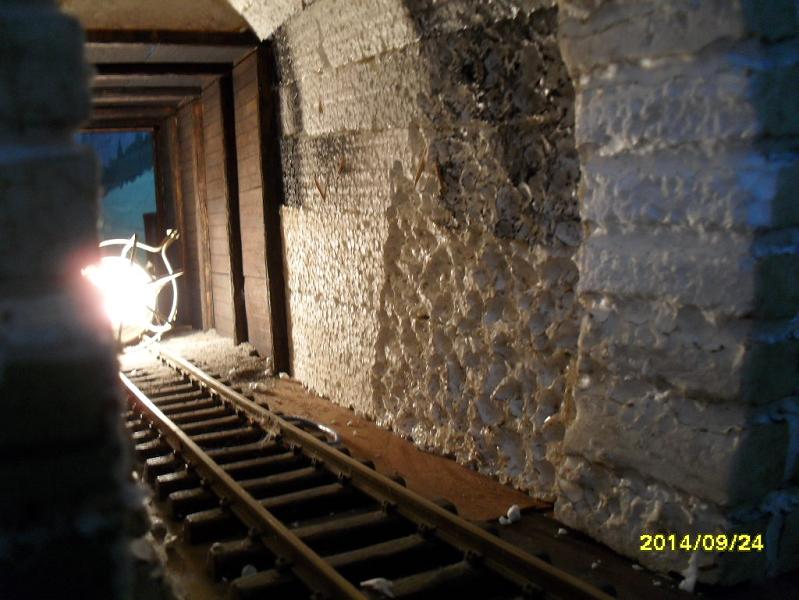
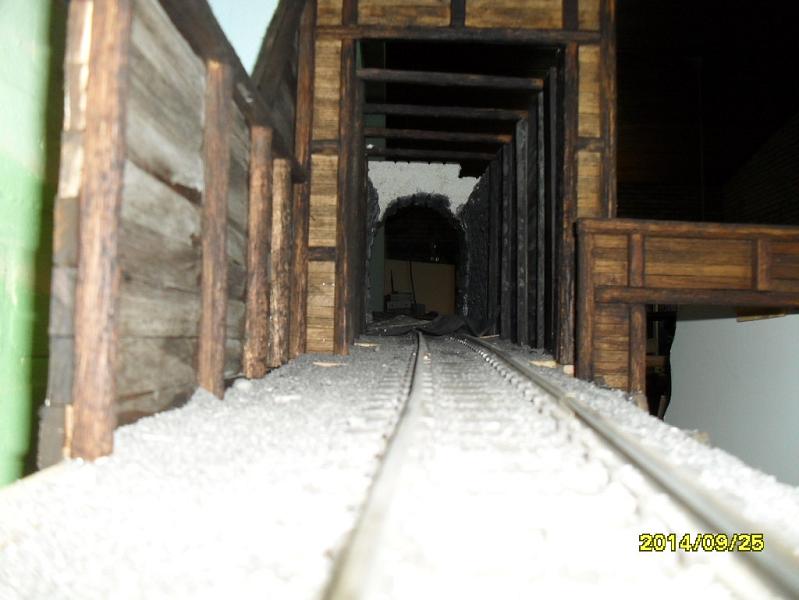
nothing new at this end - just another tunnel interior…
but at daily temperatures about 105 F i’m progressing really slow.
just some more sawing, glueing and painting.
(and every little sin of having been sloppy revenges itself with some extra effort necessary…)
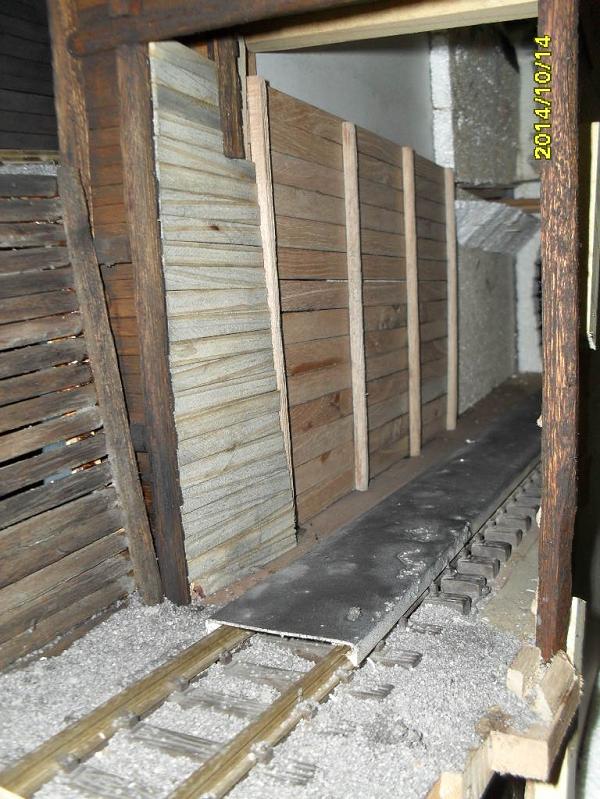
I like the planking , it looks quite real . Do you make it as a sub assembly , or build it in situ?
Mike
This is coming out great! Most tunnels are just portals with nothing inside. This takes the scale inside as well and offers photo opportunities.
well, the longest of these tunnels is about four foot. that lets so much light enter, that the “big nothing” would be very noticeable. (the disadvantage of building at table to eye hight)
and, really, the worst that could happen to me, would be to finish this layout.
(because that would mean to start a new one)
so, even if i am too old, to take the time to make nailheads for the planks on the tunnel insides, i’m not in a hurry.
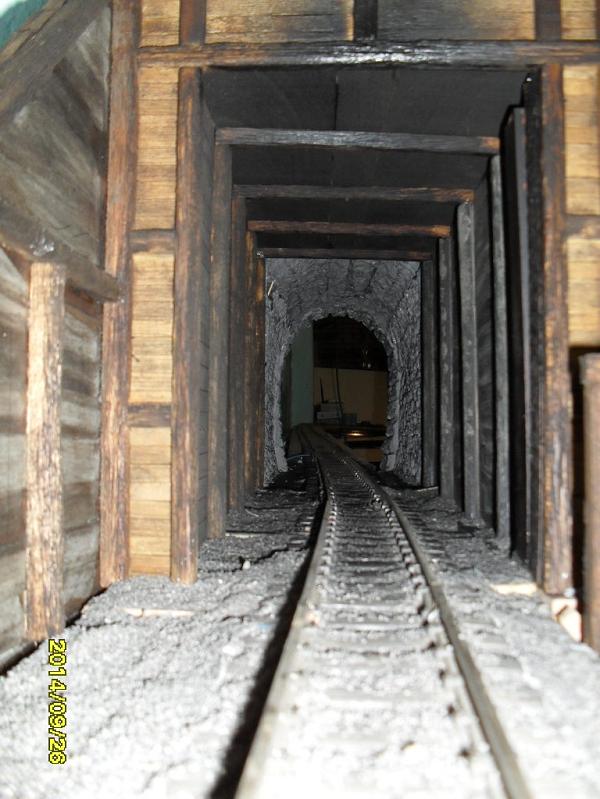
still without the last coat of cigarette ashes:
Are you going to “TAG” the inside?
You could leave tools, skeletons etc. for the masses to see!
Make sure there is @ least a "Kilroy was here "!
hmmm… Kilroy might be out of my era.
if i’m not mistaken, he was a WW2 guy in the pacific/asian theatre.
but some leftovers from construction - yessir! thanks for the idea.
btw, got a new idea.
i am experimenting to inset thicker pieces of styropor into the styropor tunnel walls.
in the hope, to not only get a rough, but a rough and uneven wall.
(pics of that will come together as a serial)
Mike Morgan said:
I like the planking , it looks quite real . Do you make it as a sub assembly , or build it in situ?
Mike
sorry, i did not notice your post earlier.
that depends
most often i just glue down something, then look for a piece of scrap that might fit to it.
but the ceilings of the tunnels for instance are sub assemblies, for removal, if necessary.
for the retaining walls outside the tunnels i really did cut all the pieces beforehand, then assembled in situ.
the portals were assembled on the workbench.