Large Scale Central

Firetruck

Sometime last year I took a serious look at one of my vehicles. I started this project, but it’s been stalled for some time as I tried to work through some details.

I leave them out all year long and the weather takes its toll.

So, I could strip it and repaint it, but I’m eventually planning a fire house in my town, although who knows when that will be.

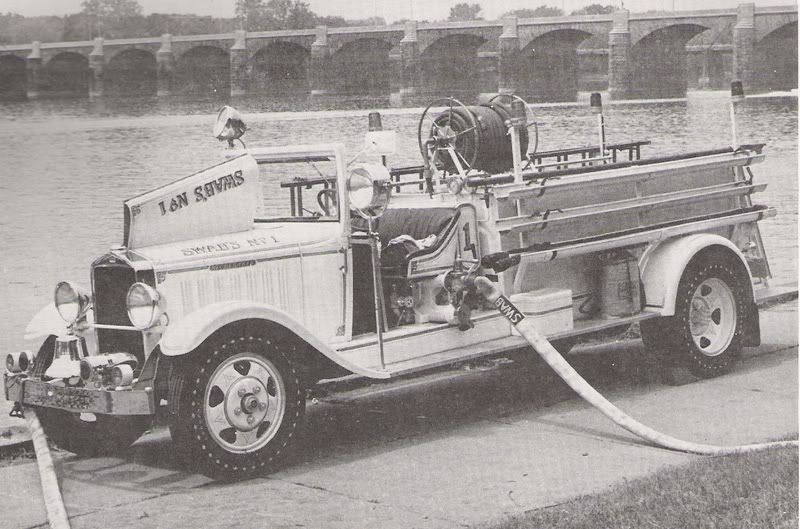
Why note make a firetruck? Well, it’s a small pickup. It’s a Solido 1:19 1936 Ford pickup. It doesn’t really look like a firetruck. Hmm. Not that I really know what a firetruck really looks like, but that’s never stopped me.

Out comes the dremel!

Firetrucks back in the day did not come with a roof. Off with the roof! And the paint.

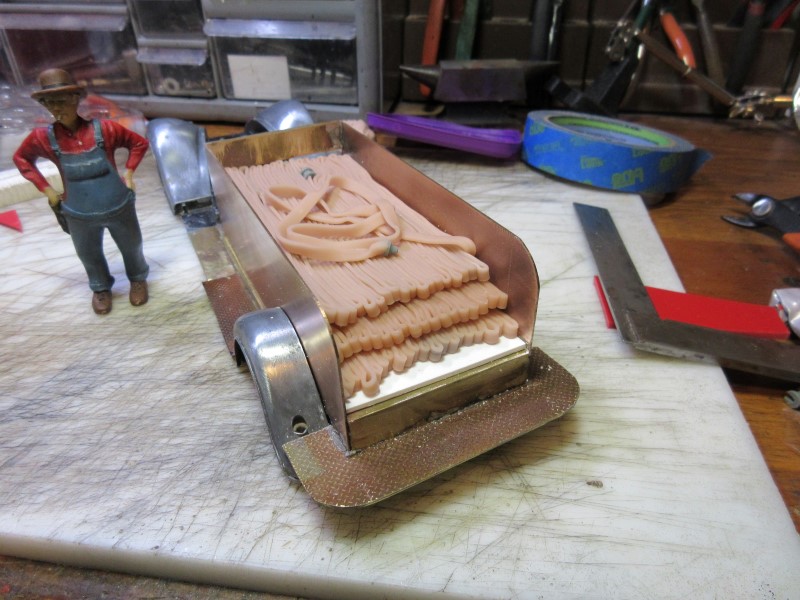
But, it’s a bit too short. Get out the Dremel again. I cut the fender section (there is no separate frame) in two and put in some brass sheets and strips to lengthen the whole thing.

I also had some COPPER sheets that I soldered together to make a bed.

Starting to look more like a firetruck, but here the project stalled out as I really couldn’t figure out what to do with the inside of the body.

I decided to start with the “easy” stuff first. I knew I wanted a ladder on one side and some firehoses on the other. This will stay outside, so I didn’t want anything that wouldn’t stand up.

I have some styrene tubing. I’ll use that and paint it black. I cut some copper tubing into narrow strips that I’ll place on each end.

Poking around the Internet yields lots of possibilities. I come across pictures that show the back of the truck filled with a long fire hose all curled up.

Neat idea. I’ll just get some tan shoelace and glue it together to look like folded fire hose. My initial thought is to have it look like there’s two layers of hoses, so I’ll just do a short one to try out the idea.

Ack. It looks like a blob of tan, not a folded hose. Not at all what I was hoping for. But, I have a 6mm piece of homasote. I’ll be like Ray and carve it. Based on what Ray has been able to achieve, this should look pretty good.

Ooh. Two stumbling blocks. I have neither the patience of Job nor the talent of Ray. (http://www.largescalecentral.com/externals/tinymce/plugins/emoticons/img/smiley-embarassed.gif)

It’s a start but at least it doesn’t look like a blob of tan. Not sure it looks like folded hose, but it might be considered progress.

Painted up, I think it will be OK. At least the back is filled up.

Neat project Bruce. Really like the feel of the truck. I like your carved hose better too but it’s hard to get that organic feel with it. Maybe try a tighter knit lace? Looking forward to seeing the end result. You’ve never disappointed before. (http://www.largescalecentral.com/externals/tinymce/plugins/emoticons/img/smiley-cool.gif)

On most fire trucks the back bed is a tank and the top of the tank is for hose. You don’t need to model the tank. Just put another sheet to close in the bed, about 2/3rds of the way up. Put a 90 degree bend in that sheet to close the back. Be sure to leave a shelf at the rear for your firemen to ride on.

Pump controls, and the large suction hoses go on the driver’s side. Ladder on the other. Pump controls can be pretty simple on ealy trucks. Here’s an example of a 1942 Chevy from the house that I volunteered at when I was a young wippersbnapper…

OK, you were still posting when I started mine. I hadn’t seen your bed pic before I posted my pics. I’d raise the hose bed up so the top layer of hose is just under the top edge of the sides. Hose would be some 2.5" and some 1.5". There would be an end with a coupler showing for the firemen to grab when starting a hose lay. But no one other than firemen would probably know this, so your hose is probably fine as-is.

The restored truck I posted has no hose bed, the rear has benches along each side and is used in parades.

Thanks for the ideas. I will keep pondering this one. It’s easy to get wrapped up in details that don’t really matter, but I would like it to at least resemble something that maybe could have possibly been a fire truck.

If I’d have known about this last August when I was out in Oregon, I could have gotten some detailed pictures for you. The hotel we were staying in had a lot of National Park Service Firemen staying there because of all the fires. Of course these were the more modern version fire truck but most of the back end were controls and gauges for the pumper. On top of that was a hose reel with what looked to be 2" hose on it. Behind that I would guess was a large tank for holding water. I didn’t notice any extra hoses since these seemed to be self contained units.The sides were taken up with storage compartments. What was interesting was that some of these guys were from as far away as Colorado and New Mexico.

What the drivers side, or pump panel could look like

note the reel would have a hard 1" hose on it, seen laying in the bed below the reel. And would have two 10’ sections of hard 4 1/2" for drafting water frome a pool,stream,pond,etc. These actually lay in trays too keep them from forming over brackets. One of these would sometimes have a strainer in place to save time on stting up. The strainer is about 8" long x 6" diameter all mesh around the sides ans a solid circle on the end. The solid flat end would have an eye in it at center to tie a rope to help take the strain off the hose whill it’s in use.

Not good but you can see the trays.

And the passenger, or officers side

On this side you may find a ladder or two hung on brackets and a longer nozzle or pipe standing up on the step area behind the rear fender. Also note that the lower fitting with the larger cap is 4 1/2" for the larger hoses, and the upper fittings are 2 1/2" for the hand lines. The one farthest away has a gated reducer on it for the 1 1/2" dwelling lines that are used. Don’t forget that beautiful Federal Q siren on the front fender.

Not very large but it does show how some companies laid hose.

In Baltimore we laid the hose flat across the bed. We also had a dividing wall to seperate the hose bed for laying 2 1/2" hose and 1 1/2" hose. Note the hose reel in the opening below the laid hose. Also a fire extinguisher and a couple different pipes on the running boards/steps. Oh, the only open end of a hose you’ll see in the hose bed is the starting section and the last section. Everything else is connected. If you really want to worry it, the hose sections are 50’ long so you need couplings for each end.

When I built my fire engines I got the material for the hose from a faberic store. The stuff they use to make those nice round seams in furniture cushins. Rodding I believe, anyway I pulled the filler out of it so it would lay flat.

Alright that’s enough history for today.

Bruce or others,

I have about zero experience soldering. When making the chain binders I noticed copper is easier to solder than brass or at least with what I had on hand. I noticed you used copper. My question is is there different techniques or solder for brass as opposed to copper. I know brass get soldered but the solder just wnated to ball up and not flow like it did on the copper.

I have a hankering to do one of my 4 locos in all brass just to see if I can do it.

Cool pictures; thanks.

Devon, I typically use and prefer brass.  I had obtained some copper sheets from my son-in-law's father and had them on hand so it made sense to give it a try.  Frankly, I found the brass a lot easier to solder, but it may be because I didn't clean it up as much as I should have.

I'd sure give a thought to building one in brass.   Did you ever see the one I did? (http://www.largescalecentral.com/forums/topic/19091/a-brass-critter/view/page/1)  It was a lot of fun, but I'd sure recommend a resistance soldering outfit.

Now see you just went over my head already with the whole resistance soldering outfit. I am over my head even thinking about it but I don’t typically shy away from a challenege. I will check out your build for sure.

Your link apears dead.

Flux! Clean metal and flux and the solder will flow to the heat.

The material from a fabric store is called ‘Piping’.

John

Ok basically a stupid (ignorant) question for you John. Are you using a torch to supply heat and silver solder? I was using a cheap soldering iron and who knows what kind of solder. As I was doing it (without flux) I was wondering if I was just going about it totally wrong.

Fixed the link. I don’t know why it didn’t work when I used the link tool. I’ll play with that some more.

I tried all sorts of different flux with that copper. I think it was just too dirty…

Thanks for fixing the link

I have torches, but I use a small iron for soft solder, not silver containing solder nor silver solder (the hard ones)

Soft solders for electrical and non-structural joints -irons

Silver bearing solders (plumbers solders) -torch or iron

Silver solder -torch only.

In my shop I have Oxy-Acet and irons, outdoor and plumbing jobs I’ll use a Benz-o-matic torch on a tank and with that, the Silver bearing solders. Silver Bearing solders are stronger than soft solders. On a scale with soft =1 and Silver Hard solders at 10, Silver bearing is about a 4 on strength. Based on my experiences only.

Clean metal and flux, do not rely on the flux inside some solders, not enough! I have a tin of paste solder for soft solders. I use it liberally and remember solder flows to heat. Use the heat to control it’s direction.

Different fluxes for different solders; soft solder; a brown paste, silver bearing (a soft solder with silver for added strength) a white paste flux and Batterns self pickling liquid flux for fine Sterling silver work.

Copper and brass are equal, but brass is often thinner and easier to heat.

John

Thanks John.

I got inspired by the prototype photos…and even more discouraged with my efforts to date.

I had to have something that would look more like a hose and not like a block of pvc. (http://www.largescalecentral.com/externals/tinymce/plugins/emoticons/img/smiley-embarassed.gif)I was racking my mind. Woo…did that smart.

Anyway, I’ve had pretty good luck with Magic-Sculpt outside, so I thought about that for a bit. But, trying to produce an even looking hose might be problematic for my limited sculpting ability. Then I thought about an extruder - hmmm, that would give me something very even looking. But, I got to thinking that maybe it wouldn’t work with Magic Sculpt? What would? Poking around via Google, I ran into some posts about extruders and how well they worked with Sculpey.

OK, that would work, since I have a little toaster oven in my shop from when I was using Sculpey trying to make some figures.

There’s lots to learn about extruders, but I found one that got some pretty good marks. It’s from Walnut Hollow and it works VERY well; I’m quite pleased. It comes with about 12 dies and one of them looked like it could be a fire hose.

I started to extrude the Sculpey and fold the hose - the first layer will just be at the bottom of the stack.

Then I did some more layers and, to my eye, it looks just a whole lot better.

I haven’t glued it in place yet, as I plan to paint the truck first. I’ll probably put some acrylic on the hose as well.

Not too shabby Bruce.