Thank you for telling us about your granddaughter’s wedding, Dave. It brought a happy smile to my face and a warm glow to my heart. Love is the BEST! 
Dave, that is a precise model of the craftsman’s meld of precision and speed. Good job!
Nice work!
This weeks progress has been more behind the scenes. I got the final coats of paint on the tank ant spout holder. Boring, but necessary. I’ve decided to use the FREE 3/32 wire for the bands, it does scale out to 3/4 in, so about right. I did not have a 3-48 die to thread them with so went internet shopping and found this set.
(http://i1234.photobucket.com/albums/ff403/dave2-8-0/WT-85.jpg)
This set is tiny, ( thats my not to large finger) but the Price of $39 +SH seemed fair. Quality? well they do work, and if I was making my living with these ?? There OK , Not NASA grade, but they do work. I did some test cuts, and bought some 3-48 nuts, there not the tightest but seem to hold well enough for this job.
(http://i1234.photobucket.com/albums/ff403/dave2-8-0/WT-86.jpg)
Note: thats a Aristo track driver for size comparison. This is what I have come up with for the turnbuckles. I have ordered bar alum. to cut to size, and thru drill.
(http://i1234.photobucket.com/albums/ff403/dave2-8-0/WT-88.jpg)
Anyone notice anything stupidly wrong with this, before I waste a lot of time cutting, drilling and threading? Off for a mini 4 day vacation to Zion NP, and on to Las Vegas while the bar stock gets shipped in. I really miss St A’s Junction in Vegas, it was a better place to visit then most of the strip.
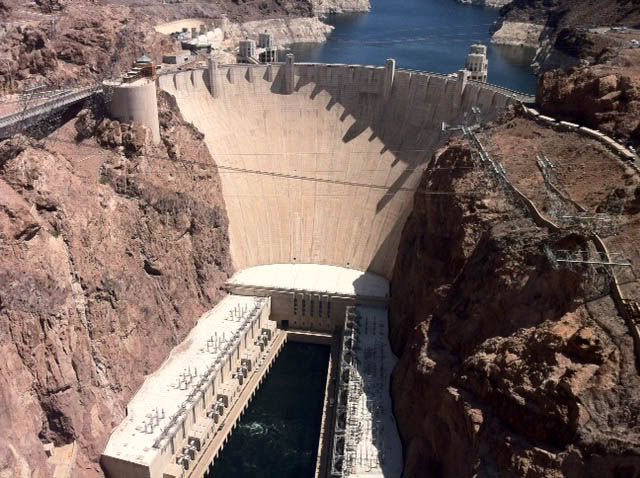
Zion NP GREAT Place!! Vegas OK! On the way home, stopped at Hoover Dam. BTW the new bridge ( named for Pat Tillman, a great American, that gave the ultimate sacrifice for us) over the river just down stream is a great place to view the dam.
(http://i1234.photobucket.com/albums/ff403/dave2-8-0/HooverDam.jpg)
Work sure gets in the way of my railroad! Got started on the turnbuckles, Hand cut and drilled a test piece. Seems to work well.
(http://i1234.photobucket.com/albums/ff403/dave2-8-0/WT-93.jpg)
Started production on 25 turnbuckles and bands. Bandsaw made short work on the Alum. bar stock.
(http://i1234.photobucket.com/albums/ff403/dave2-8-0/WT-97.jpg)
Built a jig to hold the little pieces for thru drilling both holes.
(http://i1234.photobucket.com/albums/ff403/dave2-8-0/WT-96.jpg)
(http://i1234.photobucket.com/albums/ff403/dave2-8-0/WT-90.jpg)
Threaded both ends of a 67 1/2 " long .091 wire for the bands.
(http://i1234.photobucket.com/albums/ff403/dave2-8-0/WT-91.jpg)
Assembled the bands and turnbuckles.
(http://i1234.photobucket.com/albums/ff403/dave2-8-0/WT-92.jpg)
Test fitted and tightened up a band on the tank… It Works!!
(http://i1234.photobucket.com/albums/ff403/dave2-8-0/WT-89.jpg)
The shakes on the roof are slowly coming along. Having to wait for the silicone to set up before applying the next course is really holding back the progress. But it is coming along.
(http://i1234.photobucket.com/albums/ff403/dave2-8-0/WT-94.jpg)
Next: Primer and Flat Black paint on the bands, And Plumbing the water in.
Dave, Unless you have other plans, I used a solid brass lamp shade finial on the peak of my water tower. They come in all shapes and sizes. You can also get a stud that is wood threaded on one end and machine threaded on the other to fit the finial. Just an idea. This is an example of hundreds of shapes.
(http://freightsheds.largescalecentral.com/users/jebouck/finial.jpg)
Would a lamp finial be big enough in this scale, I wonder? ’ Course, down there in the 'States you often have way more choice in these things than we generally do up here.
All the same, there are some pretty big gubbins in the drapery section that go on the end of curtain rods. At this scale I wouldn’t be surprised if an old bedknob would work!
Whatever, I’d recommend Blacken - It or a similar product rather than paint to blacken any brass parts - the finial, bands, etc. Works on other metals as well, doesn’t ever flake off! Costs about 10.00 a bottle, but it’ll do a lot, and you can use it on locos, handrails, chains, etc… Other metal-blackening products are available in gun shops, BTW…
You dun good on the tap and die set. I needed to replace ONE broken 2-56 tap last year, cost me $18.00+tax.
I’m gonna’ get me one o’them sets like yourn… PDQ.
Birchwood Casey Perma Blue Gun Bluing also works excellent on brass and duracast (white metal) parts. Available in Wally World and any sporting goods store.
OK guys I’m a little confused! Use the Blueing on the bands? Or on the Brass finial if I go that way? In fact I haven’t thought that far in the future as what to do to top it out. Suggestions?
You can use the bluing on both metals, if you wish. Bluing on brass gives a dark brown appearance and blue/black on steel and aluminum. If the brass has been coated (lacquer or urethane), that will need to be removed.
Jerry
Yes, Dave use the bluing instead of paint on any metal part. The longer you soak the metal the darker the colour you’ll end up with. I wouldn’t worry too much about whether you end up with a blue-black, black, or brown colour on the various metals when you’re done; it’ll all look OK out there… just get those metal parts treated one way or another before assembly. It’ll be way better than the bare metal & far, far better and 'way more durable a finish than paint will ever be.
You won’t feel you wasted your money. But if you do, you can sell me the leftovers! 
Those were great photos on the making of those t-buckles, BTW! Thanx, Dave.
Spent the evening finishing up building the turnbuckles and bands. I’ll have 24 total to work with.
(http://i1234.photobucket.com/albums/ff403/dave2-8-0/WT-98.jpg)
(http://i1234.photobucket.com/albums/ff403/dave2-8-0/WT-99.jpg)
Thats 48 threading. Tomorrow I’ll drop by Wally World to get some blueing. This will again take me into unknown territory. Any hints and tips would be excepted. I understand the Blueing principal, I just never did it before. The bands form a circle about 23" across, or 67" long. How much blueing agent is it going to take to “Tank” something this size? and some idea on the time factor? BTW I did get 2 more row of shingles down… I’m getting tired of this end… 4 more rows left…
I found that if you are careful, you don’t need to wait for the preceding row to dry before proceeding.
FINALLY !!! finished the shake shingles on the roof… I did a rough count and came up with about 1150 shingles. Putting the shingles down wasn’t the tough part, Being that the roof is an octagon there is 8 ridge lines, and at least 2-4 cut angles on each course. A quick count came up with about 360 cut shakes. About 1 in 3 had to be measured and cut for the ridge lines.
(http://i1234.photobucket.com/albums/ff403/dave2-8-0/WT-104.jpg)
(http://i1234.photobucket.com/albums/ff403/dave2-8-0/WT-105.jpg)
A lot more work then I had planed for the roof, but the finished look in the long run will have made it worth the extra effort. Went by my dads and picked up some brass pulleys for the water spout counter weights. My 90 yr. old Dad is a clockmaker and still the 4 corners region only certified Howard Miller tech. He still drives all over the country side making house calls and fixing clocks. These are pretty nice pieces, They are used for the weights on Howard Miller Grandfather clocks. I also got some brass braided cable to use.
(http://i1234.photobucket.com/albums/ff403/dave2-8-0/WT-100.jpg)
Bent some wire, threaded the ends, Drilled a couple of holes and mounted the pulleys so that they swivel.
(http://i1234.photobucket.com/albums/ff403/dave2-8-0/WT-101.jpg)
(http://i1234.photobucket.com/albums/ff403/dave2-8-0/WT-102.jpg)
Found to long of a piece of 1 1/2 pvc pipe and mocked up the spout
(http://i1234.photobucket.com/albums/ff403/dave2-8-0/WT-103.jpg)
Had to paint the bands… the blueing that I could get, would only work on the steel band part and not on the Alum. turnbuckle, or the SS washer and nuts, meaning that I would have to paint the buckles and nut anyway! Next up… Band this beast, and find stuff for the spout.
Great job on those shingles. The roof looks really good.
Ralph
Nice job on the whole tank. That roof really sets it off…
Dave
That is a masterpiece. Those pulleys are nice touch also.
Your friend is getting a wonderful water tank. The roof has come out excellent.
Dave, really well done on the roof. Looking forward to the builder’s photos.