V. cool.
Looks nice. I’d like to see how you did it…
I love the tank. I just have to ask. Are the spout weights from a cuckoo clock? They just look kinda’ familiar.
Best,
David Meashey
Congratulations!
It looks great.
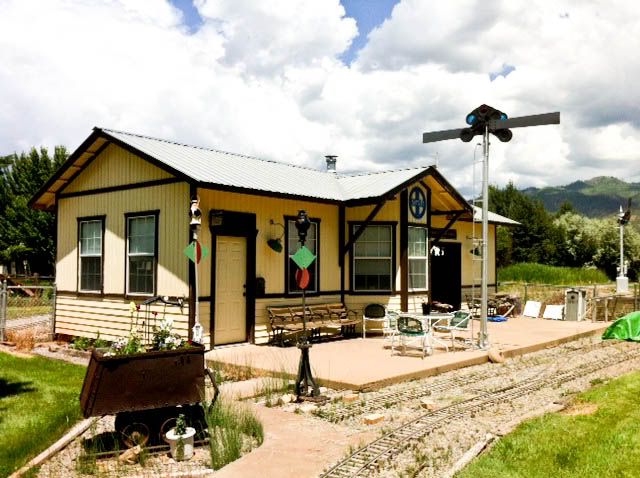
Now to steal your friends live depot idea for my track shack for my 1:20.3 stuff
Or, maybe I’ll take a trip to Greensboro Bend VT and copy that design.
Sorry, no pics of my own at the moment
Please let us know if he doesn’t like it and we’ll have a many LSC forum member fight over it!
Excellent build Dave!
I just love the Hickory spout

Quick response to a couple os ?s @ Dave, Yup you got it. My dads a clock maker, those are from a dead 8 day cuckoo clock. They came out just right on the weight. Free also… as was the brass cable, and the neat pulleys. @ Don His depot is really neat. The inside is decorated, and he has a telegraph set up on the station masters window seat. He uses the freight end for storing his live steamers. The three truck shay im riding at the very start of this thread is his. A 3/4 view from the SW side.
(http://i1234.photobucket.com/albums/ff403/dave2-8-0/AP-014.jpg)
A front view from S. to N.
(http://i1234.photobucket.com/albums/ff403/dave2-8-0/AP-06.jpg)
And looking to the West from the other end.
(http://i1234.photobucket.com/albums/ff403/dave2-8-0/AP-016.jpg)
Andy is a retired Special Agent for the Santa Fe, I dont know if this is a duplicate of an existing depot or a generic version, but I could find out for you. Here is what I came up with for the outside handle for working the valve inside the frame.
(http://i1234.photobucket.com/albums/ff403/dave2-8-0/WT-209.jpg)
I found a stick of popular in the scrap box and did a quick turn job on it. Fitted it into a 1" PVC union and attached with screws, so it could be removed with out to much hassle.
(http://i1234.photobucket.com/albums/ff403/dave2-8-0/WT-208.jpg)
A quick coat of paint, and it’s not to obtrusive on the finished tank.
(http://i1234.photobucket.com/albums/ff403/dave2-8-0/WT-262.jpg)
Here’s a shot by my wife, thats just made for “Add your funny caption here” I’m on the left and Andys on the right.
(http://i1234.photobucket.com/albums/ff403/dave2-8-0/WT-241.jpg)
It’s OK guys, Go for it, I set it up for you. I’ll finnish up on the build string tomorrow, Dave
How about:
Wow! How did you get those “Petticoat Junction” girls scaled just right - and “necked” too!
Best,
David Meashey
Andy - “Wow Dave, this is the greatest beer keg I’ve every seen.” “Do you think we will have much foaming in the boiler of the shay?”
Great job Dave! This project is certainly deserving of a MMR award from the NMRA.
Awesome project!! Looks really great installed…have to agree, this should win an award!
“How do you suppose these tadpoles got into our moonshine, Dave?”
“See I told you it would hold 2 cases of Beer.”
The tank looks great and I’m sure Andy appreciates all the work you put into this wonderful tank. I’m looking at making a trip to Durango in the near future (probably next year) to take the wife and kids on the D&S. might have to try and arrange a visit to Andy’s when we are there.
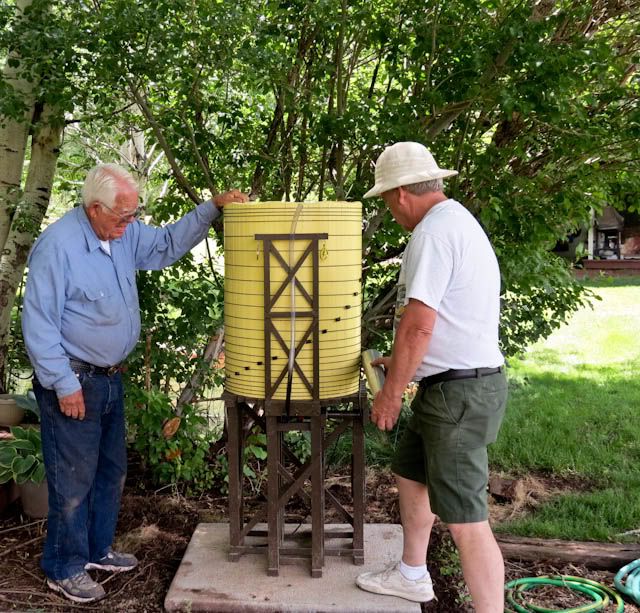
On to the instillation: Perrty straight forward. I’ll tell ya what we’re doing, and show the pics. CEO of the Animas Valley RR (Andy {blue shirt}) and ROW superintendent of the New Mexico Northern RR (Me, Dave) saying "How the H*%lL we going to do this. Ah lets jest drag it out!!
(http://i1234.photobucket.com/albums/ff403/dave2-8-0/WT-210.jpg)
(http://i1234.photobucket.com/albums/ff403/dave2-8-0/WT-212.jpg)
So we did.
(http://i1234.photobucket.com/albums/ff403/dave2-8-0/WT-213.jpg)
And carried it to the site.
(http://i1234.photobucket.com/albums/ff403/dave2-8-0/WT-214.jpg)
(http://i1234.photobucket.com/albums/ff403/dave2-8-0/WT-217.jpg)
Andy had prepared a site with a fiberglass pad about 3" thick, and we set it on the pad. The pad is about 30" square. Well… the design was to have a longer then normal spout, to facilitate the extended setback from the track center line. After all this is a “Ride On” railroad, and we wanted added clearance so that riders would not have to duck or dodge as they went past the tank. We had to reset the pad.
(http://i1234.photobucket.com/albums/ff403/dave2-8-0/WT-219.jpg)
Of course there are large tree roots where we needed to move the pad to, SOoooo. ROW guy ( Me) decided instead of digging up large roots we would set and level the pad on a 3" base of 3/4 gravel. A lot of gravel for two old men, but not if one of them has a tractor.
(http://i1234.photobucket.com/albums/ff403/dave2-8-0/WT-221.jpg)
And Andy of course let the ROW guy handle the gravel.
(http://i1234.photobucket.com/albums/ff403/dave2-8-0/WT-222.jpg)
(http://i1234.photobucket.com/albums/ff403/dave2-8-0/WT-223.jpg)
And we set the tank on the pad
(http://i1234.photobucket.com/albums/ff403/dave2-8-0/WT-225.jpg)
1st order of business was checking the alignment of the tank to the base. It’s not fashioned on., and then alignment of the on/off valve to the controller.
(http://i1234.photobucket.com/albums/ff403/dave2-8-0/WT-229.jpg)
Slid the spout over the plastic tube ( it reminded me a lot of what it would be like to catheter a rhino) and attached the base to the tank.
(http://i1234.photobucket.com/albums/ff403/dave2-8-0/WT-230.jpg)
verified that it centered on the track.
(http://i1234.photobucket.com/albums/ff403/dave2-8-0/WT-232.jpg)
Added the weights and checked for balance… perfect.
(http://i1234.photobucket.com/albums/ff403/dave2-8-0/WT-235.jpg)
To fill the tank I had to go to the float valve assembly, and it is filled with a 1/4" poly tube ( much like you would have on a re-fridge Ice maker. Out West we have evaporative (swamp)coolers that set on the roof and the water supply comes from a tap in the side of a hose spigot. Had to install a new spigot with the tap in it.
(http://i1234.photobucket.com/albums/ff403/dave2-8-0/WT-239.jpg)
(http://i1234.photobucket.com/albums/ff403/dave2-8-0/WT-238.jpg)
And of course… we had to watch it fill
(http://i1234.photobucket.com/albums/ff403/dave2-8-0/WT-242.jpg)
And checked that it really worked.
(http://i1234.photobucket.com/albums/ff403/dave2-8-0/WT-250.jpg)
Touched up the paint
(http://i1234.photobucket.com/albums/ff403/dave2-8-0/WT-254.jpg)
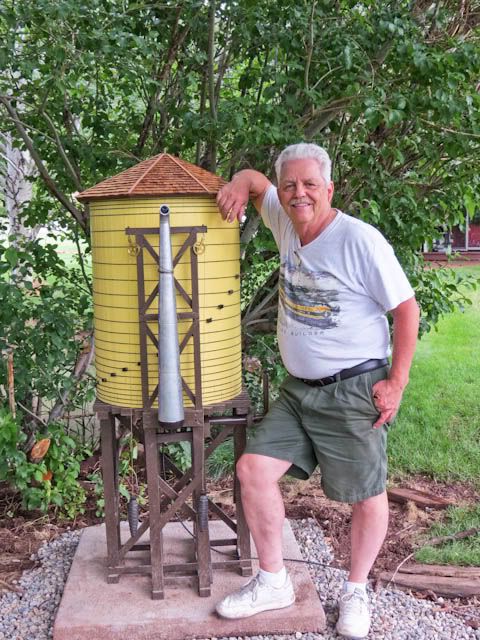
And TA DAH…!!! The tank and I.
(http://i1234.photobucket.com/albums/ff403/dave2-8-0/WT-255.jpg)
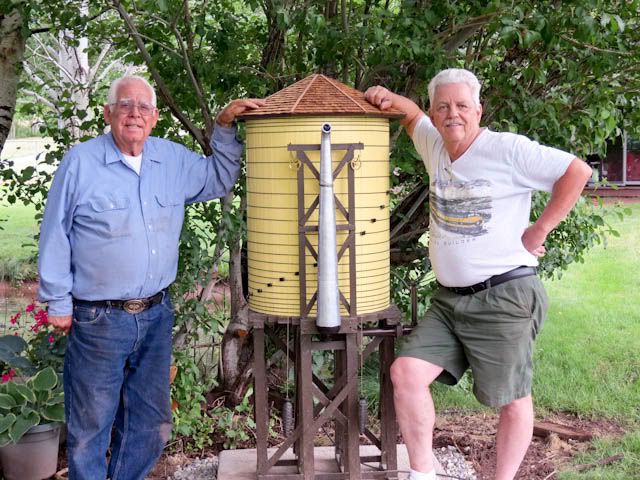
And My railroad friend Andy, the Tank, and I.
(http://i1234.photobucket.com/albums/ff403/dave2-8-0/WT-260.jpg)
I have the Finial to finnish this week. My train club, the San Juan Large Scalers, annual July (Andy has been hosting it for years), Pot luck, meeting, and train rides is this Sunday at Andys and we will have the topping out then. Stay tuned , this ain’t over yet. Dave
Now that is one fine piece of workmanship…well done!
Great work. And now the size of this build becomes known. Dang that thing is big.
Very nicely done. Looking forward to seeing a thirsty locomotive taking a drink.
Tom
Dave Taylor said:I KNEW it all along!:P
On to the instillation: (sic)
The words, “You can tell the men from the boys by the size of their toys.” come to mind…
(http://i1234.photobucket.com/albums/ff403/dave2-8-0/WT-260.jpg)
Big and Beautiful!!! Fantastic job Dave. It has been a lot of fun watching this progress.
Turned the finial… Came up with the design from several drawings and cut it down.
(http://i1234.photobucket.com/albums/ff403/dave2-8-0/WT-264.jpg)
Laid in a couple of coats of UV urethane. Looking good.
(http://i1234.photobucket.com/albums/ff403/dave2-8-0/WT-265.jpg)
I’m now wondering if it’s a little large! I don’t want it to overpower the tank. I Guess I’ll find out Sunday when I put it on… Dave
Hey, Dave! Following your build really pushed me to get things done so I could FINALLY get on with my own tank, and your research photos are really helpful. So a big thank you to you. I have spent a lot of time lately finishing up a bunch of my started but not yet complete jobs to clear my head of them all (they had piled up) and clear my workshop (they were taking up a lot of space in there) because I badly wanted to build a water tank… 1n 1:24 scale. I think I mentioned this water tank project of mine at the top of this thread. Anyways, I finally got all those other projects finished a couple of days ago, and boy, does it feel good! By now I was so eager to get my own tank started after such a long delay. I looked at my drawing, and pulled out the templates I had made for this project - they were dated 2007! And all this time I’ve really wanted to get started on it. I can report that I have made a start now… Feels really good, like a logjam finally broken. In about a week, I’ll have the Depot, freightshed, coaling tower, and Water tank all in place. Also, three factories and a bunch of end of track bumpers… these were all part of the present blitz. And I’m researching Sand towers and icing facilities, hoping to get them made in the next couple of months too. But your post about the finial got me started writing to you this morning. I’ve been doing a little research of my own, you see… You won’t be worrying that yours is too big for very long! Wait’ll you see THIS, from an 1880 plan for a water tank:
(http://freightsheds.largescalecentral.com/users/choochoo_chaboogie/_forumfiles/Finial1880.gif)