Large Scale Central

Ventilated Boxcar

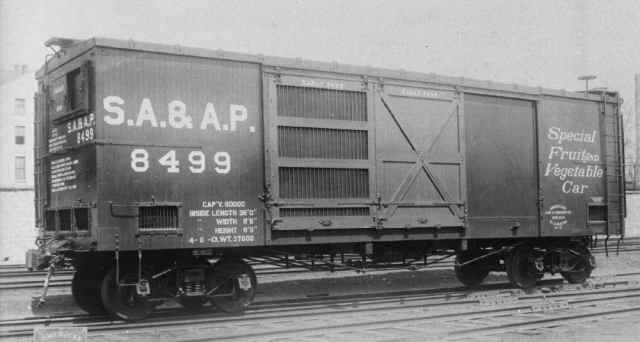
I bought a few of those AMS flatcars that were on sale back in January and I needed to figure out what I was going to make. :wink: I like the idea of a ventilated boxcar, even though there weren’t very many in narrow gauge. I used this standard gauge car for inspiration:

So, the first step was to remove all of the hardware from the flatcar. There’s some nice brass steps that I’ll reuse, as well as the couplers and lift bars. I cut the rest off by running it through the table saw. Then I painted the top to look less red.

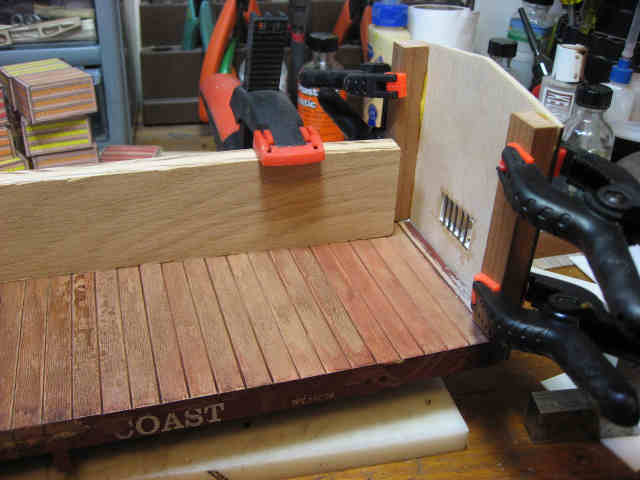
I got some scribed sheets from Ozark and cut them to shape. Then I used my little Microlux jigsaw to cut the openings. The vent openings were framed with plastic angle pieces.

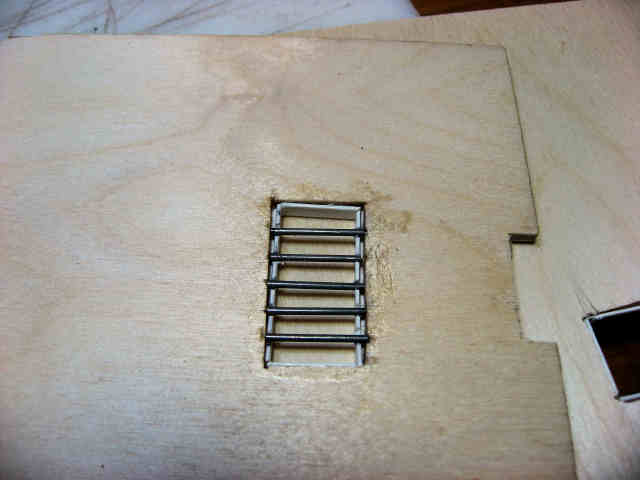
I notched the back side of the vents to put in some .047" music wire. I was originally going to use some 1mm brass wire, but I really like the music wire as it doesn’t bend as easily. It is quite a bit harder to cut, but at least it doesn’t deform when I’m inserting it.

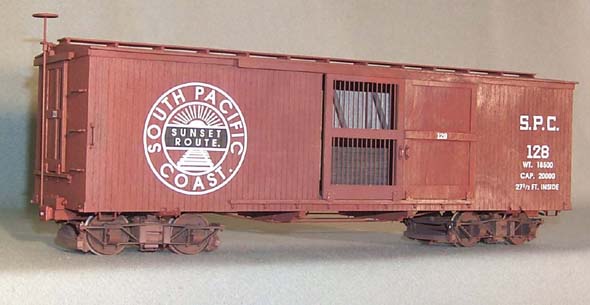
From the outside, it’s starting to look decent.

I don’t think I’ll do the doors at the top of each end, so these will be the only vents. Well, other than the side doors, of course.

Nice start Bruce. Are you putting in any screening for the vents,and if so what do you use?
Also, any idea why the company spent money for two doors with the way the track is arranged

Dave

David, Two doors; one was solid, one had the bars for ventilation. That way you could use either one. This picture shows it with the barred door in place:

(http://www.jbrr.com/Pics/RollingStock/Boxcars/Ventilated/K22.JPG)

I still haven’t decided if I’m going to make working doors or not. To tell you the truth, I’m not sure of the best way to do it. As for screening, I haven’t made up my mind yet. I could use some real screens. There was an article in FineScale that showed one that way, but without the bars. If I do use it, I’ll have the bars and the screen. Probably just some door screen…

Someone posted pics of a poltry car that used both screen and bars. Thought on the screen may be pantyhose or is the mesh to fine. I would think they wouldn’t want the tiny crittes getting in.

Dave

Bruce, the car side looks good… If it was to left outside, I would definitely put some kind of screen to cover the open doorway… Around here, it would probably take a hornet about 15 minutes, to start using it for a nesting area…

:slight_smile:

Pretty nifty!

I remember reading in the Gazette about some NG ventilated boxcars, I think they were built by Carter Brothers.

Andy, screen is still an option. It would end up looking like hardware cloth. But, it will probably live in my garage. Ray, I think it was something like this:

(http://www.jbrr.com/Pics/RollingStock/Boxcars/Ventilated/Ventilator.JPG)

It’s a shorter car, about 25’ or so as I recall. Mine will be 30’ since it’s based on the flat.

Bruce,
Are you familiar with drywall sandpaper? A well used piece might create the ventilated screen you are speaking of.

I’ve got some screening that looks OK. I just haven’t decided if I want screening yet. It may end up detracting from the bars. Ed Morris built this model, and used a similar size screening on the door. He had louvers instead.

(http://www.jbrr.com/Pics/RollingStock/Boxcars/Ventilated/FineScaleAnnual.jpg)

Chech with suppliers of screening used for Sieves. That where I have found some very fine screening material.

Paul

Bruce,
This is a neat project. How tall and how wide will it be?
Dave

It will be about the same dimensions as an AMS boxcar. I’m using one for the “pattern”. I think the ends are 7’6" at the peak, and 88" wide. So, probably add another 6" to accomodate the thickness of the sides and it should be almost 8’ wide.

On the theory that you might be able to see through those barred doors, I decided to detail the interior a bit. But, I REALLY didn’t want to build an interior. Instead, I downloaded the free outhouse kit from Paper Creek Models (http://www.papercreek.com/). I got the “O” scale version, cropped the boards I wanted, enlarged it and then printed a sheet. I cut these to size and glued them in place with some spray adhesive.

(http://www.jbrr.com/Pics/RollingStock/Boxcars/Ventilated/IMG_5769.JPG)

Close enough. :wink: Of course I didn’t want to have an empty boxcar, as exciting as that might be. My next stop was to Ozark Miniatures; they have some free crates that you can print out. I built some forms out of styrene, some others out of wood, and used the spray adhesive to glue the cut out crates to the forms. One caveat; they come four to a sheet of paper. Half of the oranges and half of the apples have the lettering reversed - mirror image if you will. I’m not sure too many folks will be able to tell. :wink: I’m not sure how many I’ll make, but I like the look. I’ll be taking a marker to cover the white edges, once they’re all dry.

(http://www.jbrr.com/Pics/RollingStock/Boxcars/Ventilated/IMG_5774.JPG)

Hi Bruce,

Boxcar looking good, I like the inside wood work and your boxes of cargo. Very cool.

Chuck

Somehow, I was connecting this with the “Shooting Sports” thread under “Other Hobbies.”

Very nice Bruce… I’ve always liked these cars I’m glad you are making one!!!

I glued the ends to the flatcar base using JB Weld. Next I glued some pieces of wood to the end to give me a bigger gluing surface for the sides.

(http://www.jbrr.com/Pics/RollingStock/Boxcars/Ventilated/IMG_5776.JPG)

I’ve got a board clamped down on top of the flat in an attempt to get it flat. There’s a pretty large bow, upwards. Gluing the sides in place should help. I have also finished the boxes. I’m just going to put these near the door; the entire car will not be filled up.

(http://www.jbrr.com/Pics/RollingStock/Boxcars/Ventilated/IMG_5777.JPG)

You might notice the orange crates…some of the labels are printed backwards. It’s a little harder to tell with the apple crates. The lemons are all OK.

I glued one side in place. JB Weld for gluing the side to the plastic flatcar edge, and Titebond for gluing the sides to the ends.

(http://www.jbrr.com/Pics/RollingStock/Boxcars/Ventilated/IMG_5778.JPG)

I left the clamped board in place and I’ll let this dry overnight before I attempt to glue the other side in place. I’m still worried about that bowing, and there isn’t a good way to clamp it down when I put the other side on. Hopefully the other side will help keep it flat, and I’ll probably use MORE clamps for the other side, just to make sure it stays even. It was really bowed; when I had just one end of that board clamped, there was at least a 5/16" gap at the other end of the board.

Might want to think about screwing some aluminum channel to the floor to keep it un-bowed

I talked to someone from accucraft about the bow on their flatcars. They said to cut between the boards down to the frame in a few places, this will relieve the stress the flat deck puts (or pulls) on the frame rails. If you did this then glued the sides on it may help.

I had a flat that I left out in the sun (obviously too long) and it bowed so bad that it uncoupled itself. I cut it, put it back in the sun with a little weight on it and you would never know the difference.