Rick Marty said:
Better stop here for now, almost started to get into forbidden areas.
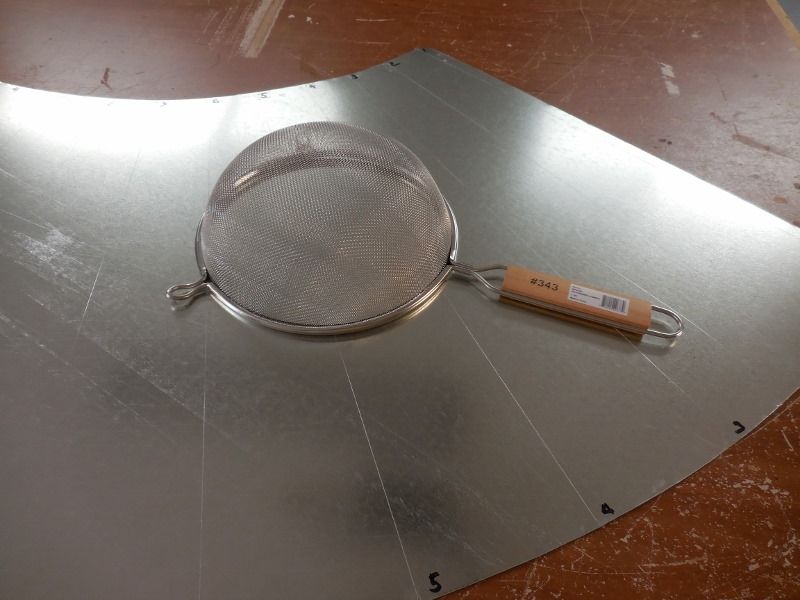
She didn’t realize you took her kitchen strainer yet did she?
Rick Marty said:
Better stop here for now, almost started to get into forbidden areas.
She didn’t realize you took her kitchen strainer yet did she?
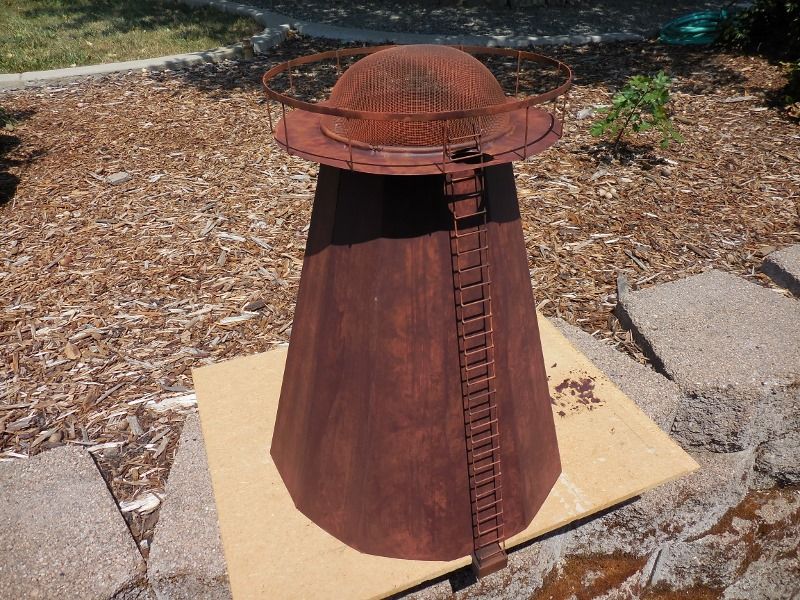
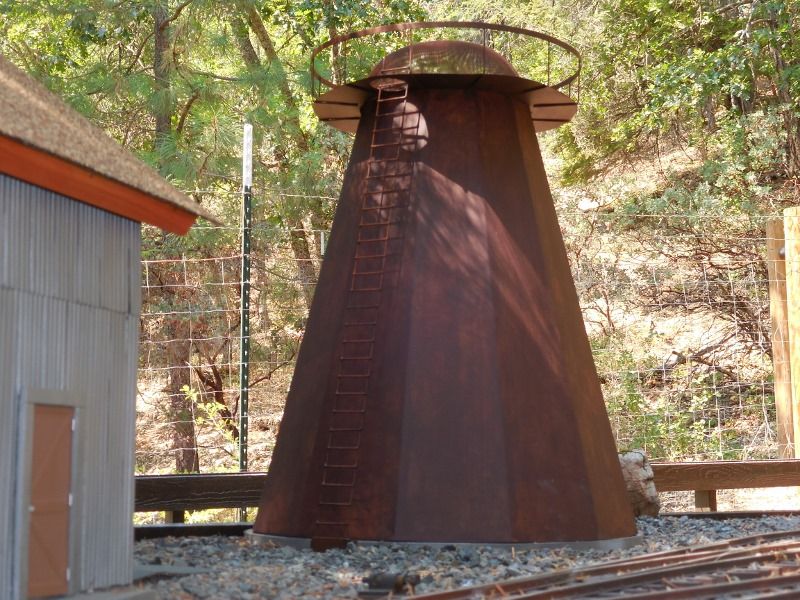
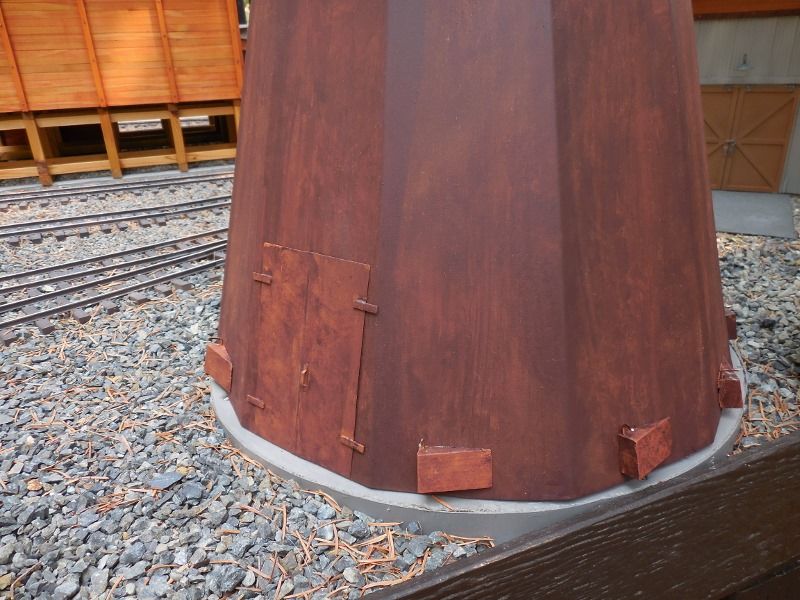
Here is the finish up of the burner project.
Painted, weathered and ready to install.
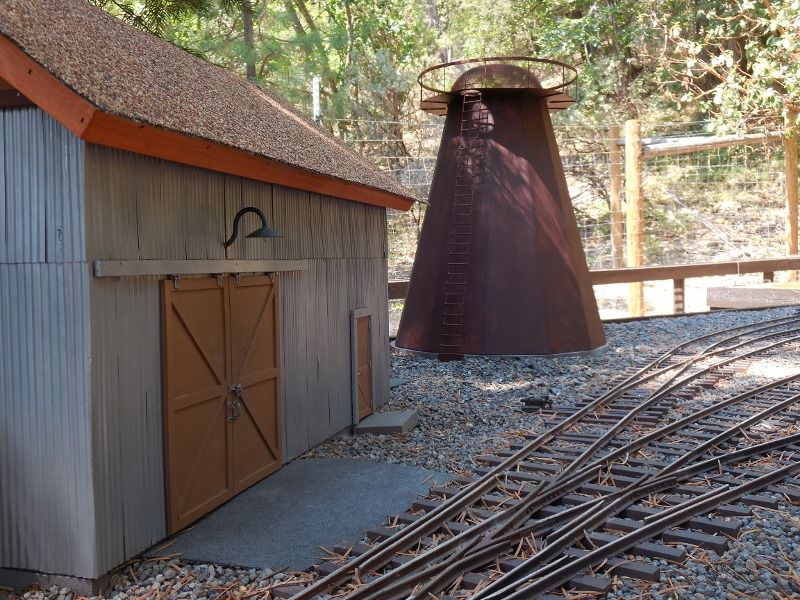
Setting in place at the mill
At the last minute I decided to go ahead and add the access doors and the cyclone intakes to add a little interest to the project.
Not much left except the main mill building and the green chain sheds, coming up next.
Shouldn’t the metal strainer have more black …it does burn things… Looks incredible non the lest … (http://largescalecentral.com/externals/tinymce/plugins/emoticons/img/smiley-laughing.gif)
Looks awesome Rick.
Sean McGillicuddy said:
Shouldn’t the metal strainer have more black …it does burn things… Looks incredible non the lest … (http://largescalecentral.com/externals/tinymce/plugins/emoticons/img/smiley-laughing.gif)
If it’s not actively burning it will rust up in a few days if there is moisture. At least that’s what happened with my fire pit screen (https://www.largescalecentral.com/externals/tinymce/plugins/emoticons/img/smiley-cool.gif)
Rick: I think I read somewhere that conveyors were used to move sawdust from the mill to the burner. Is that right? If do, you planning to model that part too?
Jim, that’s right.
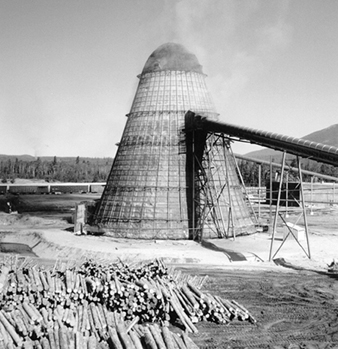
Conveyor chains were used to move scrap lumber and sawdust to the burner. Blow pipe and cyclones were used to move planer shavings and sawdust for burning. If you look back to the mill site picture at the start of this build you can see the blow pipe and the cyclone on the nearest burner and the conveyor on the one towards the back.
Yes, I plan on modeling the conveyors and the cyclone systems some time later after I get the sawmill building built and in place. That may be delayed for a while, I just, finally, got all the parts and pieces to convert my 2 truck Shay to battery/RailPro.
Sean McGillicuddy said:
Shouldn’t the metal strainer have more black …it does burn things… Looks incredible non the lest … (http://largescalecentral.com/externals/tinymce/plugins/emoticons/img/smiley-laughing.gif)
Sean, You are probably right but as Jim pointed out they can rust up pretty quickly when not in constant use. I ended up spraying the screen with a little black and some medium and light grays just to add some breakup of the full rust look(https://www.largescalecentral.com/externals/tinymce/plugins/emoticons/img/smiley-laughing.gif)
Wow, can’t believe it has been a month since I updated this thread.
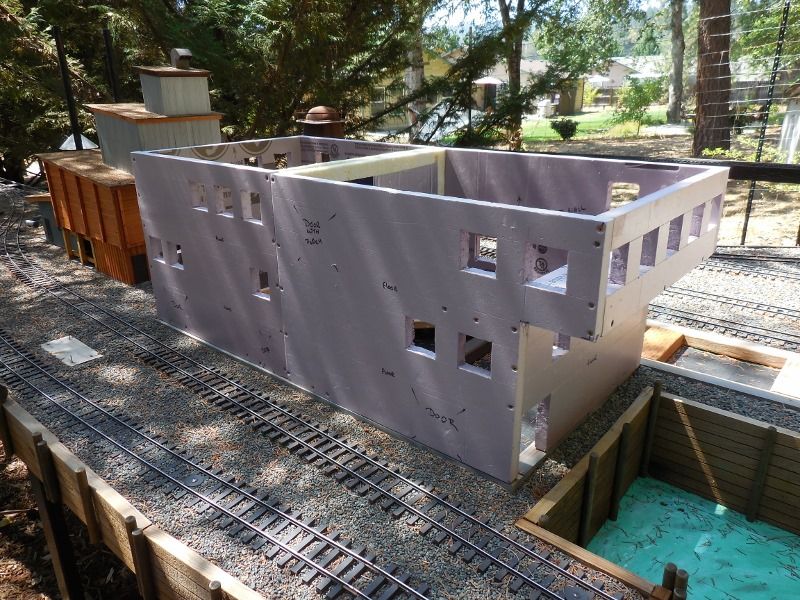
The main sawmill building is the next project. I based my design on this prototype; a 1948 view of Diamond Match’s mill in Chester, California, a town we nearly lost in last months Dixie Fire along with Greenville. The footprint of the build will be/is 24 X 48 with a side building of 12 X 42 and even at this size it is really to small but there is only so much realestate on the table.

Because this building is so large I decided to build it with a core of 1 inch foam board and in four sections, two boxes for the main building and two sections for the roof assembly. Here we are laying out all the doors, windows, floor levels and other features. The inside of the boxes will be reinforced with wood and the outside clad with Redwood siding.
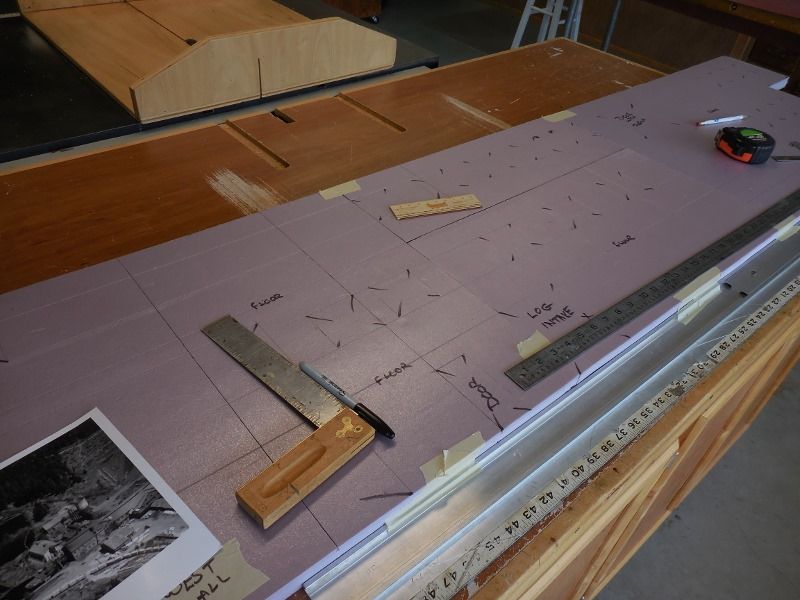
Cutting out all the panels to size and cutting out the window openings.
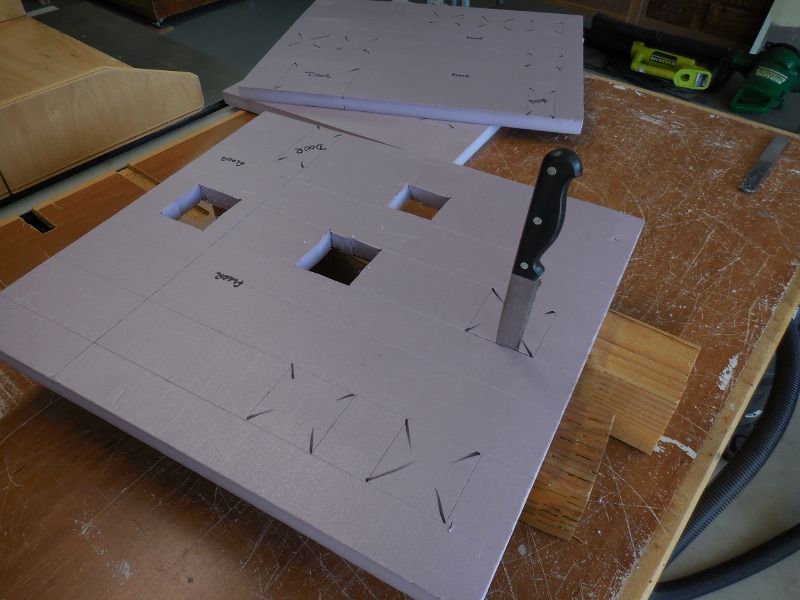
The two base boxes sitting in place to get a feel for the size, I think it is going to look really good when done, but maybe that is just wishful thinking. I did a quick cardboard mockup to get the general size but it was really ugly and I’m to embarresed to show it(https://www.largescalecentral.com/externals/tinymce/plugins/emoticons/img/smiley-foot-in-mouth.gif).
More later, this one is going to take a while.
So THAT’s how one should cut windows in foam! Trick noted for my next foam core project! Thanks!
Nice start, Rick. What’s the overhang for (on the right in the last picture)?

Jim Rowson said:
Nice start, Rick. What’s the overhang for (on the right in the last picture)?
Thanks Jim , the overhang is mostly to add some architecural interest to the building and increase it’s size. I decided that area would make a great saw filing loft hence all the windows in that end.
Rick Marty said:
Jim Rowson said:
Nice start, Rick. What’s the overhang for (on the right in the last picture)?
Thanks Jim , the overhang is mostly to add some architecural interest to the building and increase it’s size. I decided that area would make a great saw filing loft hence all the windows in that end.
Some more work done on the mill building.
Framing up the main roof assembly.
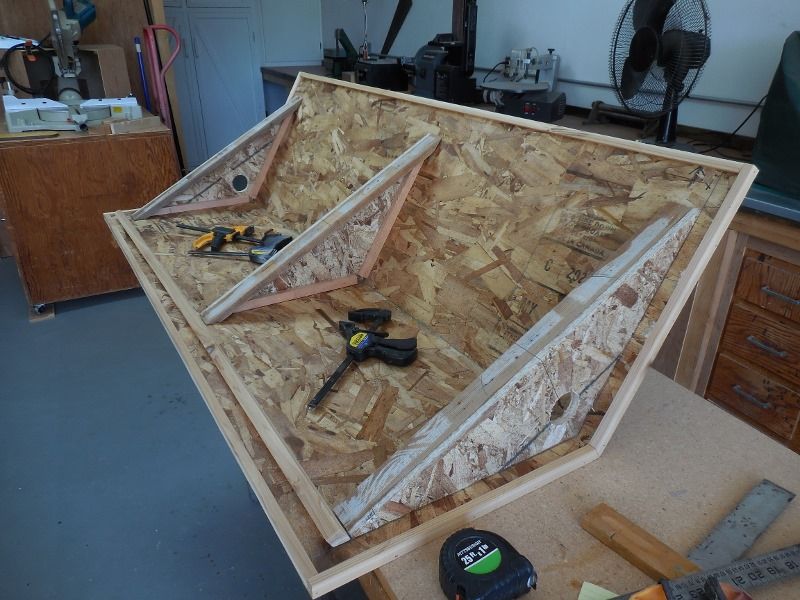
Building the dormer sections for the roof.
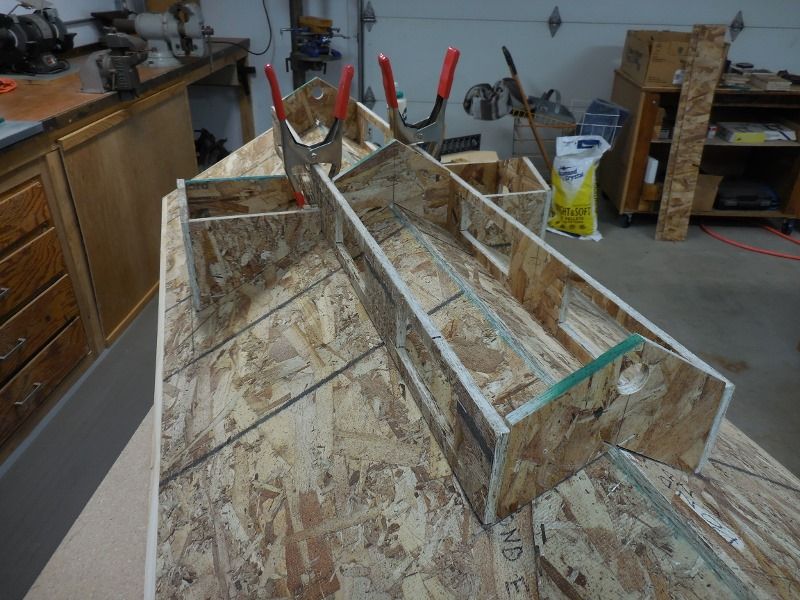
Test fitting the roof to the building boxes. The framing square gives you a feel for the size of this baby.
Everything good so far.
Well crap!
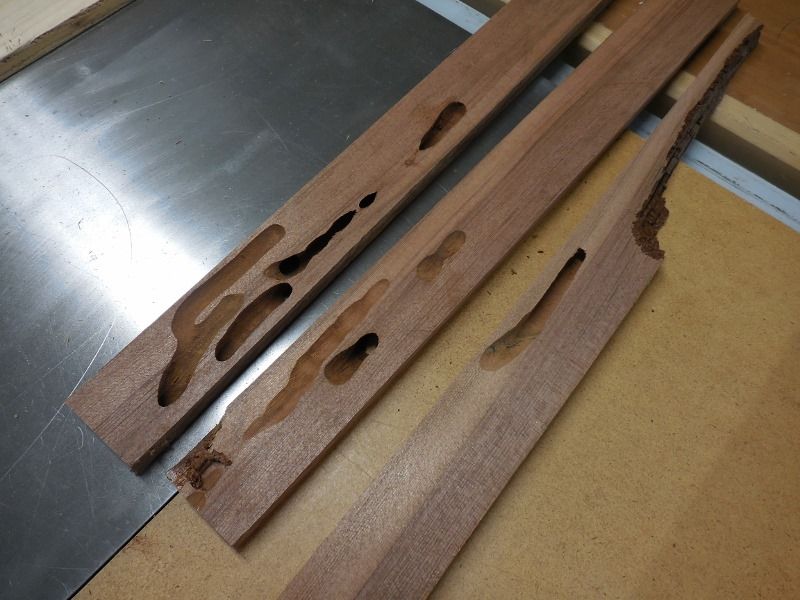
I dug some of my old growth Redwood boards out of the barn loft and started cutting them into siding strips when I discovered that the Carpenter Bees had been busy building new homes. Too bad their agenda and mine are not the same. They sure do chew some interesting holes thrugh the wood but it doesn’t make very good looking siding for a scale building.
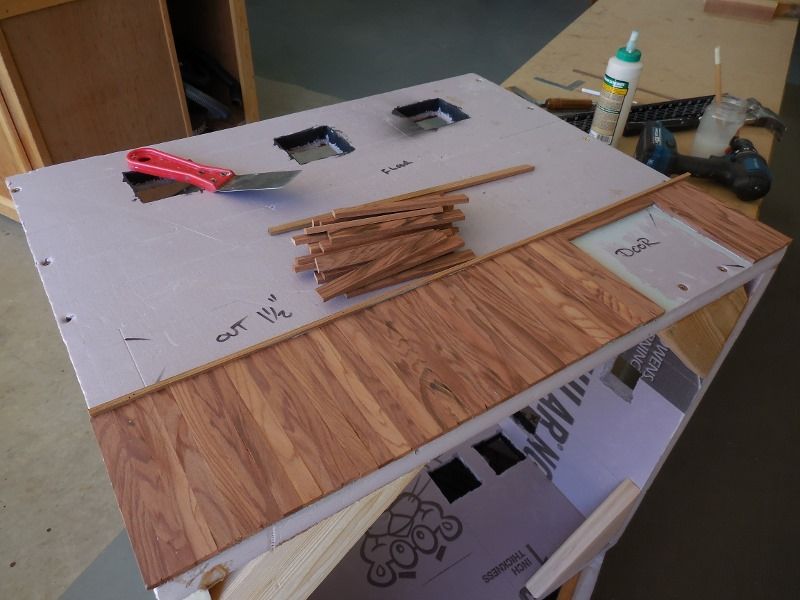
Starting to laminate the Redwood siding to the extruded foam boxes using Polyurethane caulking (Vulkim seal 116). As I said earlier the Vulkim works very well the only down side is that it takes about two days for it .to set up enough to move on to the next section/
A few more posts to come.
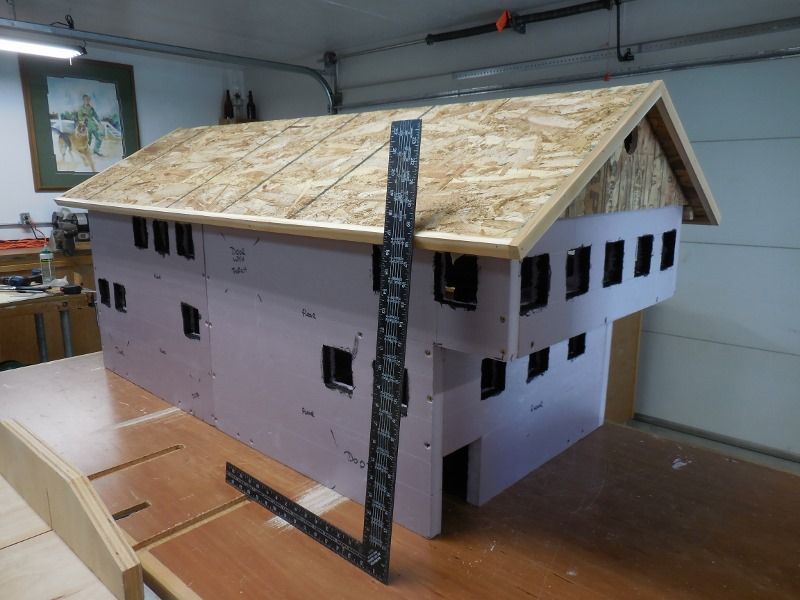
Getting the roof sections finished. Since the dormers will be lift off I made the roofing underneath them a solid sheet. Getting all the siding glued to the framing and test fitting.
Getting the side dormers mounted to the main section.
Windows in and most of the roofing completed. All the trim is done, painted, or stained. This roof section is pretty heavy, I will have to call for help to set it in place once the building is on the layout.
Getting closer to done, just miles of siding to cut and glue to the building, then 25 windows and 7 doors to build and install.

Looking VERY good!
Wonderful work, Rick!
Your entire build is beautiful! But one sentence caught my eye:
This roof section is pretty heavy, I will have to call for help to set it in place once the building is on the layout.
Yeah, I had the same issue, and I trust you’ll have a couple of buddies to lend a hand. Here’s Bruce and Jerry helping me out a couple years ago:

Cliff


