Jon, the way you run wires, even left outside of the body you’d make them look like they were piping that belonged on it. 
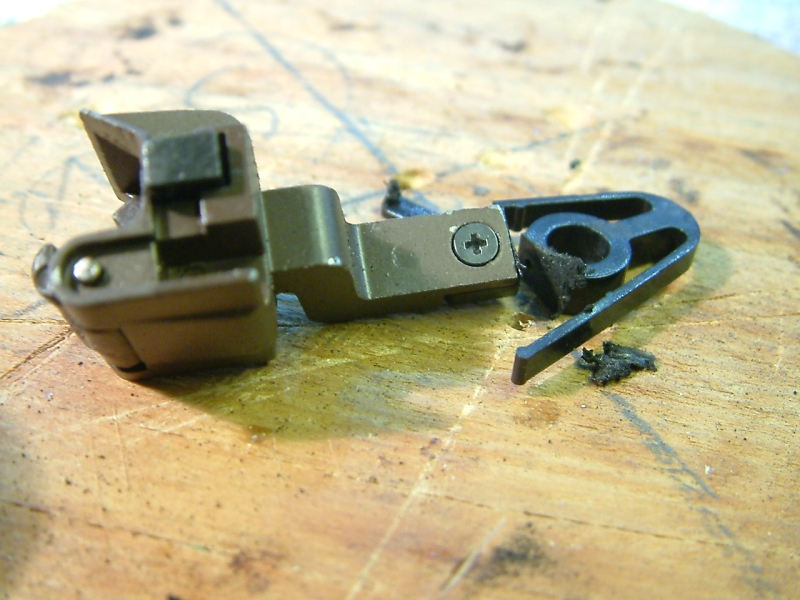
It’s Coupler Time. I read Chilli John’s Method of adding another wooden beam to the pilot to allow the coupler pocket casting to be mounted lower. I might eventually do that, but I want to test the engine under load today so a quicker method was needed.
Pinning an Accucraft coupler into the bottom pocket resulted in too much height mis-match. While trying to think of what I could use to make a drop adapter I remembered the drop couplers that came with my Bachman FN3 rolling stock.
My first attempt (below) worked fine for height, but the shank was not long enough to allow enough swing to get cars through curves.

So I started over by keeping the entire metal shank and part of the plastic centering spring…
Next I cut a small piece of styrene which will act as a shim to keep the coupler from drooping…

The screw holding the plastic centering spring was removed and discarded…

After the styrene shim was glued in place the screw hole was drilled out to 5/64"…

This allows a pop rivet to just fit through…

Test fit revealed there was too much material behind the pin, so it was shaped to the screw hole casting with the Dremel…

Re-assembled after trimming…

Shim is glued in place again…

And test fit on the front of Shay #5…

Height match with AMS cars is pretty good…

Now that we have a working coupler, a test run was set up. #5 coupled to 9 cars (3 more than will fit in my Wye tails) and headed up the hill. She slipped in a few places but with just a little help was able to get all 9 cars up the hill. I’m sure it will do fine with a normal 6 car train.
Cleaning Out the Boiler
To have any hope of fitting the batteries in the boiler the mount for the smoke generator must go…

I used a Dremel with a milling bit to chew through the plastic…

Almost gone…

Those nubs from detail mounts and piping need to go too. I need all of the space…

All clean and ready for test fit…

Now I’m just waiting for the batteries to arrive so I can make a decision. If they wont go in the boiler I’m thinking about designing a speaker enclosure for that space 
Batteries have arrived. After spending 12 days touring the US my package from All Battery finally arrived. Did I mention that FedEx SmartPost really stinks?
In order to fit the batteries in the boiler, I need to make my own pack. I bought a set of Tenergy 18650 cells with tabs and the Protection PCB. Here is the pack assembled and charging for the first time…
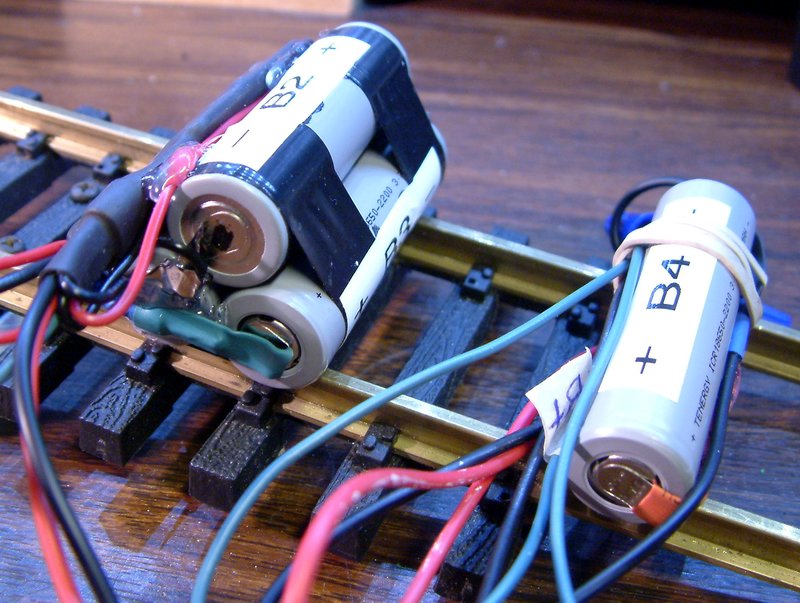
The triangular group of 3 will fit in the boiler shell in front of the weight in the space formerly occupied by the smoke generator. The fourth will have to be located elsewhere. But where? Hmm… That air tank looks like a candidate…

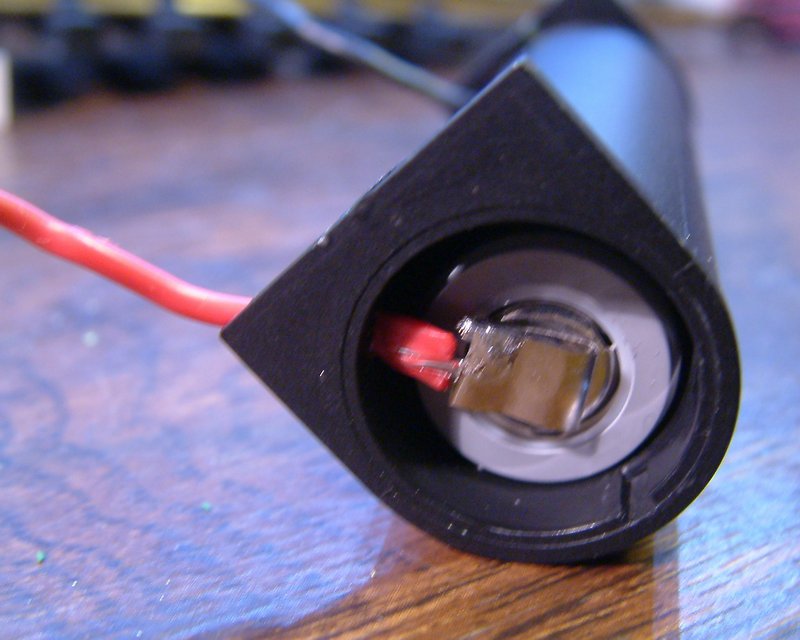
Sure enough, the piping pulls out and ends pop right off. Size looks good for length…

And the inside diameter is perfect too…

I love it when a plan comes together totally by accident :]
Did you try to reinstall the end piece yet? Not sure it will fit back in.
Also, what about wires? If it works out, excellent idea!
I did just a preliminary fit last night. In the picture the battery is not pushed all the way in against the other cap. I might have to trim a little off the inside flange on the cap ends.
Wires will probably exit in the bottom very close to each of the support beams, then through the walkway and over to the boiler where they will enter on the bottom. Like the truck wiring, it will be visible if you look for it, but I’m going for an operational workhorse, not a museum piece :]
Jon,
Like many prototype railroads, you might consider adding one or two more pilot beams. This will allow you to lower the coupler pocket and use a straight shank coupler or a level rooster to link & pin couplers. Geoff
(http://farm9.staticflickr.com/8373/8474862716_6c7ae0c2e2_c.jpg)
…(http://www.freethoughtnation.com/components/com_comment/joscomment/emoticons/funny/images/smile.png)…
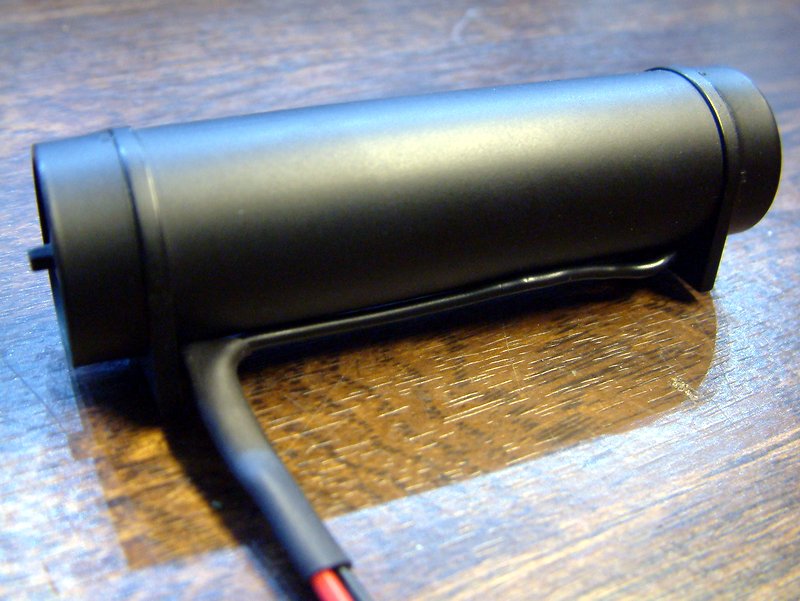
It Fits!
Was able to get the battery and wires figured out in the air tank. The only modification required was to enlarge the screw clearance cut in the flange to make room for the wire…

On second thought I don’t think I’m going to send the wires down through the walkway to avoid having to drill through the metal frame. I’m pretty sure the tank will hide them from casual view at most angles.
@Geoff - Thanks for the pic. I have been considering that. The drop coupler idea was a quick fix to get running for operational tests. I’m not promising that the quick fix won’t be permanent though :] You planning to be in Scranton this weekend?
Ready to Install…

The black wire will run along the back of the tank to meet up with the red wire. At that point black heat shrink will be added and the wires will run over to some more new holes in the boiler.
Great idea with the air taank. Looks like it was ment for it.
Nice work Jon. I’ll keep those air tanks in mind now when i work with them on other locos. Mine might be for weight though
…(http://www.freethoughtnation.com/components/com_comment/joscomment/emoticons/funny/images/smile.png)…
Dave Marconi said:
Jon, the way you run wires, even left outside of the body you’d make them look like they were piping that belonged on it.

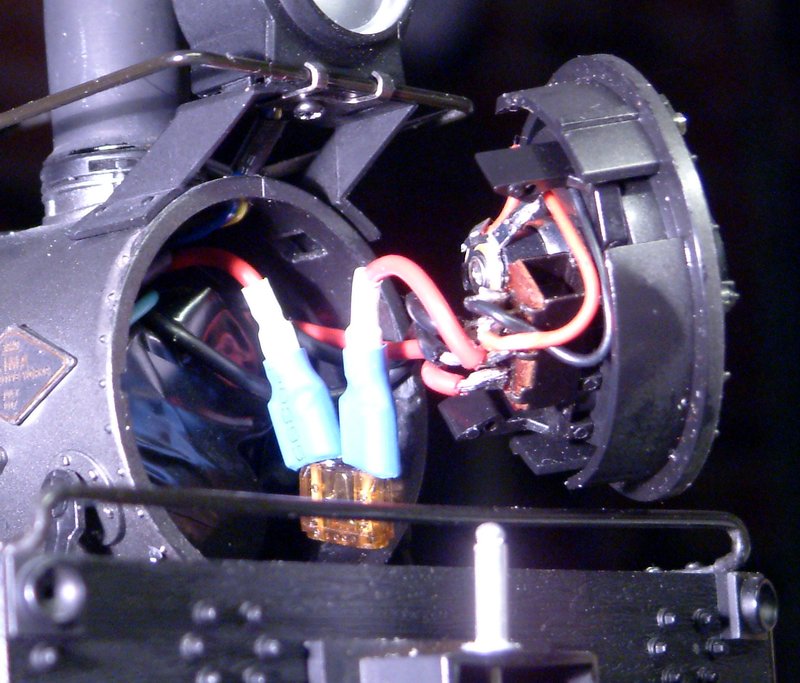
Thanks for that vote of confidence Dave. The wires from the air-tank battery must run outside for a short distance, so I took your idea and installed the air pipe for the turbo-encabulator.
First the wires were covered with heat shrink…
Then a pair of small holes were drilled in the boiler…

Those holes caused a bit of a set-back as I nicked one of the front truck wires with the drill bit. The front truck had to come off so the wire could be repaired. When that was done I began the tedious task of threading the wires into the boiler shell…

Everything is put back together and it’s not easy to spot the wire even if you look for it. If I hadn’t made the mistake of painting the heat shrink with my paint pen it probably wouldn’t show in this pic…

It’s really hard to see, even with extra light from a flashlight…

Now on to getting all the wires and batteries in place in the boiler. After all this I hope everything fits.
SLICK!
Battery Problem Solved
Had a set-back with the battery install due to my ignorance of how the protection circuit worked. Thought I had killed the pack, but in reality it turned out I had just tripped the fault detection which shut down the pack. Once I figured that out, and how to reset it I was back in business. After completely tearing the pack apart for testing I put it back together tonight and installed the output fuse.
I hope to get the boiler buttoned up tomorrow night so I can concentrate on the tender.
Here’s Power Pack Phase-II. No hot glue this time…

A Tight Fit - A little too tight.
Batteries are in the boiler and the front end all wired up. my plan was to use the original Bachmann slide DPDT switch to select ON/OFF-CHARGE. I measured depth before inserting the batteries and had enough room for the smoke box front to insert. What I didn’t count on was the depth of the Bachmann switch. It’s not going to close, so I’m working on a different approach.
3 Batteries in the boiler…
Slide switch & Charge jack on the door - the switch is too deep

I have a couple of options for the switch. One is to move it and the charge jack to the tender; the other is to try and fit and epoxy a sub-mini toggle on the cover and access it through the existing switch hole with a tool - or some variation of that idea.
Nice work!
TOOOOOO Funy!!!