Large Scale Central

Restoring a 1st Gen. Bachman Shay

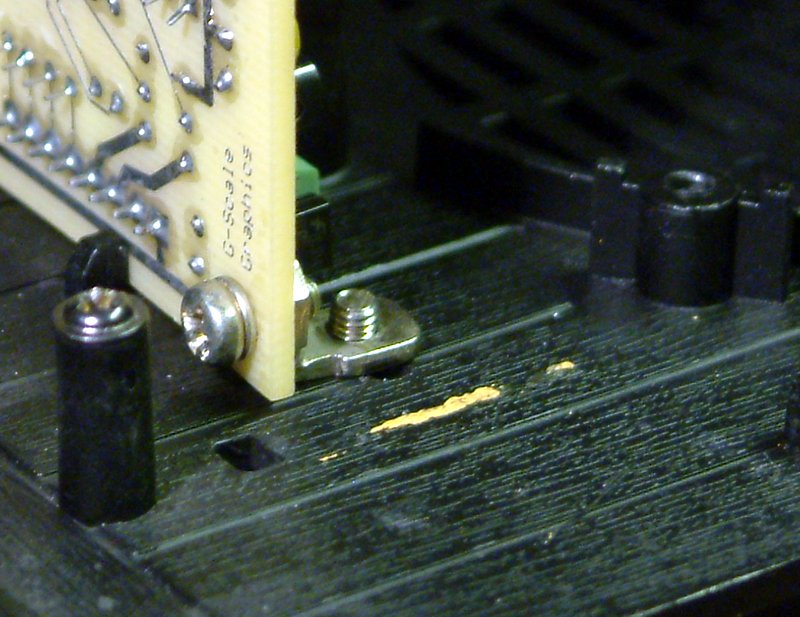
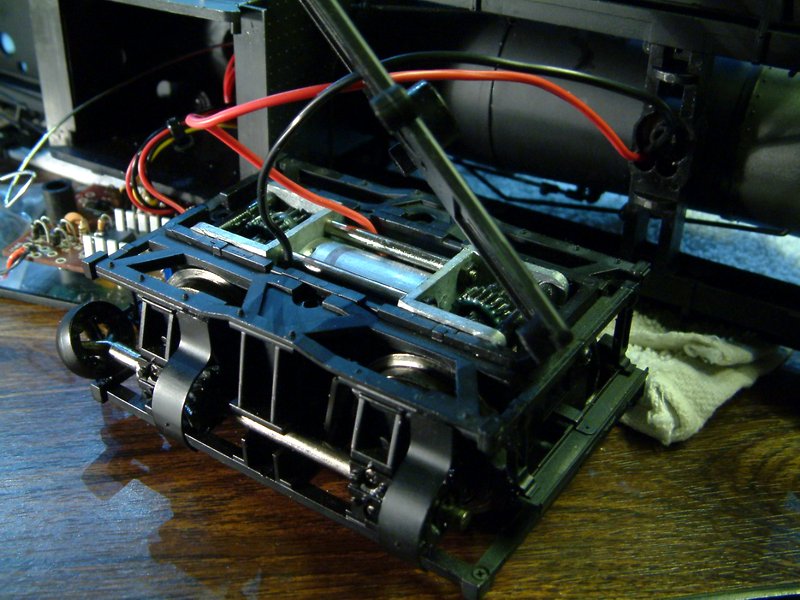
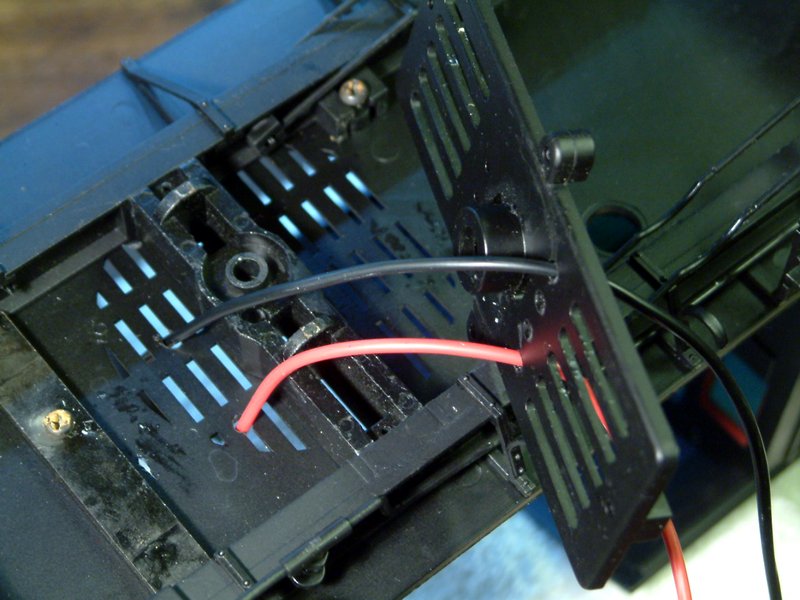
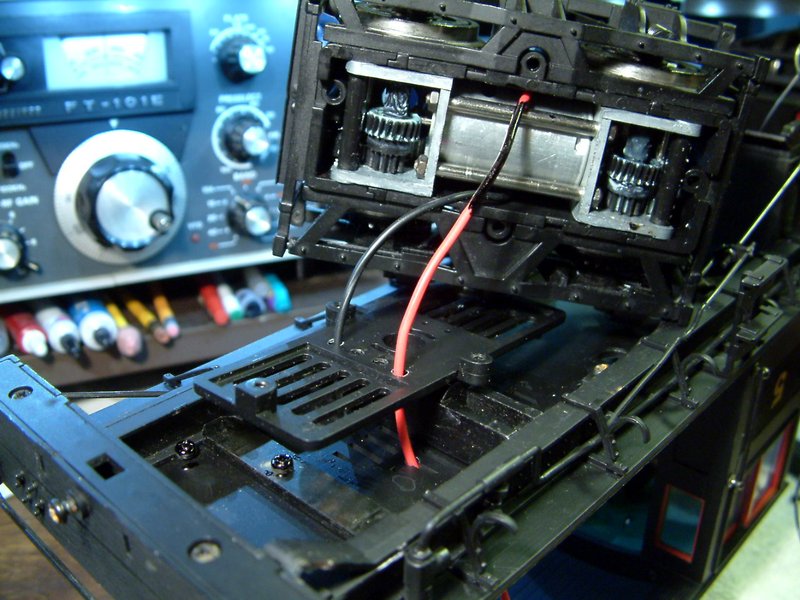
Cramming for a test - a test fit that is. It’s tight, but I’m able to fit all my components less the batteries in the original tender with only the mods shown earlier. I wanted all the components to be mounted to the floor so the shell could be removed for programming if needed. First I mounted the RailBoss board as close to the back as possible. I used a single threaded right angle bracket from my electronics junk box. Luckily, the hole through the floor just grazed the inside of the frame rail…

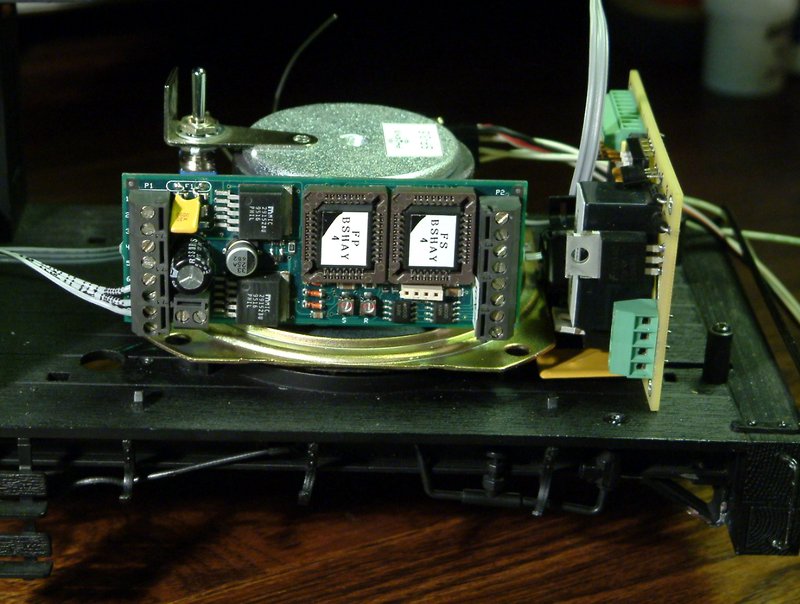
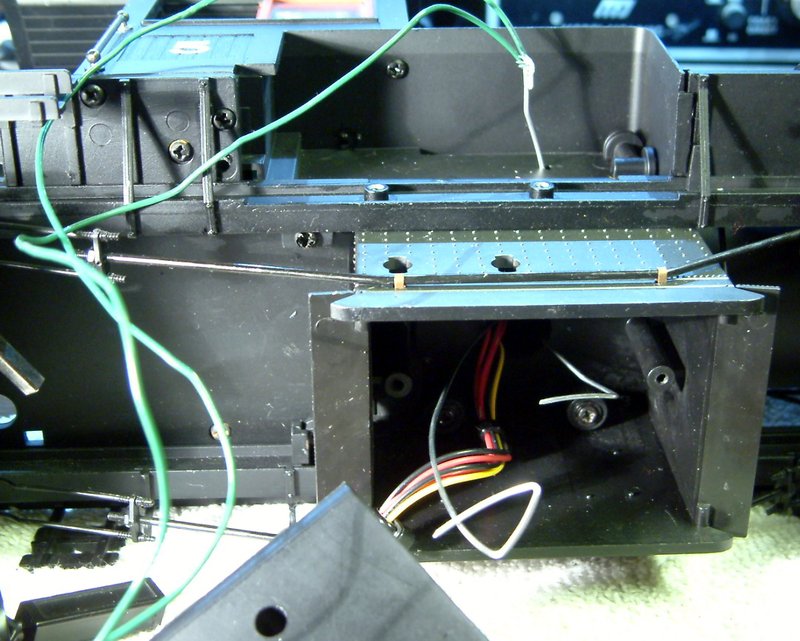
Next I temporarily fitted the upgraded speaker and rested the Big Sound 97 on one side. The volume switch seen stuck to the magnet will go back in it’s sneaky spot under the removable valve on the tender deck. I’ll hot glue a piece of styrene to the magnet then use foam double-sided tape to attach the sound board…

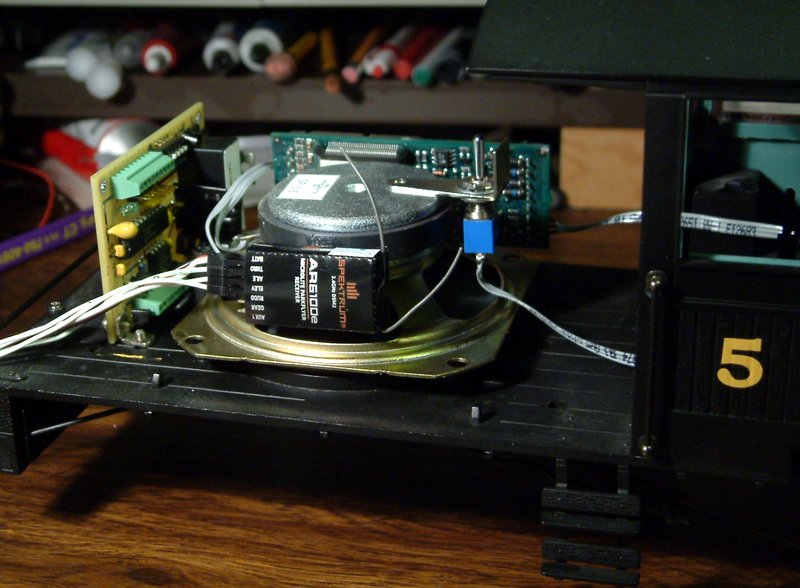
On the opposite side the receiver will be hot glued directly to the magnet…

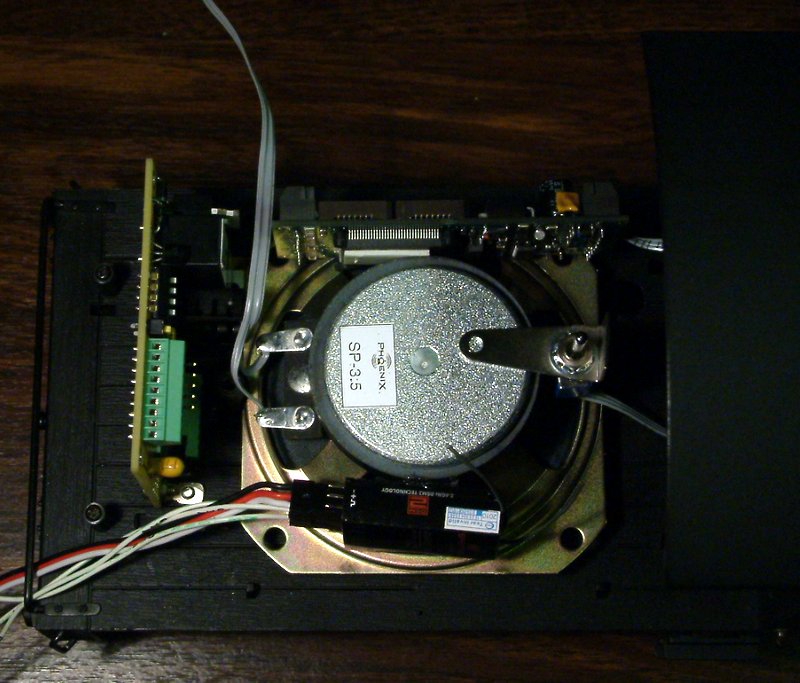
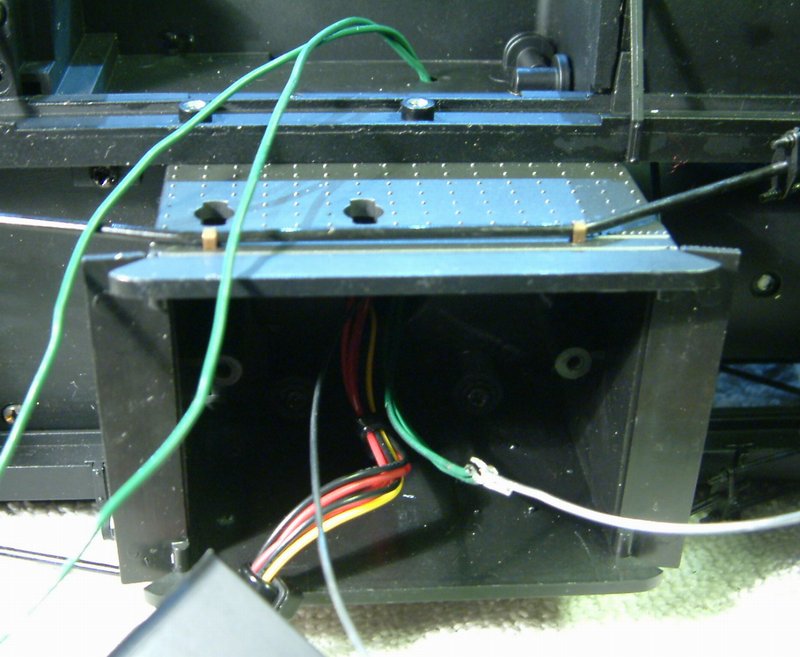
The view from above…

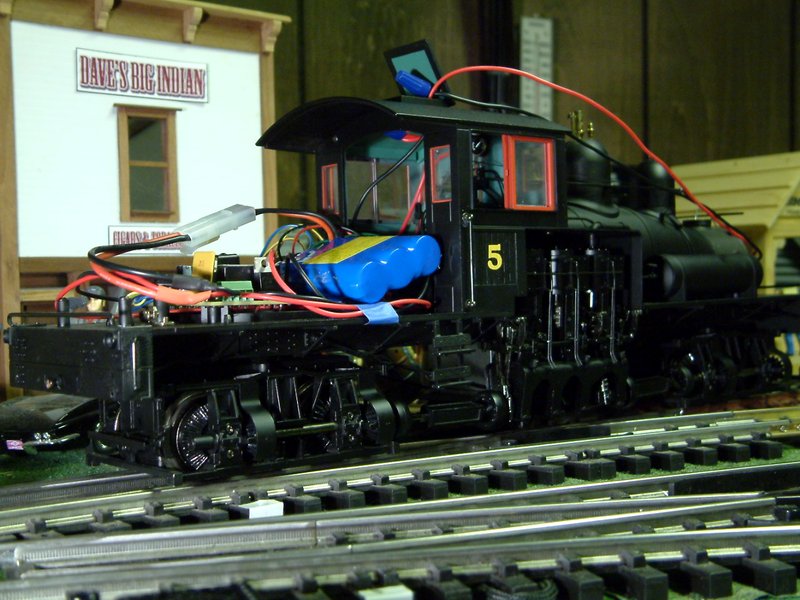
After tucking wires out of the way it was time to test fitting the shell. It was a little tricky getting it in place, but once there it sits down where it belongs…

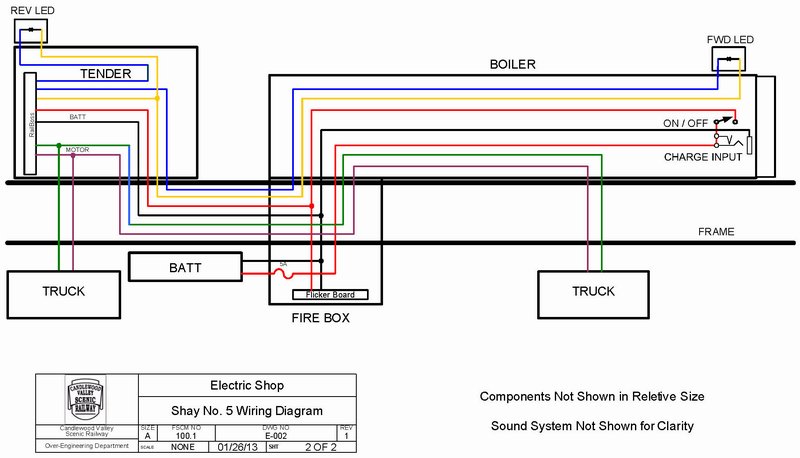
The on/off switch and charge jack (if needed) will be mounted on the smoke box front. Next up is to work up the wiring plan and start hooking things up. Finding a place for all the wires is going to be a challenge.

Looks good Jon. Your install looks a lot cleaner than mine.

Jake Smith said:
Looks good Jon. Your install looks a lot cleaner than mine.
Well yeah; there's no wires yet !!!! Wait a few days :)

Looking good Jon.

Wiring diagram complete. Time to start stringing copper :slight_smile:

(C) Note - Some portions of the image above were borrowed from Del Taparo’s RailBoss manual and the Phoenix Big Sound 97 Manuals. I was too lazy to draw them myself. I hope the owners don’t mind. I grant royalty free use to both G Scale Graphics and Phoenix Sound Systems, Inc. should either wish to use my enhancements. Or if a copyright holder wishes, I will remove this image.

Cool!

(http://upload.wikimedia.org/wikipedia/commons/8/89/Bomba_atomowa.gif)

Next up is converting the head and tail lamps to LED. I picked up a surplus LED array from All Electronics that had a bunch of large Amber LEDs. It was quite a chore to tear apart but I did manage to get the LEDs out. Once removed from the board they look like this with super short leads…

I soldered on some light weight wire…

After enlarging the wire hole and testing the LED, I threaded the wire into the lamp…

From the back you can see the heat shrink insulation…

Lens replaced and lit up…

I think I’m finally ready to start snaking wires through the boiler.

Nice!
…:)…

Schematics are great, but they don’t help me get my head around how wires will be routed. For that purpose I drew up a wiring layout diagram…

I was able to fish a piece of 20 Ga. aluminum wire through the boiler from the fire box. I’ll use that to pull the bundle of wires from the smoke box to the fire box. I temporarily put the top of the rear truck in place to test fit the 11.1V LiIon battery pack between the frame rails, below the floor and behind the fire box… So far so good!

IT’s ALIVE!!!

I decided today that it was time to install the trucks and steam motors. When I hard-wired the motors in each truck I used a much heavier wire than Bachmann did…

I tried using the OEM wire-ways but with the large wire it didn’t work well.

So; just drill some wire holes in the boiler…

To keep the red wire from jumping out at you I painted the part that will show with my Sharpie Paint Pen…

The rear truck wires will enter through the speaker cut-outs. I’ll hot glue them down from the top so they don’t interfere with the speaker cone…

Rear truck ready to go on (or so I thought). The top covers ARE NOT asymetrical…

I’m using 20Ga. Aluminum wire as a mini fish tape to get wires through the boiler…

And finally, It’s not pretty but it runs on it’s own. A full operational Battery R/C test before the wires are perminently routed…

This is going to be my new favorite loco. It will crawl very smoothly. I’m glad I waited for the test run before buying the battery. 11.1V works, but top speed is pretty slow. With 14.8V I get a nice running speed at about 3/4 throttle and full throttle isn’t Lionellish. Now I need to re-think where the battery will go. Perhaps in the boiler???

I’t has some clicks in the Steam Motor and some gear noise at high speed, but once the sound system is up and running they will blend right in.

That looks like the size of the battery pack I used. I’m thinking about changing mine into a 2 x 6 long narrow pack and then putting it in the center of the boiler.

BTW, still cleaner install than mine :smiley:

SECRET SPY VIDEO

Featured are the latest addition to the C.V.S.Ry. Roster, EBT 3 Bay Hoppers #892 & 903 that just arrived today after being transferred from the RGS East.

Check out the end where #5 pushes all those cars at a crawl. Nice!!!

Video color and exposure are terrible, but it’s Spy Video, so we get what we get.

Really nice Jon. I like the thoughtout neatness of your installs

Thanks Dave. Neat but slow.

I decided that I wanted 14.8V and I’m pretty sure I can fit individual cells in the boiler front if I cut out the mount for the smoke generator. So tonight I ordered the batteries; 4 Tenergy 18650 2200MaH LiIon cells with solder tabs and a 5 Amp protection / charging PCB from All-Battery. Next challenge is to fit all that in the boiler without removing the weight (I don’t want to disasemble the boiler).

While I was at All-Battery I ordered a few single cell PCBs that I’m hoping I can use to try and recover some of the cells from a dead 13.8V pack.

Dave Marconi said:
I like the thoughtout neatness of your installs

Me too

You calling this neat ?

I agree very neat especially when compared to the mouse nest that I creat when wiring. Oh and when you coming over to test run it on my layout. I bet it will look real nice. Dont forget to bring the live steamer. :slight_smile: Great work so far.

So y’all think I should leave those wires running outside the boiler and into the cab vent ???

Yes!

It would be different…:wink: