Large Scale Central

PNG Drop Bottom Gondola

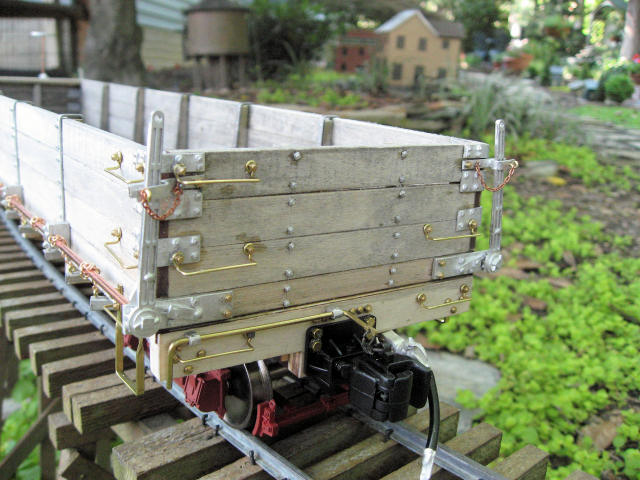
Phil recently started shipping his Drop Bottom Gondola. I just finished the model and it’s ready for the paint shop.

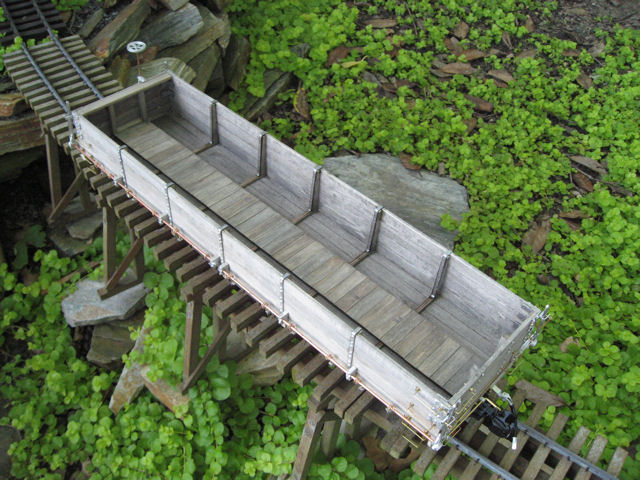
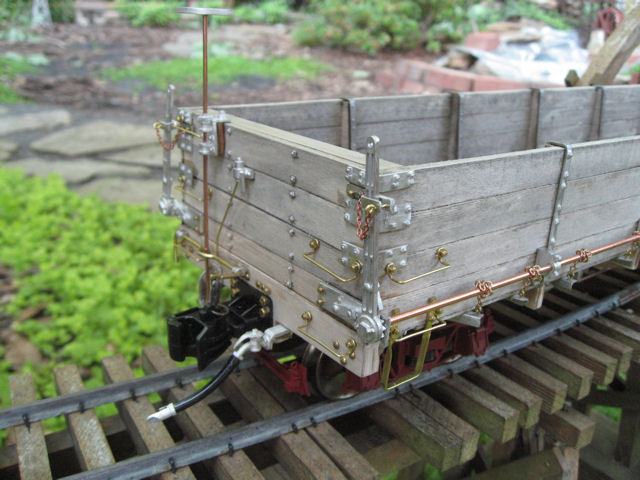
I weathered the boards with an alcohol/India ink mixture prior to assembly. I will leave the inside as is and only paint the outside. Phil’s kits are well engineered and sturdy enough even for an oaf like me to operate in the garden. While his instructions are always first rate, he has REALLY outdone himself this time with lots of pictures to accompany the step by step directions. The castings are clean and only require minimal clean up. While it’s definitely not a shake the box kit, it goes together very nicely. I sure had fun putting this one together.

Hmmmmmmmmmmmm, very nice!

Thought you wern’t gonna get one of the new ones? I recall trying to trade me your old one! :slight_smile:

Seriously, it looks great.

Bruce,

That looks good, sure has a lot of hardware on it, too!

Build em by the half-dozen!

(http://zbd.com/photos/OnePoint20/DropBottoms/IMGP0912.JPG)

Sweeet!! I love all the details!

Nice work Bruce. The weathered wood looks great. What kind of wood did you use? Bob’s look like Cedar on the sides and end.

Bob, that’s too many. You need to send me one.

Jon, I think it’s basswood for Phil’s kits.

Bob, you may want to talk to Phil and get some metal replacement parts for the plastic levers - they’re a LOT sturdier.

Bruce Chandler said:
Jon, I think it's basswood for Phil's kits.

Bob, you may want to talk to Phil and get some metal replacement parts for the plastic levers - they’re a LOT sturdier.


or send them to me and buy some new kits …:wink:

Bob McCown said:
Thought you wern't gonna get one of the new ones? I recall trying to trade me your old one! :)

Seriously, it looks great.


I’ve got two of these, but won’t be keeping them. Just get to build them - what a deal! :smiley:

Those are so cool.

Bruce Chandler said:
... I've got two of these, but won't be keeping them. Just get to build them - what a deal! :D
Takes up less shelf space that way, though. All the fun of building without the worry of storing. Those are great looking cars. What are your plans for the white metal castings on the inside with regard to finish?

Later,

K

Kevin Strong said:
Bruce Chandler said:
... I've got two of these, but won't be keeping them. Just get to build them - what a deal! :D
Takes up less shelf space that way, though. All the fun of building without the worry of storing. Those are great looking cars. What are your plans for the white metal castings on the inside with regard to finish?

Later,

K


Kevin,
I painted them all before I installed them. It’s hard to tell in the picture; a steel color, which doesn’t look TOO much different from the white metal. :wink:

I’ll probably put some weathering powders on them - rust and grime. But, I’m open to other ideas. :smiley:

New levers and stuff arrived from Phil today. Time to retrofit the hoppers, get rid of the nasty plastic stuff, and get them all painted up.

Hey Bruce
Can you give me an idea of how you attached the release handle to the end of the rod? The new castings I have only have a slight indent. I think Im going to have to epoxy them to both the rod, the pawl assembly, and possibly the upper bracket?

Hmm. Just finished the second one today. The handle had a hole drilled into it and slipped right on. He uses 3/32" rod…and the hole is about 3/32" deep. It’s also important to note that there’s a left and right handle…as well as a left and right pawl assembly. Putting the correct ones together makes things line up. The instructions state “Fit the ratchet handles on the rod and engage the gear on the back of the handle with the lock pawl. The cast in locking pawl on the handles should be to the outside of the car.”

So, I just used some CA to glue the handles to the rods. The upper bracket is there, but doesn’t really hold anything.

Hope that helps.

Looking at Phil’s picture - that sure is some nice detail. With all that he put into it I wonder why he used slotted screws to mount the draft gear. Kinda blows the illusion. Hex heads would at least be passable.

This coming from a guy who has the coupler on his Shay mounted with a big machine screw and nut as the pin :o

I guess sometimes you just use what you’ve got.

Well. then you have to worry about what size hex head…and people would probably complain about the size of the wrench needed. …and it would cost more. :smiley: Having said that, I use the lag bolts from Micro Mark.

(http://www.jbrr.com/Pics/RollingStock/PNG_DropBottom/IMG_4098.JPG)

I used lag bolts on mine, too.

(http://zbd.com/photos/OnePoint20/DropBottoms/drop2.jpg)

Them are some nice looking cars!