Large Scale Central

My First Build

So MIK 2015 is over so back at the Mogul. When I last left off I was able to be onvinced that the electronics and battery would fit in the tender. So I needed to modify the top for easy address. Meaning I need to cut it out and make a removabe piece for the wood load.

I think at this point I am done adding wood that was a pain to cut split and stack (glue) all that wood. It works though. Everything got touched up on paint. I am using the Bachmann tender trucks for now, I have to make a connection to the locomotive, lengthen the hoses. Then I have to start spending some money. Electronics, battery, sound. Lettering. Glazing.

If you miss splitting wood you can always split my 1:1 size wood for the woodstove. I just finished splitting some of mine!

I did that for way to many years. That was my families primary source of heat growing up and then when I moved into my current house we had a wood stove. Now I set a thermostat and split 1:20.3 wood with an exacto knife.

I’m getting closer to that. We have to buy a new heater because the one in the house hasn’t been used in over 30 years!

To add a little more room in height to the tender, use a piece of carved blue foam to raise the wood load up a bit, and hollow the foam piece out. Or add a set of “hungry boards” to the tender.

I did both to this tender.

Ok So here are some shots of it mocked up. I need to get the vinyl letering and put it on. I think I am going to shoot the whole thing in steam loco black before I do there are spots and uneven paint. I have to glaze the windows. I have to build those trucks and get the wheels. I need to do that before I make the final attachment to the loco so I can get it at the right height. Then electronics and weathering. Seems like alot but not really. Pretty pleased for my first F scale stem loco.

On the issue of glazing the windows, before or after weathering? I realize the real thing gets the windows dirty but will it have the right effect or make them to dirty. I am pretty much thinking a very dilute wash of black grime is all I will be doing other than spot grease and what not. I want it clean but used; not abused and abandon.

I was going to do the foam thing but with the wood having gaps yo can see deep intp the pile. So figured just lots of wood. And wife says more so tme to fire up the razor saw and xacto mal.

Ken, Never knew they had a name. Thanks!

Nice to see you hop right back on this now that the challenge is in the history books. It’s looking very nice. I’m looking forward to these new trucks and the water feed lines. I’ve often thought it would be really cool if the could some how be functional on live steam models, but you don’t even see much of them modeled entirely even on sparky’s.

Devon Sinsley said:

I was going to do the foam thing but with the wood having gaps yo can see deep intp the pile. So figured just lots of wood. And wife says more so tme to fire up the razor saw and xacto mal.

Paint the foam black and the shadows get deeper…

Randy Lehrian Jr. said:

Ken, Never knew they had a name. Thanks!

Nice to see you hop right back on this now that the challenge is in the history books. It’s looking very nice. I’m looking forward to these new trucks and the water feed lines. I’ve often thought it would be really cool if the could some how be functional on live steam models, but you don’t even see much of them modeled entirely even on sparky’s.

Not knowing better I just figured they had to have them (hoses that is). I am going to try using the wire insulation like I started with but its a little stiff. More likely go with Kevin Strong’s suggestion of rubber fuel line from model cars (actually he refered to it in a RRcontext but I have used it in model cars) it is basically very small rubber tubing. I belive it was Bruce that added a way to connect and disconnect them easily with magenets that gave me an idea I might try.

I have to bite the bullet on the trucks. Its time I am a little intimidated but I think it will be a hoot to make real scale trucks. Mircromark has 00-9 and 0-8 dies so I can make 1 1/8 (0-8) and 7/8 (00-9) bolts. They need to be longer than you can buy. K&S metals has brass strip that come out decently close to the bar stock used. http://largescalecentral.com/folders/file/6 here is a link to the PDF of the truck I am building. I think I even have an idea for functioning leaf springs that will move and hide a coil to do the actual work. we will see.

Once I do them I figure if it was to tough I will use them to make a mold to cast the parts in completed components for the rest of my builds.

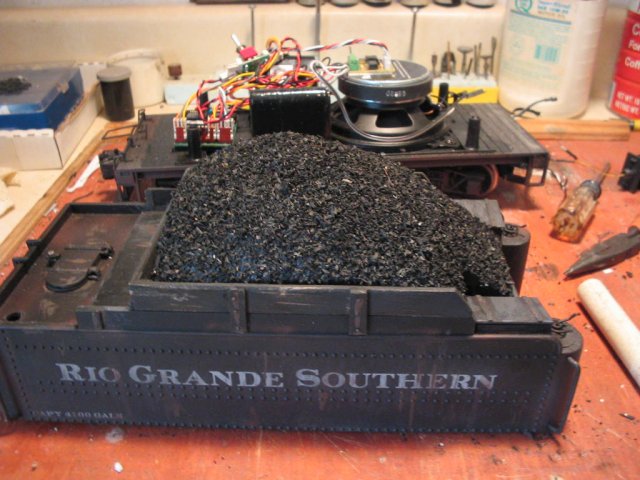
Need to get an email to del to get my decals on the way.

John Caughey said:

Paint the foam black and the shadows get deeper…

Well that would be true but to late. The first course is glued down to the styrene base and I have about two more cords cut and split ready for loading into the tender. I will file this away for next time.

Wow Devon, you’re sure doing wonderful work!

Thanks Cliff and everyone else cheering me on.

It has been fun. A very steep learning curve going from Modern HO to steam Fn3. This is the most intensive thing I have ever built. It’s not perfect but I think its pretty and I will gladly take her to the ball. It is still up in the air as to whether it will even work. I went back and looked over this thread just so I could see where I have come and i was asked if this was for static use or a runner. Well that still remains to be seen. It will be a real bummer if I put it on the track and it wont move (http://www.largescalecentral.com/externals/tinymce/plugins/emoticons/img/smiley-yell.gif). Really at this point I think it is sound and will run. The motor is untested so who knows it was supposed to have been working. The only other concern I have is the side rods and connecting rods not binding. I have no reason to believe they wont work.

Say that brings up a question what would it take to test the motor and running gear? I am not sure if i still have my old HO dc controller, would that work? I suppose I could get off my duff and go visit chuck, I bet he could help me test it. There is no control system, I only have the two wires connected to the motor.

I also bought these

on Ebay so I can thread rod for my truck project. Thanks to Mike who directed me to scale hardware so I can get 1mm and 1.6 mm nuts and som 1mm rivets to use as pins. I need to buy the rod and some bar stock and get cracking on the side frames. I also got Del to resend the quote for my vinyl letters, need to check spacing and have him send them on their way.

It’s been a while since I’ve checked your progress and I gotta say that’s a lovely little mogul! I can’t wait to see the finished result.

So I have been a little dormant on this build. I have been waiting to get the lettering for it and Have found a hundred other things to spend my money on. I tried to print my own on water slide decal paper with no luck.

This is the lettering I tried to print. This is the second time with my new printer that I have tried to print colored decals on clear paper only to have them be transparent to the point that they are almost invisible when applied. I have used this paper and technique before many times with great success on a different printer. I print them as a PNG file on the highest quality I can. I do not know what is going on. It is like the ink is just not laying down think enough. I haven’t tried photograph ink.

So I am back to wanting vinyl. Need to get this done so I can run it at a club function this year.

“It is like the ink is just not laying down think enough.”

Maybe the ink in not thick enough (as in not enough ink). (http://www.largescalecentral.com/externals/tinymce/plugins/emoticons/img/smiley-wink.gif)

X

Joe I think that is exactly the problem I am just not sure how to solve it. Printers are not made to print letters on clear paper. As such, they print as dark (thick) as need be to have the printed subject show up on an opaque background. These same decals printed on white paper show up great. The idea of printing them in PNG format is the high resolution and also having the printer set on highest quality for the same reason. I figured (guessed) that this would lay the ink down thicker but no such luck. I think i am stuck in a situation of having a crappy printer.

It’s the ink, some are translucent (light passes through) and the others are Opaque (light is blocked)…

John

John Caughey said:

It’s the ink, some are translucent (light passes through) and the others are Opaque (light is blocked)…

John

OK that makes sense. Wonder if I can get opaque ink for my printer?? I will have to try see.

Wow Devon I just checked out this post , great job !