Large Scale Central

Mik's challenge build

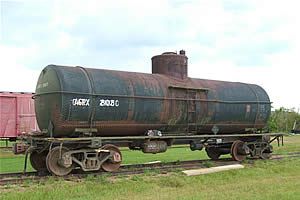
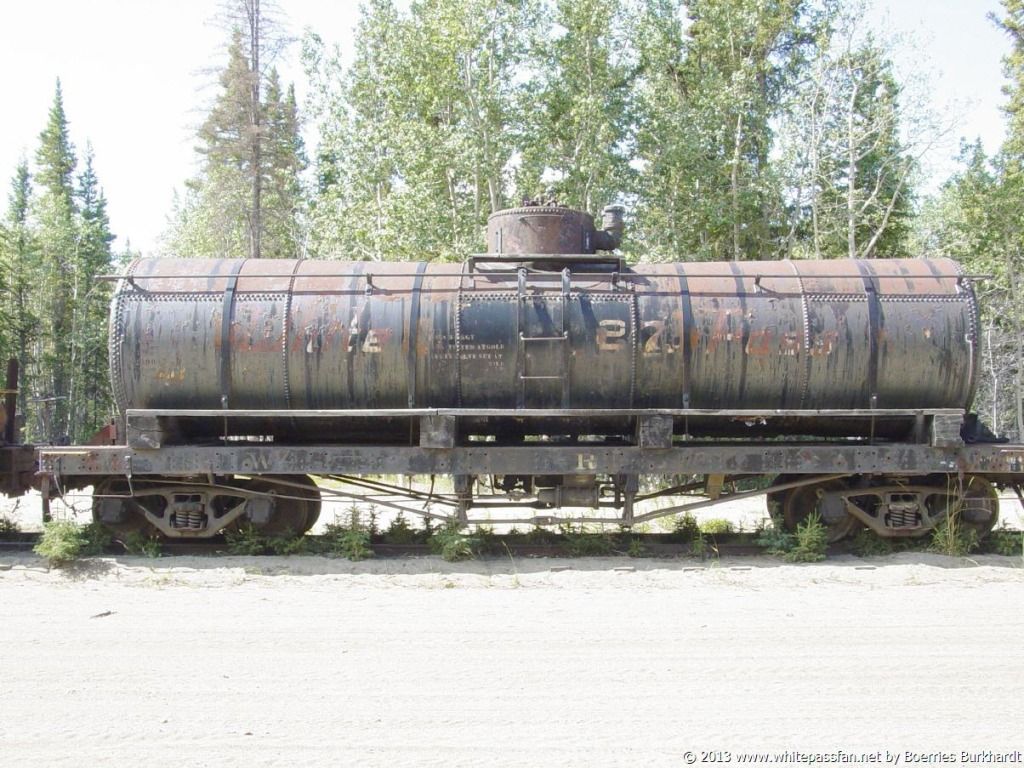
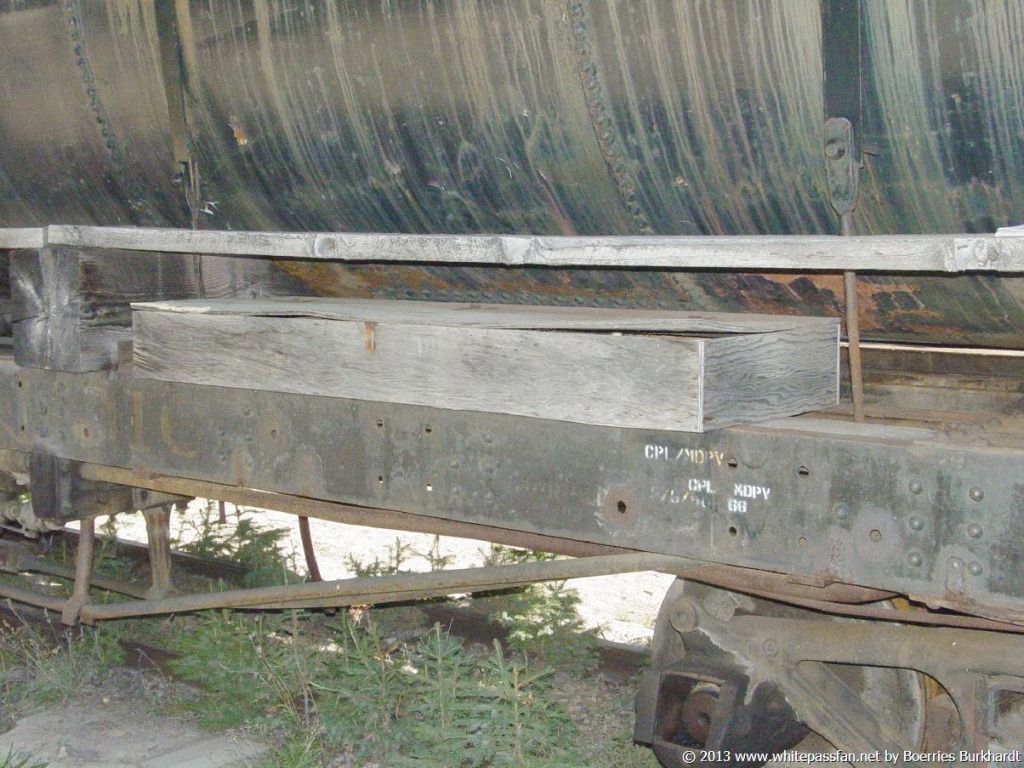
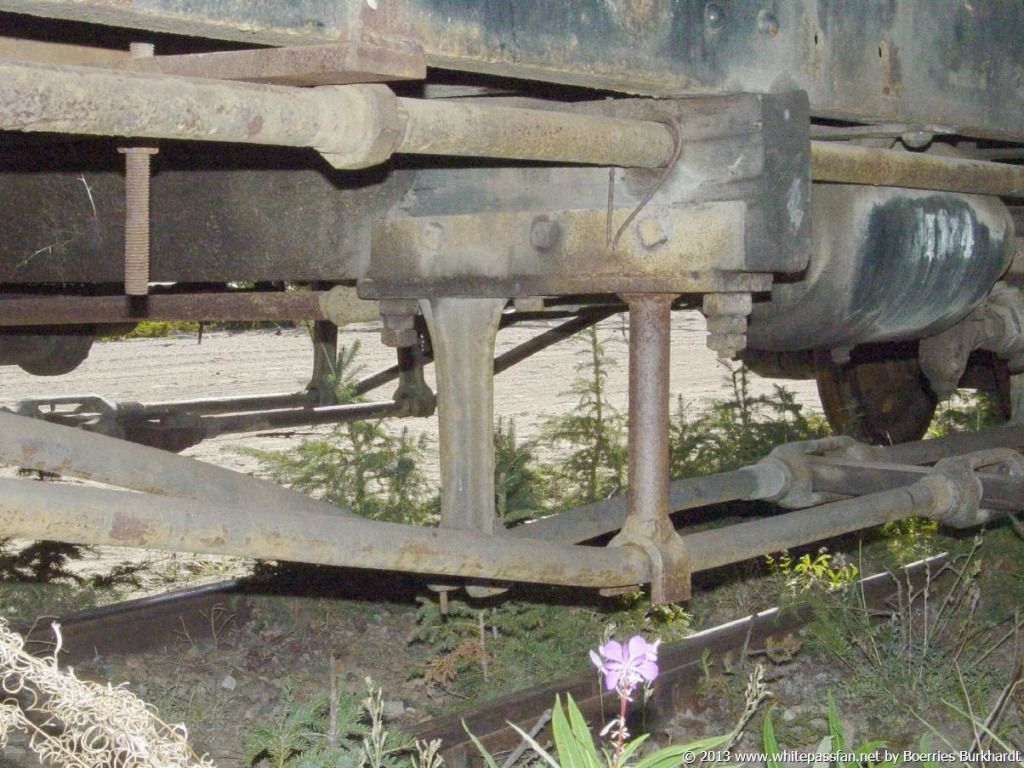
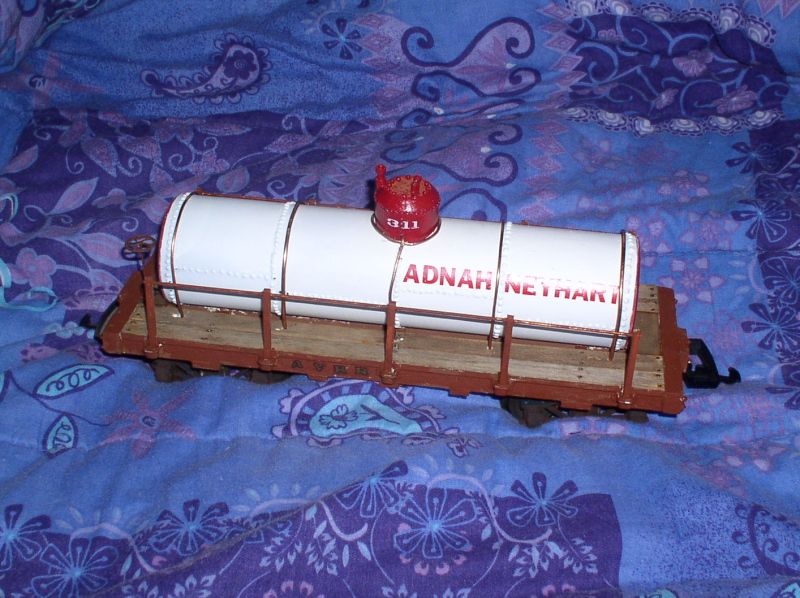
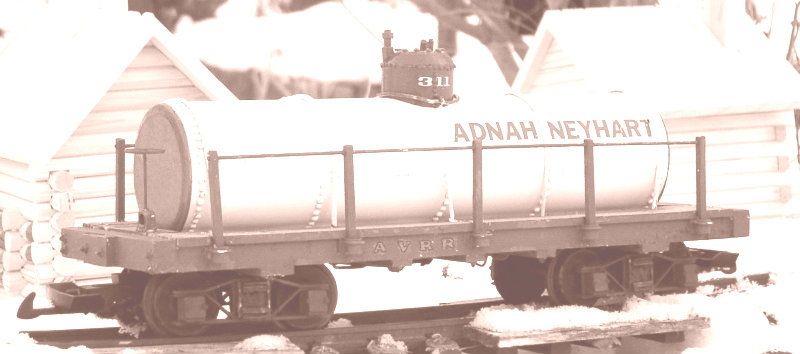
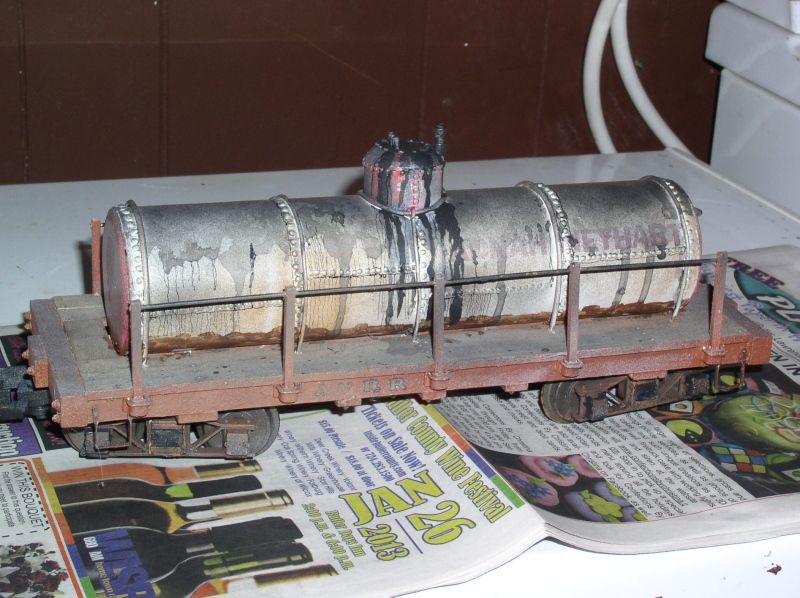
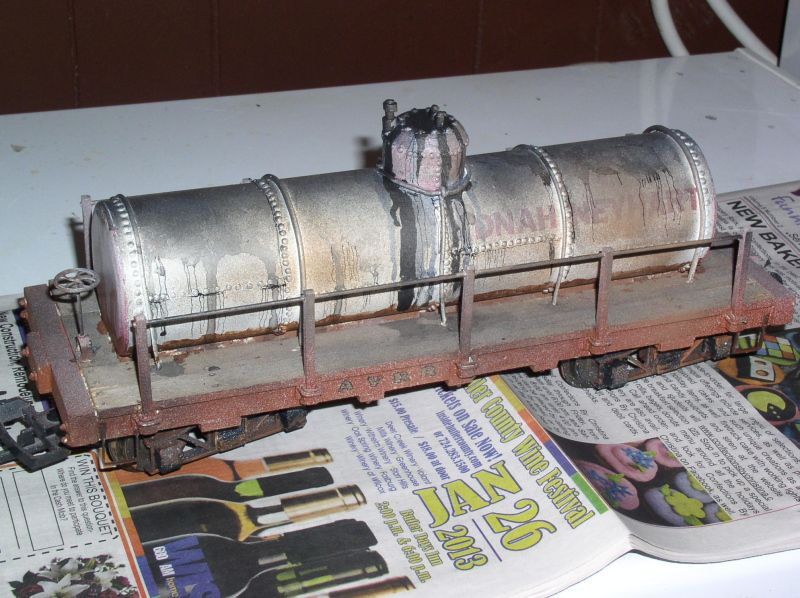
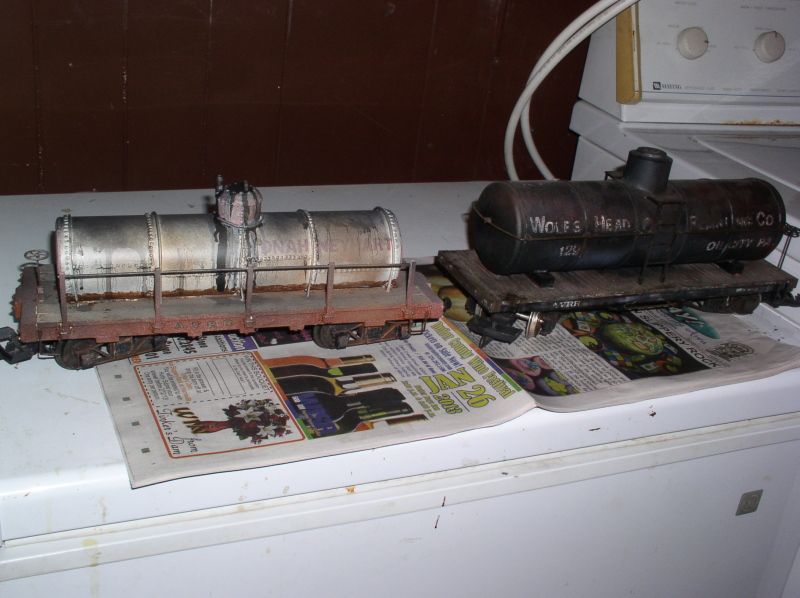
In the spirit of a build log that actually helps others be able to reproduce WHAT I’m doing, rather than just being another “Looky what I dun!”, I thought I’d make a process, rather than progress post today. I find it’s entirely too easy (and common) for modellers to slop on “weathering” willy nilly (clutter is another thing that’s often overdone) , but much harder to get it to actually look natural. So, while waiting for the paint to harden (and mostly trying to ignore Kim’s feetball games, since I didn’t follow any of those teams all season) I went surfing for grubby tank car photos. I found these and thought I’d share. (I’m claiming “fair use” as an educational tool.) Most of these effects can be reproduced with paints by dry brushing and washes.

(http://i397.photobucket.com/albums/pp52/steamnut1917/weathering/utlx17635.jpg)

(http://i397.photobucket.com/albums/pp52/steamnut1917/weathering/cn_agrx-802_tank_car.jpg)

(http://i397.photobucket.com/albums/pp52/steamnut1917/weathering/Railtown1897Tankcar.jpg)

(http://i397.photobucket.com/albums/pp52/steamnut1917/weathering/dsc02370c.jpg)

(http://i397.photobucket.com/albums/pp52/steamnut1917/weathering/dsc04100c.jpg)

(http://i397.photobucket.com/albums/pp52/steamnut1917/weathering/dsc04090c.jpg)

(http://i397.photobucket.com/albums/pp52/steamnut1917/weathering/dsc02835.jpg)

Honestly, I wish the search engines returned more stuff you actually wanted, and less stuff that some guy paid to have pushed at you… Even using the ‘advanced search’ filters it took me about 90 minutes to find just these. Google is one of the worst offenders. This is part of the reason I started my “someday files”. When you find a really useful photo, SAVE IT to disc or hard drive… because the chances of finding it again when you need it is sometimes fairly slim, if you just bookmark it you’re taking a chance, too much older net content disappears into an electronic black hole every day. Besides, if you have it in your photo files, it’s more likely that you’ll actually START building.

Very nice pictures. Good food for thought on saving prototype pictures to a dedicated file. I am trying to do that with every image I can scrounge up related to the Little River RR in East Tennessee. I agree it can take sometimes 1-2 hours to find appropriate images on the net.

Tom

Just 1-2 hours? The only one I ever found was that little logging caboose model!

I wish I didn’t have to take this week off from the build but it just means I’ll be busier when I get back to it!

Mik… thanks for the looks… That last tanker car, the pics were lifted from a White Pass site, so it seems, that car was probably one of the Narrow gage cars from the D&RG that was appropriated for the War effort.

Good pix you found in the end, though… Your dome is very cool, BTW.

Geez Allen that drill is so antiquated it might as well be coal fired! :stuck_out_tongue: A few years ago I invested in a B & D LI3000 compact screwdriver and a drill bit chuck attachment, never regretted that money spent.
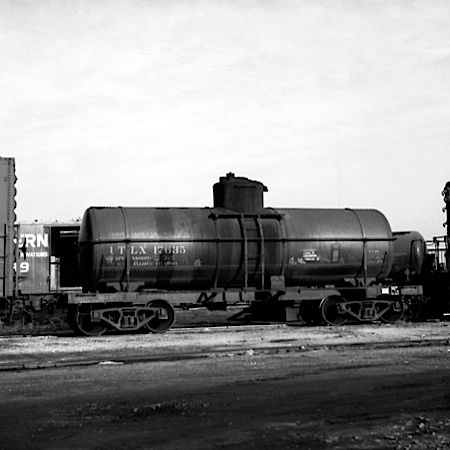
(http://toolmonger.com/wp-content/uploads/2006/07/bdsd08.jpg)

(http://toolguyd.com/blog/wp-content/uploads/2012/01/Dewalt-DW0521-Impact-Driver-Conversion-Chuck.jpg)

@Vic - I was considering a similar tool. How small of a drill bit can you chuck? I’m wondering if I could use the mandrel from a pun vise as a chuck adapter for tiny bits. My hands have a real problem with repeated use of the pin vise.

@Mik - Looking good so far. Thanks for the prototypical pictures. I need to file them away when I get home for my yet to be completed tank on flat.

Jon Radder said:
@Vic - I was considering a similar tool. How small of a drill bit can you chuck? I'm wondering if I could use the mandrel from a pun vise as a chuck adapter for tiny bits. My hands have a real problem with repeated use of the pin vise.

@Mik - Looking good so far. Thanks for the prototypical pictures. I need to file them away when I get home for my yet to be completed tank on flat.


I’m using micro-drill bits with it. I think the smallest is about 1/32", to drill pilot holes for brad pins, just gotta be patient with it as not to break the drillbit. But its nice and lightweight so its easy to guide. If I had any caviet its that the drill chuck sometimes has to be heldto the drill when reversing the bit out or the chuck will come out of the slot, you get to it pretty quickly though. Lately I have been using a bigger cordless power drill for most larger drilling chores (1/16" and above), but I have used it with the same tiny drill bits, like I said, you just get to handling them after a while. I really like the little B & D, its useful all over the house.

As I mentioned in John’s thread, I had trouble with the old stock Woodland’s dry transfer lettering I had here. Since I wanted the lettering just as much as the car. I splurged $7 on a set of 3/8" “no need to trim” waterslide decals from a company called Virnex… Up side is, yes there isn’t excess clear film to trim. Down side #1 there is a fairly steep learning curve. I think out of all the letters on both sides, I got 3 on without tearin. Down side #2 they don’t have much surface area to hold them down, so the the water gets undaer and the previous letter tries to float away when you apply the next. My personal review is they’re pretty good for a one-off car like this, but I’d really hate to letter a fleet with them. The tank straps are copper wire from a short bit of stranded entry cable that a friend was tossing out. Till I straightened it, then tried to rebend it, the stuff was getting pretty work hardened. I’ll have to see if I can snug them down better in a day or so.

(http://i397.photobucket.com/albums/pp52/steamnut1917/P1270001.jpg)

I lost half a week waiting on the lettering, because I really, really wanted to do this:

(http://i397.photobucket.com/albums/pp52/steamnut1917/P1270003-2.jpg)

NOW I can mess up the paint job!

Looking good. The B&W photo really pops the lettering. Looks very realistic. A very nice model.

Tom

Cool stuff, is it going to get weathered?

Tom Grabenstein said:
The B&W photo really pops the lettering. Looks very realistic.

Can I take a few minutes to discuss photographing tricks, too? To get that old wet plate sepia look I wanted took just a few simple, built into most modern photo editing software, tricks. Many folks, rightly, think an ‘antiqued’ sepia photo is a cliche. Mostly because too many folks just flip on the sepia filter, and stop. there. The result LOOKS fake and cheesy, because it IS fake and cheesy. Getting it to look “right” takes about half an hour of tweaking and adjusting… something most folks can’t or won’t bother with.

The first, of course, was to take the shot from a very low angle and crop it to match the original photo.

Next was to flip on the sepia filrter, and shift the quality a bit more towards brown.

Then I added a very fine “film grain” filter.

Follwed by shifting the saturation to lighten the photo a bit.

Then a little bump on the contrast and the lettering on the frame came out right.

The only thing really missing is the sun reflection on the end of the tank. I could have faked it either with a fill flash when I took the photo, or a spot fade filter in processing. I also could have painted out the weeping cherry trunk.

I was working from memory when I placed the buildings, If I’d have carried a copy of the original along out in the snow I could have matched them better - some things you just spend more time foodling with when you aren’t kneeling in the cold wet stuff.

I did a little primer on photographing model trains for newbs a while back. To the old hands, it’s probably all old hat, to the new guys there might be something useful in it that I’ve glossed over here. … http://www.the-ashpit.com/mik/photography.html

Just like building the model, the more time and care you put in, the better results you get out.

Mik, That’s a very nice looking car with lots of detail… I am almost completed my project car and will soon share the final witha description… Travis

Mik said:

Can I take a few minutes to discuss photographing tricks, too?

A good tutorial to get that historical look to our photos. I am going to have to try a few of these well thought out tricks. Thank you.

Tom

I warned everybody that I was going to really mess up the pretty paint on this car… I’m not quite done, even yet. I didn’t take pix of the intermediate steps, so those who are curious will have to settle for a talk through.

On the tank:

Step#1 was to paint on a really nasty oil spill

Step#2 was to make that spill, and the paint look “old” via my usual 3 step overspray process. See: http://www.the-ashpit.com/mik/weathering.html

Step #3 Then I gave it a wash of black.

Step #4 Next was to paint yet MORE “spillage”, much of it right over the “old” spill areas, but with differant runoff tracks.

Step #5 I drew in small “rivulets” with an extra fine Sharpie

Step #6 will be to add some fresh “rust” areas, mostly along seams and rivets.

On the frame:

Step #1 was ro use the same black wash I used on the tank on both sides near the center of the car where spillage would have been likey to have soaked into the planks.

Step #2 was subjescting it to the same overspray when I painted the tank.

Step#3 Will be to add “tarry” blobs and “moss”, mostly along the joints, via paints. --Oh, and I found a set of plastic stirrups in a box, so they got added, too.

The trucks got “old grease” creep around the journals, and some lighter brown “dry rust” highlights to bring out the details. They’ll get some tar blobs and moss as well.

I also apologize to those who expect “natural light” photos at this point. We’ve had mostly liquid sunshine all day.

(http://i397.photobucket.com/albums/pp52/steamnut1917/P1300001-1.jpg)(http://i397.photobucket.com/albums/pp52/steamnut1917/P1300002-1.jpg)

Just for the sake of showing scale, I put the car next to a Kalamazoo tanker. While some may think ithe scratchbuilt one looks “too small”, it actually pretty accurately reflects how tank cars evolved between 1870 and the mid 1880s. (http://i397.photobucket.com/albums/pp52/steamnut1917/P1300003-1.jpg)

Very Nice Mik! Great Job!!!

i lllovvve it!

DISGUSTING…I luv it.

Thanks guys!

One thing I’ve been wondering since I first saw the photo is - What kind of idiot orders an oil tank car in WHITE? (OK, it could have been yellow or even light green, too Early films just weren’t all that sensive to some colors) Yes, I’ve given thought to the solar heating argument. But, still, if it wasn’t carrying light machine oils or kerosene exclusively, then it wouldn’t have STAYED white for long.

The (probably) brass letters and numbers on the sills are another head scratcher. Why the extra expense? Yes, it was the age of pride in, and fancy paint on, lcomotives and passenger equipment… but this one is simply a puzzler. The other same period Harrisburg freight car builder’s photos that I’ve seen weren’t nearly as fancy.

Maybe it’s a milk car?