looks good Mik!
Mik… are those band straps that held it down?
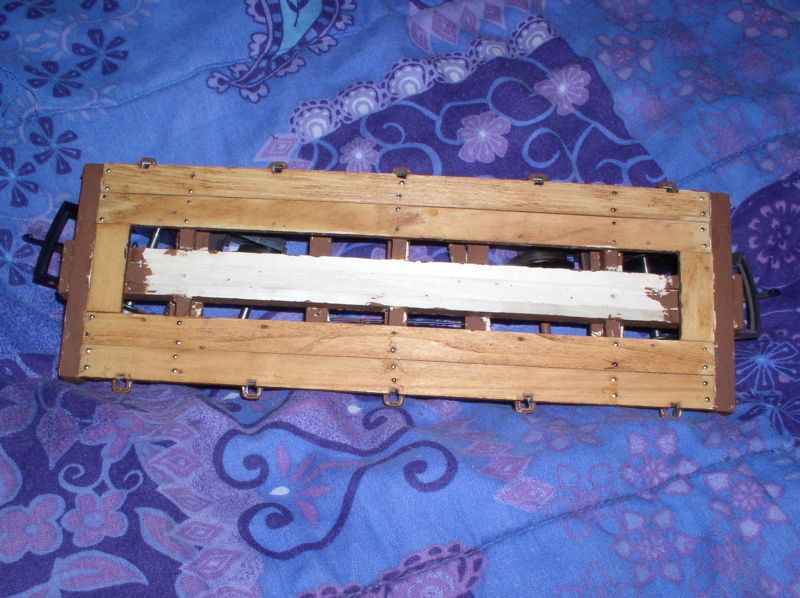
The tank was held to the frame by 5 bent rod “hoops”… I’ll need to invest in some floral wire for those, as Kimmee used up all I had.
Day… 12? One of the things I like to do during the challenge is try out new/different ways of doing stuff. Either it will work, or be a spectacular “Hey, y’all watch this!” type failure. As I hinted to John Le Forestier I read someplace last year about an interesting, and cheap wood staining technique. Since the car had all that nice white wood, it was the perfect opportunity to try it out. The first step is a basic natural stain - a teabag worth of tea leaves let steep overnight in about 1/2oz of rubbing alcohol. - This results in a nice tannin rich liquid that you just slop on and let soak in. Don’t worry about any stray bits of teal leaf, they’ll just brush off when it’s dry… If the color is too light, just recoat when dry until you get a hue you like. This is what the deck looked like after 2 coats, almost a warm maple or fruitwood color.
(http://i397.photobucket.com/albums/pp52/steamnut1917/P1170001.jpg)
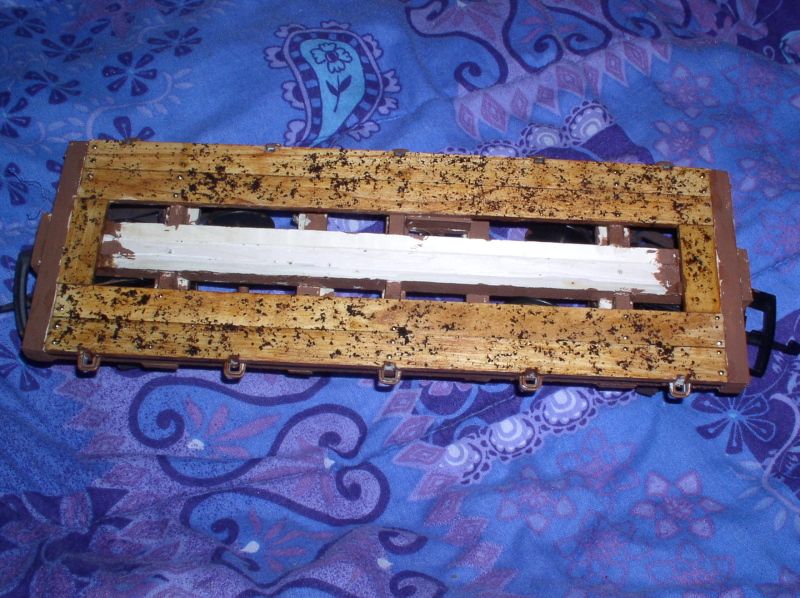
This was coat #4… I let this one set about 5 minutes before I brushed away the leaf bits with a paper towel - because I wanted the wood surface to still be “wet” for the next step…
(http://i397.photobucket.com/albums/pp52/steamnut1917/P1170002.jpg)
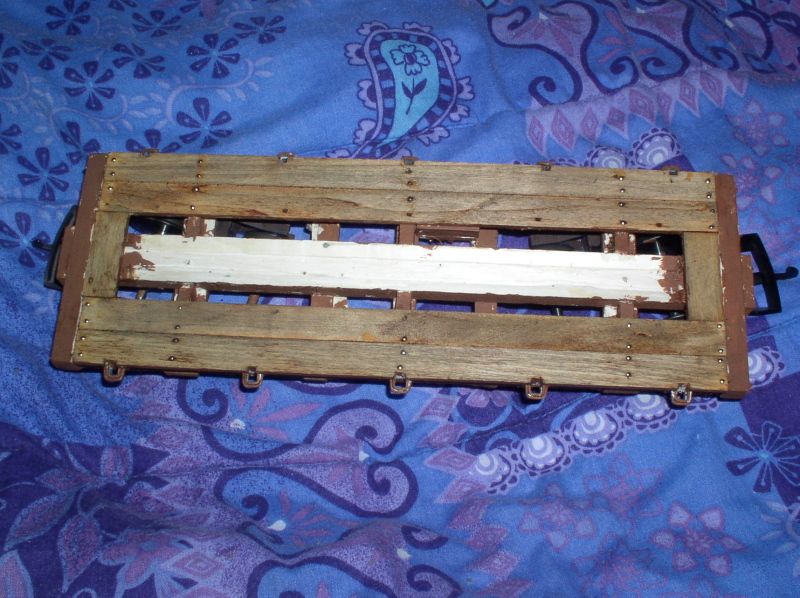
Second step, after wiping off the excess tea stuff away, I then wiped on a VERY diluted (about 20:1 with water?) black acrylic paint wash (with the same paper towel) and then buffed it away… after it dried I had this really nice faux walnut/old wood (but not rotten) look. Best I can 'splain it is the wood being damp with alcohol keeps too much of the black from soaking in initially, but then the alcohol absorbs the water and pulls the paint into the grain…
(http://i397.photobucket.com/albums/pp52/steamnut1917/P1170004.jpg)
I’d say this experiment was a moderate success. Another puzzle I’d been working on turned out to have a real simple solution. You’ll notice that the brake staff on the prototype has a cool looking support bracket. I was digging through my detail part sorter for stirrups, when I realized I could just cut away part of an Ozark Miniatures boxcar brake staff mount and it’s be “close enough for gubmint work” The lacy plastic D&RG style brakewheel really helps with the period look, too.
(http://i397.photobucket.com/albums/pp52/steamnut1917/P1170005.jpg)
I think I’ve spent about $9 so far. And I might actually finish this year!
looking Good Mik!! What did ya use to fasten the stave holders along the edge of the car?
The black wash over your alcohol/tea stain looks really good for old grey wood, Mik. I’ll remember that. The last time I mixed tea with alcohol, it was a very cold winter’s day, 40 years ago now… The were four of us winter adventurers, and we were out exploring the frigid barrens of Prince Edward County. We huddled together for warmth. We had a thermos of tea and a flask of scotch between us… In a moment of divine inspiration, the thought occurred to all four of us simultaneously…
Like your tea stain of today, the mixture we made that day long ago was, in it’s own somewhat different way, also a great success! 
Travis, I used Welder brand contact cement… I figured it would make it easier to replace a stake when (NOT ‘if’, around here) it got broken off.
John, I’m pleased with the look, too. I just wish I could remember where I saw the idea, so I could give the guy credit.
Tomorrow looks like the only day for at least a week that I’ll be able to go outside to primer the tank… and only about 150 rivets to go
We’ll just call you the “Rivet King!”
Nice work!
Looking good Mik.
Been watching this, getting sympathy knuckle cramps from all those brads I used in years past, looks great though when finished
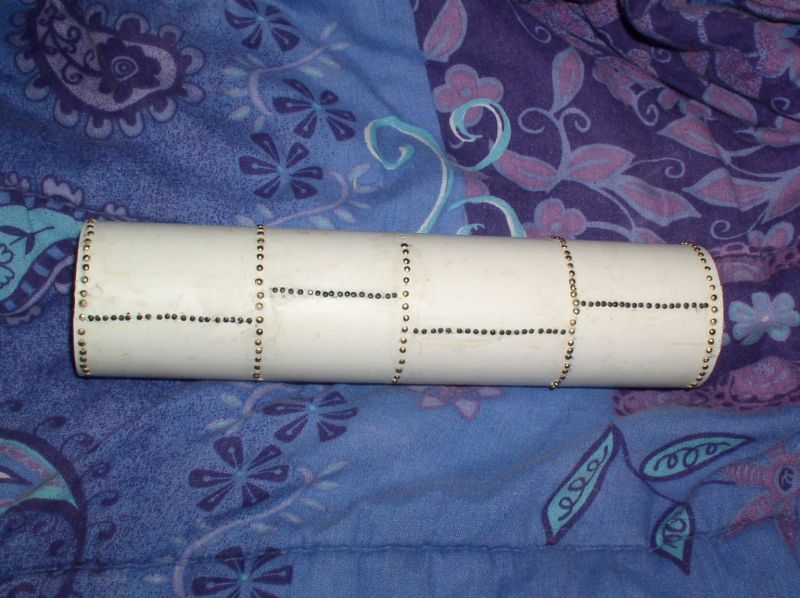
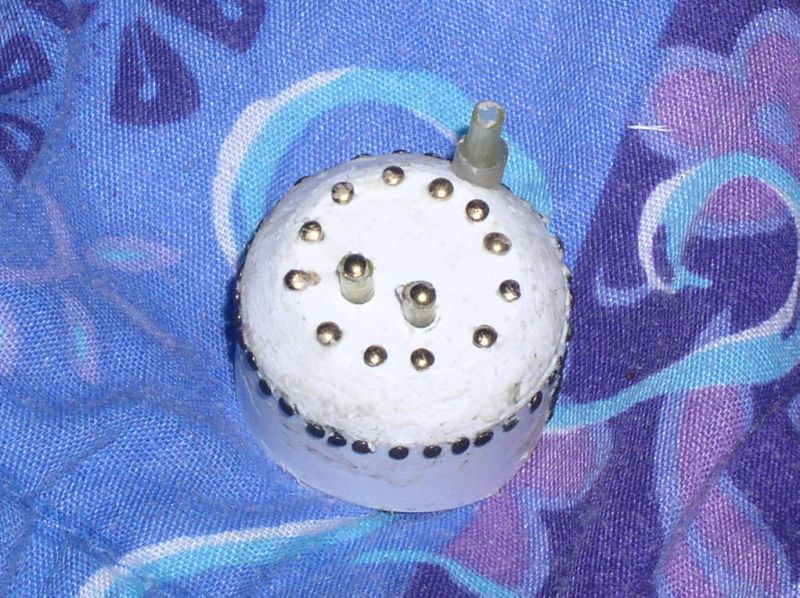
Vic… I figured out somewhere after rivet hole #250 that the easiest way to use the dinky hand drill was to turn the crank gear by the edge like it was a water valve rather than foodle around with the little crank handle… MUCH easier, and actually made it easier to control. Aaron’s brass pins and my track nails resulted in this:
(http://i397.photobucket.com/albums/pp52/steamnut1917/P1180001.jpg)
I still need to scrounge an o-ring for the dome vent.
(http://i397.photobucket.com/albums/pp52/steamnut1917/P1180004.jpg)
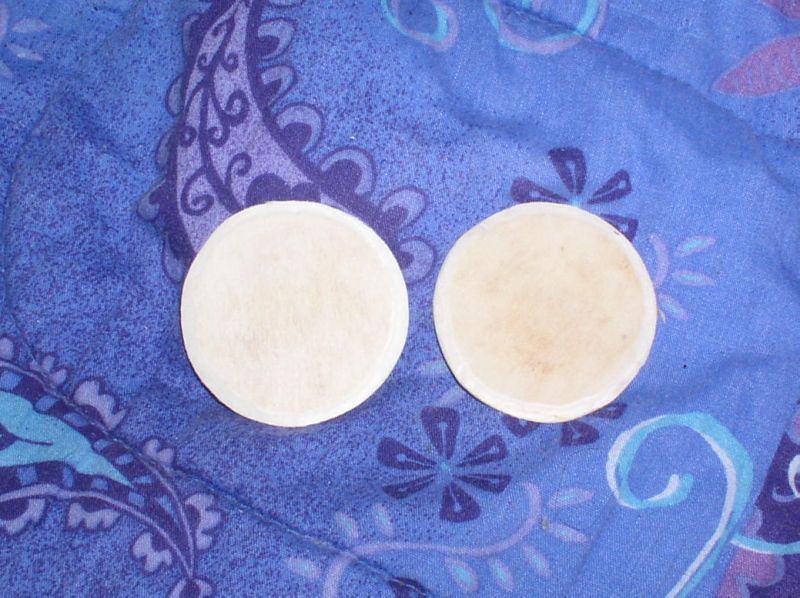
The tank ends are wooden, sanded slightly convex. I’ll be painting them and the dome separately before assembly (because I’m too lazy to mask?)
(http://i397.photobucket.com/albums/pp52/steamnut1917/P1180002.jpg)
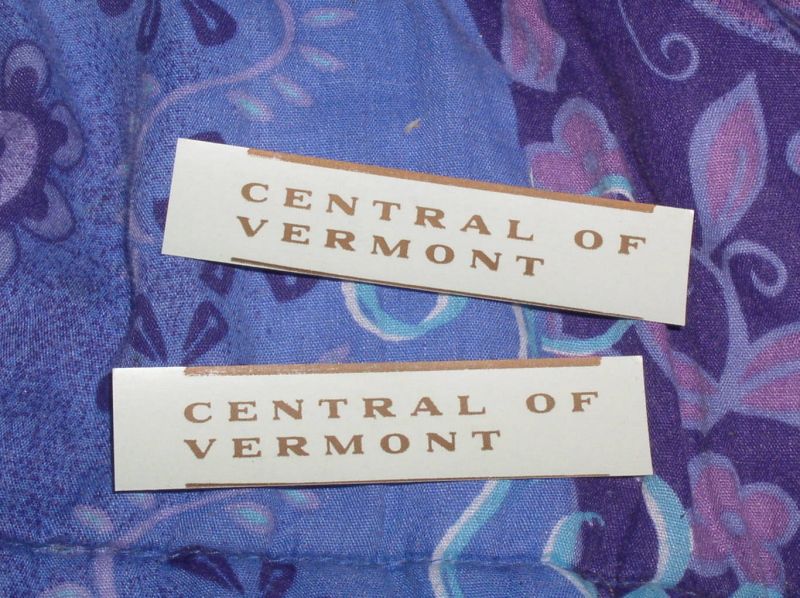
This old O-scale set of decals says AVRR, doesn’t it?
(http://i397.photobucket.com/albums/pp52/steamnut1917/P1180003.jpg)
Tomorrow will only be 40* F and windy. But they’re calling for a high of 13* on Tuesday, so I’ll have to try light coats.
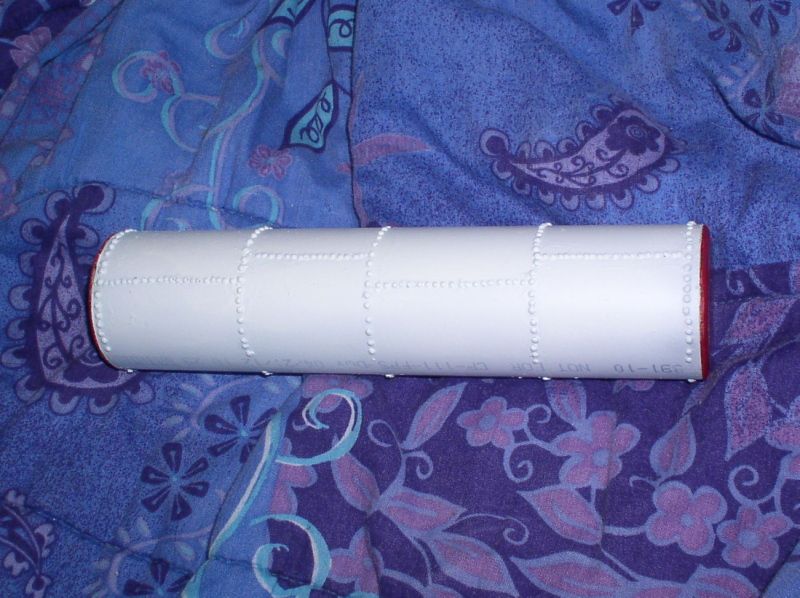
Tank painted, and ends installed. Since the red lettering I have are dry transfer… it now has to sit for about a week for the paint to harden.
(http://i397.photobucket.com/albums/pp52/steamnut1917/P1190001.jpg)
While I’m waiting on that I’ll work some more on the underframe. And it’s also time to think about weathering… Remember, this car is 1860s vintage (with an 1890s rebuild). When I do public runs my time period is 1925ish, and the home layout is 1961. I MIGHT get away with calling it a freshly restored “heritage” car in '61, but rusty and grubby is far more likely. The white will have yellowed and the red faded to pink… and probably lots of spilled oil with moss.
(http://i397.photobucket.com/albums/pp52/steamnut1917/1436TankCarOilCity.jpg)
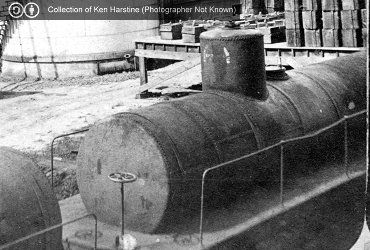
(http://i397.photobucket.com/albums/pp52/steamnut1917/2198a.jpg)
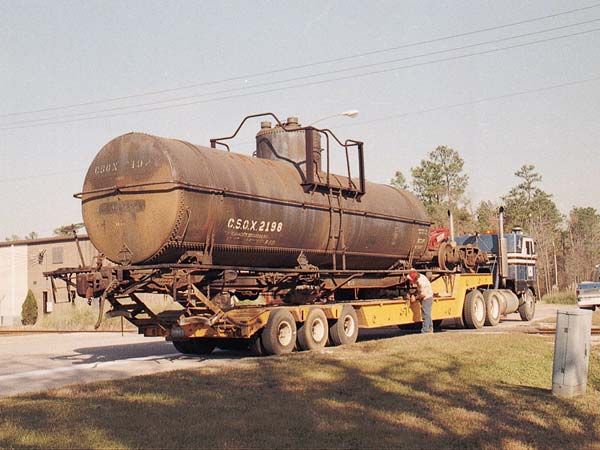
In other words, I’mma gonna “ruin” it.
I don’t think I’m up to drilling the rivits but U’m enjoying the prohect. This year I’m building a siding for a water fecility and I have to build two tank cars,
http://freightsheds.largescalecentral.com/users/doug_arnold/_forumfiles/tanker
Doug,
You are just not getting the hang of posting pictures, are you?
Actually I haven’t had any problems in a long time. Maybe it’s a conflict between the website and Mac? I was just telling Ralph that this was how the name was created bt Bob’s system.
Here’s a reimport of the picture. Even though it’s a jpg the jpg disappeared along the way so I just typed it in. Thanks Bob! ''This is the tanker I’m going to build.
(http://freightsheds.largescalecentral.com/users/doug_arnold/_forumfiles/Arrow1.jpg)
An Old Base line and North special. It’s not a MAC thing as mine work well.
What is happening is that when I use a jpg from Shorpy and others I resize it in Photo Studio. When I save it as a jpg the jpg disappears. If I type it back in on my original it works fine. That’s what normally happens.
When I shoot digital photos they are automatically jpgs except… One in my photo file doesn’t say jpg. Go figure!
Doug, drilling holes isn’t hard, just… boring. that’s why this car has 5 vertical seams rather than the prototype’s 6 or 7. This is my super-de-luxe high buck hand drill with the finished dome. If I were to do it over (and I might… someday) I’d add a nice horizontal handle to the bloody thing to make it easier to hold onto (and thereby control). BTW, you have no choice with this thing BUT to “let the tool do the work”, if you try to crowd the bit, it jumps teeth…
(http://i397.photobucket.com/albums/pp52/steamnut1917/P1200002.jpg)
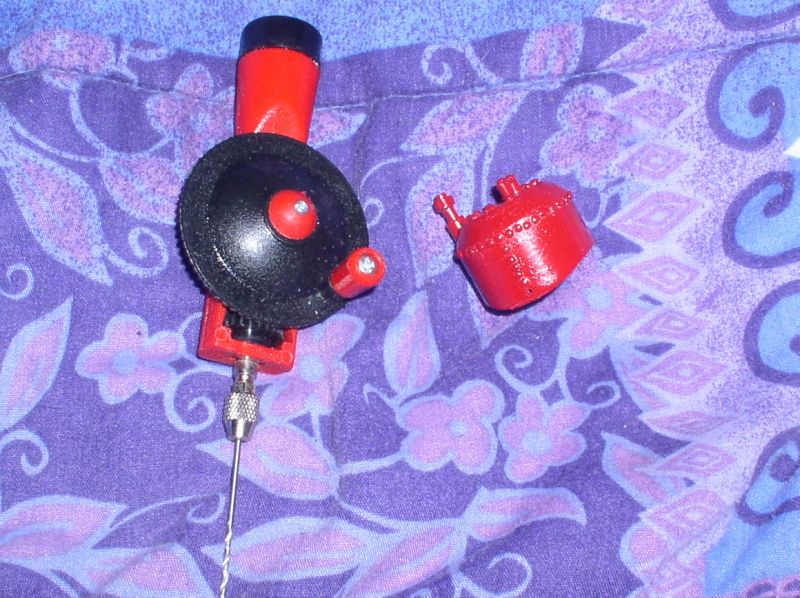
One of the guys on another board suggested using a hose clamp as a drill guide… other than possibly dulling the point or snagging and breaking the bit, it might not be a bad solution.
Not a bad thought…