Large Scale Central

Mik 2017 Daktah John - McCown Freight Forwarding

" Rooster " said:

Looks Good!

What if you turned the windows and made them 4 over 5 instead of 5 over 4 …just for a little more space on either sides of the doors.

I’ll tell myself to “shut up Rooster”

I had designed them as 4 over 5 originally. Someone early in the thread suggested the windows should not be too close to the floor in a warehouse. I happened to see the print lying around in the 5 over 4 orientation and I liked it. I think sliding them up to align the mullions will be enough.

So yeah, SHUT UP ROOSTER!!! (http://www.largescalecentral.com/externals/tinymce/plugins/emoticons/img/smiley-sealed.gif)I’m not figuring the block alignment for yet another layout. I’m committed (or should be) (http://www.largescalecentral.com/externals/tinymce/plugins/emoticons/img/smiley-surprised.gif)

@ Sensei Rooster

Grasshoper bows to your superior architectural intellect. They didn’t run the router this week, so I got 4 days to work on fixing the doors and windows. I submit for your comment the following updates. The door was split and separated from the frame. The window changed to a 6 over 4 (balances with 3 over 2?). I’m keeping the landscape orientation, but made the panes rectangular to match the doors. Latest drawings…

I know the mullions are too thick, but it’s probable this will be routed out of PVC or Acrylic, so that is about minimum with a cut through. We have a ton of router work scheduled for next week. Just hope I can get this job in while it’s spooled up. I won’t rule out getting it built by deadline, but it ain’t lookin’ too good.

Ahhhhh…you good listen Mis’er John.

Most tink Mis’er Rooster have head in ass all time so no one listen him. You keep drawing an we watch an you can send me message at

雄鸡@hookedthe"explicitive"up.com an we make you merican cowboy yet Mis’er John!

This post has not been edited in anyway “YET”

A little easier to see in this side-by-side arrangement…

I am committed to finishing; but I want to try using the CNC routed parts and waiting for machine time has put me way behind.

He only does that to slow you down Jon. Hope you get that CNC time soon.(http://largescalecentral.com/externals/tinymce/plugins/emoticons/img/smiley-cool.gif)

David Marconi said:

He only does that to slow you down Jon.

Pretty much.

" Rooster " said:

David Marconi said:

He only does that to slow you down Jon.

Pretty much.

Like I need help slowing down (http://www.largescalecentral.com/externals/tinymce/plugins/emoticons/img/smiley-undecided.gif)

But hey; I actually thought about the project for a few minutes yesterday. I hope that counts.

Looking Great John.

What are you using for your grout, or joints between the stones?

Dennis

Dennis Rayon said:

Looking Great John.

What are you using for your grout, or joints between the stones?

Dennis

When I finally get that far, I had planned to use some regular tile grout I have left over from a bathroom repair. I’m not sure how that will work out with teh textured paint. Might be triumph or disaster.

By popular demand, I have revived this old thread to document new work and my attempt to finish this project.

At the time, I failed to finish because I wanted to custom mill the doors and windows from acrylic using the CNC router at work. When I was unable to get router time before the contest close, I pretty much gave up. The flat has sat with it’s pencil sketch layout since early in 2017.

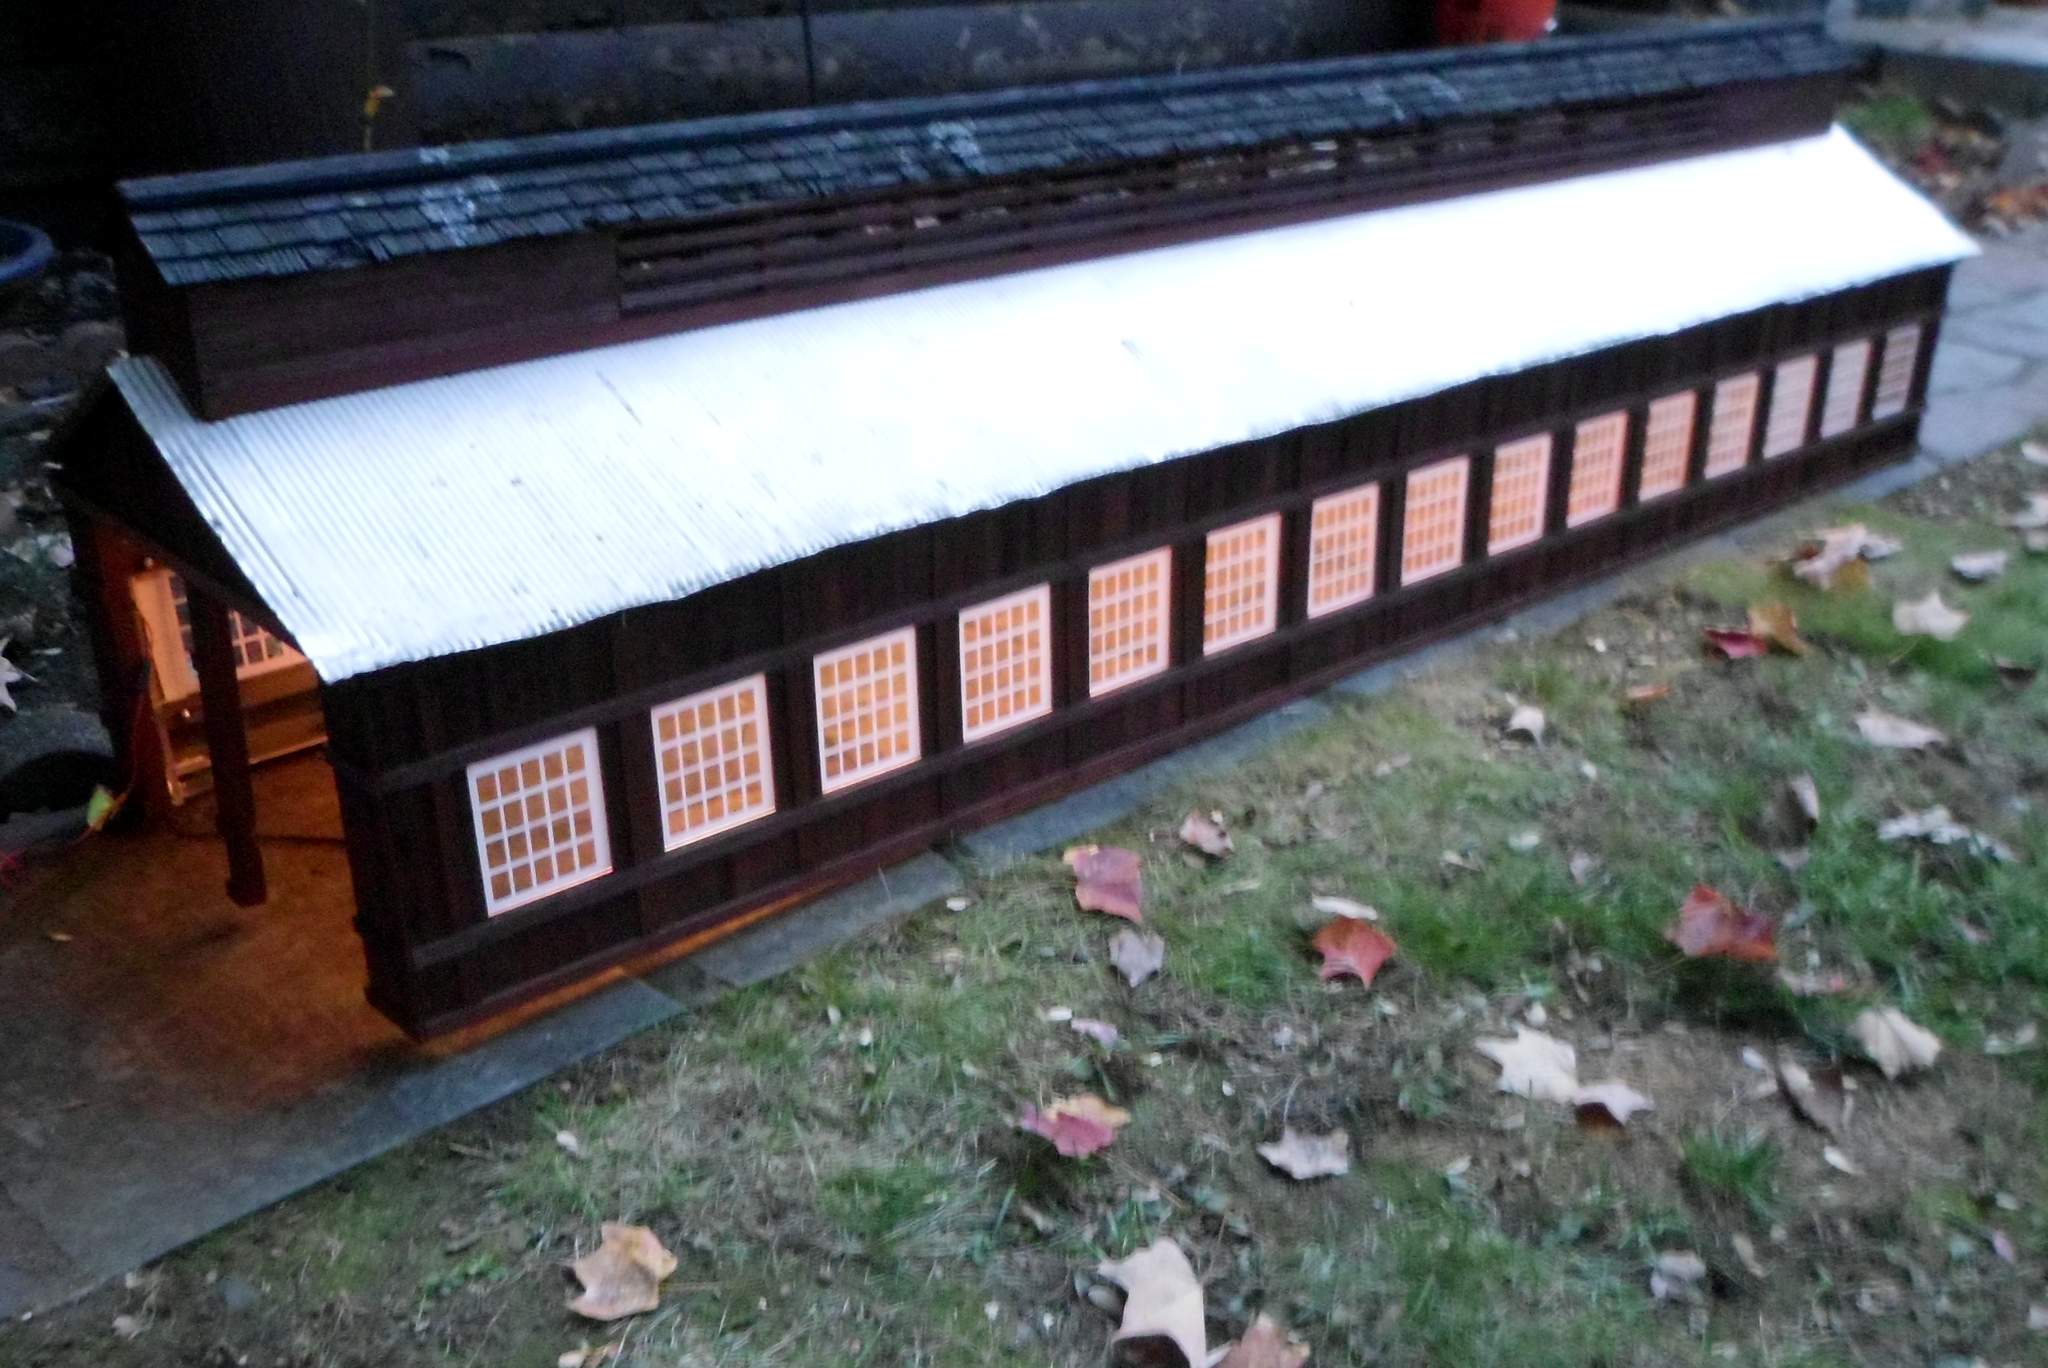
Early this spring I purchased a good supply of Fn3 scale cut cedar lumber and just last week picked up a well loved MicroMark mini table saw. Needing a project to utilize these purchases on, the first thing I thought of was this building. Rather than mill the windows and doors, I’ll build them up from wood, acrylic and and maybe a bit of styrene.

The first step was to remember exactly what I had planned, then consider some new options, like a shadow box interior similar to Cliff’s recent town fronts. So first, I went back and read every post in this thread. There were some relaly good suggestions offered that I passed on due to time constraints. Now that the deadline is gone by nearly 4 years, I no longer have that excuse! One thing I will seriously look at is operating doors in addition to the shadow box interior that will feature some vintage black and white interior photos lit by RGBW LED strips that I can control with my phone or tablet.

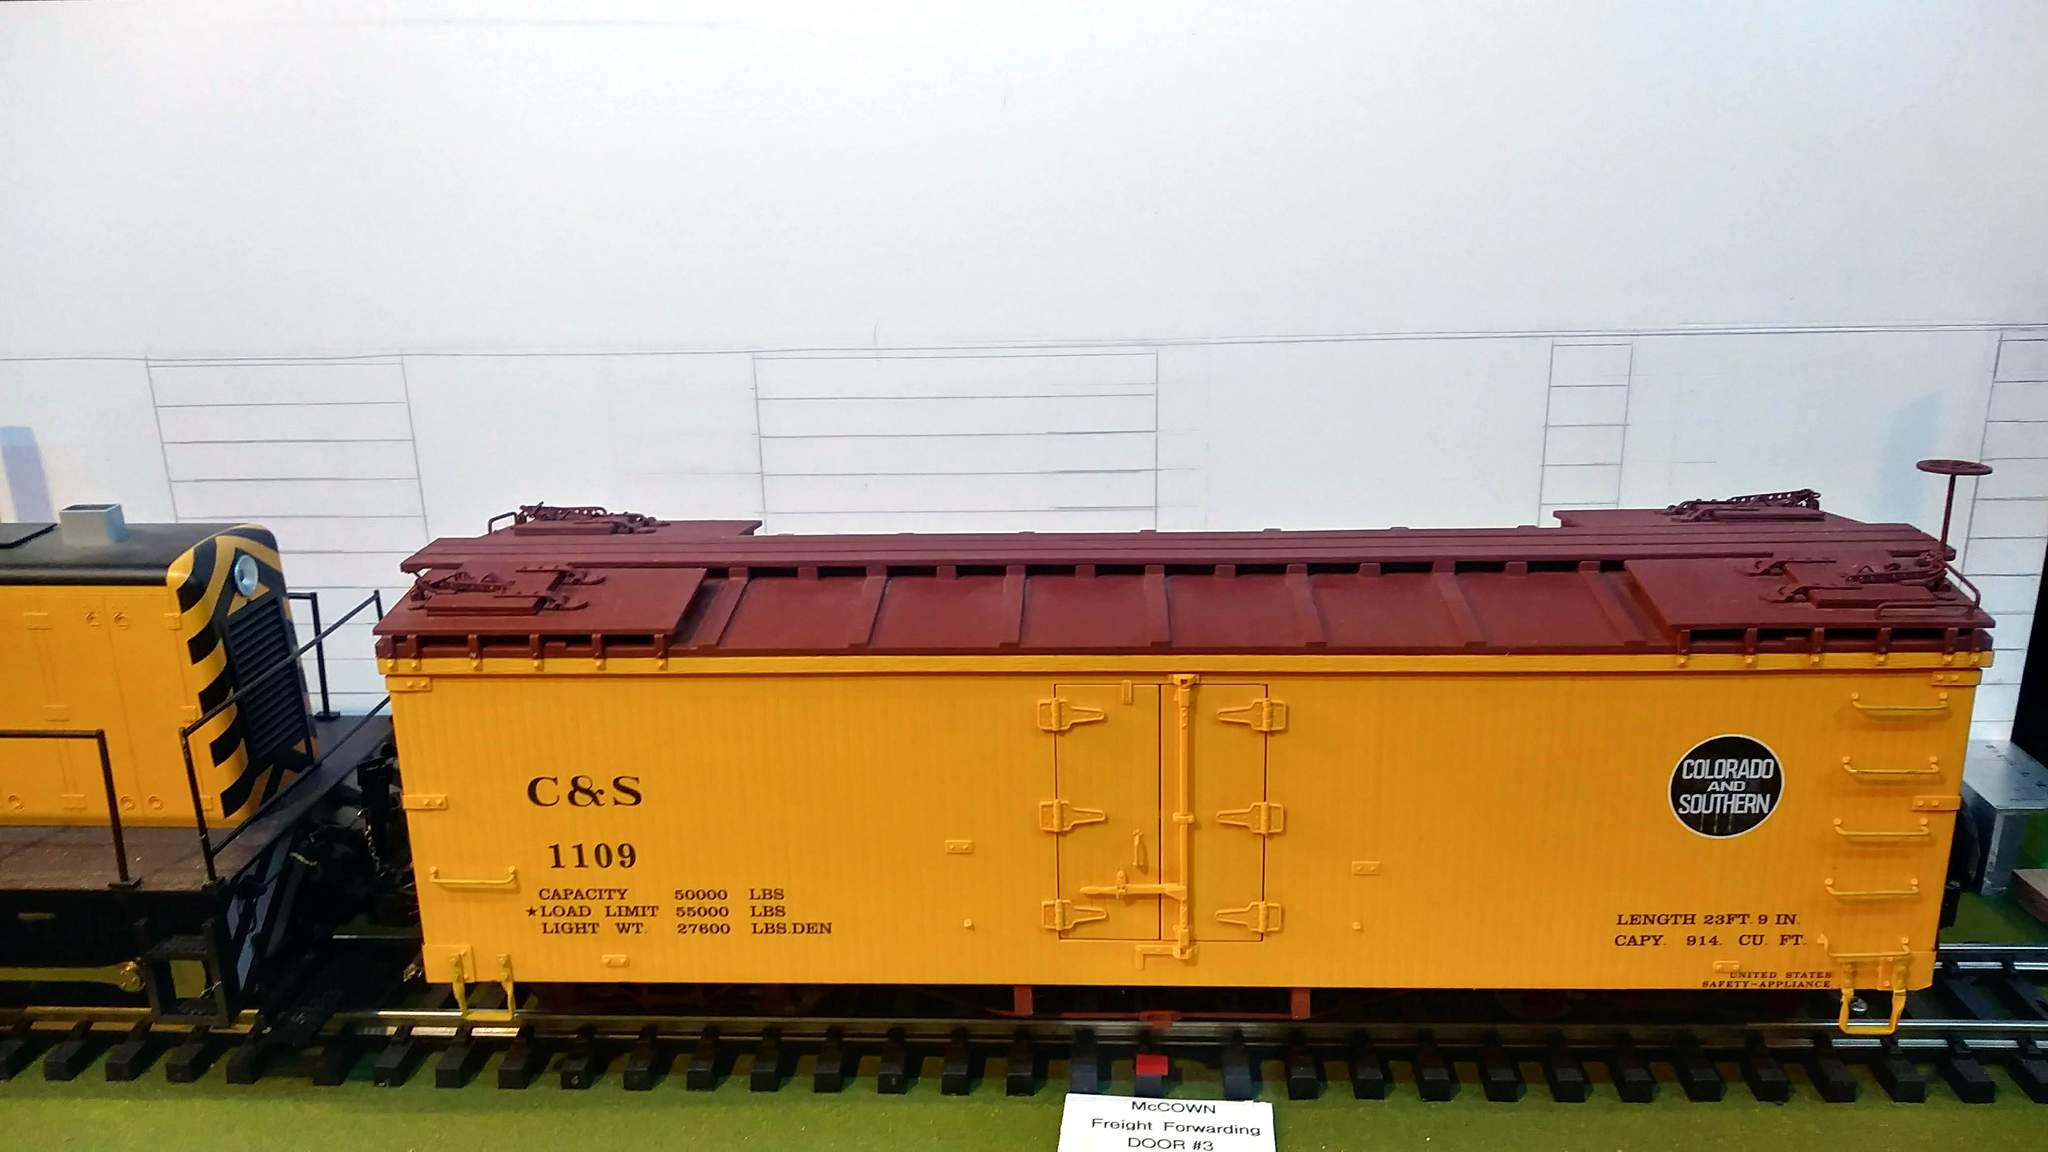
In order calculate maximum building depth, I needed to run clearance tests. That was today’s project using my 45 Ton loco and a few cars. The following photos illustrate that process and some decisions that were made based on testing. In this picture, the blue corner mark on the wall was the original planned position. I determined that by shifting the building 4 inches to the right, I could gain almost an inch of depth and not loose any of the car spots…

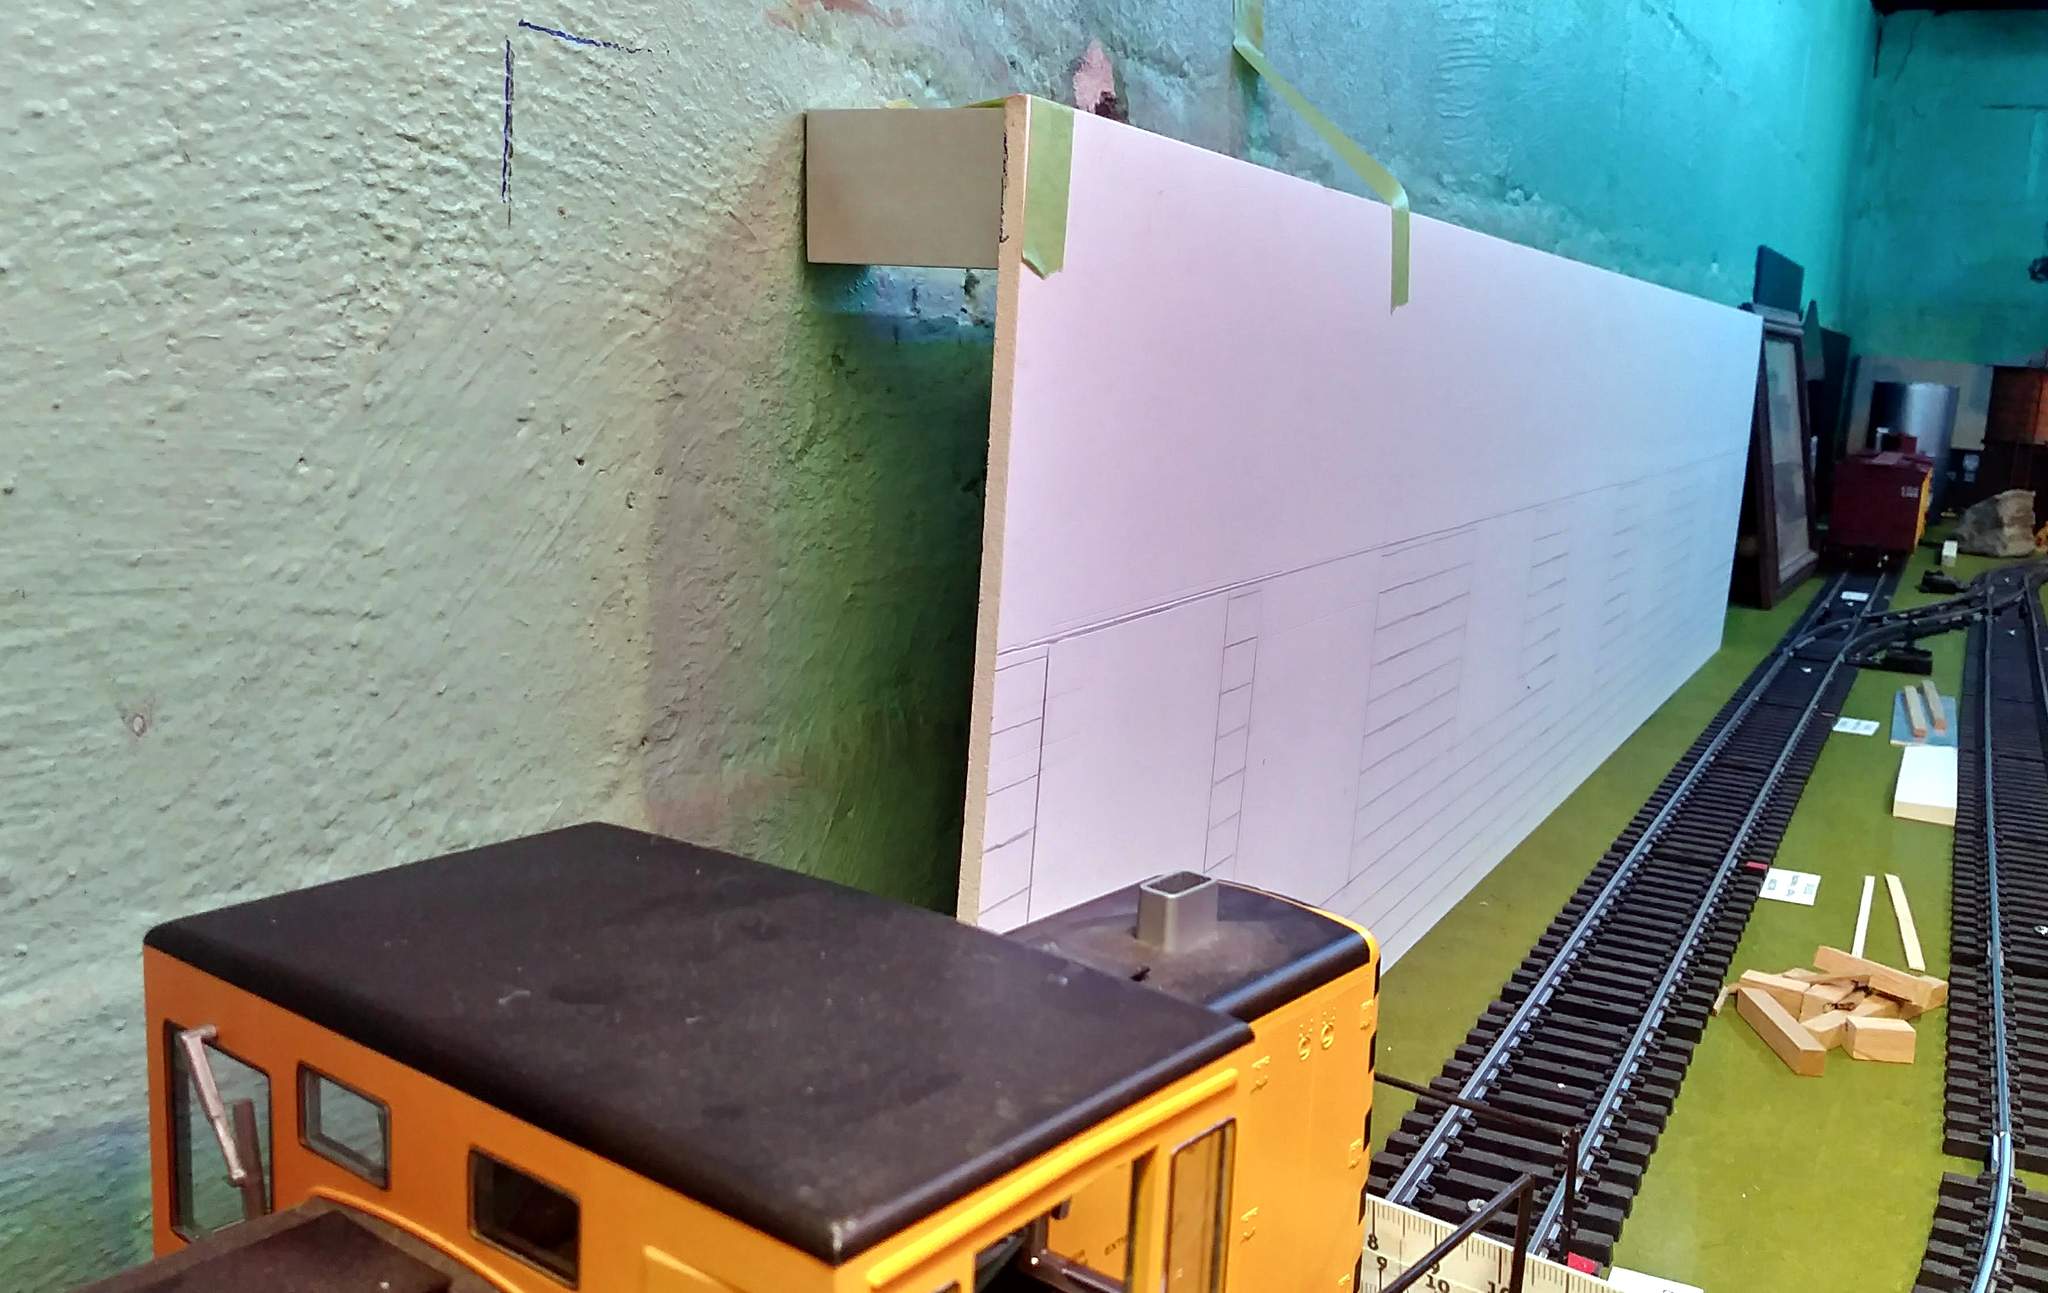
From the other side…

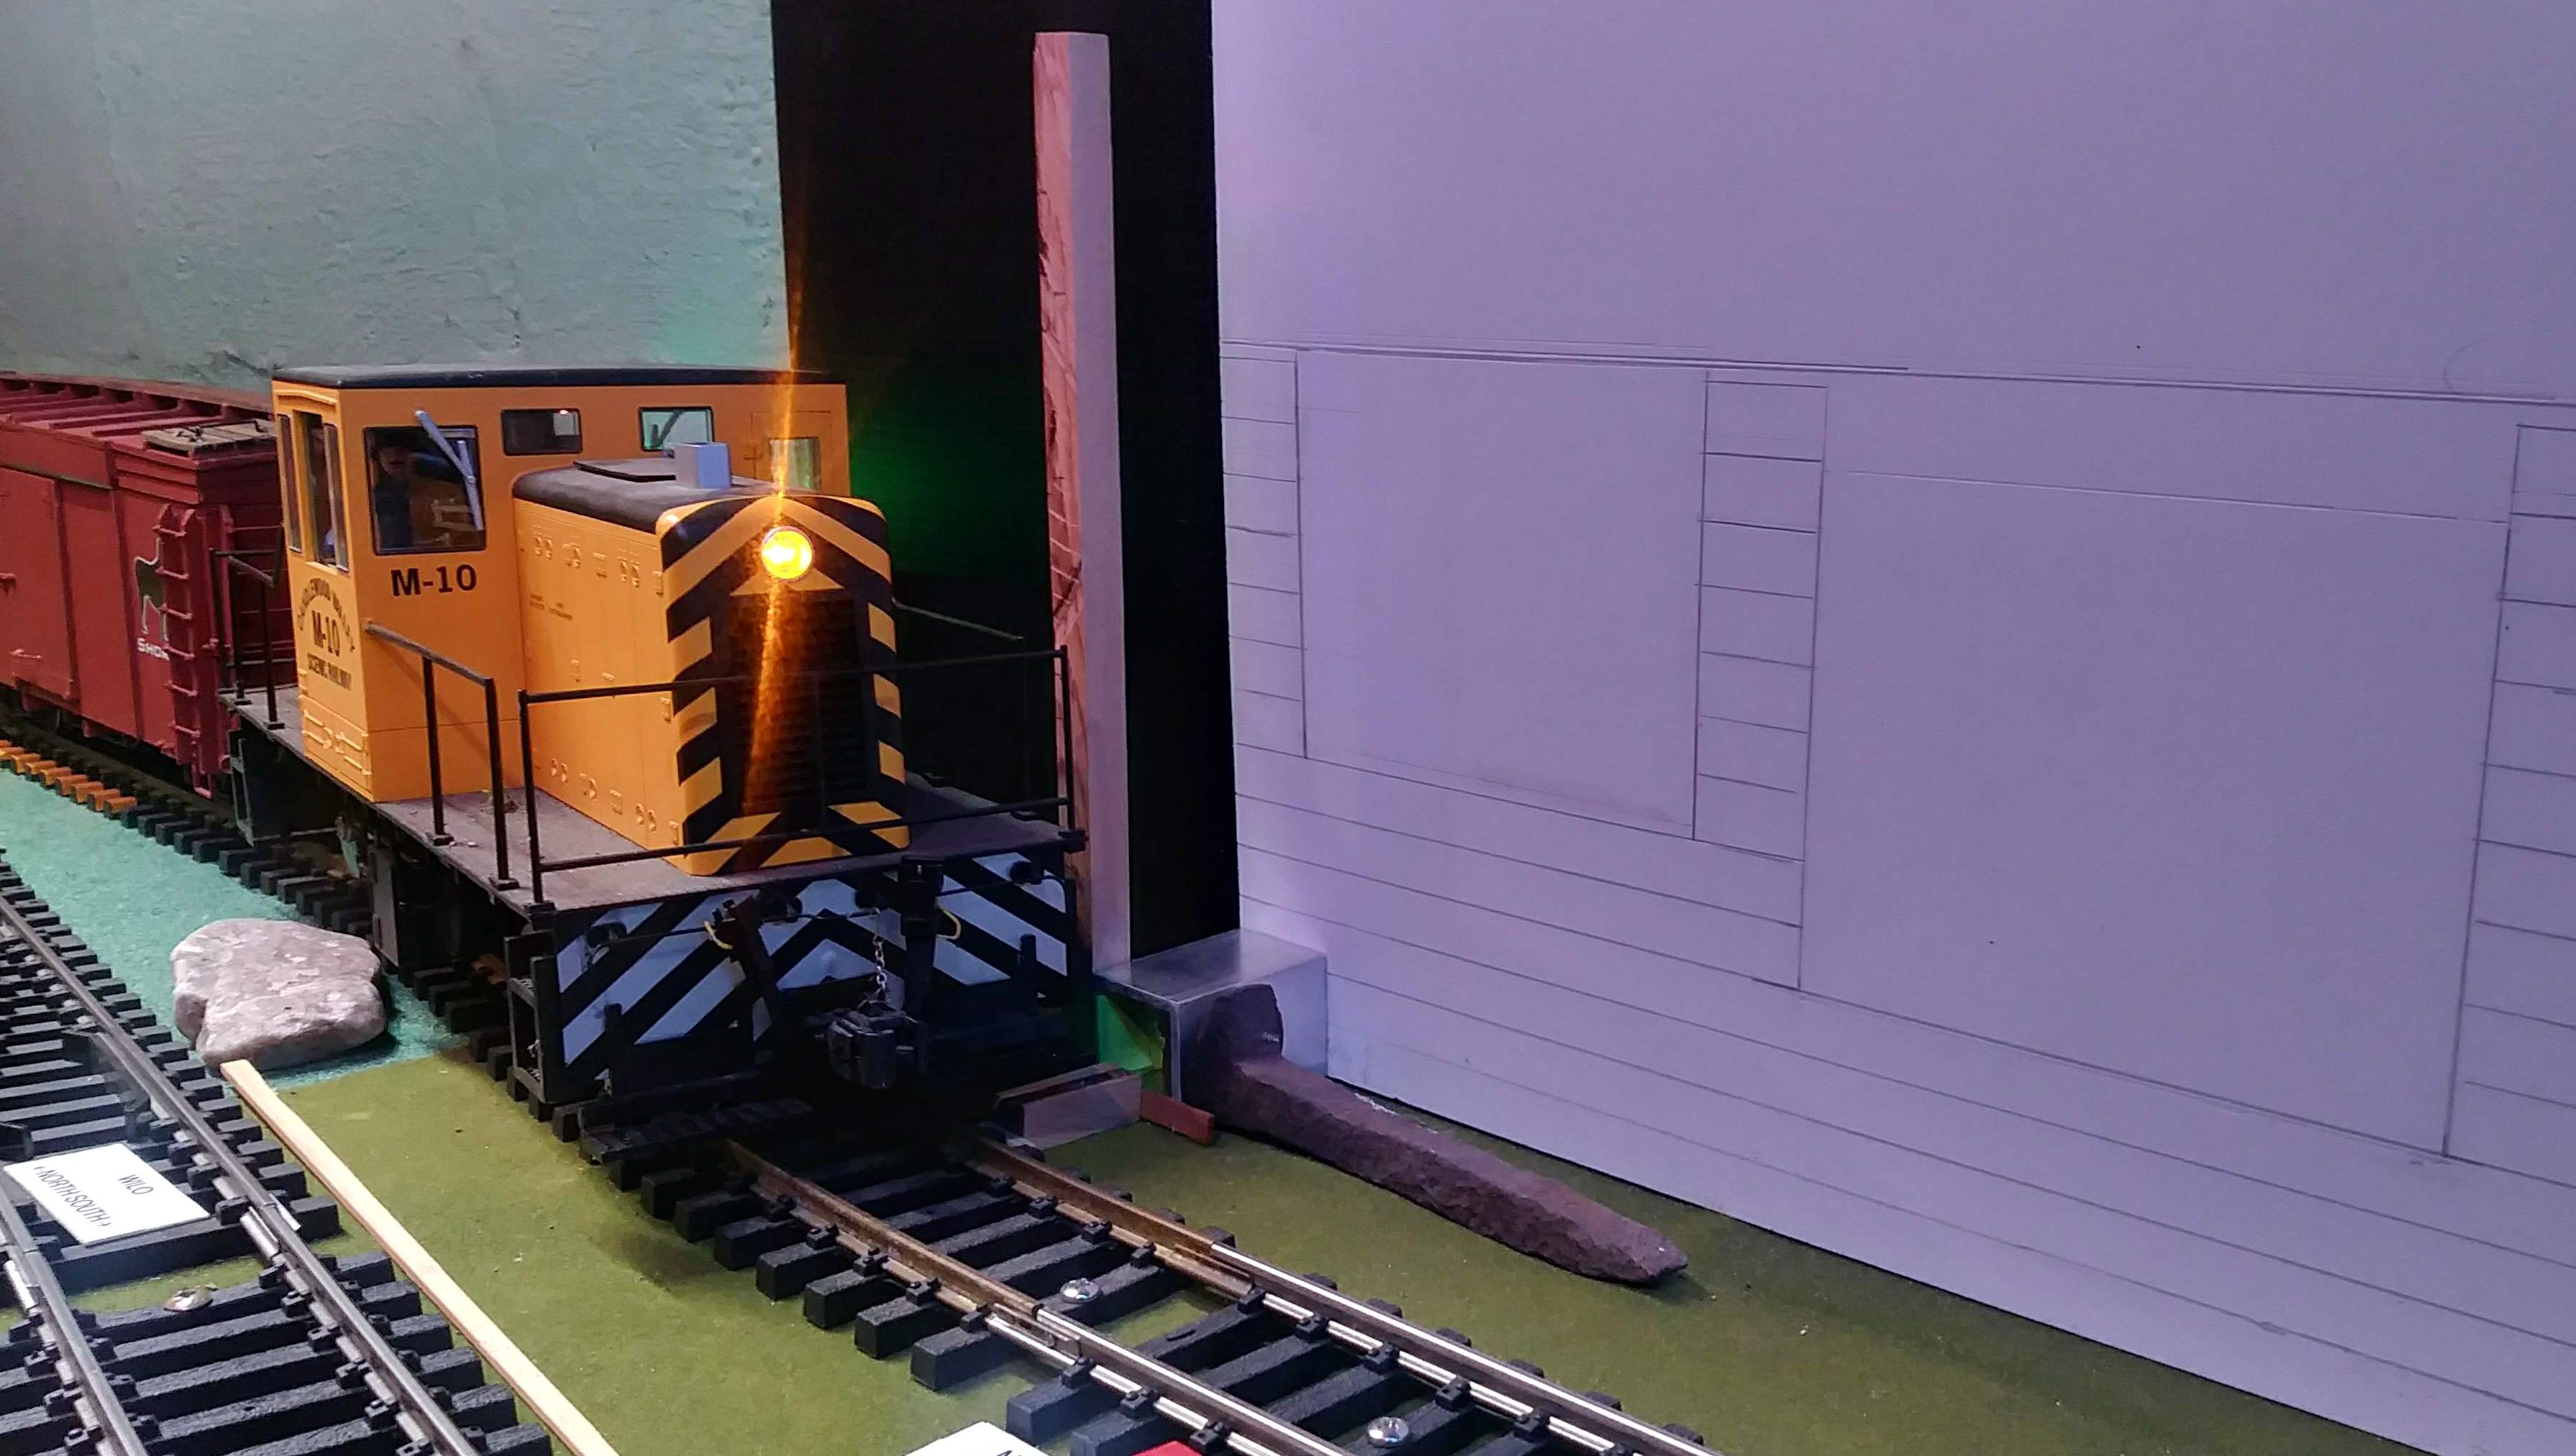
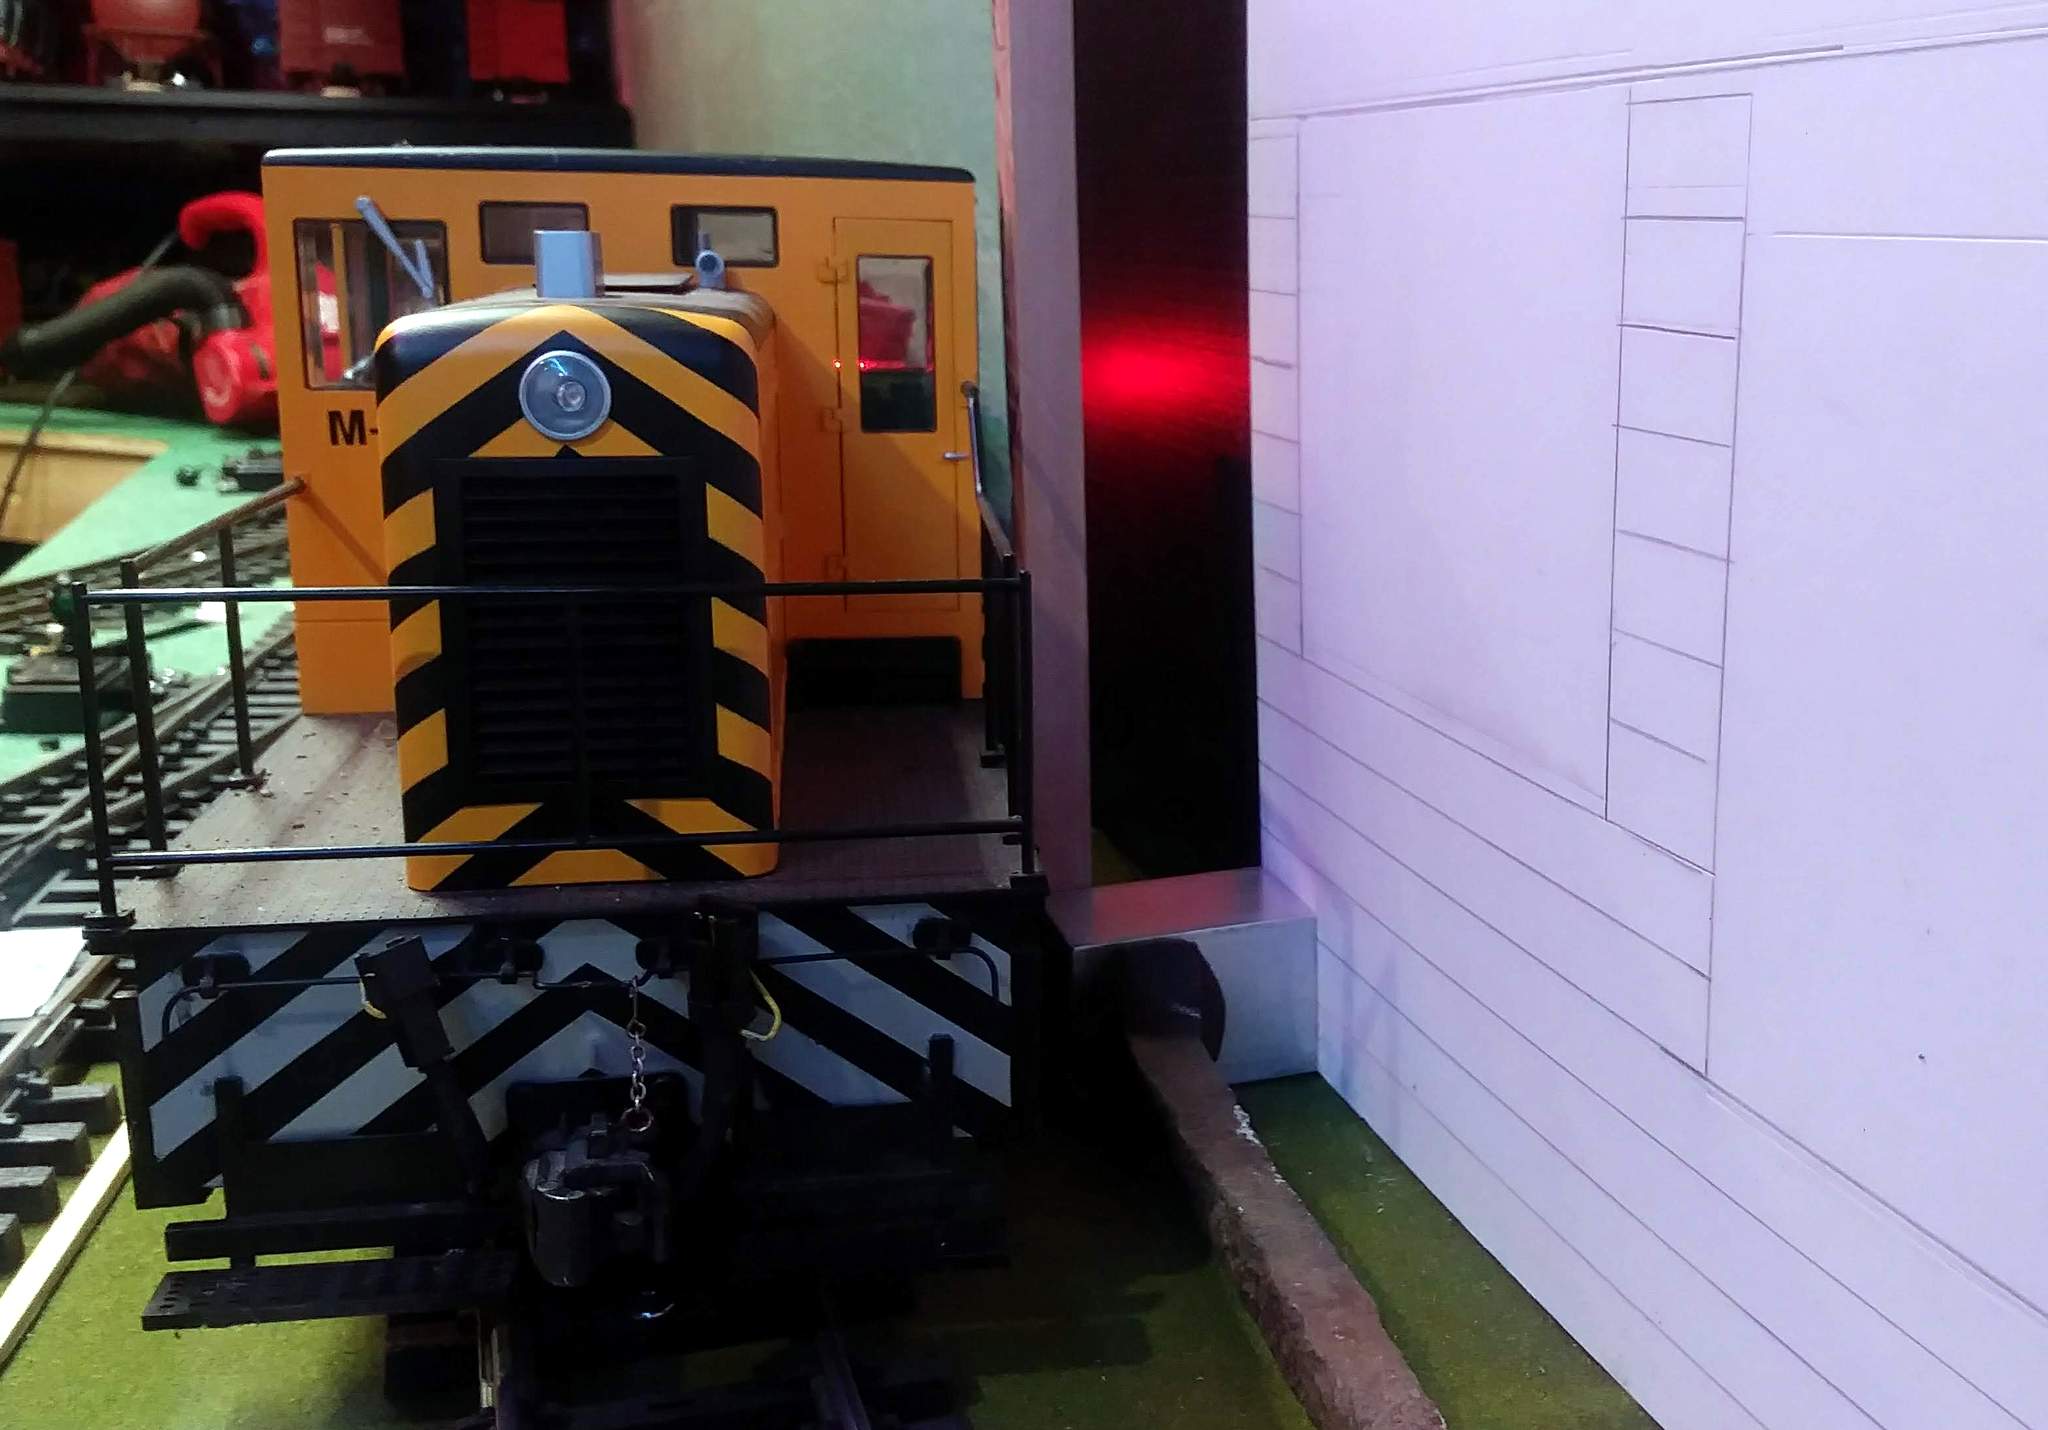
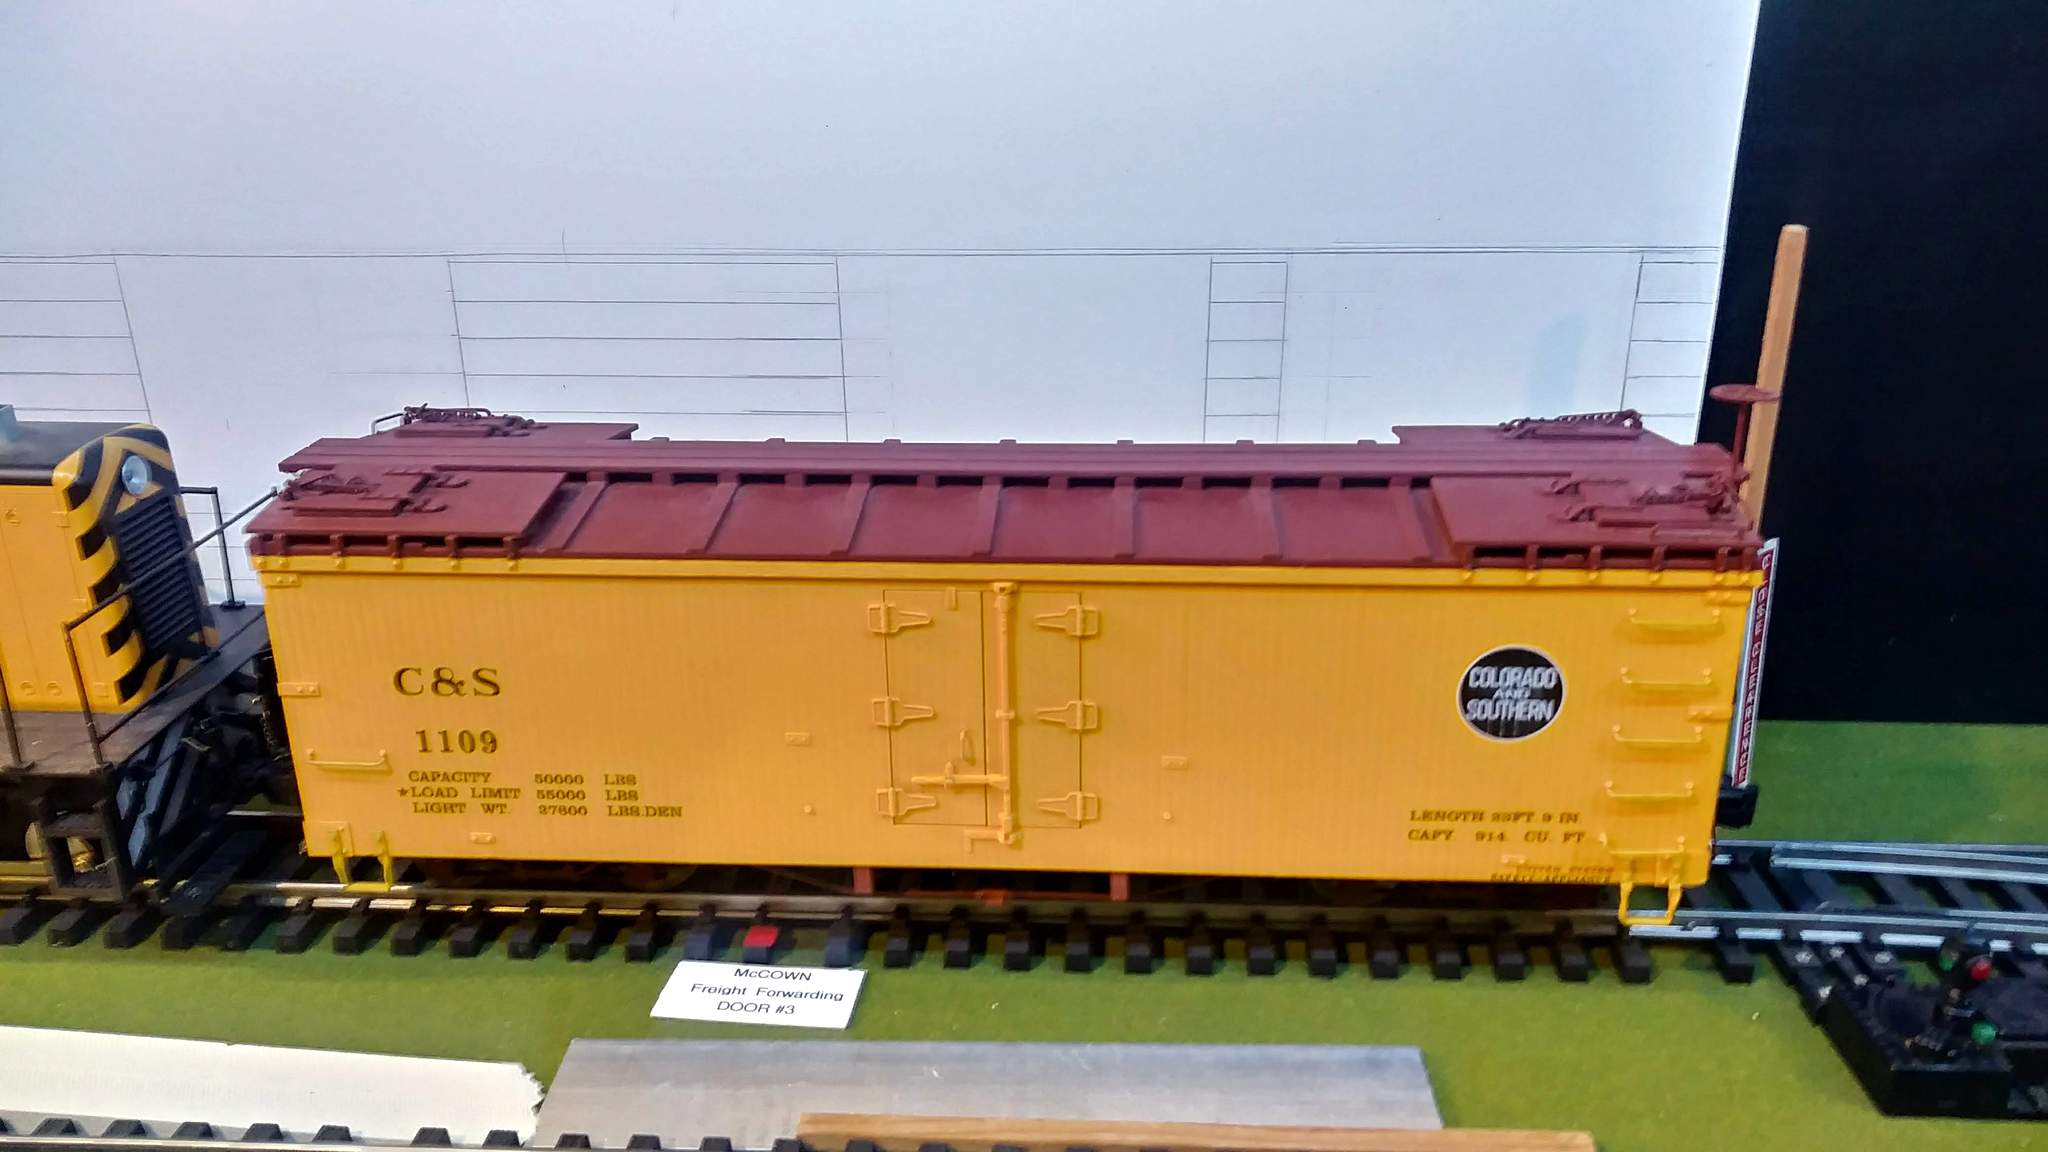
The result of this position shift and test was a gain of 7/8" more space for the interior leaving plenty of room. Next, I pushed this a bit further by adding a 3mm piece of coroplast as the back wall and positioning some verticals to mark the proposed front location. Once this was in place I ran extensive tests with the 45 ton and cars. I still need to check with my C19 to be sure the shift doesn’t cause a problem with the pilot overhang entering from the switch…

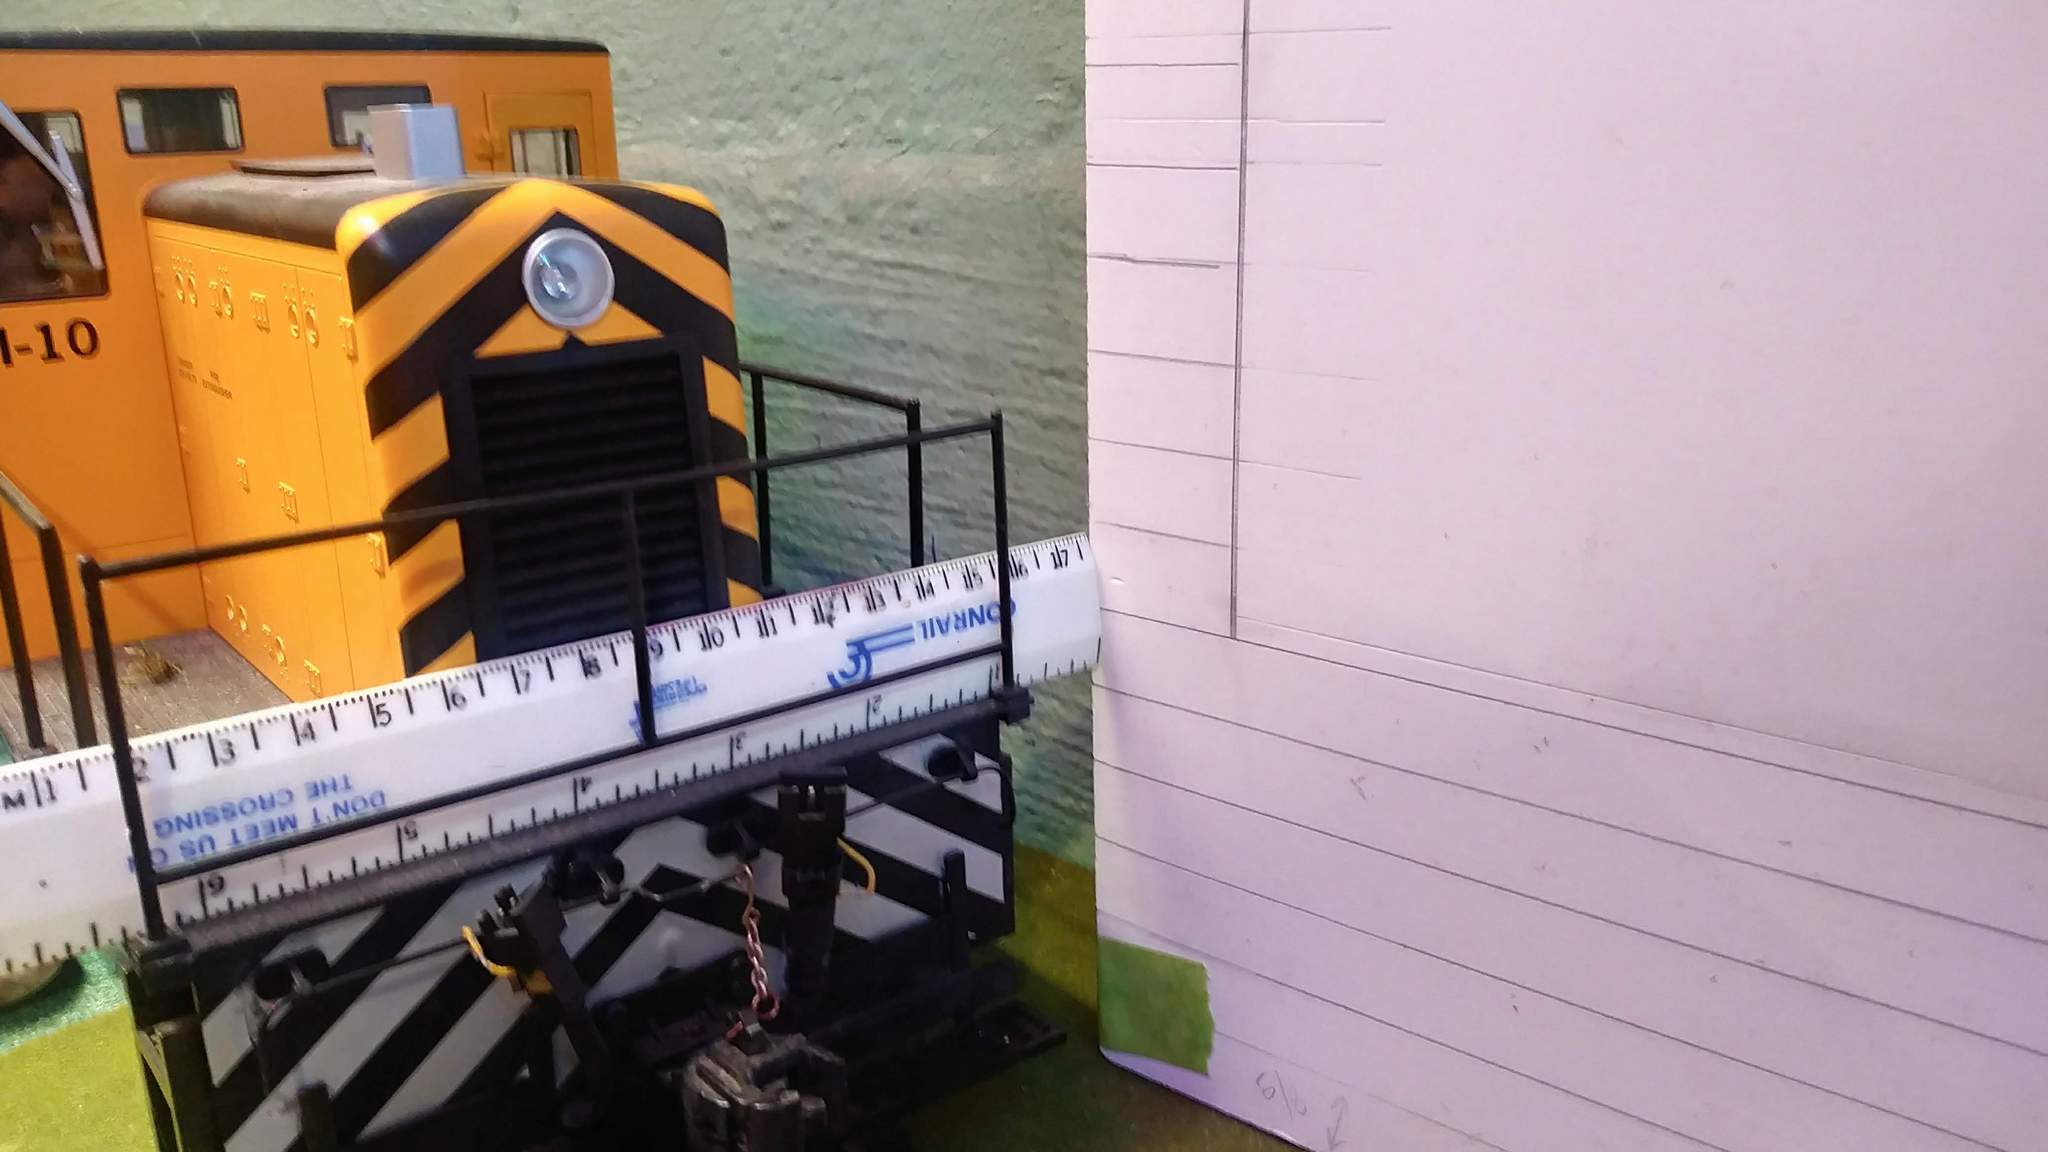
This picture illustrates how the shift to the right changes the car spots. This reefer is spotted where the old Door 3 Spot was…

And then pushed into the new spot…

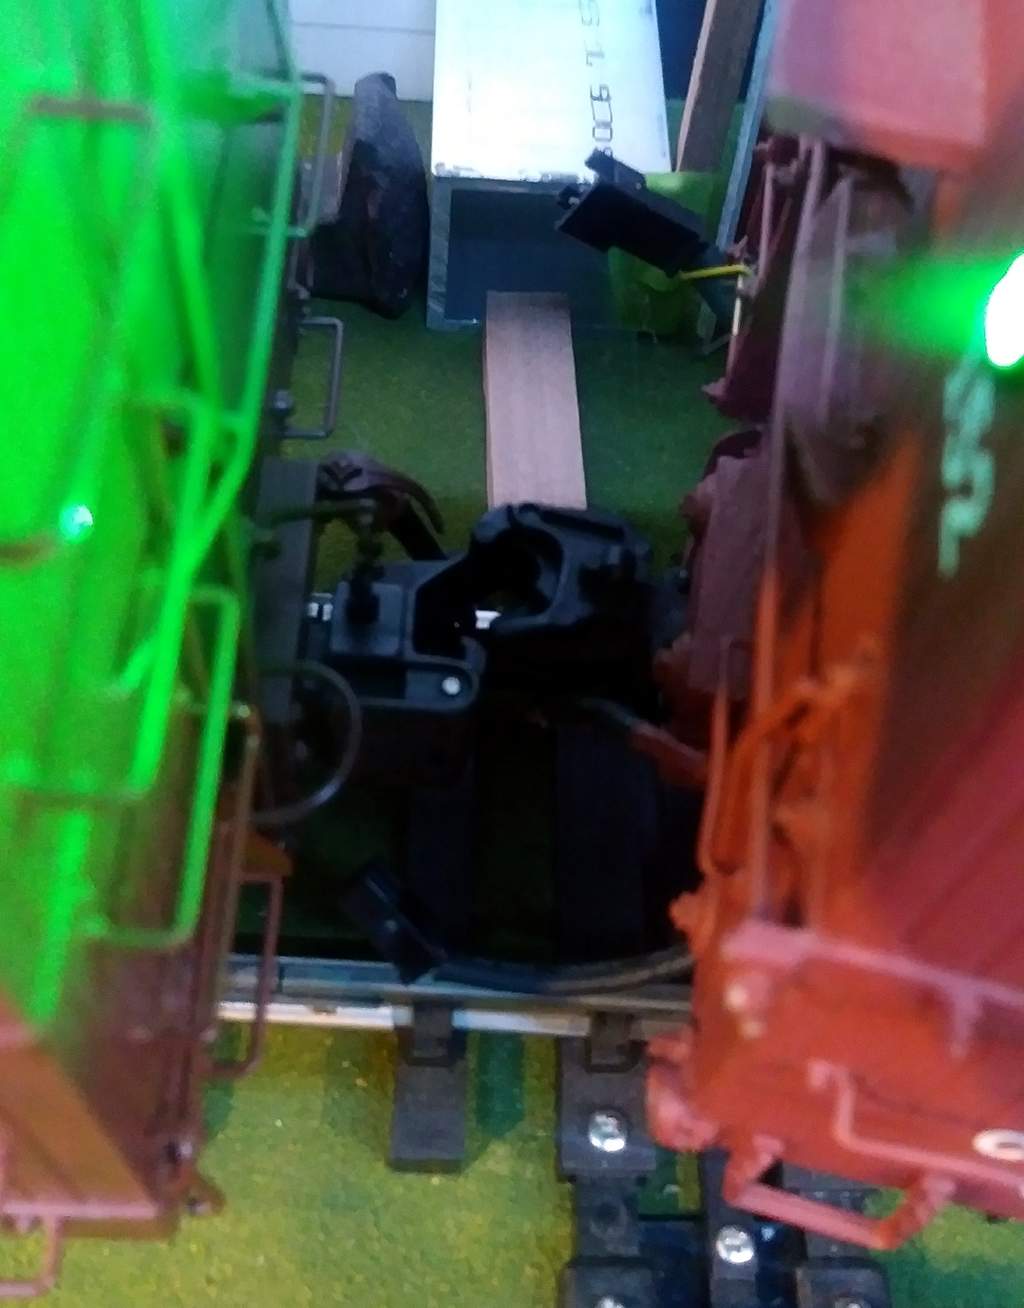
The new spot pushes the car end pretty close to the switch…

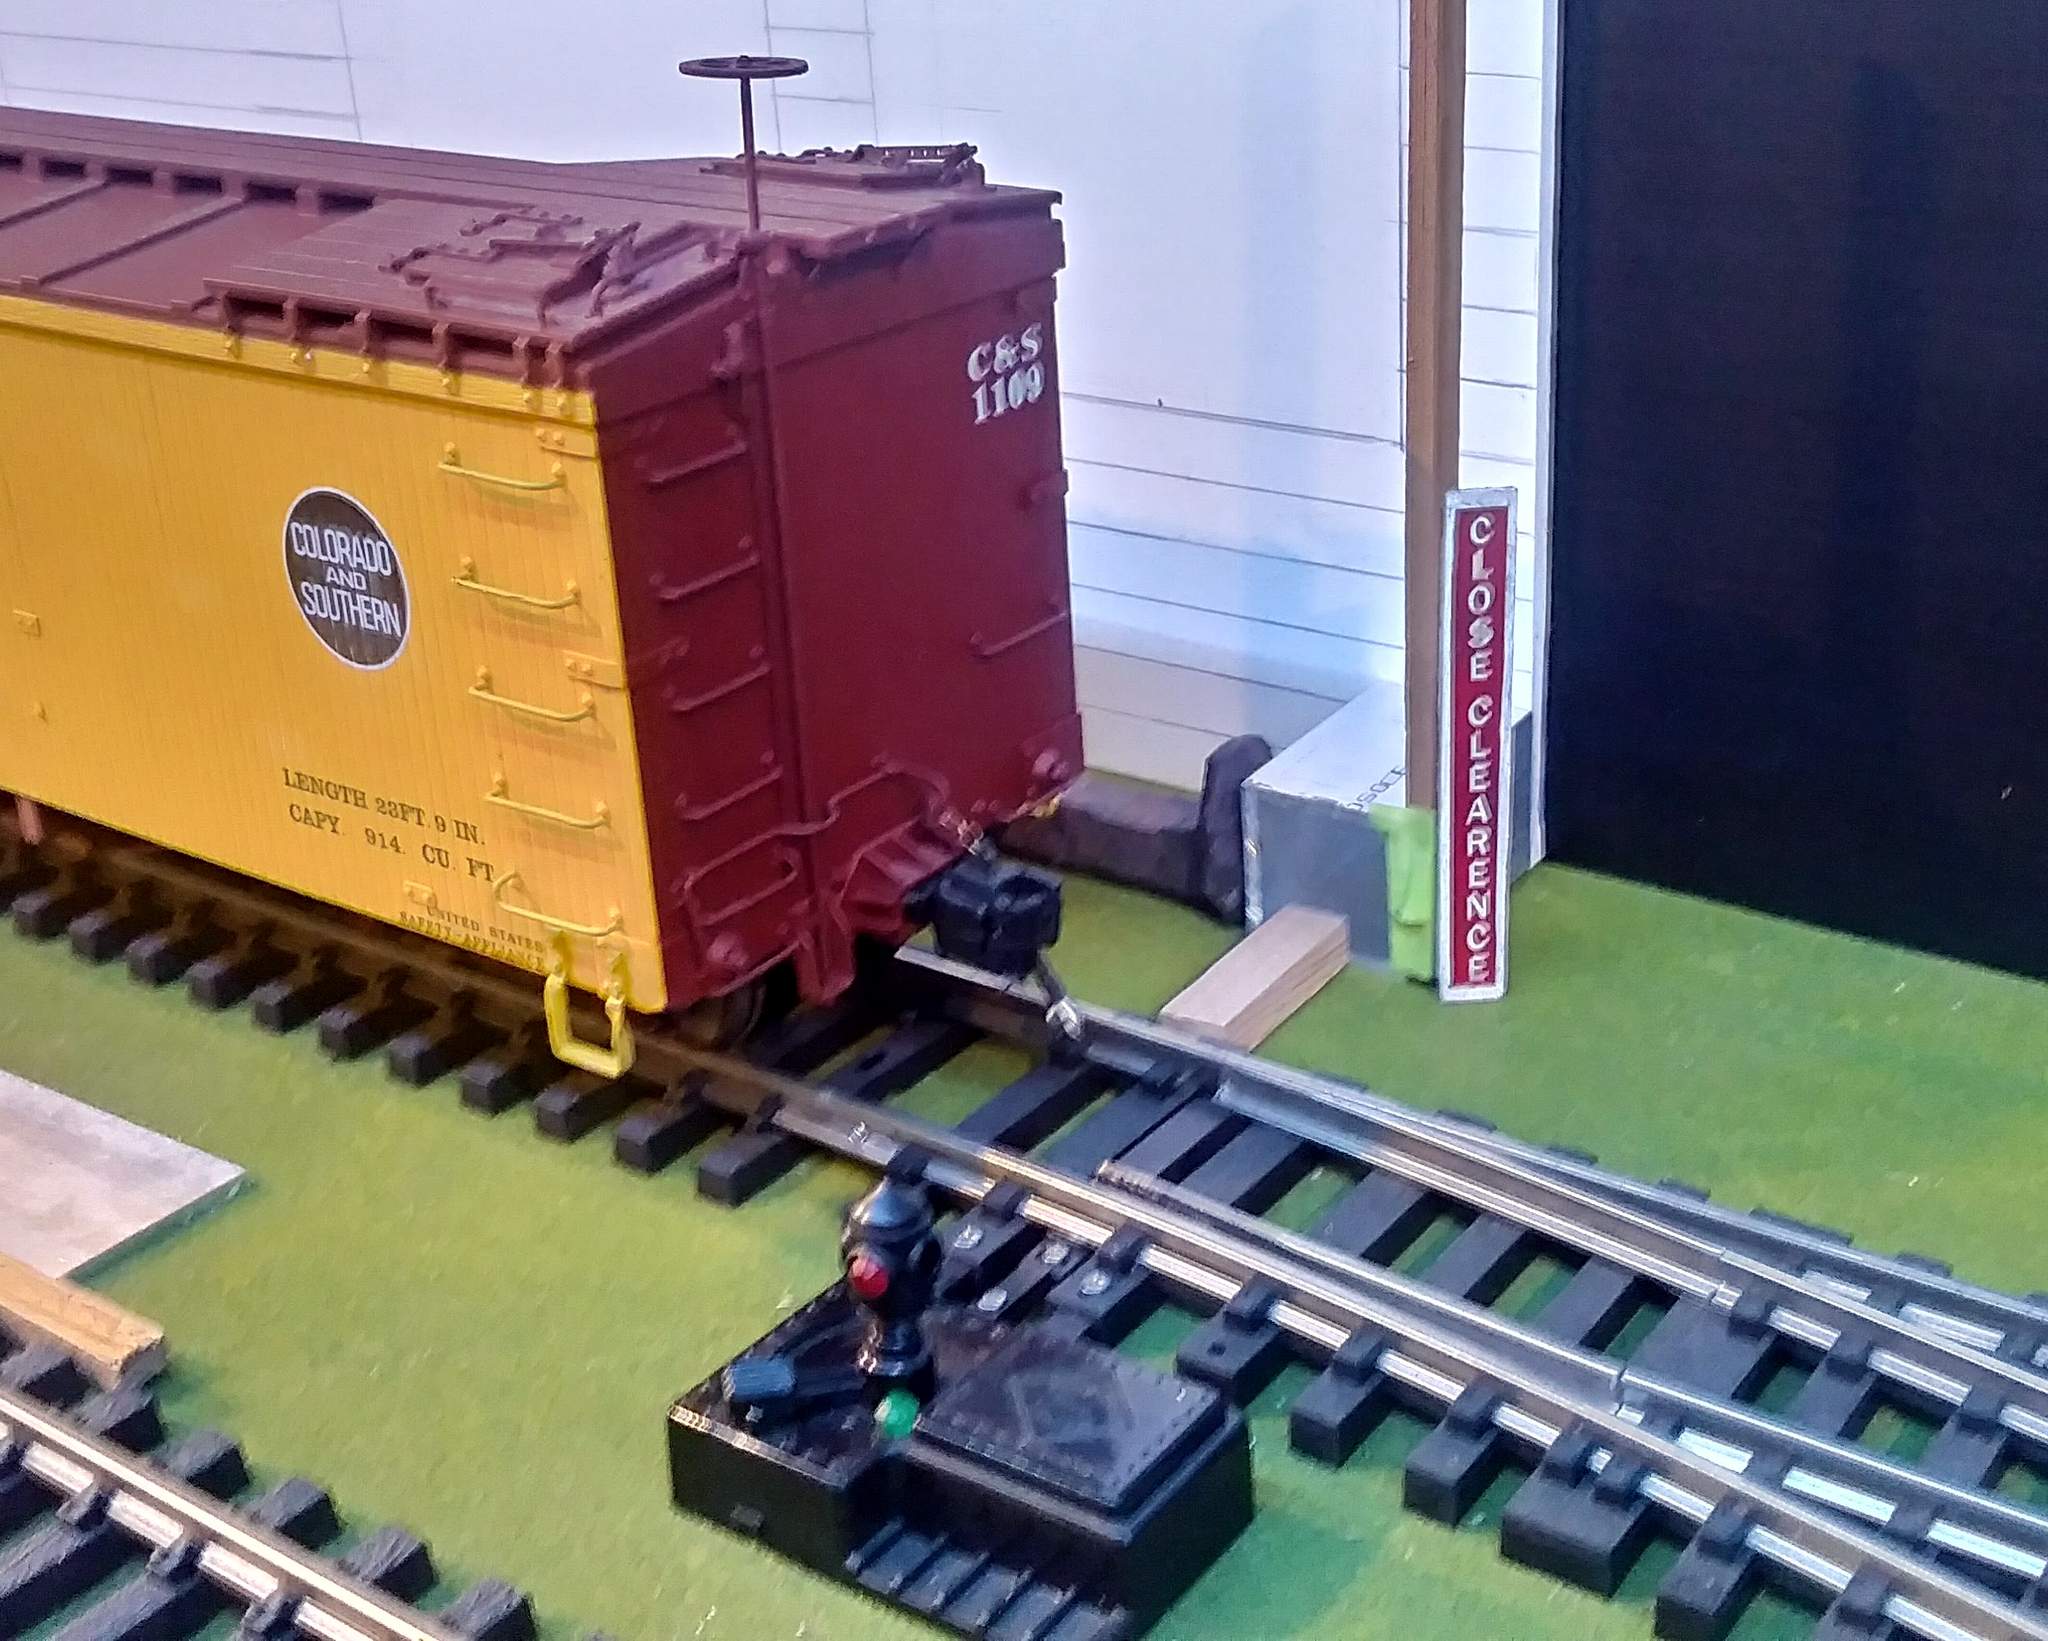
Which results in a minor coupler alignment problem when approaching from the switch…

I’m willing to deal with that small inconvenience in order to gain enough room for a reasonable shadow box depth of 2.25".

This will be an on and off project based on weather. I have lots of things on my get ready for winter to-do list, but most of them requre at least dry weather, which has been scarce of late. I’ll work on this rainy days and evenings. It may take me until spring to finish, but I’ll update this thread when there is something to report.

I have to comment on Picture #2.

Interesting Clearance Car, and it’s even marked “Conrail”.

Wow! You did bring an old project back to the front page. Like the ideas! Always enjoy your clearance car/gauge/engine. Didn’t you get a copy of my paper tracing of the "NMRA style 1:20.3 clearance gauge? I had a pile of them for passing out at York.

Ric Golding said:

Didn’t you get a copy of my paper tracing of the "NMRA style 1:20.3 clearance gauge? I had a pile of them for passing out at York.

Yes. I transferred it to 1/4" plywood and use it frequently when optimum clearance is desired. I have several situations on the indoor where I must go for minimum clearance. That’s where the 45 Ton serves well, as it is the widest and tallest engine I run. I’ll see if I can grab a shot of this same spot using the gauge to show how tight it will be.

I guess this is progress… I found my 2017 CAD files. They create more questions then they answer! For one, Version 3 and 4 look identical, and both contain an error where the left window and door are at the wrong height. I’ve also been studying various videos on scratch building widows. It’s something I’ve never attempted and I’ve picked up a few ideas. I think I’ll need to use some thin stock like popsicle sticks or stir sticks to make mullions. Ripping Cedar to 1/16" or so is not feasible. Marilyn used to have a supply of tongue depressors. I wonder if she can find them ???

While I ponder how the windows will be built up I’ll probably start with the overhang. Roofs & Rafters I know how to build (https://www.largescalecentral.com/externals/tinymce/plugins/emoticons/img/smiley-smile.gif)

EDIT to add: when I was going to CNC mill the windows, I kept the mullions at .125" since I figured that was about minimum to not break during milling. With the change of method, I’d rather be a bit more scale like. I’m also not against styrene.

AND - i just found Bruce’s Building Windows article: http://www.largescalecentral.com/articles/52

Jon,

PM sent regarding windows and doors.

Dennis

Jon Radder said:

I guess this is progress… I found my 2017 CAD files. They create more questions then they answer! For one, Version 3 and 4 look identical, and both contain an error where the left window and door are at the wrong height. I’ve also been studying various videos on scratch building widows. It’s something I’ve never attempted and I’ve picked up a few ideas. I think I’ll need to use some thin stock like popsicle sticks or stir sticks to make mullions. Ripping Cedar to 1/16" or so is not feasible. Marilyn used to have a supply of tongue depressors. I wonder if she can find them ???

While I ponder how the windows will be built up I’ll probably start with the overhang. Roofs & Rafters I know how to build (https://www.largescalecentral.com/externals/tinymce/plugins/emoticons/img/smiley-smile.gif)

EDIT to add: when I was going to CNC mill the windows, I kept the mullions at .125" since I figured that was about minimum to not break during milling. With the change of method, I’d rather be a bit more scale like. I’m also not against styrene.

AND - i just found Bruce’s Building Windows article: http://www.largescalecentral.com/articles/52

I’m not sure that will help all that much. The scratch-built windows came apart on the mill, but were fine for elsewhere - either that or they just hadn’t been out long enough to fall apart. I switched to 3D printed ones for the mill.

It could also be the glazing that I used for the mill - I think it was CD cover material - NOT acrylic. Later windows were all built with acrylic. IF you are going to use styrene, I would REALLY recommend going with the strips BOUGHT to size - yeah, you CAN save money by cutting your own, but they really have a tendency to curl.

Bruce Chandler said:

AND - i just found Bruce’s Building Windows article: http://www.largescalecentral.com/articles/52

I’m not sure that will help all that much. The scratch-built windows came apart on the mill, but were fine for elsewhere - either that or they just hadn’t been out long enough to fall apart. I switched to 3D printed ones for the mill.

It could also be the glazing that I used for the mill - I think it was CD cover material - NOT acrylic. Later windows were all built with acrylic. IF you are going to use styrene, I would REALLY recommend going with the strips BOUGHT to size - yeah, you CAN save money by cutting your own, but they really have a tendency to curl.

Thanks Bruce. This is an indoor building, so I’m sure wood will be fine., but I’m looking at milled styrene over acrylic for the mullions. outside frame may be wood, and door panels wood , except for the window in the door. Dog gone weather is so nice I’ve had no indoor time to work on updating the drawings.

Possible vinyl overlays (considering your experience) for grids/mullions …

This post has been edited by:Rooster …Lemo or J Tower (only a thought)

Ya do a wrap of the whole building front …

Rooster said:

Possible vinyl overlays (considering your experience) for grids/mullions …

This post has been edited by:Rooster …Lemo or J Tower (only a thought)

Been there, done that…

And it looks fine from 10 or 15 feet away in the garden. This will be an indoor structure only 30" away from the observer at just below eye level, so I’m trying to get a little bit more scale fidelity. I think there is a path to victory. I just need to get off my butt and get some new drawings created to have something like this made…

2021 New Site Note: I believe this may have been a pic from someone else’s album. I don’t recall what it was. Broken link as text below.

![|375x281](https://www.largescalecentral.com/public/album_photo/34/7b/02/276bb_ecaf.jpg?c=ad62)

As Sean says - “There is light at the end of the tunnel”