Another beautiful and functional piece, Al.
This looks incredible. So simple, but it works too?!
Wow John, you’re up late. Or early.

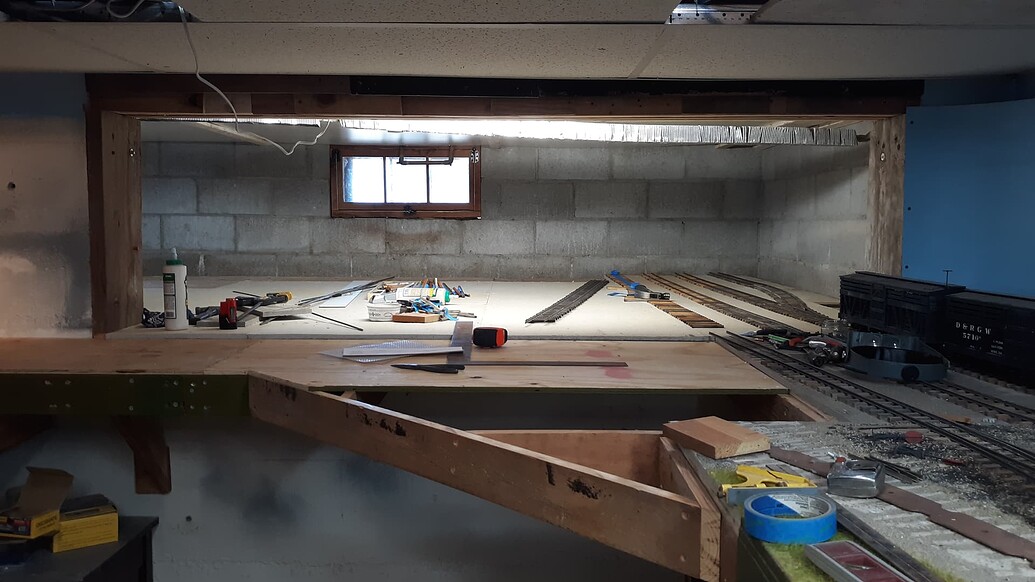
Today i finished up the outer wall sections. the east wall is full length, while the west wall is only half length to support the roof sections which i need to template and assemble next.
East wall doesn’t get much light:

And the west wall seen in this overall view, is not very visible at all. in fact i have left out the window on that side as it is not seen.

Al P.
3 Likes
Following with great interest Al. It all looks fantastic.
One q - what’s the plan for operating the turnout on the right beside the shed? Long arms, or ??
Cheers
N
More beautiful work, Al! I had the same question as Neil; and extending it to the doors?
Al this is really coming along and work as always is fantastic. These last couple of pics have raised a concern though.
Latest pic
Two older pics from during progress.
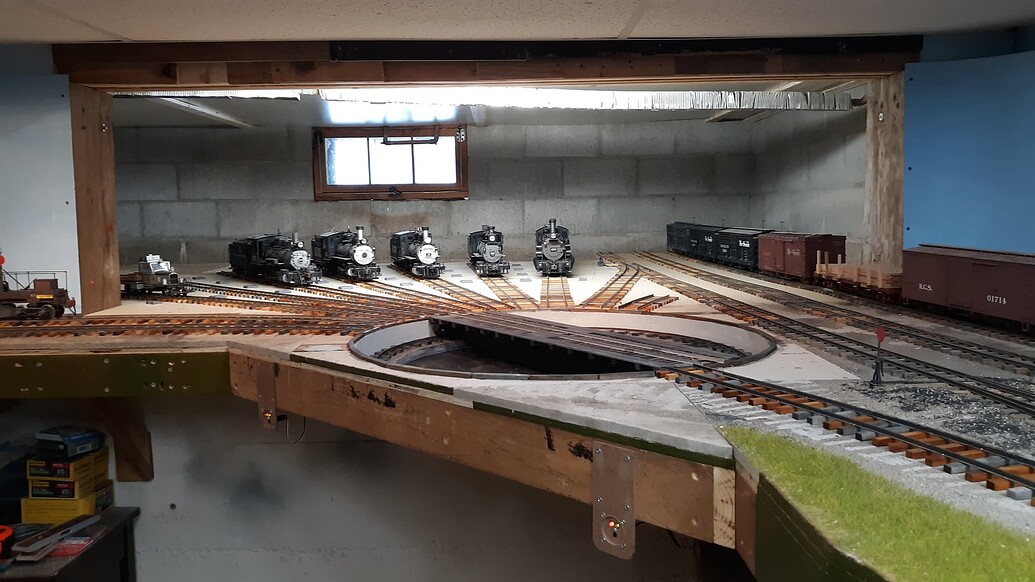
In these views I noticed the sag that has started already in your 2 masonite panels at the right rear wall. from the corner behind your two tracks to above the window. I may be overly concerned from your better on site perspective, but would now be a good time to add a ledge or support brace at least along the back wall to keep those panels from falling in the future?
It is plain you are thinking of a clean surface so as not to ruin the flat expanse of an imagined sky over the roundhouse but I’d hate to see the panels drop in the future.
2 Likes
Neil,
the turnouts in the new space are operated with servos, Tam Valley servo controls are used and mounted to the front of the bench work.
AL P.
I am not worried about the Masonite panels with a slight sag, as they are otherwise secured, and there was nothing to attach to at the outer edges.of the foundation.
AL P.
Today I cut and fitted the removable roof sections. they will get spray painted flat black tomorrow. they were cut from the remnants of the Ceiling Masonite.

Al P.
2 Likes
Today’s adventure resulted in me Remembering that i wanted to install smoke jacks on the roof, over the five steam stalls. RGS practice had these all over the map as far as location goes, but all of mine will be with the locos backed in to the stalls, as the access to the power switches are in the water hatch of my locos. so time to draw up the smoke jacks. using solid works i modeled what i wanted, then projected each face of the jack into a drawing. the end result is here:

i edge glued the boards to each other over the template, thn using my witness marks drew pencil lines on the wood:

then it was off to the disk sander to sand up to the lines:

Here are the five assembled. because the mating joints are not perpendicular, a heavy layer of glue was applied and will be cleaned up in the morning when the glue has dried.

And i did paint the two roof sections over the goose section, as they do not need these type of vents.

Al P.
4 Likes
Today i was able to finish up the smoke jacks, cut the holes in the roof for them, and finished painting the roof sections. all that is left is to install the remaining batten strips, and install the open door stops, which will be a large nail, and small strips of magnetic material will be glued to the out side of the doors.
I then need to go back and finish the turntable railings and push poles.

Al P.
4 Likes
The TV Singlet II’s are excellent, but no longer in production I think… Are you using those, or the Singlet Micro?
Cliff, this is what i use.
https://www.tamvalleydepot.com/products/microsingletservodecoder.html
AL P.
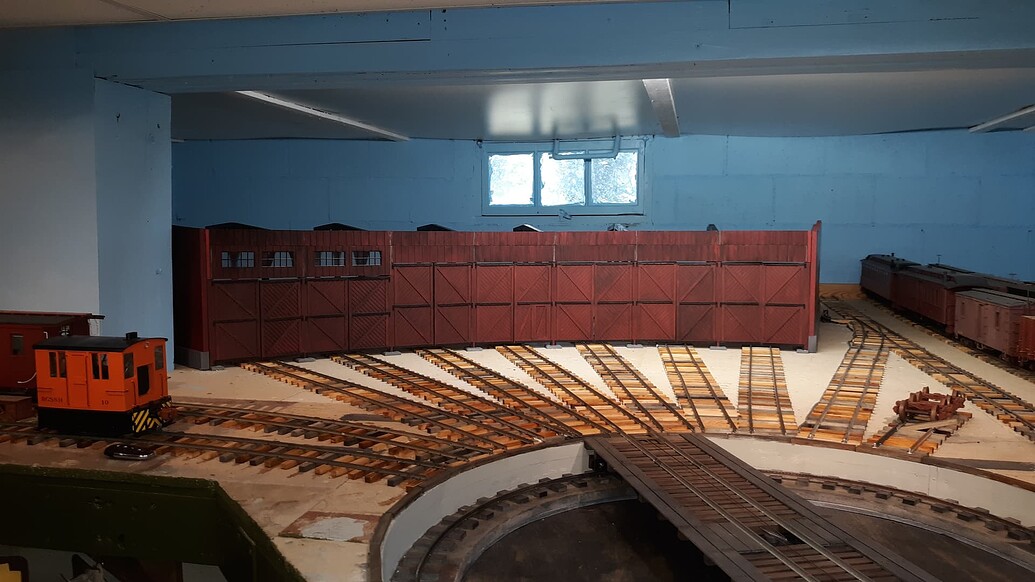
Open for Business!!
today I finally installed the missing battens, and installed steel pins for the door stops, and touched up paint and weathering.

A view from behind the scenes:


I can add a back wall at some point and complete the roof trusses but is way down there on the priority list. the front view is the key.
Al P.
8 Likes
All you are missing are workers
Another masterpiece, Al. I love how you’ve focused on the front view, and are leaving the left view exposed. Much more entertaining for the guest to see the locos moving in and out, than the walls which would otherwise hide them.
It’s almost as if you’re making the roundhouse in a cutaway version. Whether that’s deliberate or not, I’d suggest you keep it that way. Or, if you feel the urge, complete the far roof and walls (ref the last pic), and leave the near ones incomplete / partial. Just a thought.
1 Like
The open pits set it off
The open pits, all the inside details, the quality of the build itself, not to mention the time to prep the space. Wonderful work, Al. You’ve given me inspiration time and time again, this is no exception.
Over the last couple of days i have been building out a turntable for the Rico end of the line. this will eliminate having to go over to lizard head and use the Wye. I had considered making this work off the current three way selector, but as that only fits one locomotive would be impossible to turn cabooses and some other MOW equipment from that side. as Rico had a Wye i used one of my LH Wye switch templates, which put the whole curve on 5’ radius.

The first thing turned was a caboose from the last session that didn’t get turned:

the legs are bolted on with carriage bolts and a piano hinge will allow the section to swing down out of the way when my car is in for the winter. i need to make removable hard stops for each end of the table as well as the tail of the turnout when the turntable is down.
Al P.
2 Likes