Those look great! (For some reason [perhaps because I did it that way] I thought these would be brass!  )
)
Your way seems a lot easier and looks better!
Those look great! (For some reason [perhaps because I did it that way] I thought these would be brass! )
Your way seems a lot easier and looks better!
Making window and door frames. Making 2 of each so I can be sure I have enough room to fit the frames in the rock walls. @Rick_Marty : the hot water did a better job. Excellent suggestion, thanks.
If you look at my first post, the inspiration bank has some cool rounded stone mini towers on each side of the bank.
I thought: cool! I should be able to grind a couple of my rocks into something similar. How hard can it be?
Turns out the granite rocks I am using are REALLY HARD! I am slowly beating them into shape. Ear and eye protection are a must.
This may take all 30 days. How did Michaelangelo do it?
With a hammer and chisel 
I am following closely to see how your windows come out. You have set the bar pretty high on your previous builds so we have high expectations 
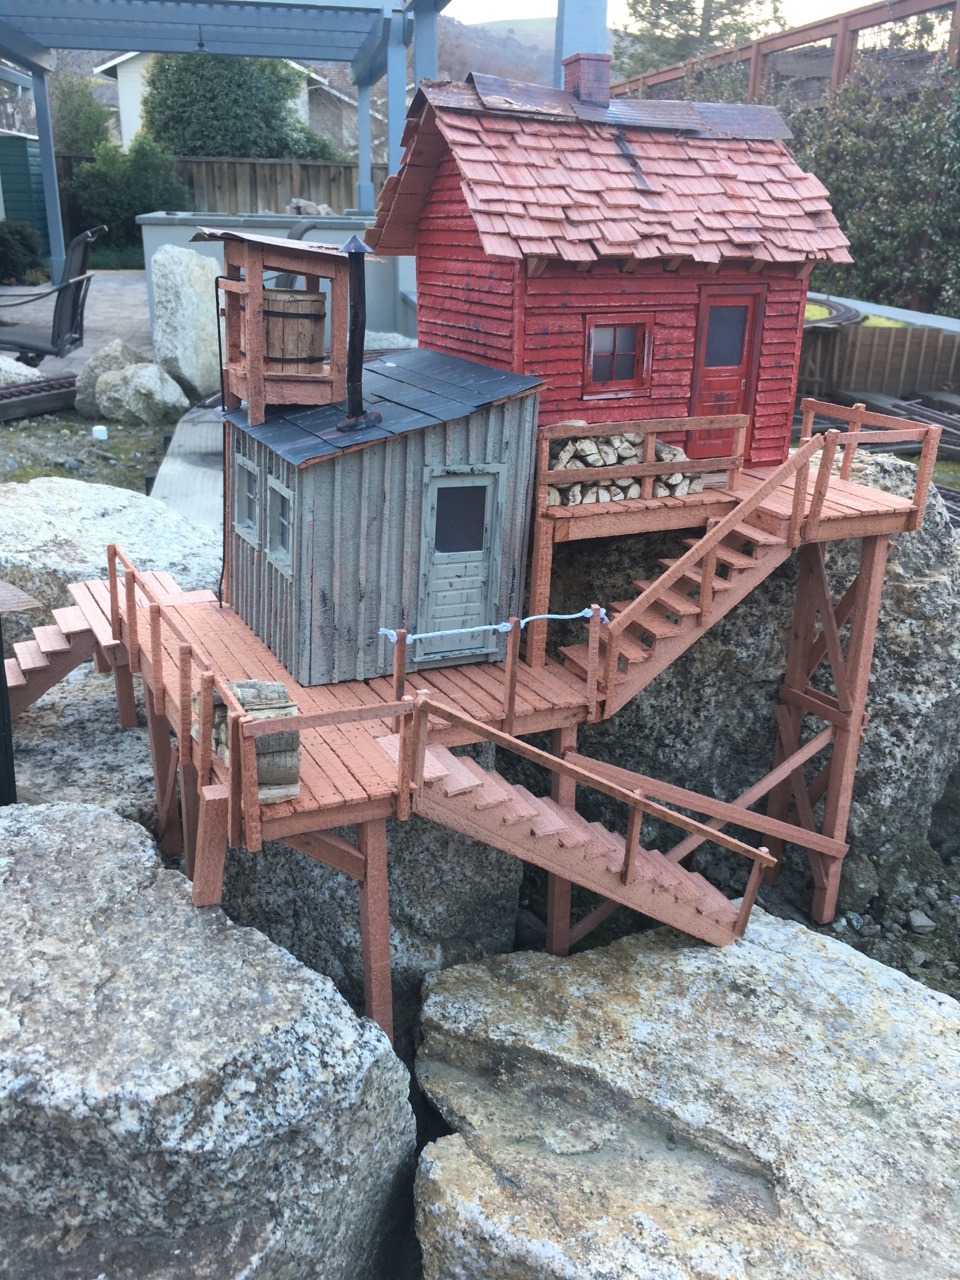
What is the strucutre in the top right of the last photo (stones)? I like that paint job and wondering how you accomplished it. I am sure you have detailed it in one of your builds. If so just point me in that direction and I’ll go refresh my memory.
Top right? That is a grinder.
Now, top left! That is Mackenzie’s Mercantile from a few Mik’s ago.
https://largescalecentral.com/t/jim-rowsons-2019-mik-challenge-build-log
From the topic:
The color is Sherman-Williams exterior Downing Stone from their vintage collection
My bad, Jim. Its been a long day. It is actually the photo above the one with the stones. Red structure with lap siding.
Ah! That’s from my first ever Mik build, cliffhangers.
That color red is actually a Tru-Color, Caboose Red I think.
Thanks, Jim. I remember the build well, now. I’ll re-read your build log.
I don’t want to hijack this thread, and I am not sure how Jim did it, but there are two tried and true techniques for chipped or peeling paint. If the weathering is what you are referring to as much as the color. For peeling paint more like you might find on a painted metal surface where you might say you want rusted bare metal underneath you paint the substrate with red oxide primer (if you want rust color) and let it dry thoroughly. Then mist water on it and then sprinkle salt on it and let that dry. The size of the droplets of water determine how large the peeled area will be. Small drops with only a few grains of salt look pitted. Large clumps of salt look like large sheets peel off. After the salt and water dries spray the final color. I will add here I have only ever done this will oil based enamel paint either air brushed or with a rattle can. Once that paint drys you go back and with a soft bristle brush like a toothbrush or even your finger you rub off all the salt. It is a very fun technique.
The other way looks more like chipped paint coming off of wood. You paint a raw weathered wood color, like a greyish brownish color and let it dry. Get aerosol hair spray and and spray a healthy coat on the what you want weathered. After that dries paint on your finish color. Now this works very well with acrylics. After that coat dries you can take any number of tools to pick and chip and scrap away the top coat. The paint does not adhere to the hairspray, acts as a barrier between the two paints, and it will flake away. It is the very best technique I know of for making peeling paint like on window trims and siding.
Devon, thanks for the tutorial. I’m more interested in the peeling paint on wood effect. I’ve used the aerosol hairspray method before, but it is hard to control where a broad mist goes 
I think I’ll try the pump style hair spray and apply if with a brush or piece of sponge so I can put it where I want and with more control.
I’m too low tech for you guys. I took a sanding stick to it and removed some of the paint in a random pattern. One coat of paint, no spraying between. Then mother nature took over. Below is a picture of what I ended up with. Doesn’t look like peeling paint. Just looks old and faded.
Well Jim your low tech way came out as good as any. Don’t change what works.
Now, if we could just get Dave to give us the Challenge 5 years in advance we could all take advantage of Mother Nature’s tried and true weathering skills  Jim, to me, the shack looks better now than when it was “new”.
I appreciate and enjoy your “low tech” modeling. Everything you build has a sense of authenticity to it and looks like its been there for ages.
I was thinking the exact same thing. The broken chunk of roof is priceless.
FYI: I did try the salt technique in a Mack truck model and it worked decently well, exposing organic shaped rust spots:
Built the mold to create the rock walls for the building.
I have also selected most of the rocks to form the pressure reducing arch above the round top window. There are some similar rocks for above the door and other window.
These rocks are bigger than those used for the bulk of the wall. Hopefully they will stand out a bit.
Next step is to get all the plugs of various types placed in the mold. Things like:
Those rocks are not to big Jim, your town is just full of really big burly men’s men who could lift them.
Can’t wait to see this come together. Did I miss something? Mold? are you casting something and I missed it? Or is your mold a form on which to place the real rock? Also not sure if it was intentional or not but the top center stone is the correct shape for a key stone. Not having any idea of the level of your knowledge of these things ( I sure don’t have much) but I do know that the top center stones are wedge shaped so that as the pressure pushes down on the arch it “drives” the wedge into the arch actually making it tighter and stronger. So that was a very good choice for the top center stone.
@Devon_Sinsley : I am using a Ray Dunakin technique that I have used twice before. The most recent time was for my not finished Casey’s Saloon foundation. Link below:
I also used this for my dynamite shack.
It is an outside mold that holds the rock in place while you pour the cement behind it.
Pretty easy to do, once Ray showed how.
I like that. I just went and looked at the first thread you posted and that is a cool idea and will be borrowed. I want to make a rock church and this will be way easier and probably look way beeter than how I was going to do it.
Now to remember how much or how little water is needed to get the mix right, hope you are better at writing stuff down than I am. Good luck cannot wait for the unveiling


