Large Scale Central

First laser building project

Here’s the pattern for the shingles.

Each shingle strip is 3/4" wide, mirrored over, and copied. The shingles will have a nominal 3/8" exposure, though with slight variances in angle and height. There are minuscule gaps between shingles, but it may take some experimenting before they become distinct enough.The strip lengths are over-long, to randomly park them over the next lower row. If anyone wants this pattern (in dwg, dxf, pdf or jpg), feel free to PM me.

This is to be laser cut from the same .04 styrene as the exterior sheathing. I plan on “pre-graining” the sheet similar to the sheathing, by using a coarse-grit belt on a sander, and maybe taking a wire brush (in a drill) to it like Dennis & I were discussing a while back.

===>Cliffy

[edit, 5/25: pattern updated]

John Caughey said:

Try rubbing alcohol to get the ink to ‘lay down’. It is a wetting agent and should pull the ink into the crevasses.

Try to keep the details contained on each board, it will help fool the eye.

Maybe you could engrave some detail deeper on each than the sanding to do the above…

Looks great, but I really think you should try to get serious with your hobby!

Your concerned net bro,(http://www.largescalecentral.com/externals/tinymce/plugins/emoticons/img/smiley-surprised.gif)

John

Cliff, I came to this thread very late. Dunno how I missed it. Great work!

I agree with John, regarding the use of isopropyl alcohol. I use 10% solution of India Ink in isopropyl alcohol. Slowly build it up to taste. It won’t look like much, at first, but you will have absolute control over the process.

Thanks Steve! And thanks to you & John for the alcohol tips, those are always welcome. :wink: Seriously, I intend to jump on that with the shingles, which are coming next.

I’ve been corresponding with Dennis (thanks Chris), and he had the great tip of using colored plastic for the shingles. He’s had some out for 5 years, and still holding their color. So I’m looking into doing the same, though in a forresty-green color. Might take a couple weeks to get, but the more I think about it, the better that sounds. Painted white styrene is probably not the best for a roof.

http://www.johnsonplastics.com/engraving/popular-brands/rowmark/rowmark-ada-alternative-pine-green-1-32-engraving-plastic

This company has something similar,

https://duetsbygemini.com/products/duets-tactiles/

Either way, I’d like to pre-grain the green plastic (it’s acrylic, very weldable), pre-treat with ink and alcohol, and then laser. After that, we’ll see.

Thanks guys for all the help, and thanks Dennis for steering me in a better direction.

Cliff

[EDIT] The Gemini people said they only talk to distributors, and sent me to one. But the distributor said they only deal with retailers, and sent me to one. But the retailer’s phone number was no longer in service. Where I grew up, they call that a hint.

So I decided to go with Johnson Plastics, who permits on-line orders, which I just did. I think their prices are good, and shipping fair. I called them before ordering with a couple of questions. They confirmed that this particular material is PVC-free and intended for laser-cutting; that it is acrylic and bondable; and that the color is all the way through (not just on the surface, and not like a two-layer thing with white as a second layer).

Hopefully I’ll be cutting the shingles a week from now.

I updated the cutting pattern based on stock size and a better randomizing of shingle widths. I was going to put it here, but now I see the image updated automatically where I posted it a few emails ago. Atta boy Bob!!

Cliff Jennings said:

[EDIT] The Gemini people said they only talk to distributors, and sent me to one. But the distributor said they only deal with retailers, and sent me to one. But the retailer’s phone number was no longer in service. Where I grew up, they call that a hint.

So it was like they were saying; “Go away boy, you bother me”. In today’s market, where so many companies are chasing what few dollars are available out there, that attitude surprises me more and more.

I so agree David!

By comparison, their competitor (Johnson) not only took my order immediately, they notified me within an hour that they had cut and shipped it. And they apologized that it would have to ship all the way from Minnesota – which is perfectly fine!

The assembly and painting are done, all except the shingles.

The shingle plastic should show up Thursday, so I hope to wrap this project up next weekend.

How long before we can start placing orders? (http://www.largescalecentral.com/externals/tinymce/plugins/emoticons/img/smiley-tongue-out.gif)

Thanks John, I’ll take that as a compliment!

I did some shingle experimenting today, though with white styrene. The green ABS sheet should be here Thursday, so this is just practice.

Here’s 3 different densities of wood grain engraving, treated afterwards with alcohol & ink. Thanks again John & Steve, the alochol made a big difference.

The patterns were done in Autocad, and the grain linework was from a free hatch pattern I found online. After “exploding” the pattern and saving the file in DXF, the laser software read it fine. (It didn’t recognize the unexploded Acad pattern). I was pleasantly surprised at how quickly the engraving went, because it ran at 10x the speed as the cutting layer.

A few comments from this experiment. I’ll probably still belt-sand (pre-laser), but I wanted to see how only laser-graining might work; and I think it’s much better than I was achieving with only sanding, with the most dense pattern being my favorite. However, I think I’ll run the engraving layer faster, to make the grooves more shallow. Finally, I’ll do the grain only for exposed portions, because the ridges it leaves behind make bonding (of the next higher row) less sure.

I noticed that the grain-engraving tended to warp the .03 sheet, so it was important to run that layer first, and then the cutting layer. Otherwise, the strip popped up after cutting, making the engraving less reliable.

===>Cliffy

And now, for some shingle talk! I know this is obscure, but I’m excited to learn some stuff today. Following in the footsteps of Dennis Rayon, who is using a similar material & approach, I think this shingling method is pretty neat, and deserves a little more description than I tend to produce. So here goes.

I received the material a couple days ago for this, .03 pine green ABS “Rowmark” from Johnson Plastics. It’s intended to be laser-cut, and is even marked with direction of grain for applications caring about that.
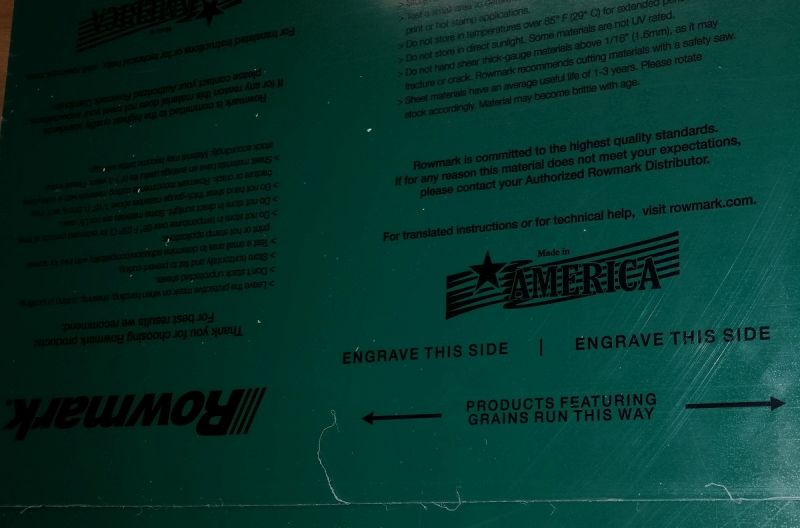
The “engrave this side” side has a matte finish, vs. gloss on the other.
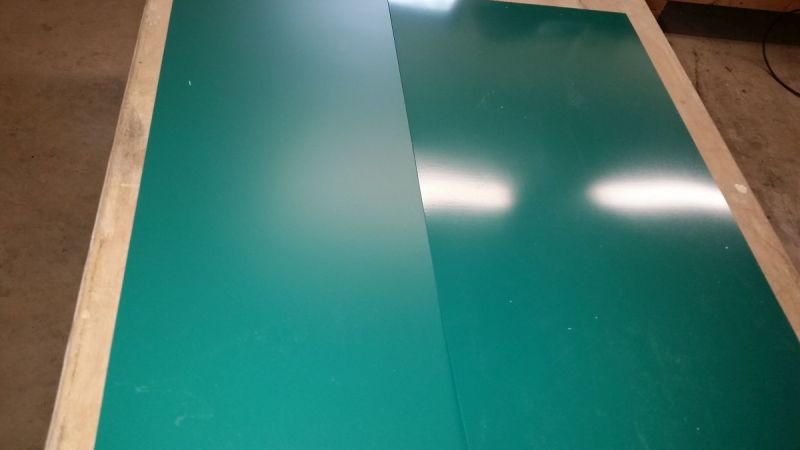
Though full 4x8 sheets are available, I purchased 2 1’x2’ sheets. Cheaper shipping, and my cutter can’t handle very much more. I started today by belt sanding (on the left, below) and then wire-wheeling the sheets (shown on the right):
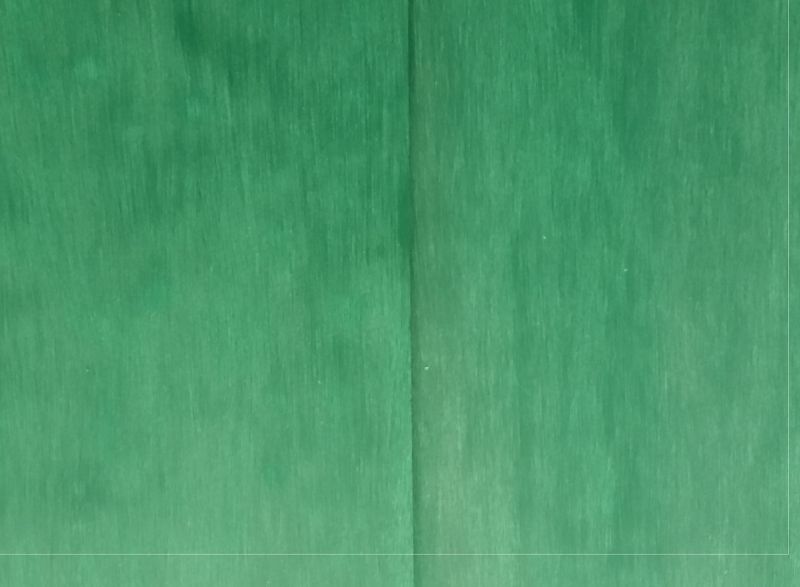
Not a huge difference, but the wire-wheeling (brush on a drill) helped to even out the oddities left by the belt sander. I found the brushing was better done with very low RPM on the drill.

Then came the lasering. For a set of strips, I set up the parameters to do all the engraving first, internal shingle cuts second, and final / outer cuts last. This is because the material tended to warp with all this, and the last bits of connecting material helped keep things registered. BTW, once a strip got fully cut, it laid down. Before then, things looked like this. You can see things curling near the cutting action.
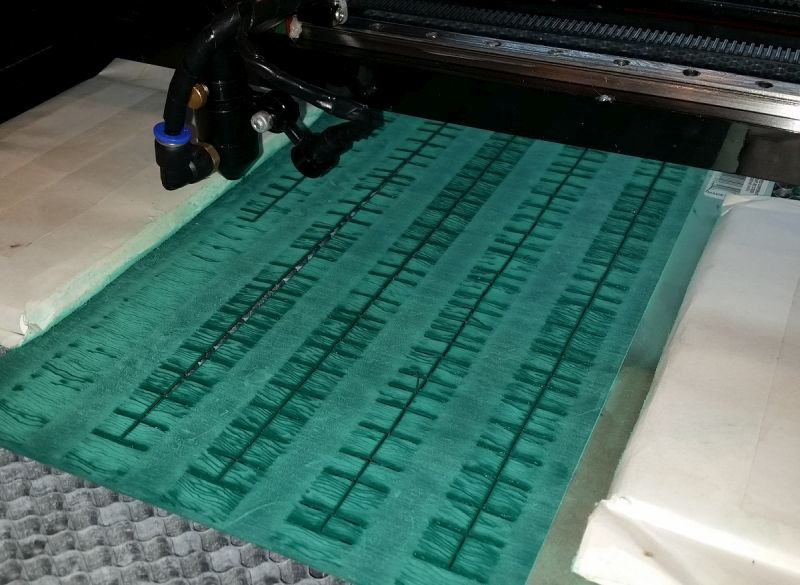
Here’s how the strips began to come out.
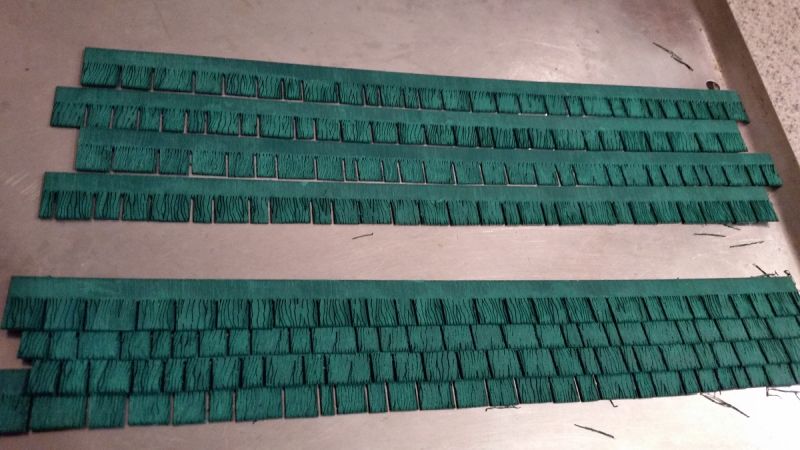
I messed with settings with each batch, trying to get the speed up and power down, yet produce the needed graining and cutting. I also wanted the engraving to NOT produce raised ridges. Again, this is .03 ABS, and settings will differ for other materials of course. But in case anyone wants to know, here’s my settings (for power reference, I’m using a 60w laser):

  • Engraving: 450mm/sec @25% power

  • Cutting: 16mm/sec @70% power

By the time I finally arrived at these settings, I was cutting batches of 10 strips in 25 minutes, or 2.5 min/strip. I needed 50 strips (at 12" long), so here’s what 50’ of shingle strip looks like.
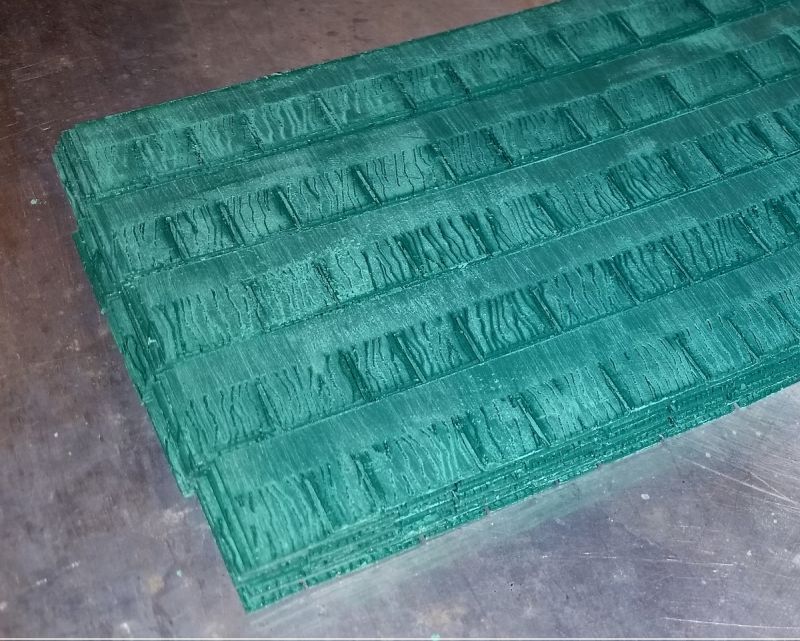
It’s sort of powdery still from the sanding, but that should go away with the next steps of cleaning / staining. Then comes installation! Anyone remember those Campbell shingle strip rolls (for HO)? I used those as a kid, and had a blast. Maybe that’s why I’m going off the deep end on this phase of the project! :slight_smile:

Thanks for your interest,

Cliff

PS, someone please ask me why I’m using green shingles… :wink:

PS, someone please ask me why I’m using green shingles… :wink:

Ok, why are you using green shingles?..:wink:

Ken, it’s funny you should ask.

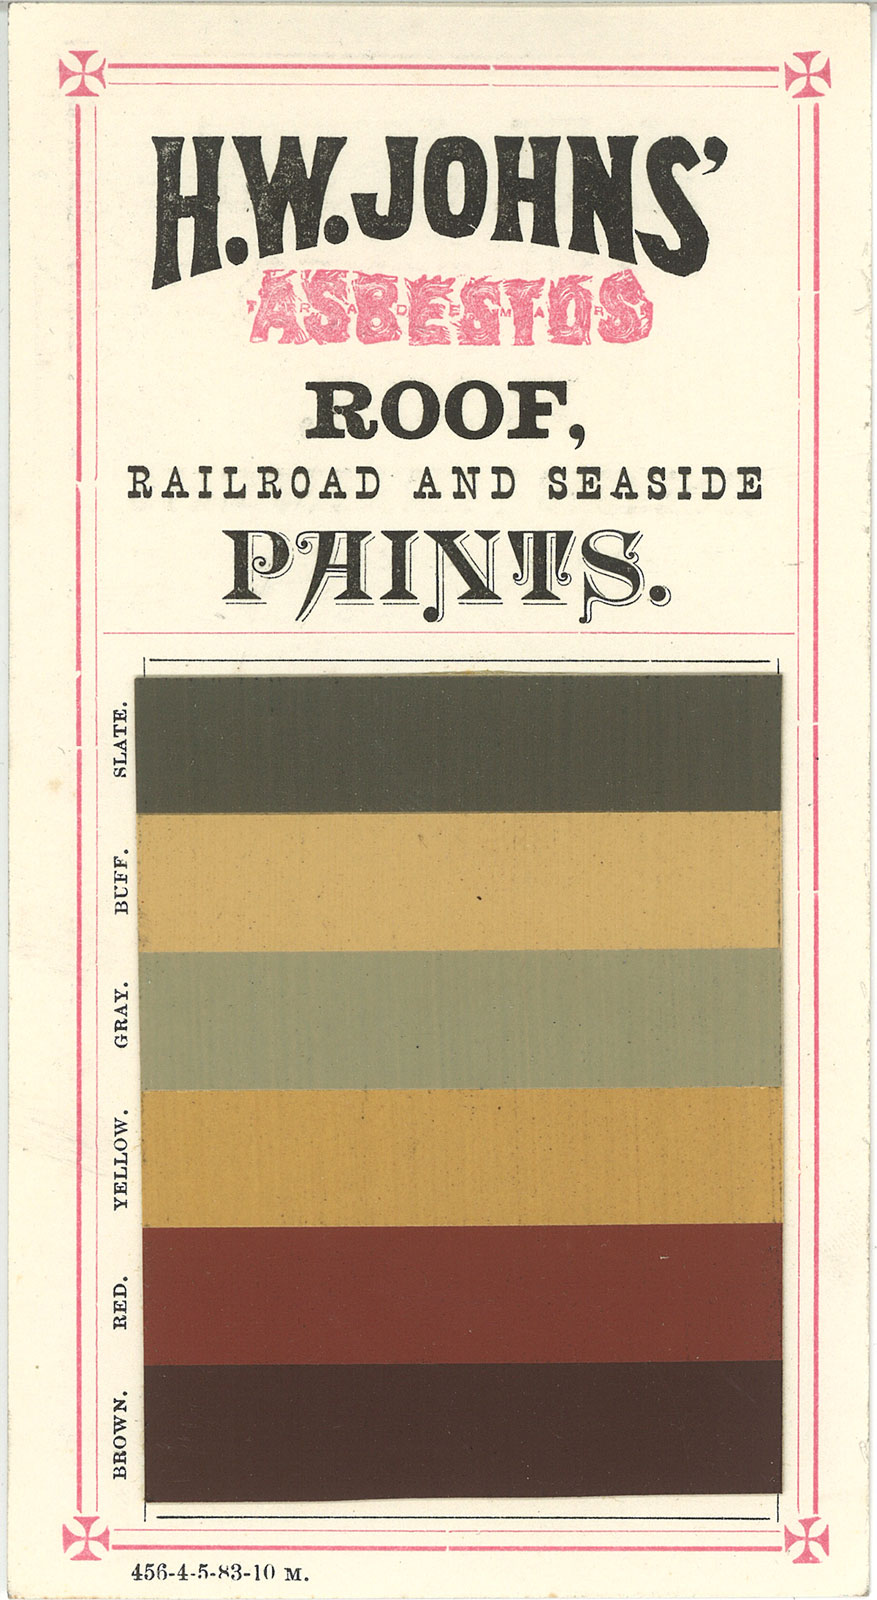
The V&T had their building rooves painted with fire-retardant paint, and it was cheaper to buy in bulk and not mess with any color but the usual: and at least from around 1890 to 1920, the color tended to be green. The Comstock mines were the same, so their rooves were often green as well. For similar reasons, the mines & mills & V&T structures tended toward a fire-retardant “barn red” or “mineral red” for siding, and white for trim.

Perhaps it was the same for ranger stations and other forresty buildings in CA, which as a kid I recall sometimes having green rooves and reddish walls.

Anyway, here’s an example of paint product involved back in the day.

And another card, showing a green color.

Thanks for asking, we must be on the same shingle wave length or something. :smiley:

Cliff

Cliff

Very interesting on the fire retardent shingles. Your shingles are shaping up and progress is marching forward, and looking very good.

Keep us posted.

Dennis

I am not Hijacking Cliffs post, He does a wonderful job of explaning his adventures in laser cutting, Cliff and i have conversed on the shingling method that i have used for years.

I am posting a couple pictures of acrylic shingles that has been out for years.

Thanks for posting those Dennis, very appropriate!!

Here’s one more paint line card,

This is a link to the Johns entire product line. They sure loved their asbestos!

https://ia600305.us.archive.org/14/items/H.w.JohnsMfg.Co.Asbestos/H.w.JohnsManufacturingCompany_text.pdf

BTW, this company later merged with the Manville Co. to become Johns Manville, who still is involved with asbestos lawsuits.

Back then Asbestos was a miracle product. It was fire proof, and it added strenth to plasters and linoleum, and there was dozens of other uses for it.

Sure seems like it, David!

I now have shingles!

Ok, you sold me. I will take about 30 scale square of them there first class shingles, and some of that there excellent wood siding, and if you could spare a door or two…

Gonna add copper flashing so the patina will blend in?

Must be nice to model the ‘hey day’ of the mine, on my pike the blush has faded and we are on a ‘get by’ frame of mind …

John