Large Scale Central

ET&WNC Hopper

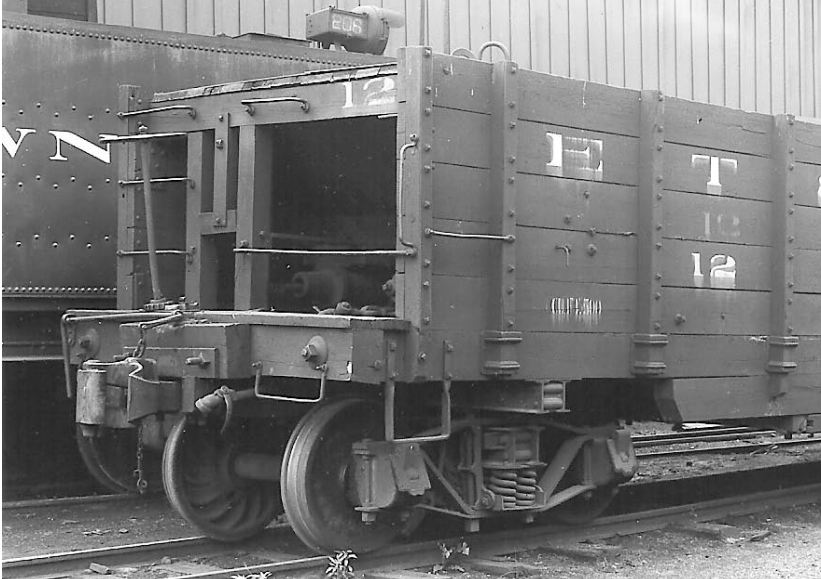
Early last century, the ET&WNC built a fleet of wooden hoppers, similar to this one.

Many years ago, I built a similar model, using scale lumber from Kappler.

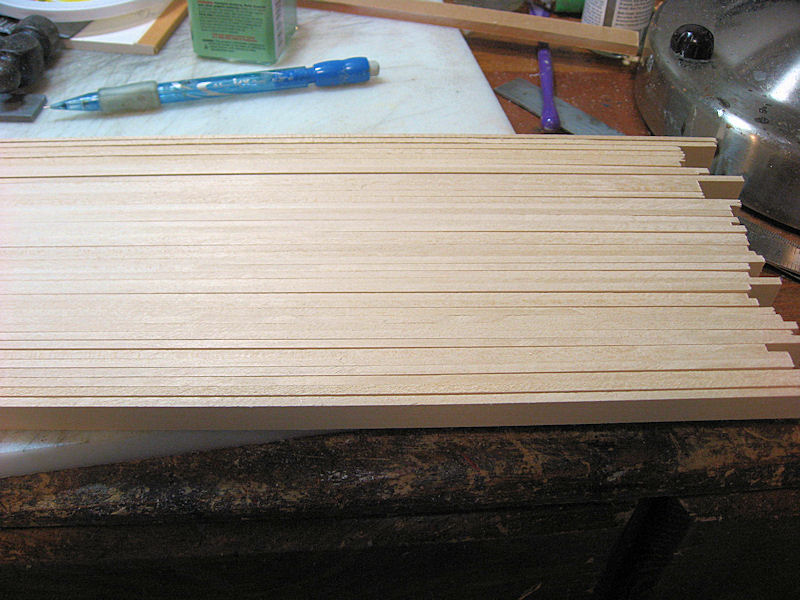
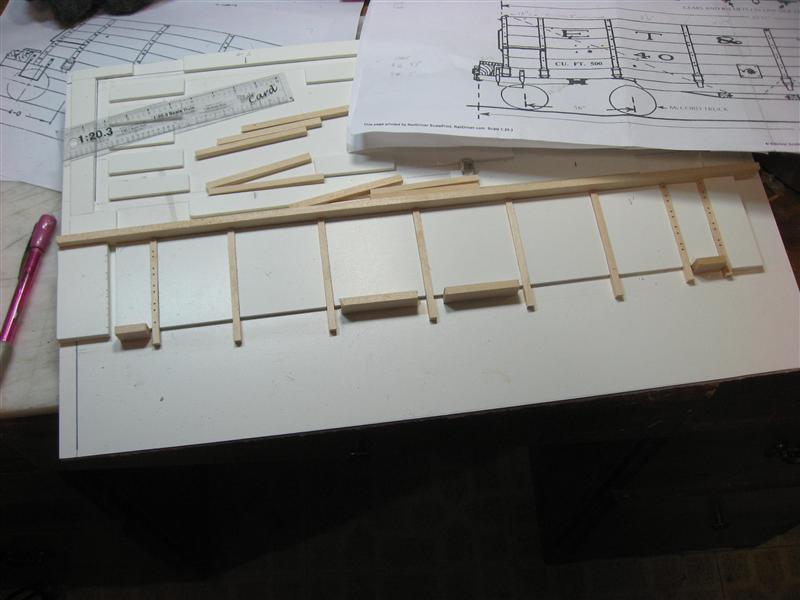
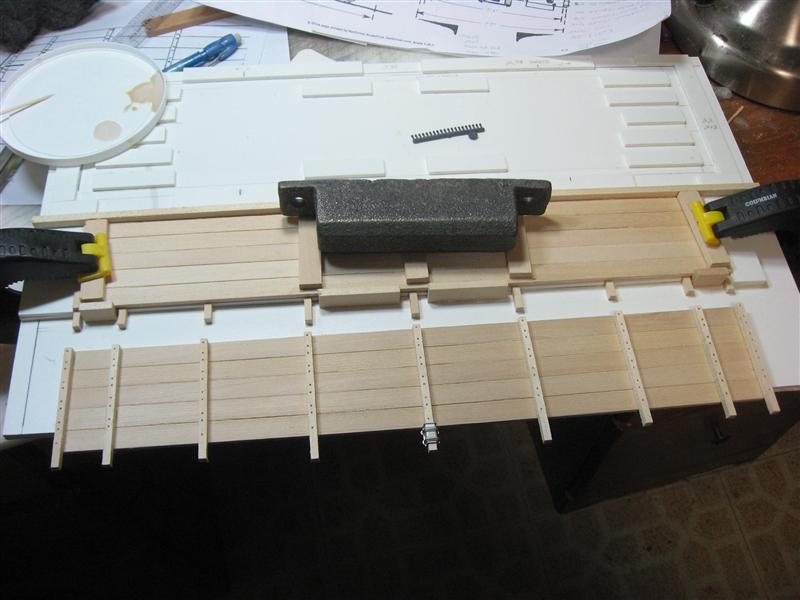
The problem with using the scale lumber is that it’s not the right size. :o For instance, I used 2"x9" lumber for the sides. This gives you a side height of 45", but the prototype was 4 feet. I know, not a lot of difference, but enough to throw things off. So, this time I decided I’d build a fleet of four hoppers and they would be closer to scale. That means each board is a scale 9.6" wide. Not a LOT of difference, but I will have the right height. I will also be able to cut the vertical posts to exactly fit the Ozark castings; previously I had used 3"x3" and they are a bit too small. I bought a bunch of basswood from MicroMark and proceed to first built the frame. I cut some 1/4" basswood to be 8" wide. I used the scraps I got from Jon to build a nice jig and quickly glued 4 frames in place.

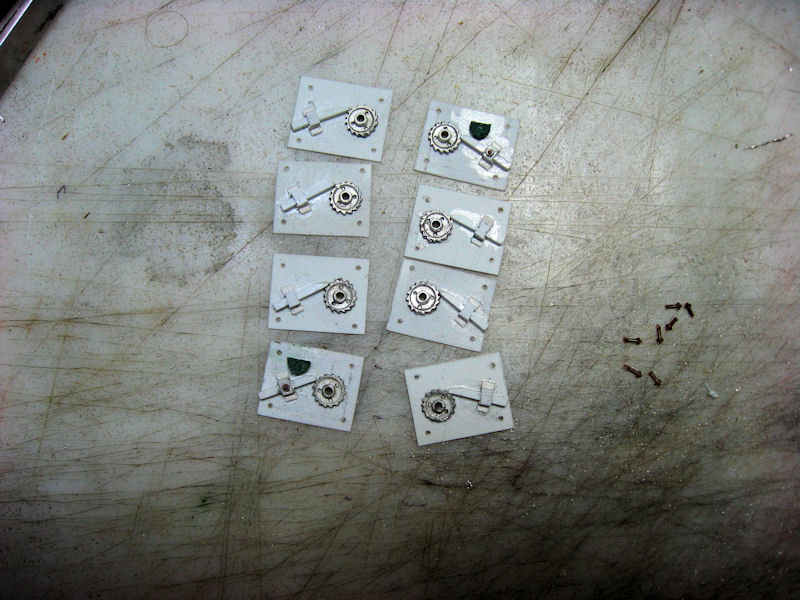
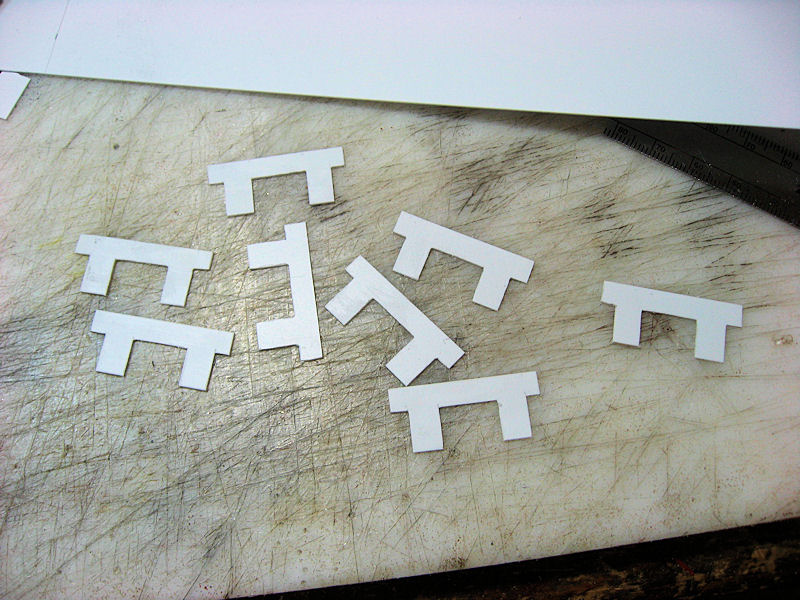
Weight and clamps are used to make sure that everything dries flat. While these were drying I decided to make the gear mechanism for lowering the doors. It is only on the one side. I started with some pawl castings from Ozark and cut the gears out by grinding from behind.

A few scraps of styrene and NBW casting and I’ve got a reasonable facsimile.

I need 8 for my 4 cars

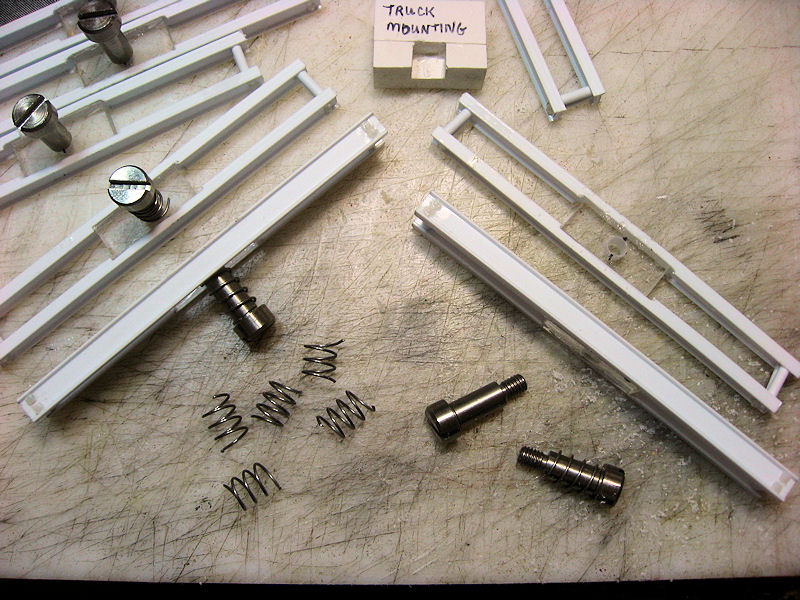
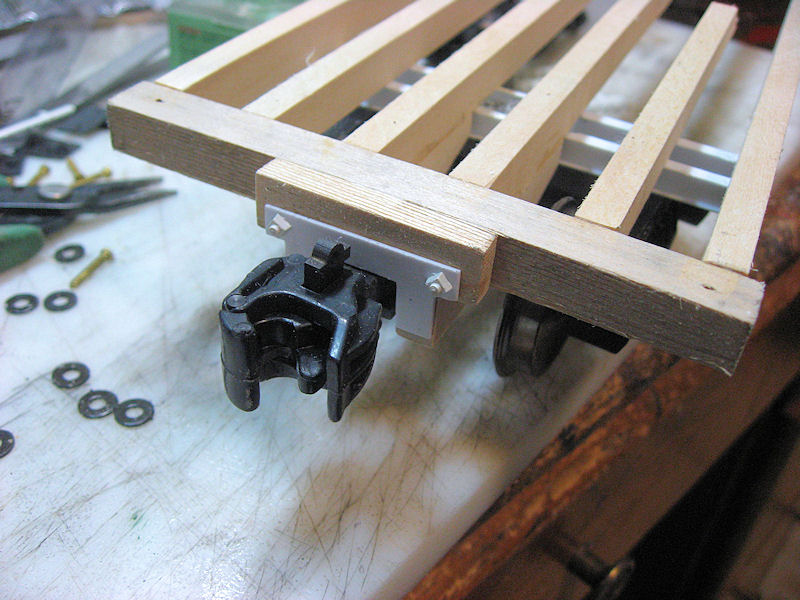
Bolsters are made from I beams. I sandwich a small piece of acrylic between the two beams, filing down the flanges to allow for a close fit. I stuck some NBW castings into 3/32" tubing to complete the look.

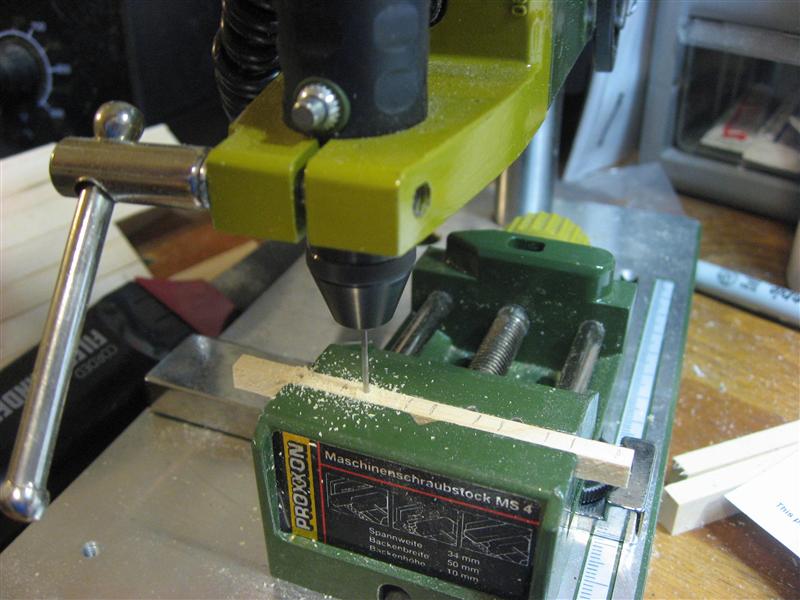
My order of basswood just arrived, so next step is to cut the side pieces to 9.6" wide. :wink:

Very cool…Can’t wait for the finished product!

Is it done yet?
:wink:

David Russell said:
Is it done yet? ;)
Yes. Finished it months ago.

Always liked the look of those cars, and love your step-by-step instructions. They give me ideas!

Nice Bruce. Ill second what Bob said.

Damn, I wish my shop was finished!
I want to build something!
Nice model, Bruce.

Ah, the wizard is at it again!!! Can’t wait to see the result.
Dave

Thanks, guys. Today, I tapped the bolsters for the 10-32 shouldered screws I use to secure the trucks. I also cut springs to put on each screw.

(http://www.jbrr.com/Pics/RollingStock/Hopper/ETWNC/IMG_9665.JPG)

I glued the bolsters in place using E-6000 adhesive. While those were drying I went ahead and cut 40 pieces of 2" x 9.6" for the hopper side. I found that 12mm gets me close.

(http://www.jbrr.com/Pics/RollingStock/Hopper/ETWNC/IMG_9667.JPG)

I also cut the stakes. They scale out to about 3" x 4".

(http://www.jbrr.com/Pics/RollingStock/Hopper/ETWNC/IMG_9670.JPG)

The stake pocket fits perfectly.

(http://www.jbrr.com/Pics/RollingStock/Hopper/ETWNC/IMG_9669.JPG)

Where do you get your shouldered screws and springs? I don’t have anyplace here local that carries them.

Hehe. Neither do I. McMaster-Carr. The screws are 91829A537. The spring is 9663K63 (I think).

The screws are not cheap, but I really like that way to attach the trucks. Actually, I patterned it after the AMS cars, but needed a thicker screw to handle my trucks.

Have you thought about using threaded inserts, like Phil uses?
I have to mount some trucks to a project and haven’t quite decided how to do it yet.

John, I haven’t really thought about it. I already have the tap and the acrylic seems to be strong enough. Of course, I’m always willing to try something new.

Good grief. Doorbell just rang. UPS dropping off the order I made through McMaster Carr. Made it just a bit over 24 hours ago!

The scale post make a big differance. Would you mind showing the mounting jig in use. From the pic of the bolsters.

Ive been pondering using Rivnuts for threaded inserts.

Dave Marconi said:
The scale post make a big differance. Would you mind showing the mounting jig in use. From the pic of the bolsters.
Oh, that's just to cut the springs to the right length. I stick the spring in there and cut them - they sort of end up the same length that way. The cutters add about 1/8" inch to the length.

In this case, I’ll probably have to shorten them some more, as I need a few washers to bring it up to the right height.

Time to work on the couplers. I went through a LOT of iterations on the coupler and finally just decided to use the bottom piece of the coupler mount. It was trimmed to fit between the beams. After filling the nut hole with JB Weld, I discovered I really did have some small washers that would work.

(http://www.jbrr.com/Pics/RollingStock/Hopper/ETWNC/IMG_9674.JPG)

And after installing the first coupler I decided that now was not right time to install them, as there is another piece of metal on the prototype.

(http://www.jbrr.com/Pics/RollingStock/Hopper/ETWNC/Hopper12End.JPG)

I decided to go with this style. I have lots of pictures and they all seem different. :wink: I started with a sheet of .030" styrene and laid out the end pieces.

(http://www.jbrr.com/Pics/RollingStock/Hopper/ETWNC/IMG_9648.JPG)

Then I cut them out and cleaned up the edges.

(http://www.jbrr.com/Pics/RollingStock/Hopper/ETWNC/IMG_9649.JPG)

Glued in place with some square nut castings.

(http://www.jbrr.com/Pics/RollingStock/Hopper/ETWNC/IMG_9675.JPG)

neat project bruce… And excellent workmanship, as usual… :slight_smile:

Nice, nice job Bruce. Your step by step is really well done and you couldn’t have picked a better looking prototype. I’m looking forward to seeing the whole string together in a train on your RR.

OK, four frames are more or less complete. Yes, there’s still some work on each.

(http://www.jbrr.com/Pics/RollingStock/Hopper/ETWNC/IMG_9676.JPG)

I’m going to need 8 sides, so a jig was in order. I used the scraps again to build one. Here, the stakes are in place.

(http://www.jbrr.com/Pics/RollingStock/Hopper/ETWNC/IMG_9679.JPG)

Of course, before the stakes can be used, I wanted to drill for the nut castings. I drew reference lines on the side of the jig; now I just slide in a stake and mark it against those line.

(http://www.jbrr.com/Pics/RollingStock/Hopper/ETWNC/IMG_9684.JPG)

Once marked, I put it in the vise and drill the holes. The vice slides along a guide, keeping the holes all in a line.

(http://www.jbrr.com/Pics/RollingStock/Hopper/ETWNC/IMG_9683.JPG)

I apply glue to each stake and put the side boards in place. I use a weight and clamps until the glue dries. Here’s one side done, while another sets up.

(http://www.jbrr.com/Pics/RollingStock/Hopper/ETWNC/IMG_9693.JPG)