Jon Radder said: but I don’t want to be going in too many directions at once.
That’s called “Devoning”… (https://www.largescalecentral.com/externals/tinymce/plugins/emoticons/img/smiley-wink.gif)
Jon Radder said: but I don’t want to be going in too many directions at once.
That’s called “Devoning”… (https://www.largescalecentral.com/externals/tinymce/plugins/emoticons/img/smiley-wink.gif)
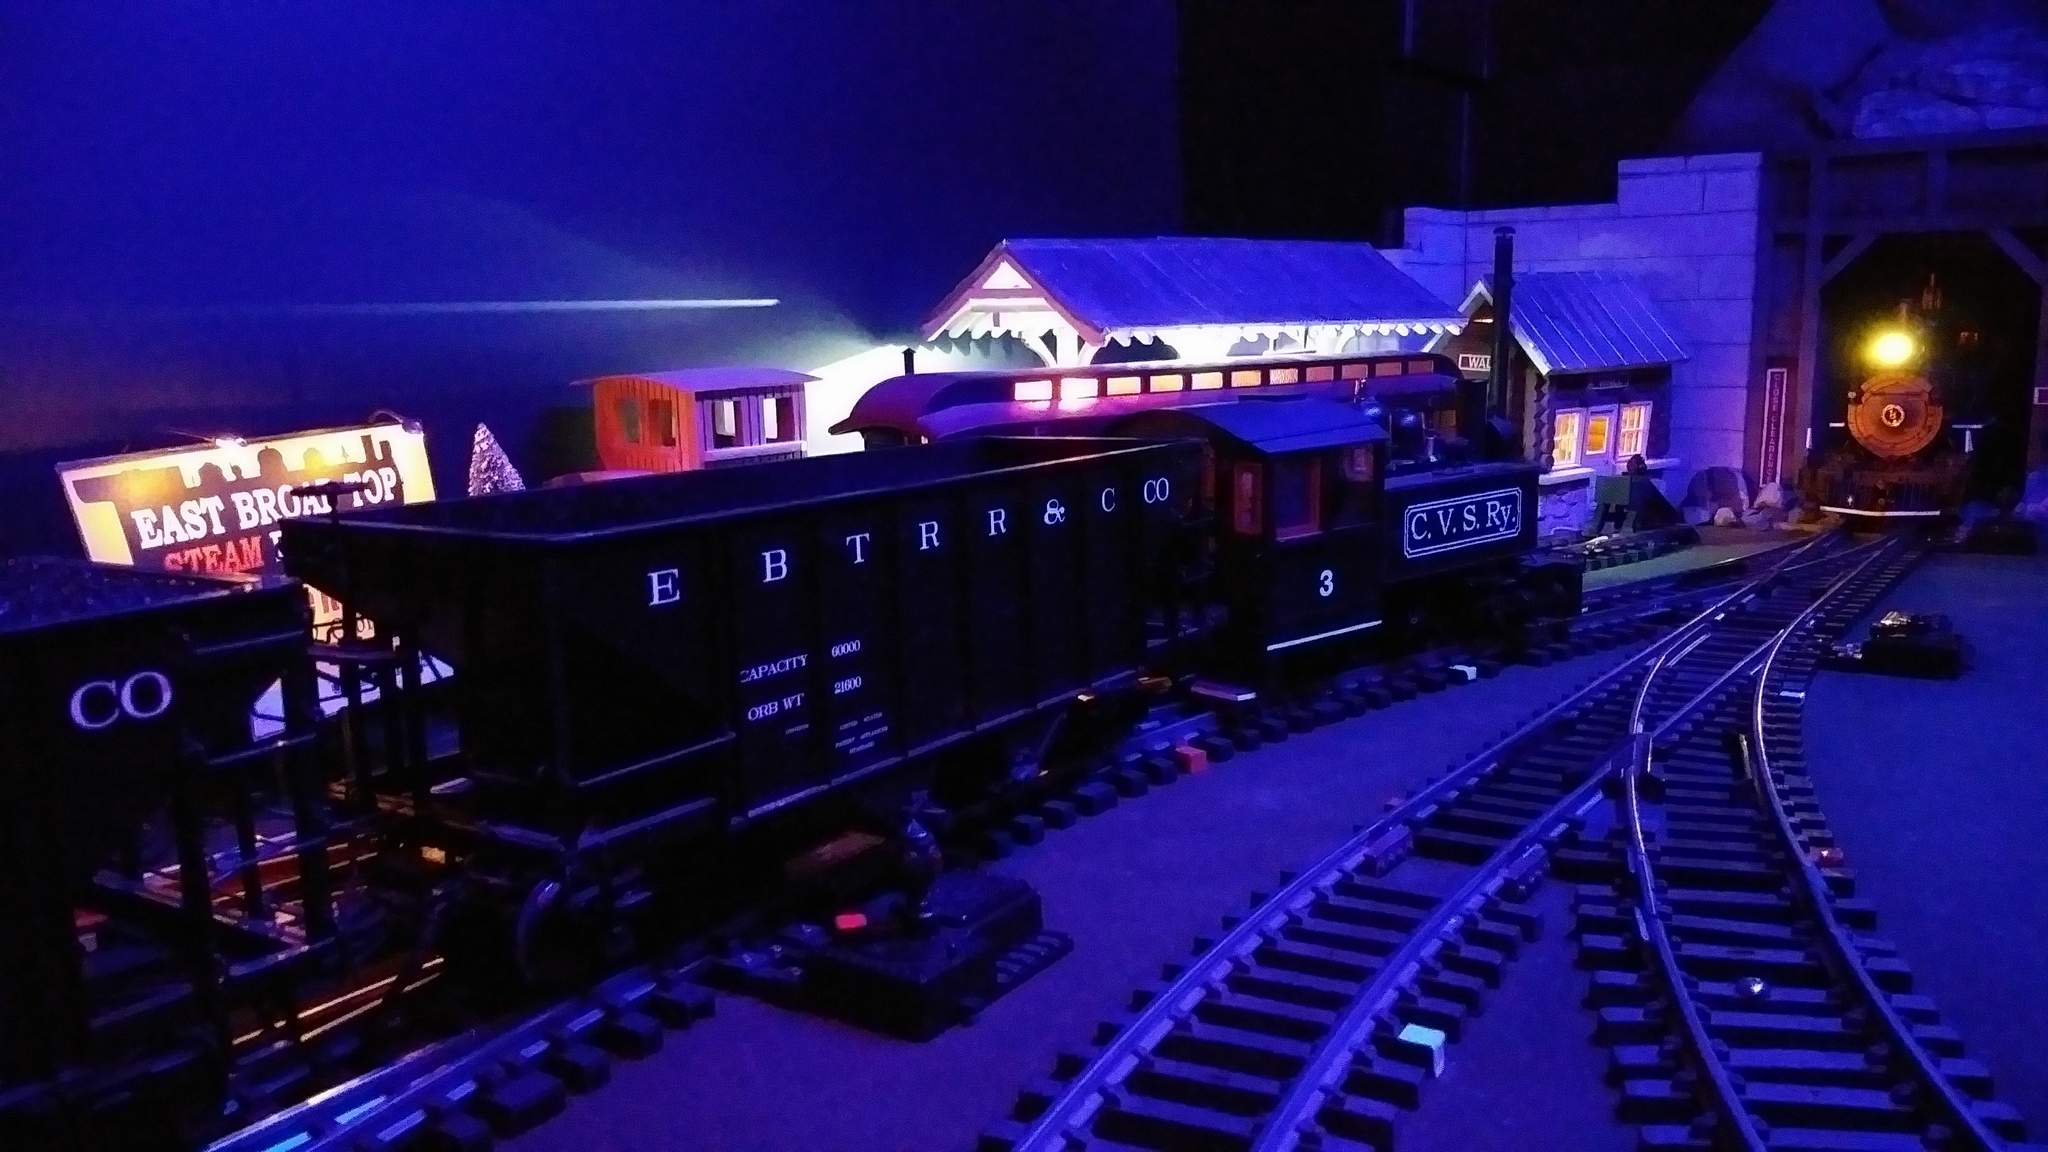
While I build up a can-do attitude toward designing, building and coding my own fully programmable color lighting system using Adafruit Neopixel RGBW LED strips, I have ‘borrowed’ a few under-car blue LED tubes that my youngest left behind and mounted them, along with a few red sign LED modules, behind the new valance. It’s not exactly the look I am after, but getting there. This cell phone shot of Porter #3 holding with interchange cars for #8 to clear the switch with the Northbound train is pretty true to real colors…
There are more recent photos in my Structure Lighting Project - Indoor Edition thread <-- link
EDIT to change picture!
The lighting looks great, Jon. It really brings the scene to life.
EDIT TO ADD: Jon, that tunnel portal in the background should be entered into some sort of contest (http://www.largescalecentral.com/externals/tinymce/plugins/emoticons/img/smiley-laughing.gif).
Dan we are just jealous , because Jon has an indoor and an Outdoor layout and all you and I have is an indoors and an outdoors!
Okay…you move out here to Colorado to be close to your wonderful family, and you know what will happen? You’ll spend half your free time lighting my layout and I’ll spend half my time making mountains and rocks for you. And we can both get Kevin to do all our electronics and battery stuff.
Now, really, you need to ballast that track!
Pete Lassen said:
Dan we are just jealous , because Jon has an indoor and an Outdoor layout and all you and I have is an indoors and an outdoors!
I am certainly envious, Pete. Here I sit with all the room anyone would ever need to build a RR with nothing standing in the way but me … well and honey do’s and a wood fired oven and work and … and … and…any other excuse I can find. You are making headway and making me tired in the progress.
John Passaro said:
Okay…you move out here to Colorado to be close to your wonderful family, and you know what will happen? You’ll spend half your free time lighting my layout and I’ll spend half my time making mountains and rocks for you. And we can both get Kevin to do all our electronics and battery stuff.
Now, really, you need to ballast that track!
If I could convince Marilyn. She is very close to her family here, so we are torn. We’ve got a really big footprint here too - been thinning out for a few years, but not fast enough for a major move. But would so love to have talented guys like you two close by.
Ballast - definitely. Probably only in this corner of my little world because I like using real stone dust, same as outside with no glue to allow easy changes. I have so many bad ideas in my head I could work full time on just the RR and still not get it all done. I’m trying to get focused on carving more of that block for the black wall in the pictures, then build a facade for a big brick structure to hide the water pipes. The overhead LED lamps for the walkway came in, so that will be the next project - then on to carving.
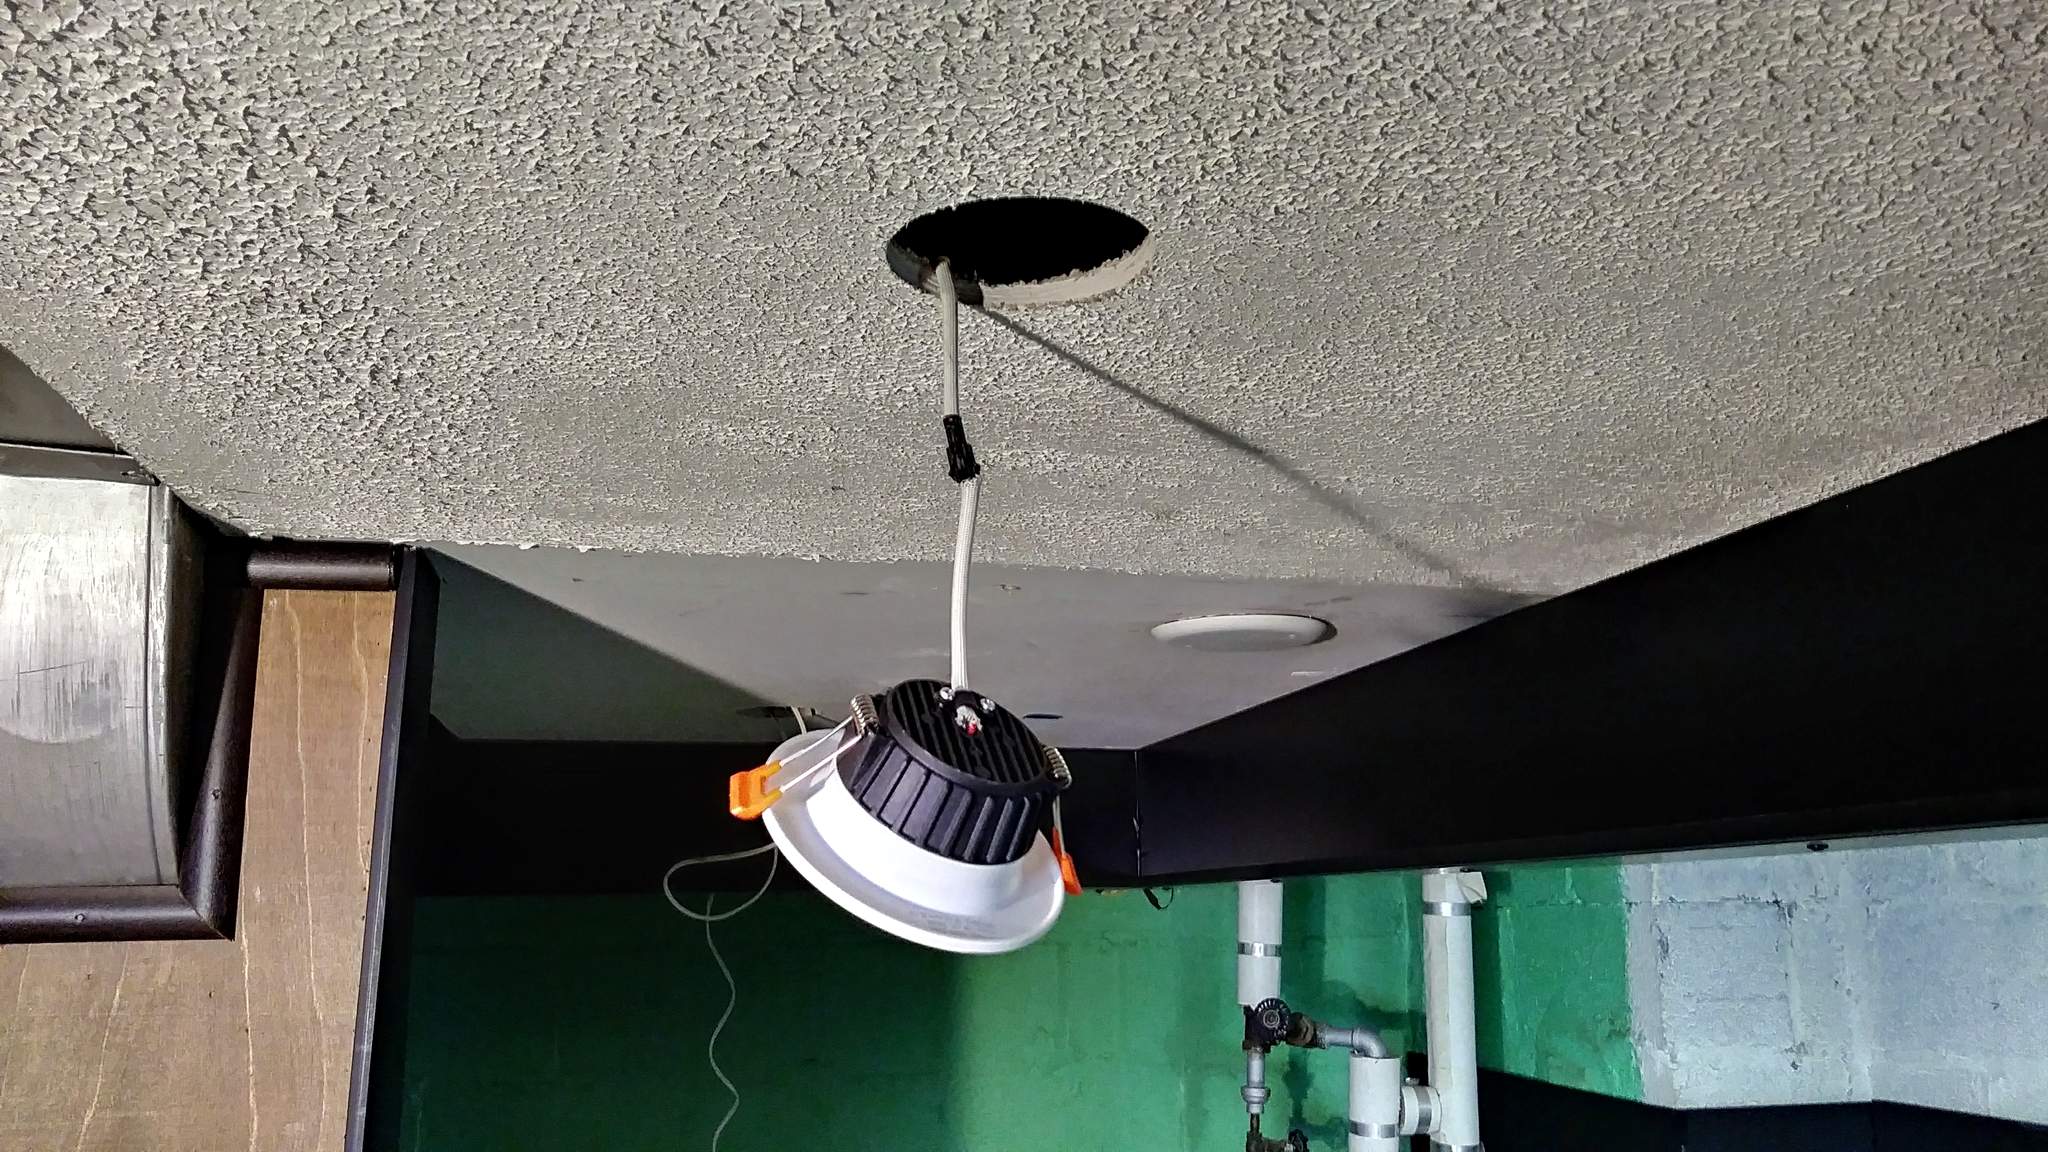
Snow day today so it’s back to this project. Been doing some demo of electrical work that is in the way preparing for new recessed lighting for the walk way. It’s amazing what you find in 1950’s homes before building codes were tightened up and after homeowners have done remodel work…
When the house was built, the HVAC guy and the framing guy disagreed upon where a duct should go, so the HVAC guy cut through a sistered 2x6 floor joist leaving about an inch of wood left. This is directly below a high traffic area of the first floor! I guess since it has been OK for over 60 years that I’ll not worry about it.
I opened up an electrical box to remove some cabling that is no longer needed. Inside; the main feed is 3 wires, Red, Black and White. The Red and White was being used as the circuit feed and the black was taped off. I decided to test the black to see if it was live, or a switch feed. With all power on the black wire tests around 70 volts to Red and about 17 volts to white (neutral). Red to White tests a normal 117 volts. I assume the other end of the black wire wire is shorting somewhere or it is picking up an induced voltage. I’m going to cap it back off like it was.
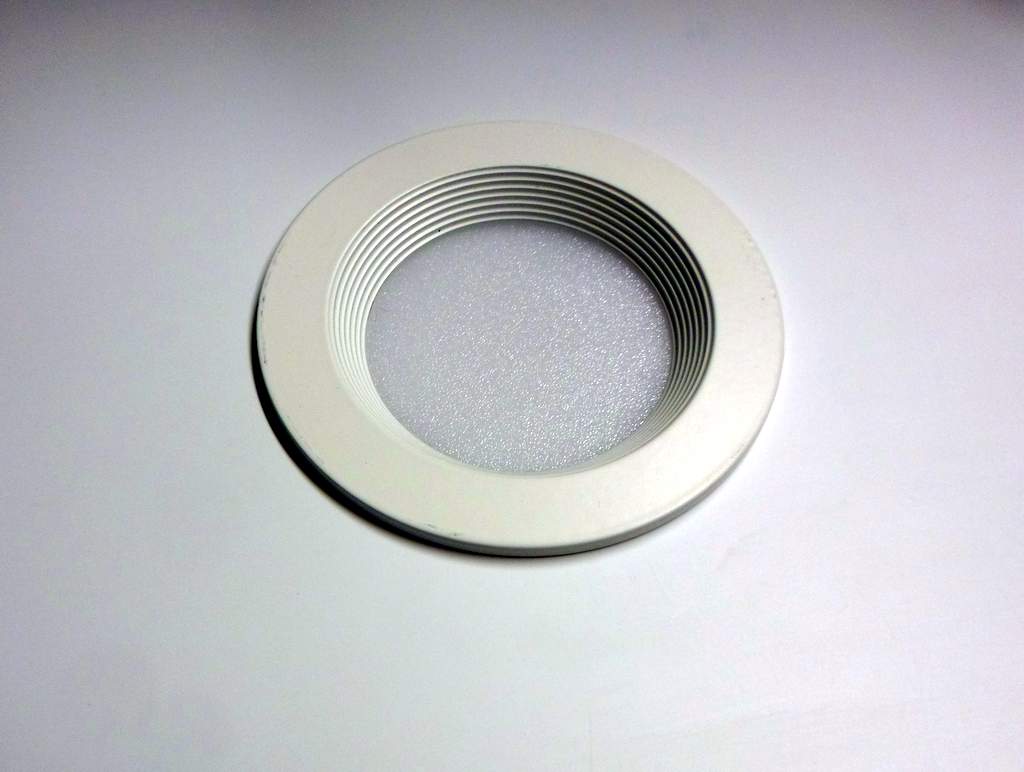
If the mail man shows up I’ll have a supply of downlights I can install later. They are cheepies from Amazon. The light itself is all aluminum and seems to be high quality. It runs on 24V and they provide a chincy looking power supply with each one. I don’t trust the supply to last as long as the LED lamp, so I’ll wire them as low voltage and supply my own 24V from a quality supply. Pictures when they are in and working.
Usually the red wire is the “traveller” in a 3 way switch situation… that would also jive with weird voltages. Is is possible this was the other end of a 3 way switch circuit?
The red connected to either black or white would simulate a 3 way switch in one, fixed position… the other end of the circuit could still have it’s original 3 way switch and it would now function like an ordinary on off switch, with no “remote 3 way mate”.
Greg
In this basement, anything is possible. Part was “finished” by the previous owner. He worked in the trades in NYC, not sure which one. Pretty sure not a carpenter or electrician based on his work. The red and white have been a good branch circuit feed for many years with no issues. There are a pair of 3-ways for a ceiling light. Their position does not affect this branch. It’s possible this box was part of the ceiling 3-way circuit at one time. The previous owner had a freezer outlet off this box, so he may have done something weird somewhere to make sure it stayed hot.
Come on Jon …you know how to “Google” and I agree with Greg that red is a traveler with a 110 circuit.
It is whatever it is. Capped back off and tucked away in a new grounded box.
My LED downlights came in and I’ve been messing around with them. The lamps themselves are very nice high quality, but the power supplies are cheap junk. They also are sold as not dimmable, but it’s not the LED that can’t dim, it’s the power supply. So into the junk box the supplies go. A look at one lamp mounted in a panel…
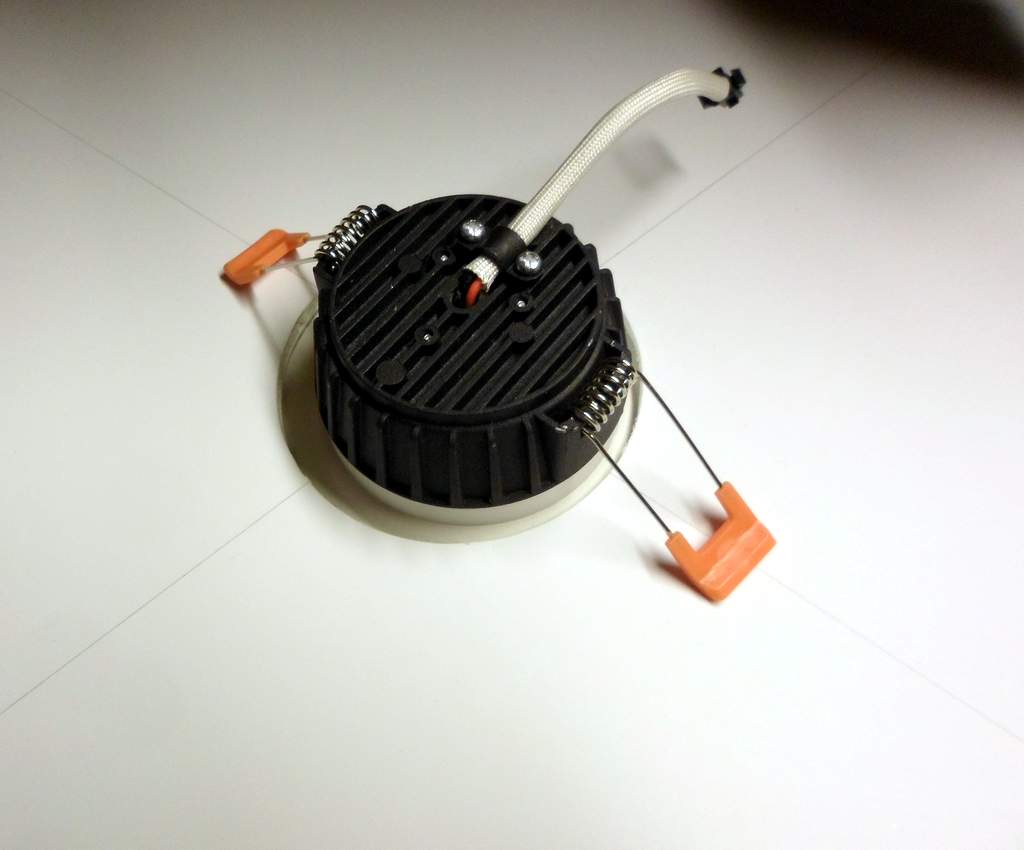
I’ll use a high quality supply with enough capacity to add more of these later. They are too bright for my tastes in a low ceiling, so a DC-DC buck converter was added between the supply and the low voltage buss that will power these. The voltage adjustment on the buck converter allows me to trim the brightness to a fixed setting. The buck converter fits inside the housing from one of the cheap supplies.
Photo of my set up: Lamp at top. Original intact supply below. On the left the original supply board and at the bottom a buck converter wired up and ready to button up in the old power supply case…
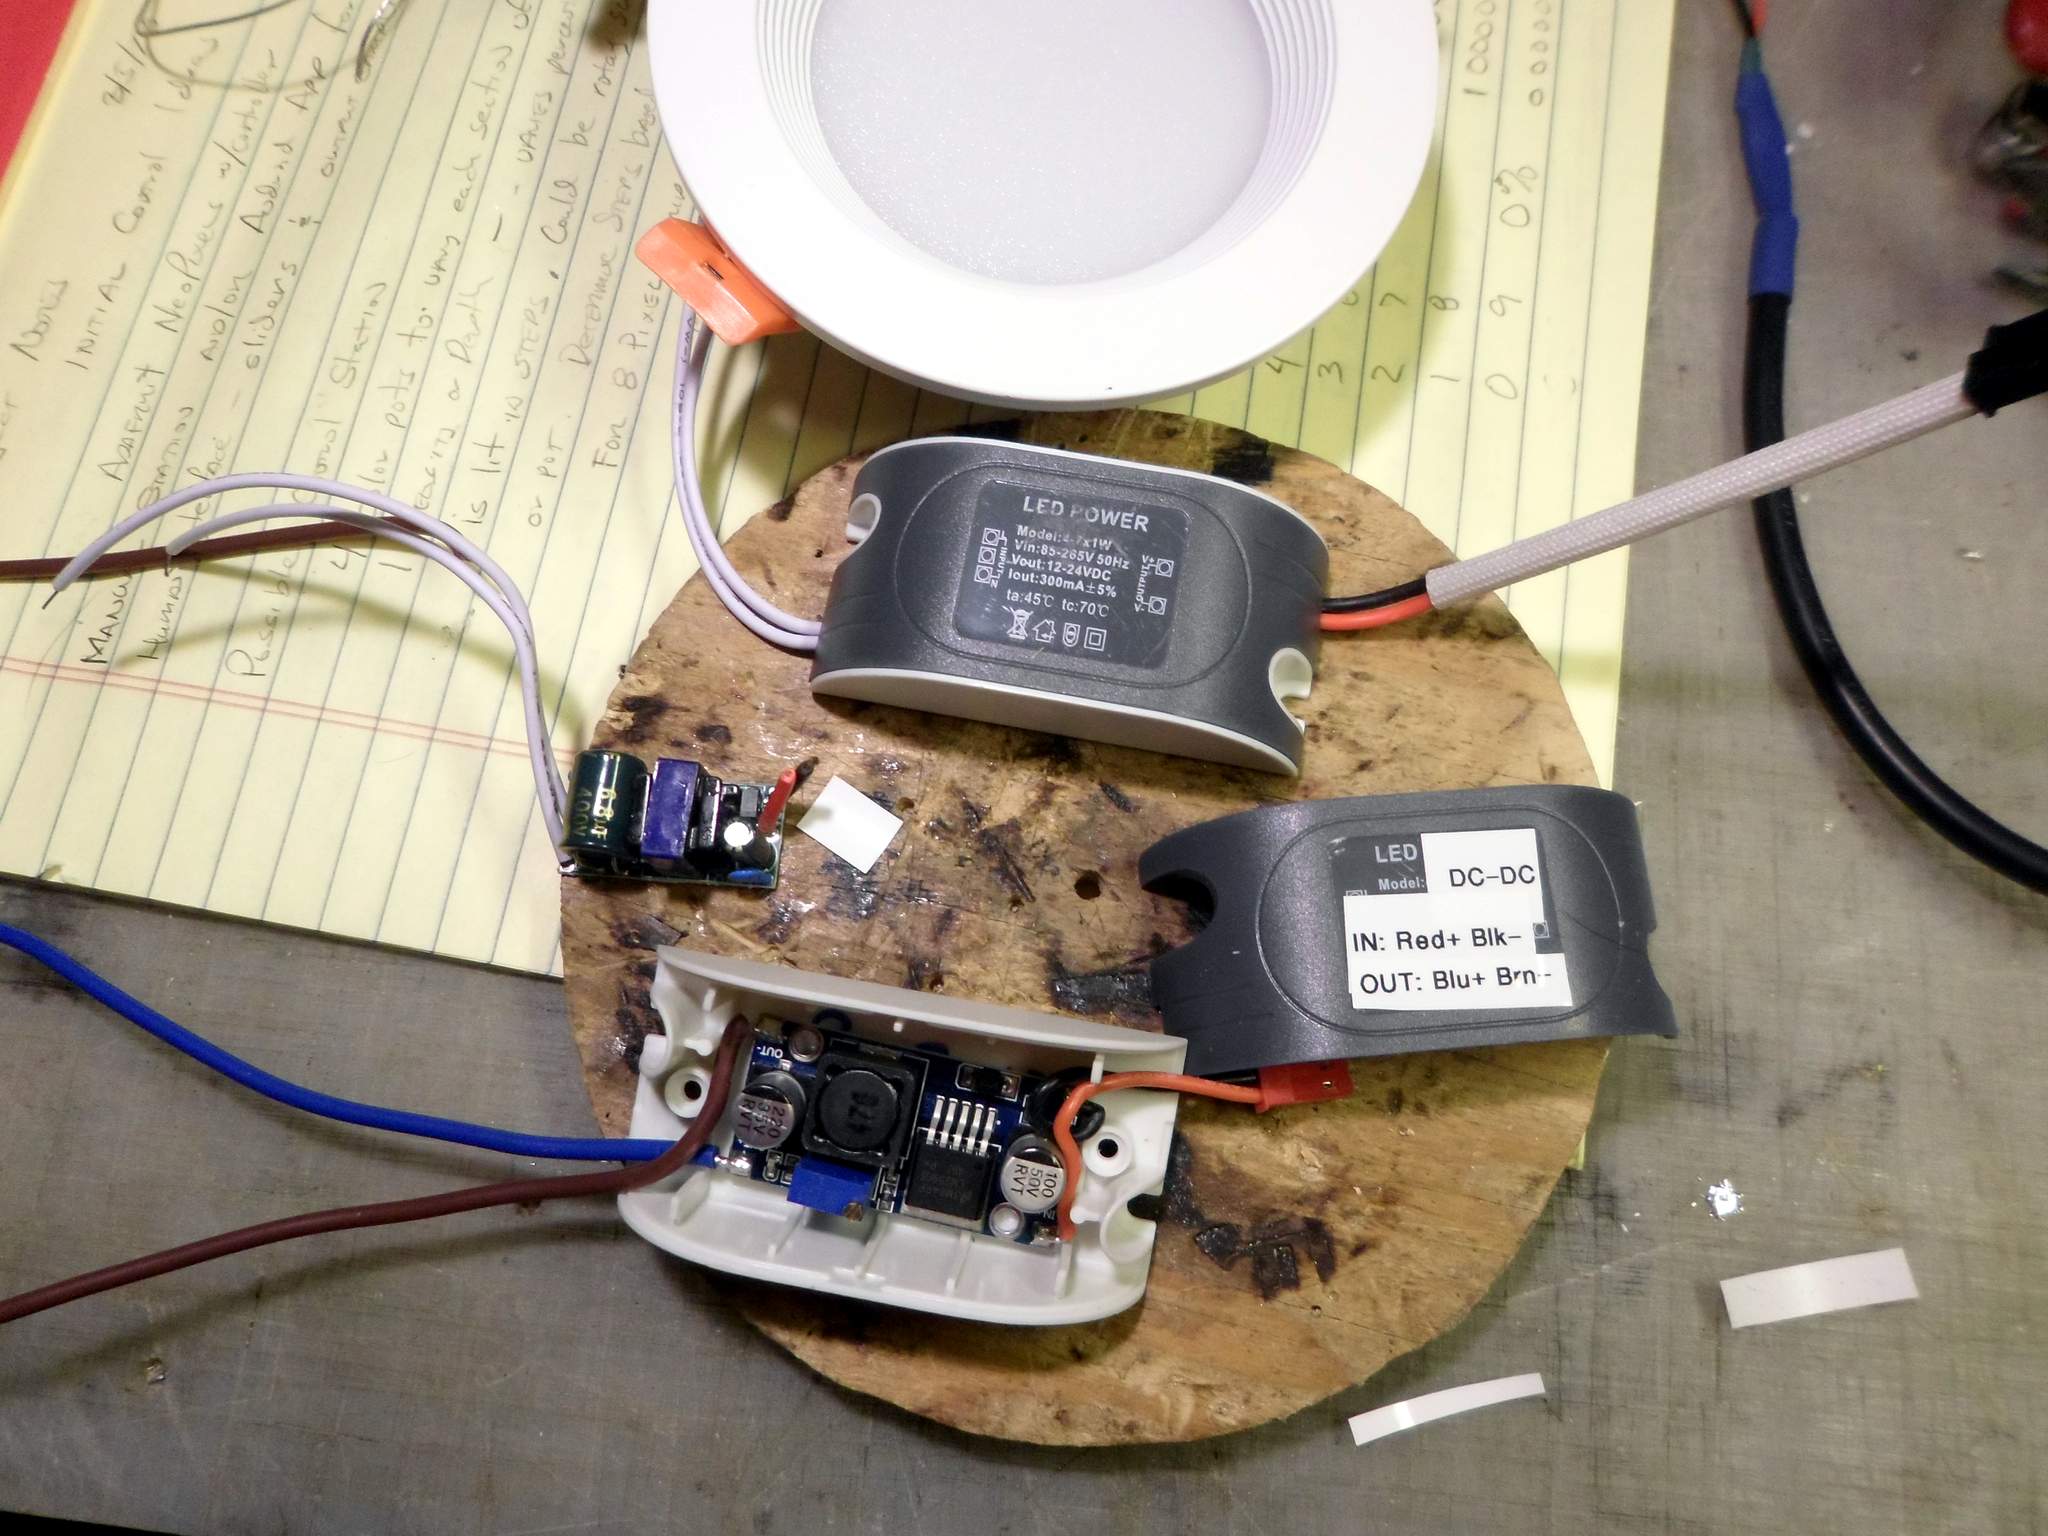
And here’s one wired up and set dim enough not to wash out the camera…

Installing all the components is a pretty big job that I’ll tackle on Saturday.
Well, after working on my house, I know for sure, that there are certain folks who should never touch electrical, or plumbing, or carpentry or…
First major home improvement thing I did to my house, was buy a bunch of junction boxes and wire nuts to safely enclose all the splices in the attic. It was scary!! I wonder why the home inspector didn’t see all the open splices…
Jon Radder said:
It is whatever it is. Capped back off and tucked away in a new grounded box.


I’ve been saying that there should be a competency test required to buy certain items from places like Lowes or Home Depot! Some of the things I’ve come across in my work just boggles my mind!
Steve
Steve, it didn’t boggle my mind, it scared the heck out of me.
I spent 12 hours yesterday playing amateur electrician. At least I have a fair knowledge of the electrical code and try and follow it. I decided to look for the other end of that wire in existing switch boxes. Sometimes ignorance is bliss. The main switch box was never converted from a utility box when the paneling was added. There are no mounts in the box for the switches so the owner used bailing wire to attach them. The box wasn’t properly trimmed out so there is flammable material just millimeters from a terminal. I didn’t want to derail my lighting project, so fixing that will need to wait a while.
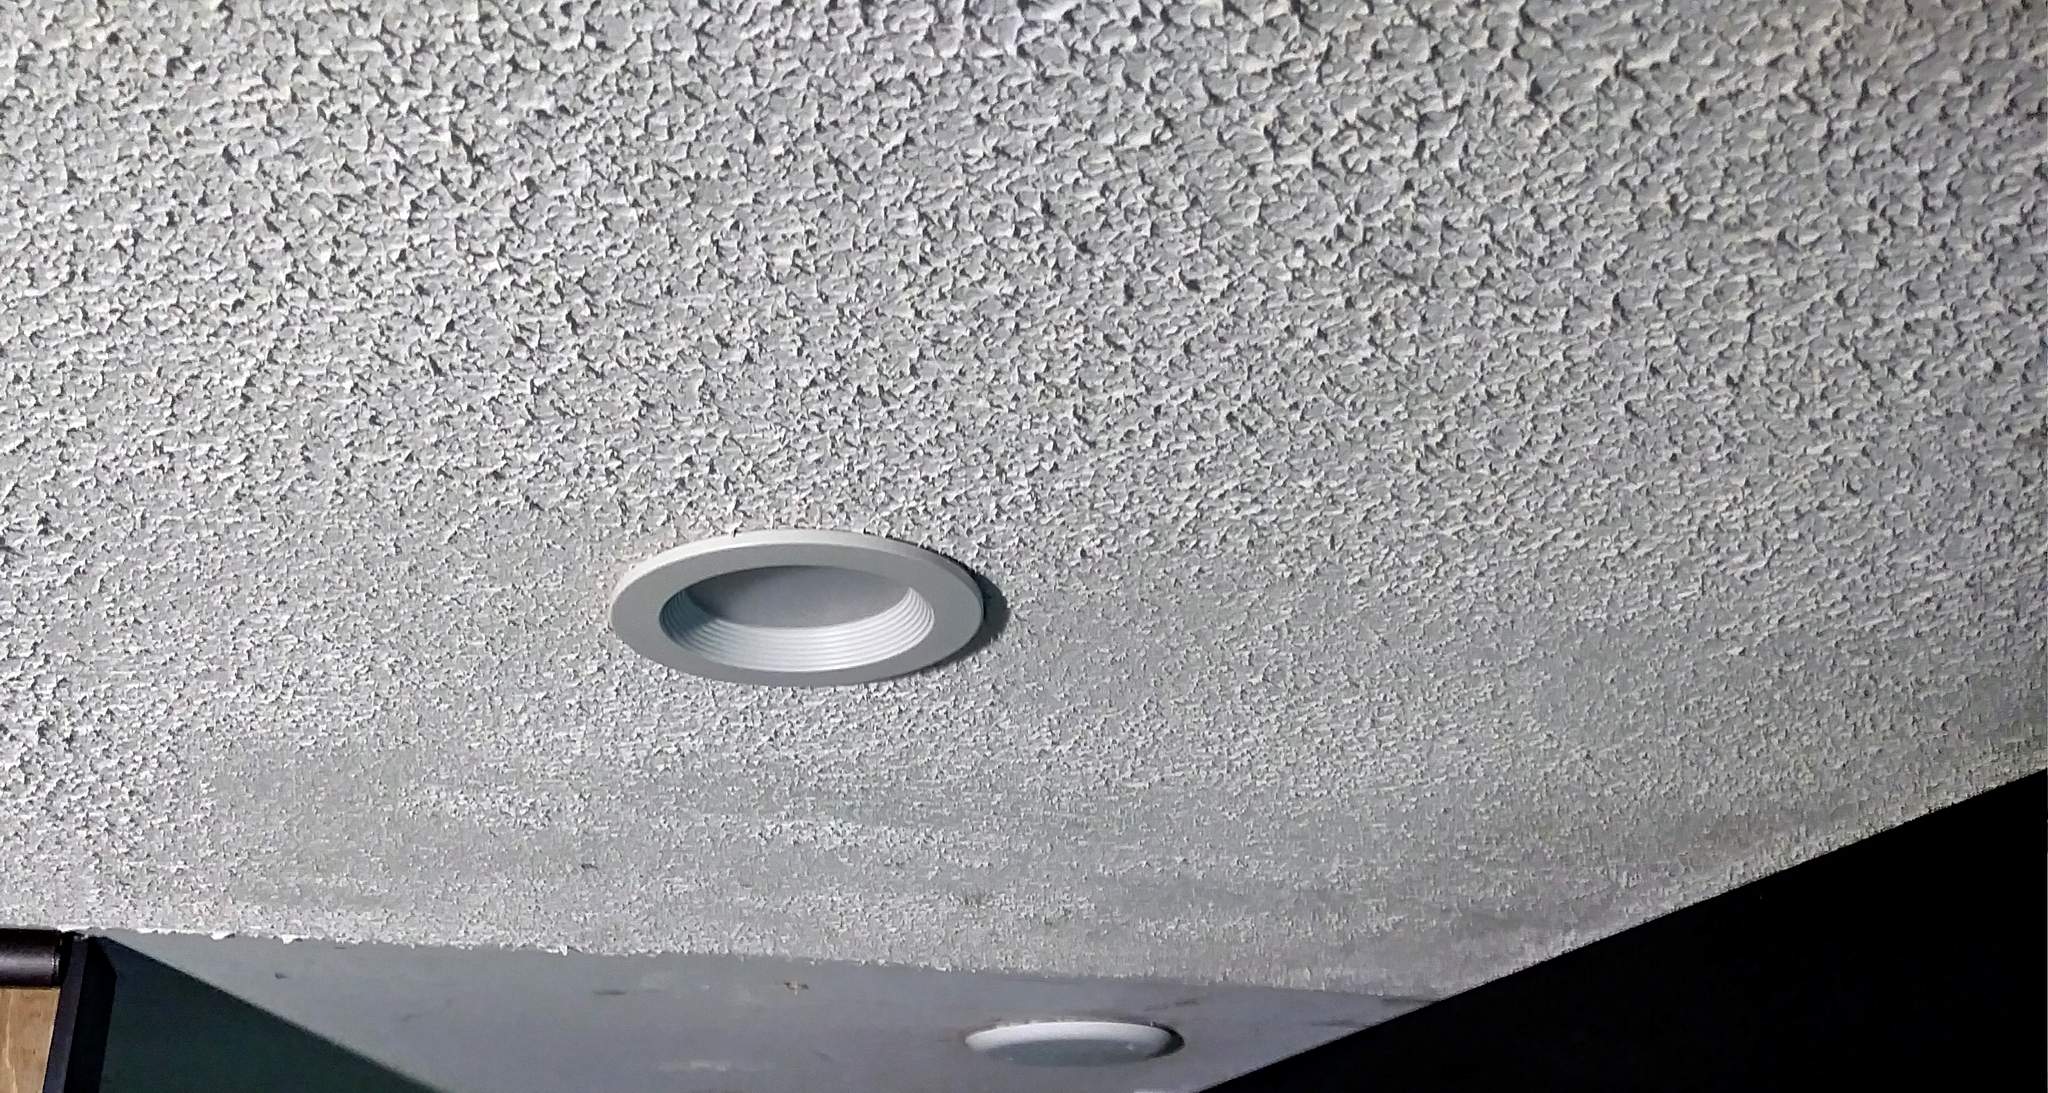
I managed to get all 4 of the low voltage LED fixtures installed and wired up. 3 were in drywall. One is in a panel that is mounted to ceiling joists while I decide on what I will do about the unfinished ceiling above the walkway. Took a few progress pics along the way…
At some point I need to continue that ceiling treatment beyond where the old wall was. I think it was done with drywall joint compound and a sponge or a long nap roller. I did something similar in the 70’s when finishing an attic at my parent’s house.
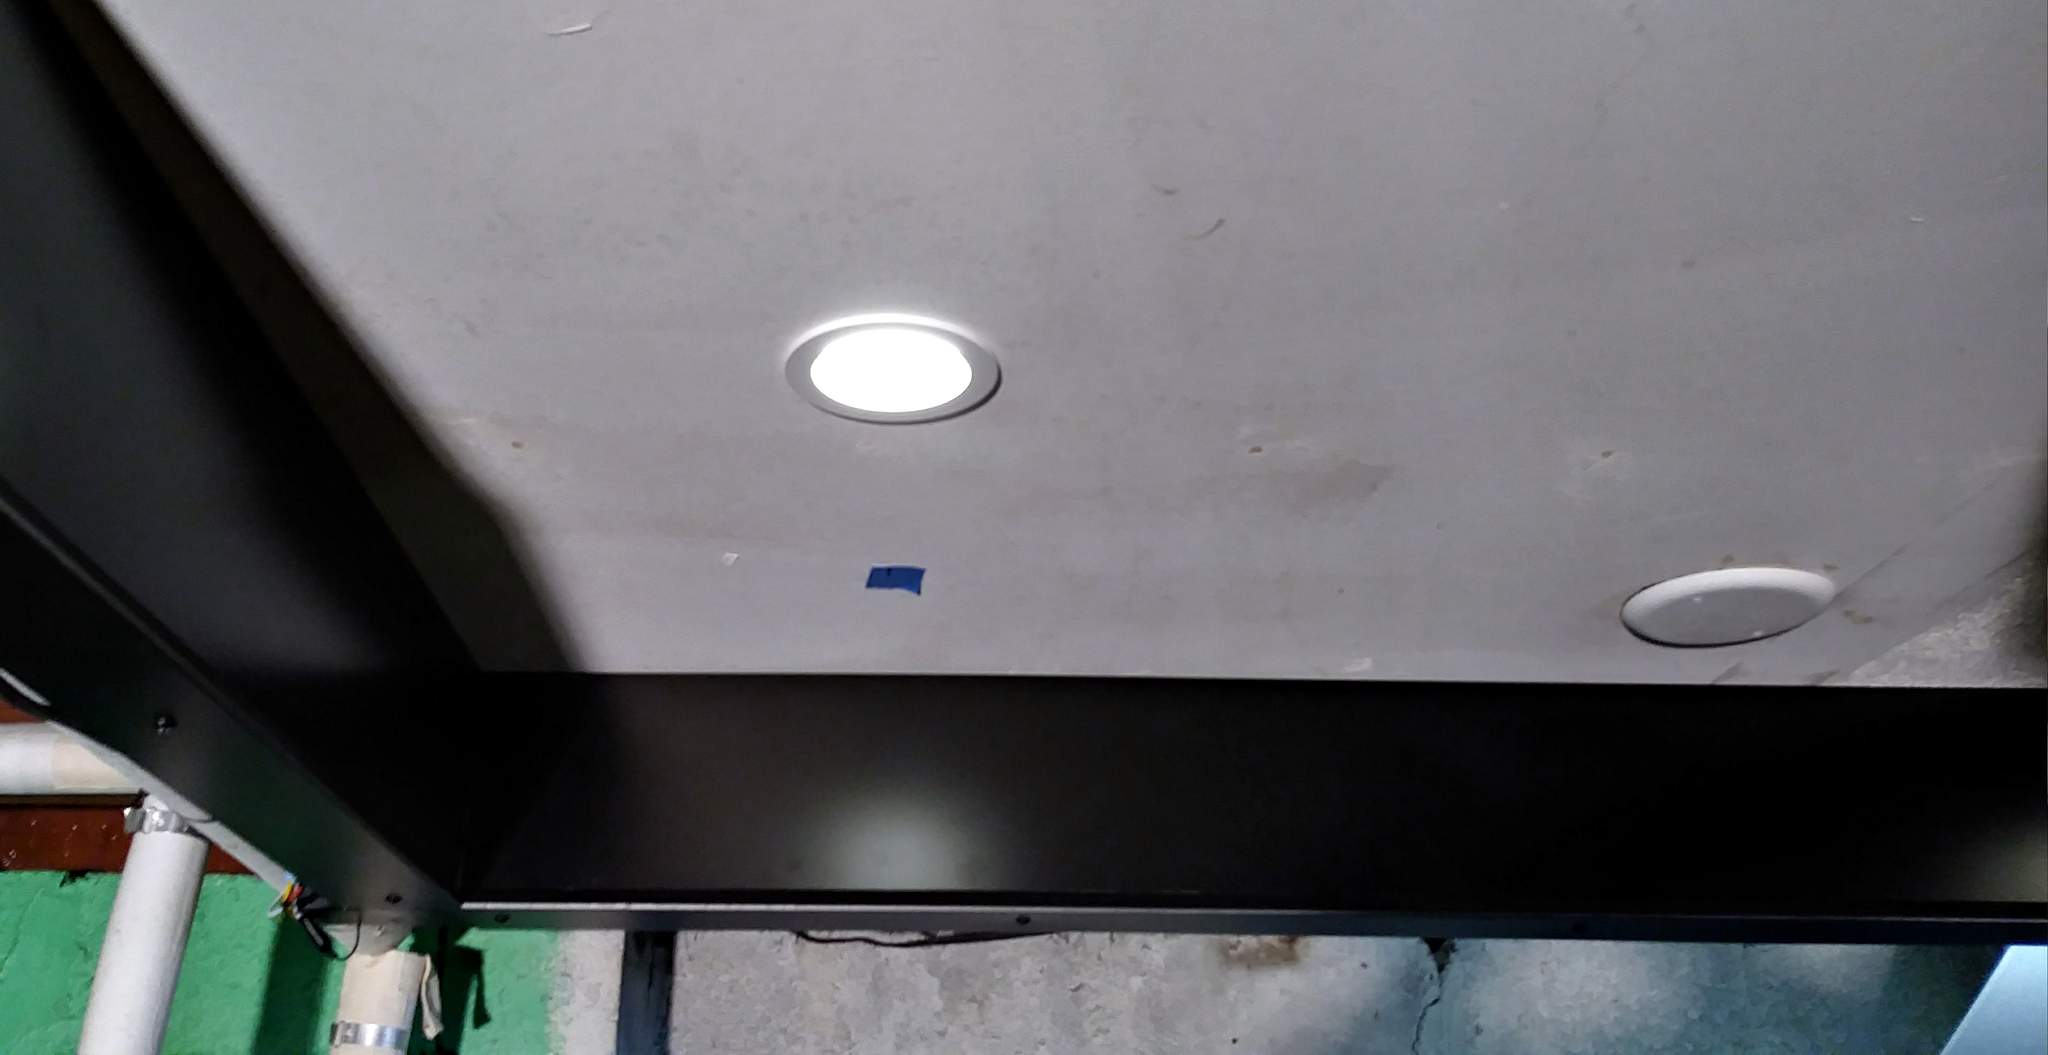
All lit up (https://www.largescalecentral.com/externals/tinymce/plugins/emoticons/img/smiley-cool.gif)

Finished up the power station area. This is what it looked like before with everything running off an extension cord plugged in to a ceiling bulb adapter…
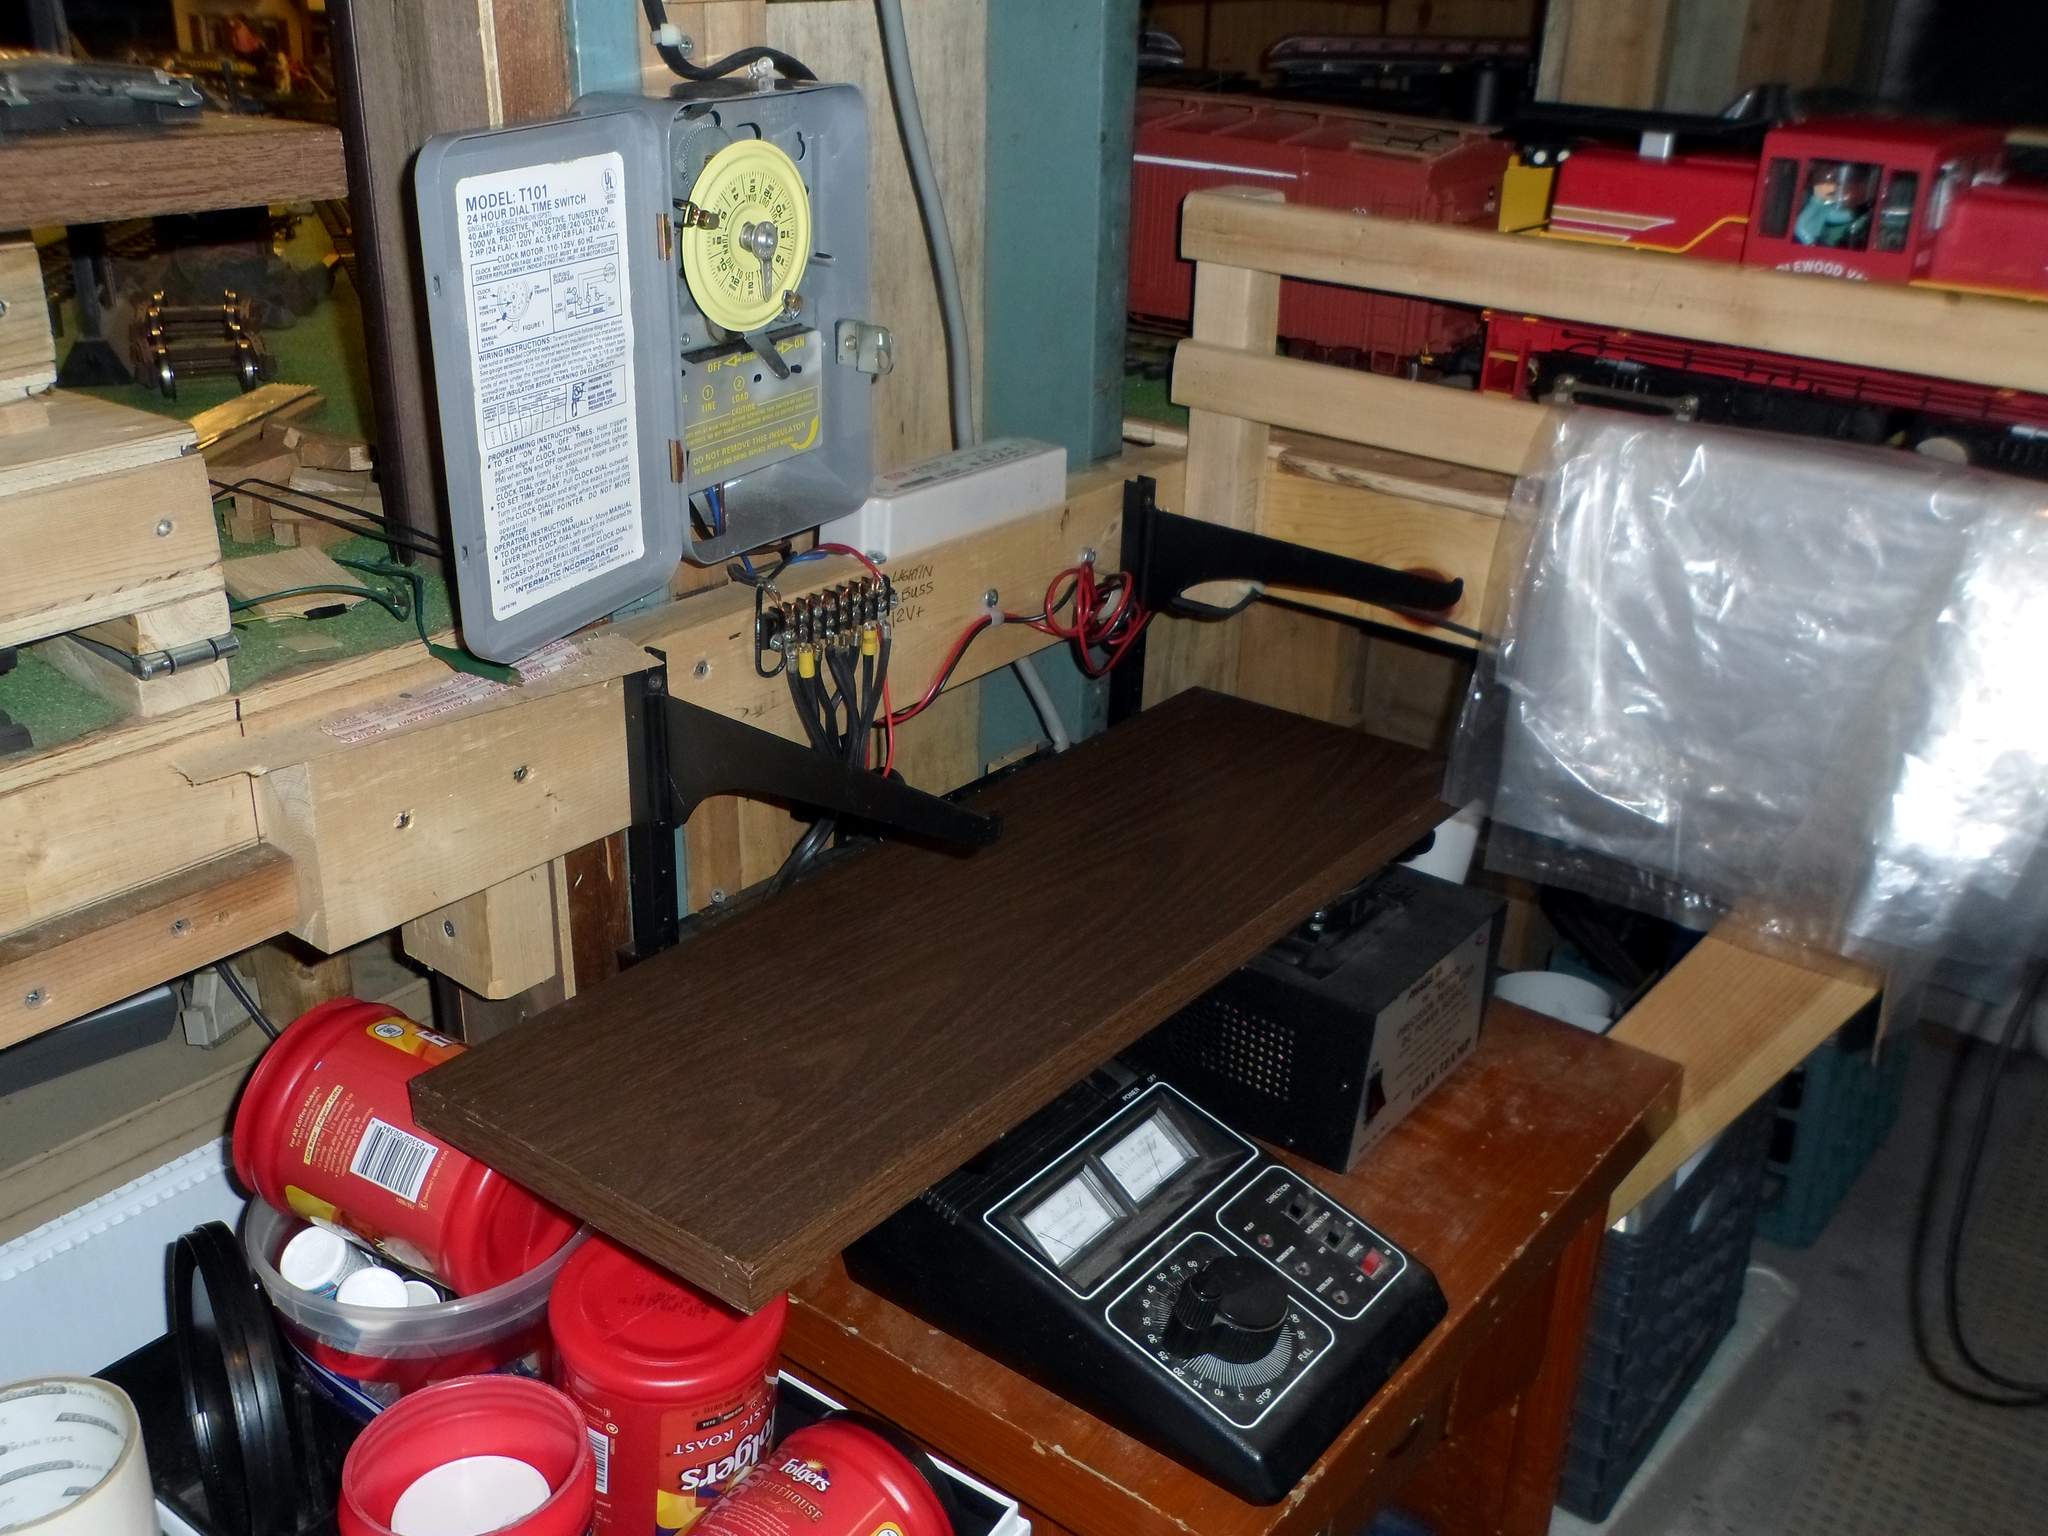
That ceiling box went away, replaced by a new junction box and a utility outlet. Down here at the power station a new quad outlet was added as well as a switch for the low voltage down lights. The timer is also hard wired now…
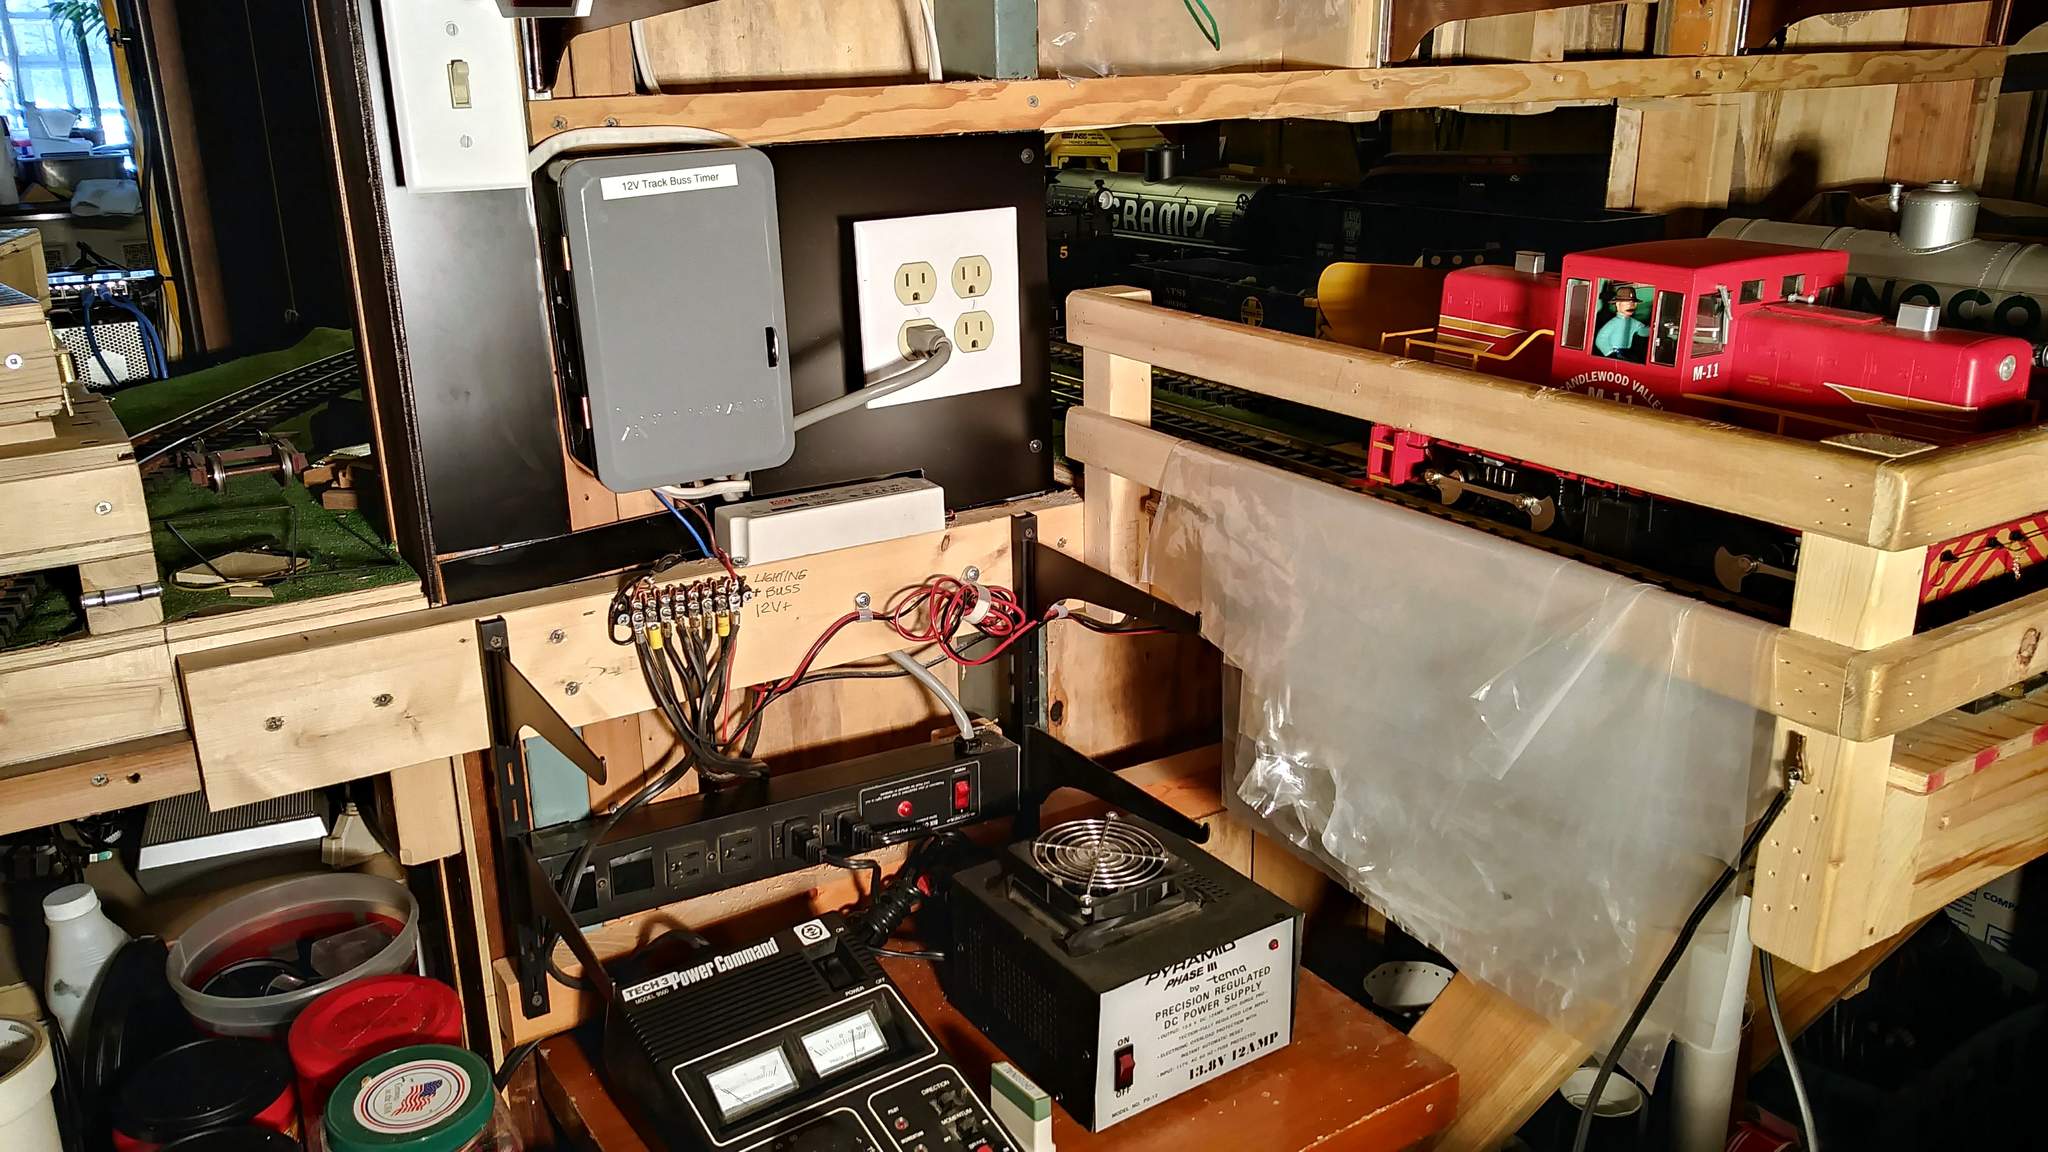
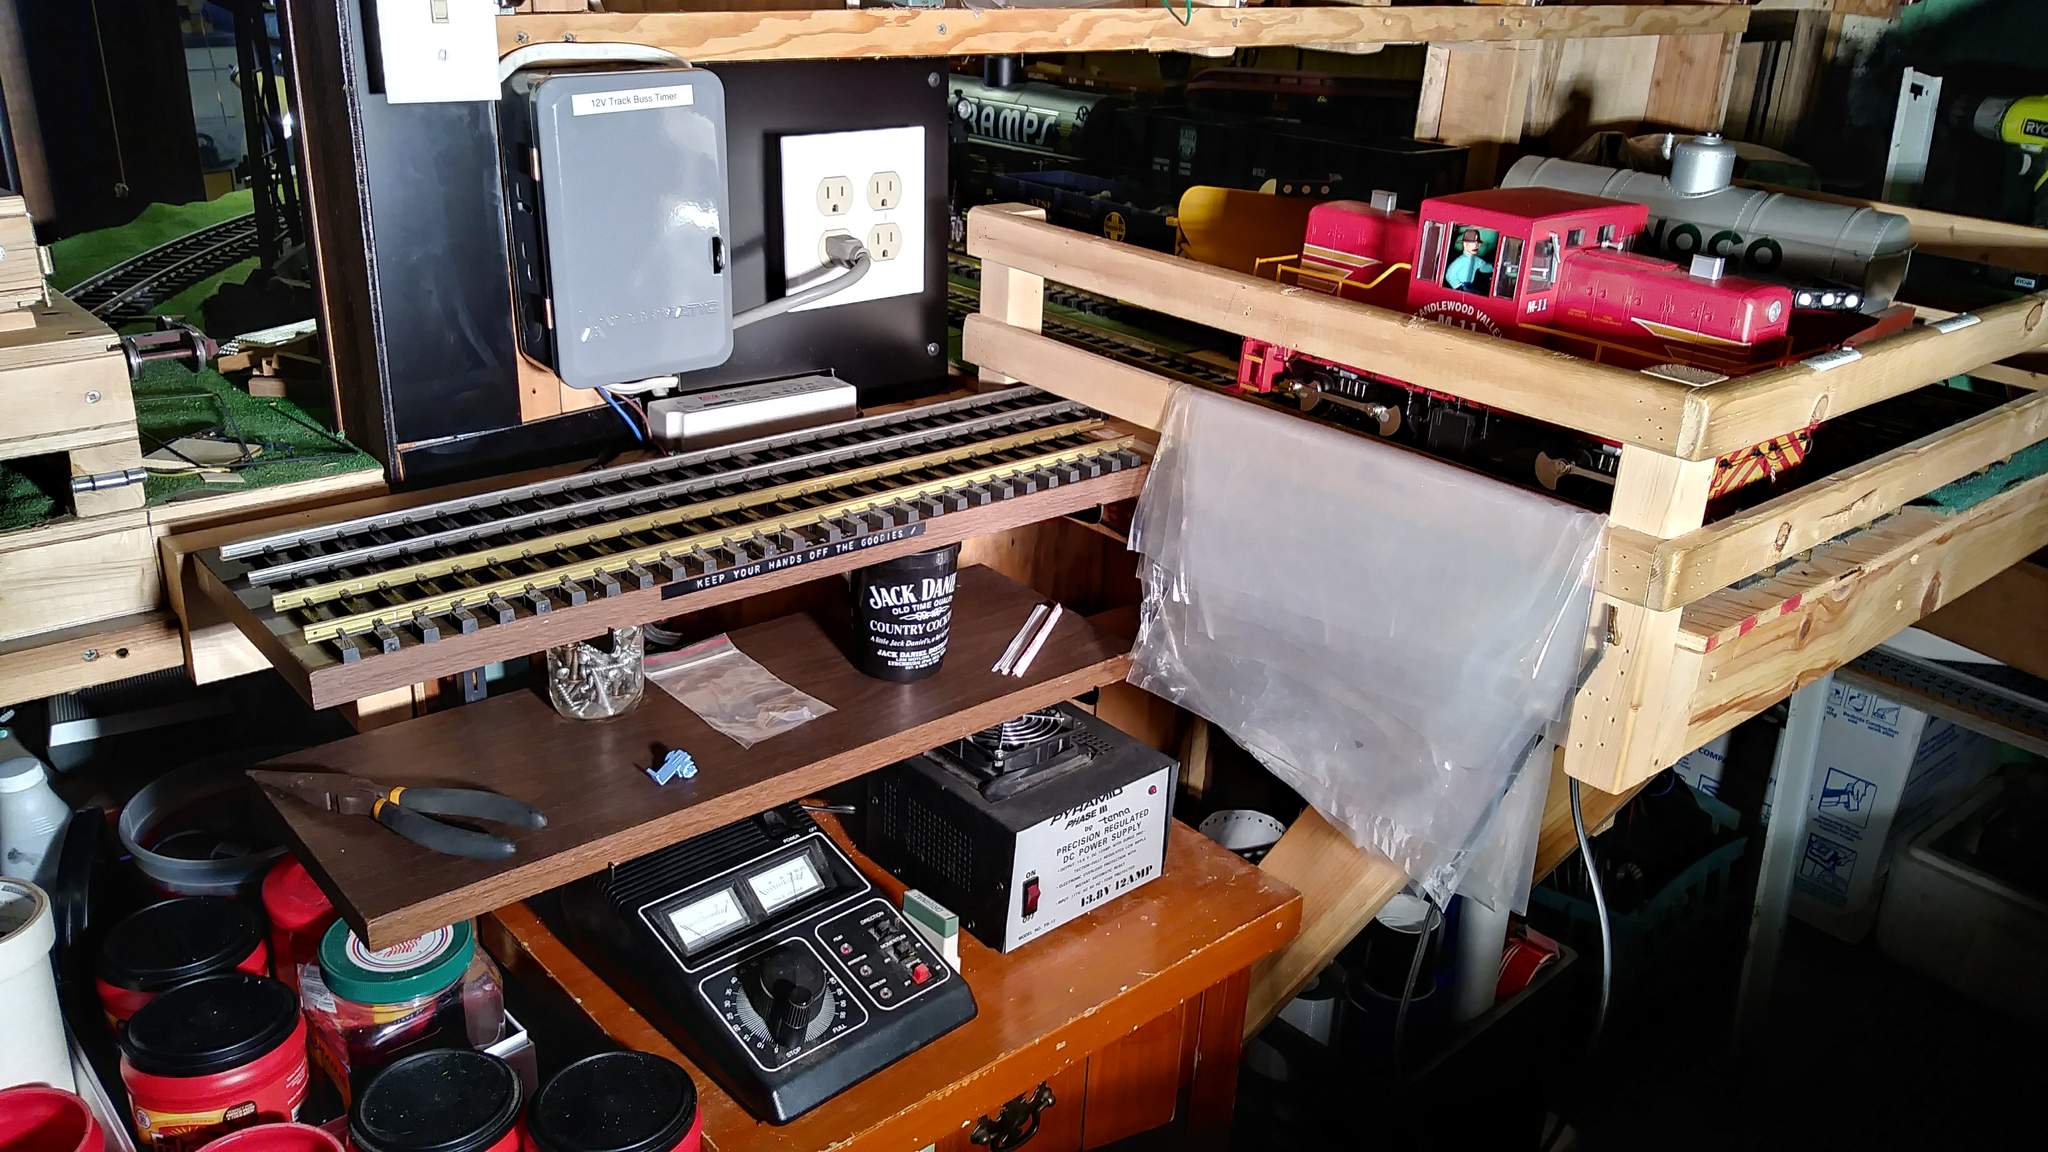
And with the shelves put back, what it looks like when not being serviced…
I’m almost done playing electrician which is good because I’m itching to get back to scenery.