Ivory sockets and a white faceplate? Ahh… sorry, that’s rivet counting ha ha!
Yes looks like we will not lose you due to electrocution!
Greg
Ivory sockets and a white faceplate? Ahh… sorry, that’s rivet counting ha ha!
Yes looks like we will not lose you due to electrocution!
Greg
Greg Elmassian said:
Ivory sockets and a white faceplate? Ahh… sorry, that’s rivet counting ha ha!
Did that intentionally, just to piss you off Greg.
I have to keep my hands off the goodies? then what’s the point??
Jon Radder said:
Greg Elmassian said:
Ivory sockets and a white faceplate? Ahh… sorry, that’s rivet counting ha ha!
Did that intentionally, just to piss you off Greg.
Now you are stepping on my toes as I thought that was my job!!
Rooster : has reread his LSC contract TWICE and confirms his findings
Just yanking your chain in fun Jon…
Looks much safer now.
Greg
David Maynard said:
I have to keep my hands off the goodies? then what’s the point??
That goes WAY back. That shelf came out of my Mother-In-Law’s estate. The Dymo label was applied somewhere around 1984 when my Brother-in-lay set up an ham radio antennae tuner for my Father-in-law. He wasn’t supposed to ouch the knobs on the tuner; just turn on the transmitter and broadcast. Brings back a lot of great memories of the three of us chain smoking Marlboro’s and talking around the world on 80 watts. That’s why it stays.
Thanks for noticing (https://www.largescalecentral.com/externals/tinymce/plugins/emoticons/img/smiley-smile.gif)
Ah, nostalgia. I understand.
And some folks just have to turn knobs when the see them, I understand that too.
Greg Elmassian said:
Just yanking your chain in fun Jon…
Looks much safer now.
Greg
'sOK. I was just yanking back. My entire house is Almond and I had those duplex outlets and switch and switch plate in stock. I bough the quad plate new. Lowes and Home Depot no longer stock anything other than Brown and White. I was thinking of painting the white ones black so all you see is the outlet itself, but then again this is a really behind the scenes spot, so worrying about aesthetics on this little spot is on the bottom of the to-do list.
I (personally) think it looks more Ecu and not almond to me and I wasn’t yanking anyone’s chain. I think they actually make a stippling mop for the ceiling Jon but not sure.
Snow day today, got the last down light installed. I’m pretty happy with the color. Part of the job was to clean up the joists and neaten up old wring runs. I may just leave the framing exposed. I’m experimenting with some led up lights hidden out of view. With everything on…

This might be it for Winter '17/'18.
Jon,
That really looks good! Thanks for sharing.
OK. Second attempt at this post. I just lost an almost completed post by accidentally closing the browser tab when I meant to switch tabs 
It’s been a while since I’ve updated this post, but I haven’t been slacking. I’ve been busy nearly every evening and all day on weekends getting this project closer to done. Recent work includes stripping the floor joists (above) of nails and misc. junk and relocating a 220V cable that feeds the kitchen range to get it out of the way. I wasn’t happy with fixed brightness for the walkway overhead lights so I changed from a fixed voltage control to an adjustable PWM LED Dimmer. It works well, but must have a very low PWM frequency because there is very noticeable flicker at low brightness settings. The solution was to add a selector switch and use the PWM dimmer for medium to bright settings and the fixed voltage DC-DC converter for the “dim” setting I will use for night mode.
With those projects complete I moved on to finishing the valance to the North end. Of course my framing nailer decided to quit in the middle of the job, so I had to tear it apart to grease the seals in the high pressure valve. It took a few attempts, but I fixed it and finished the framing. Yesterday I added the finish composite panels and aluminum trim. I also started experimenting with ceiling treatment. Originally I was planning to leave the joists exposed, but decided to try some of the lightweight white panels. Happy with the look, I installed about 8 feet at the South end. They are supported by a slot in the valence framing and rest by gravity on top of the duct work with a little PVC trim to level them. Joints between panels are aluminum strips screwed into the joists. The panels can be removed for access to the floor above if needed in the future.
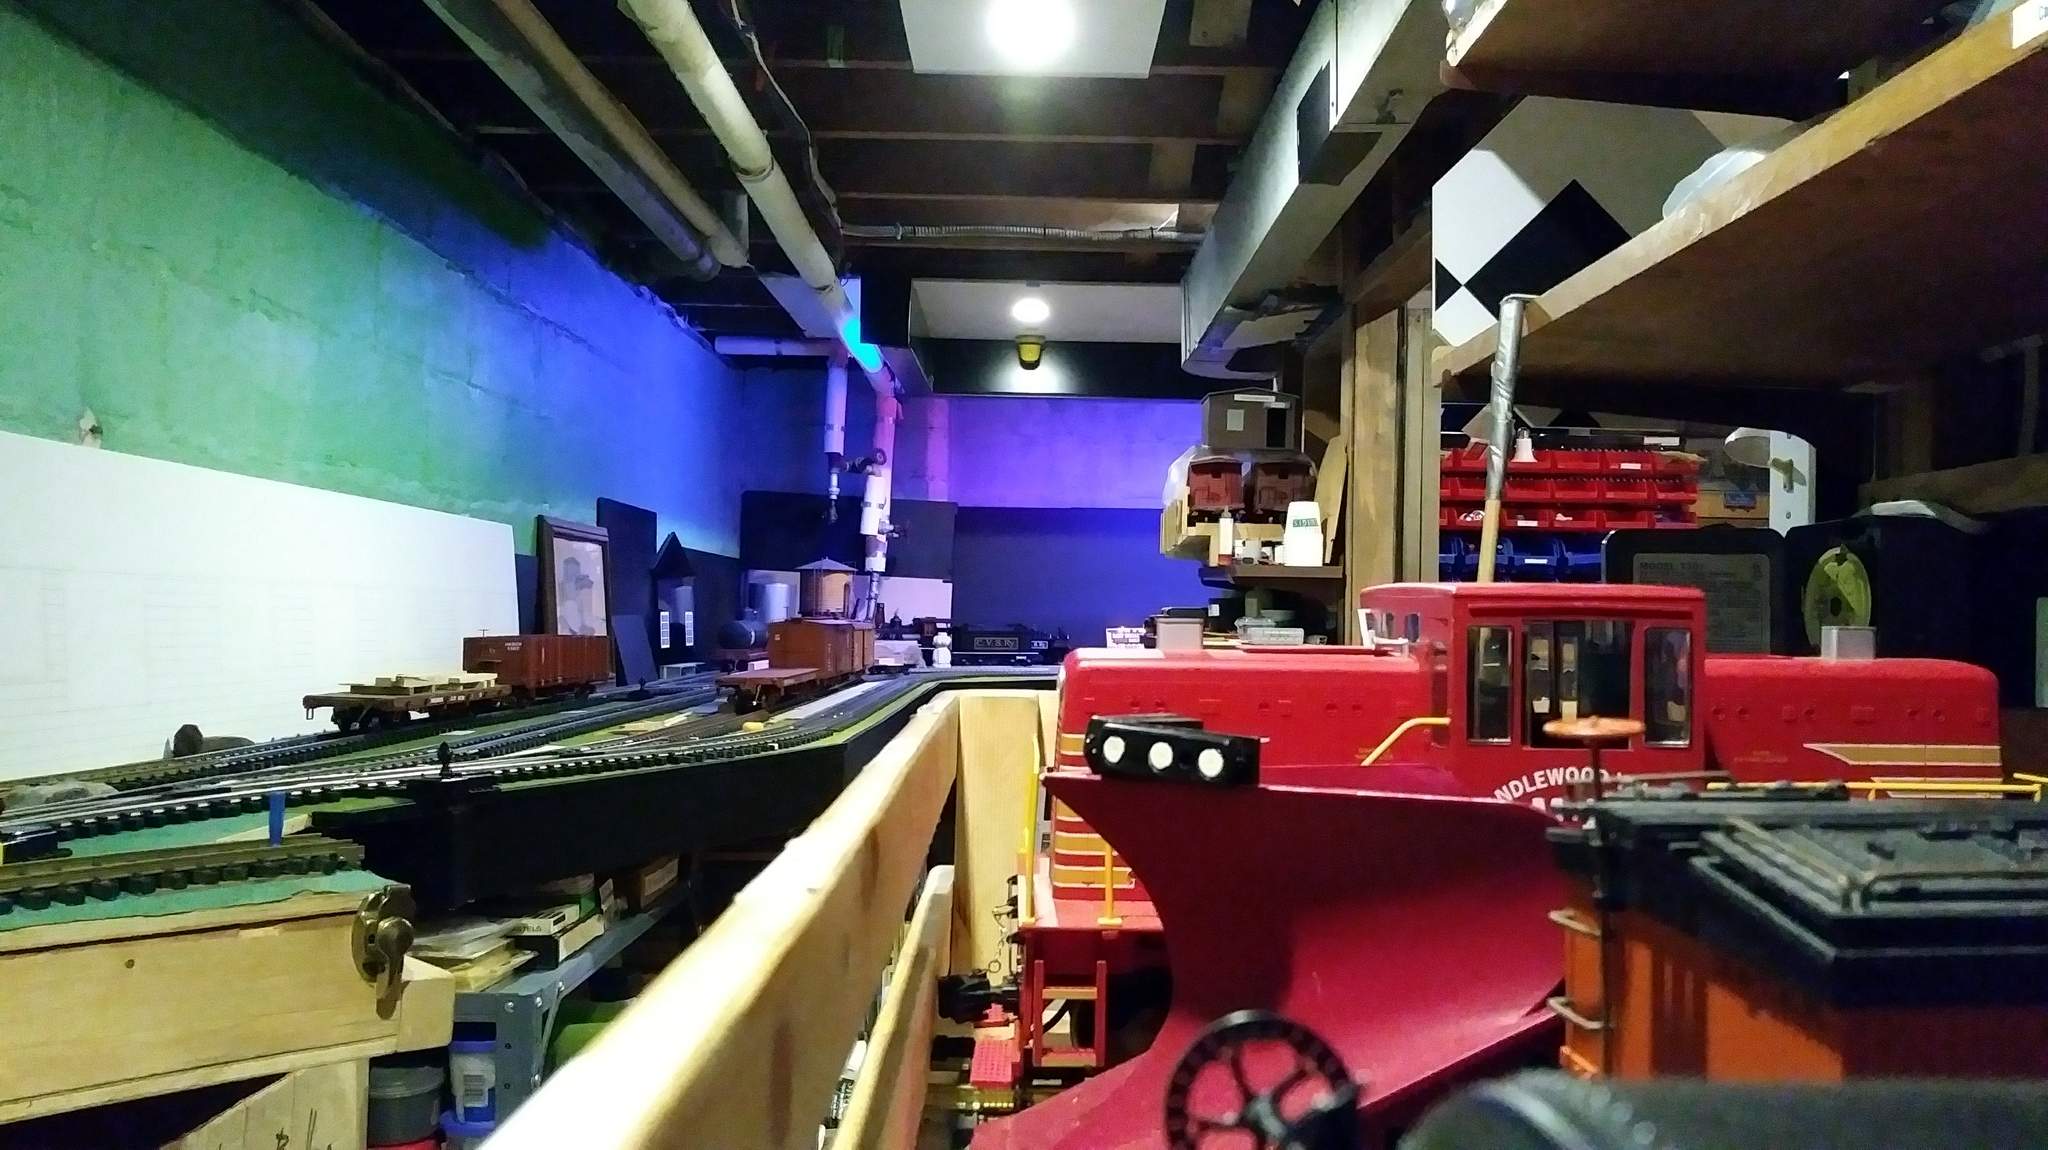
Photos are quick cell-phone grabs. Some of the aluminum scrap I had for the trim was gloss rather than matte finish. I’m not liking the reflections so it will be taken down and sprayed with matte clear once the weather warms up. Here is a view looking South. New valence on the left, duct work on the right, new ceiling panels at the top center. The third panel is existing drywall…
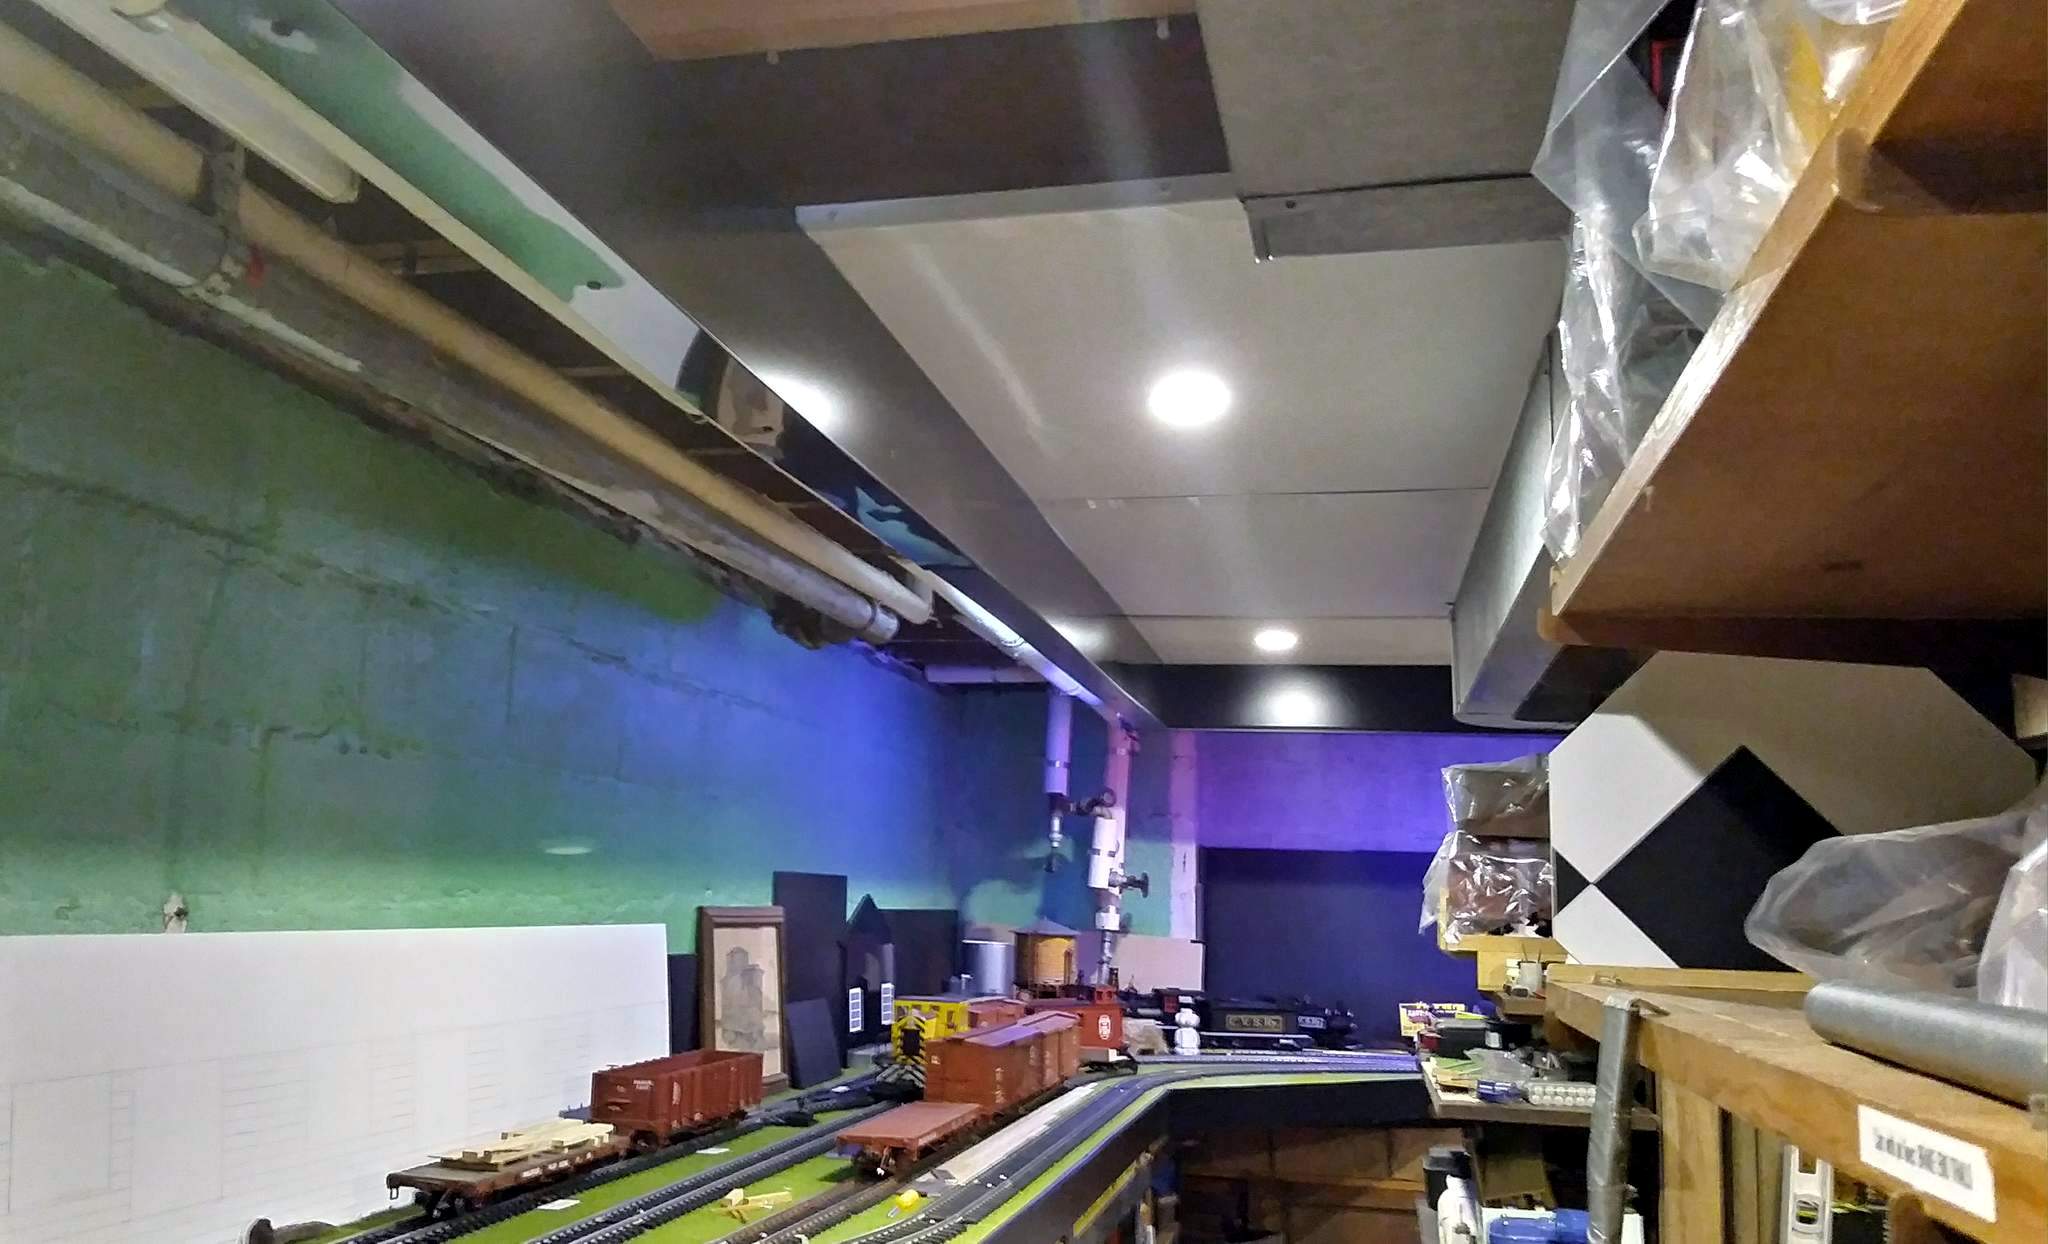
Looking North at the ceiling panel / valence joint. Not bad for an amateur (https://www.largescalecentral.com/externals/tinymce/plugins/emoticons/img/smiley-surprised.gif)The heat duct at left will eventually be boxed in with the black composite panels as scrap becomes available…
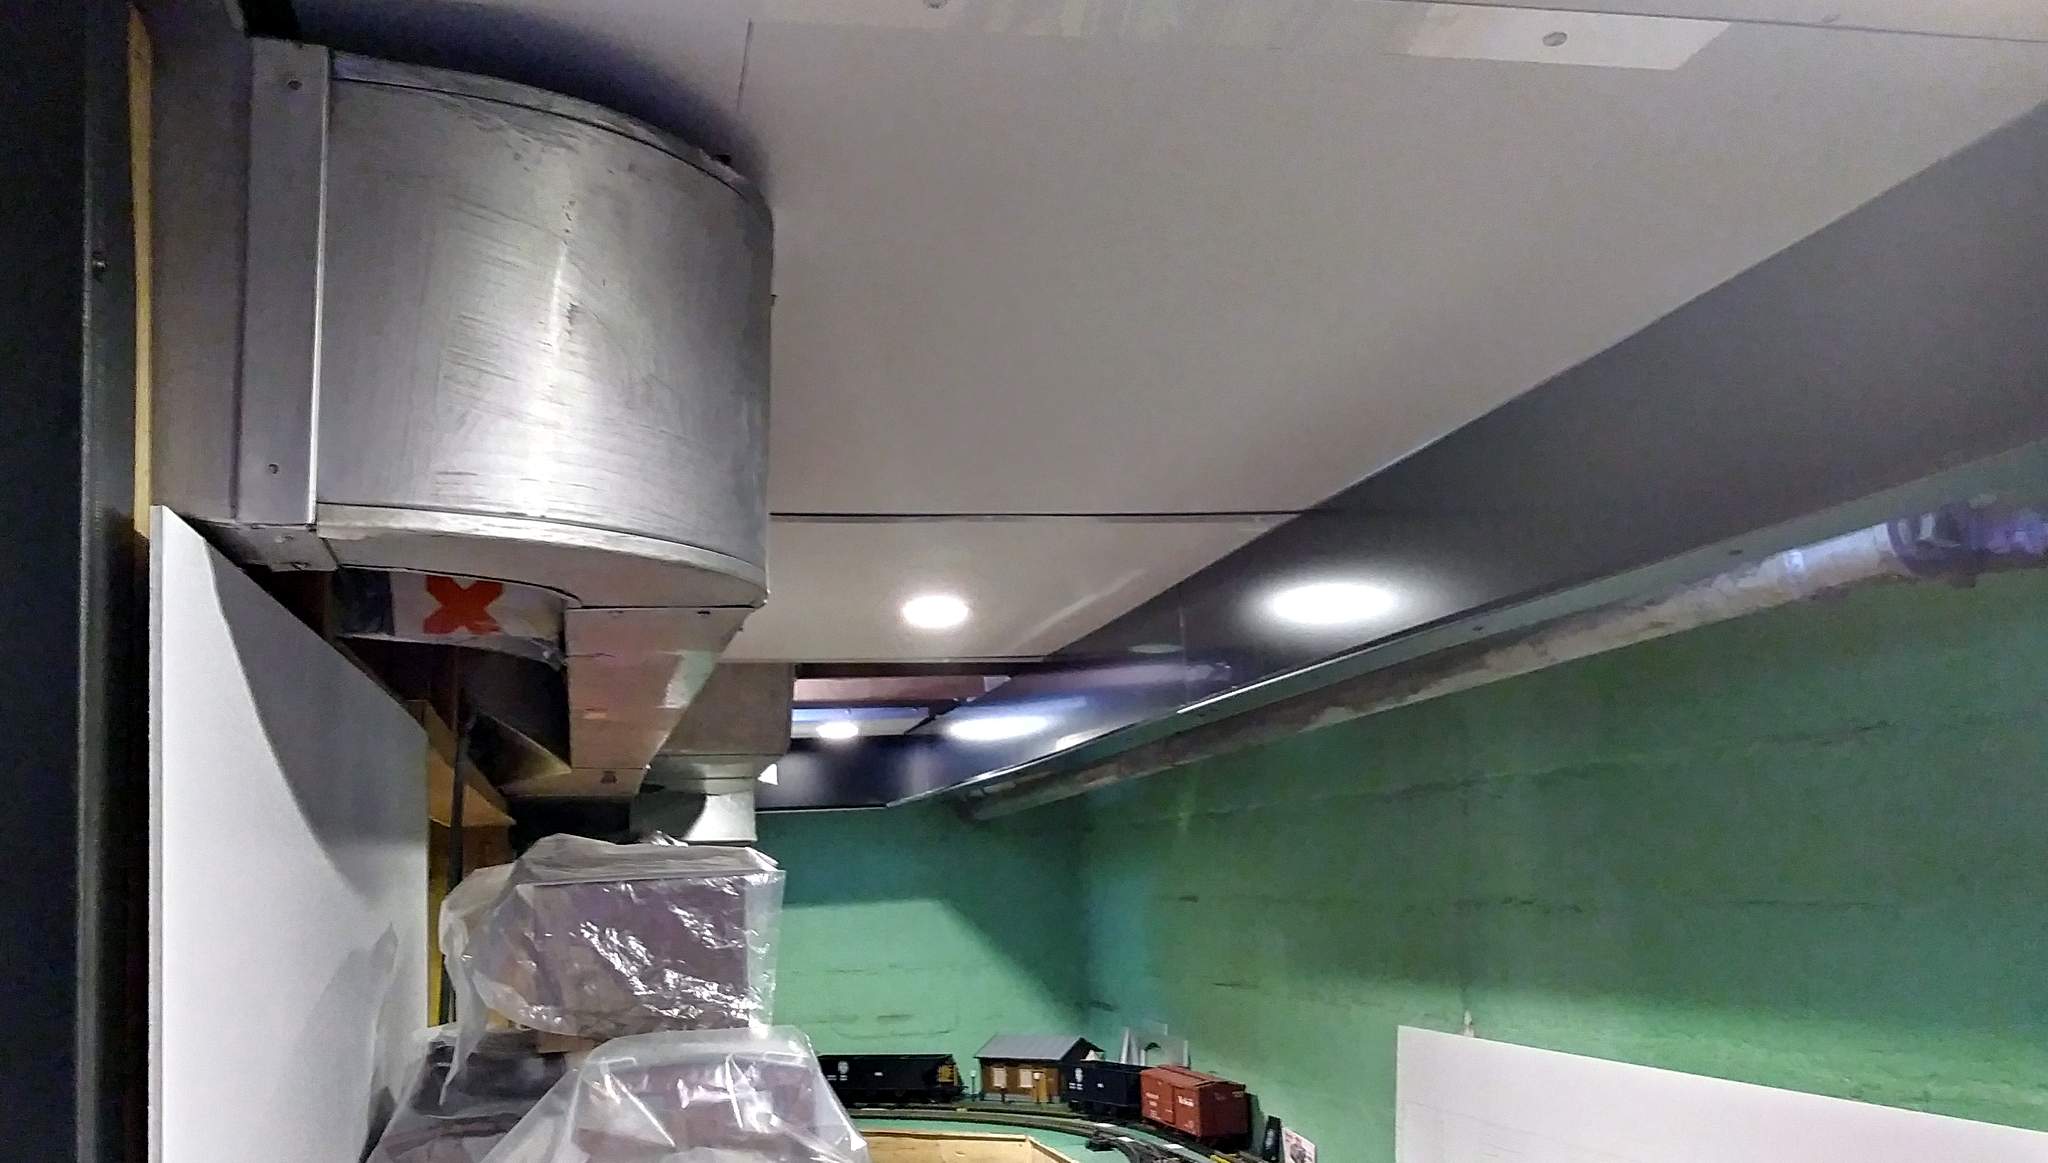
A closer look. You can detect a little light leakage at right where some bright white LEDs are mounted in the framing of the valence. Eventually they will be controlled with the RGB lighting…
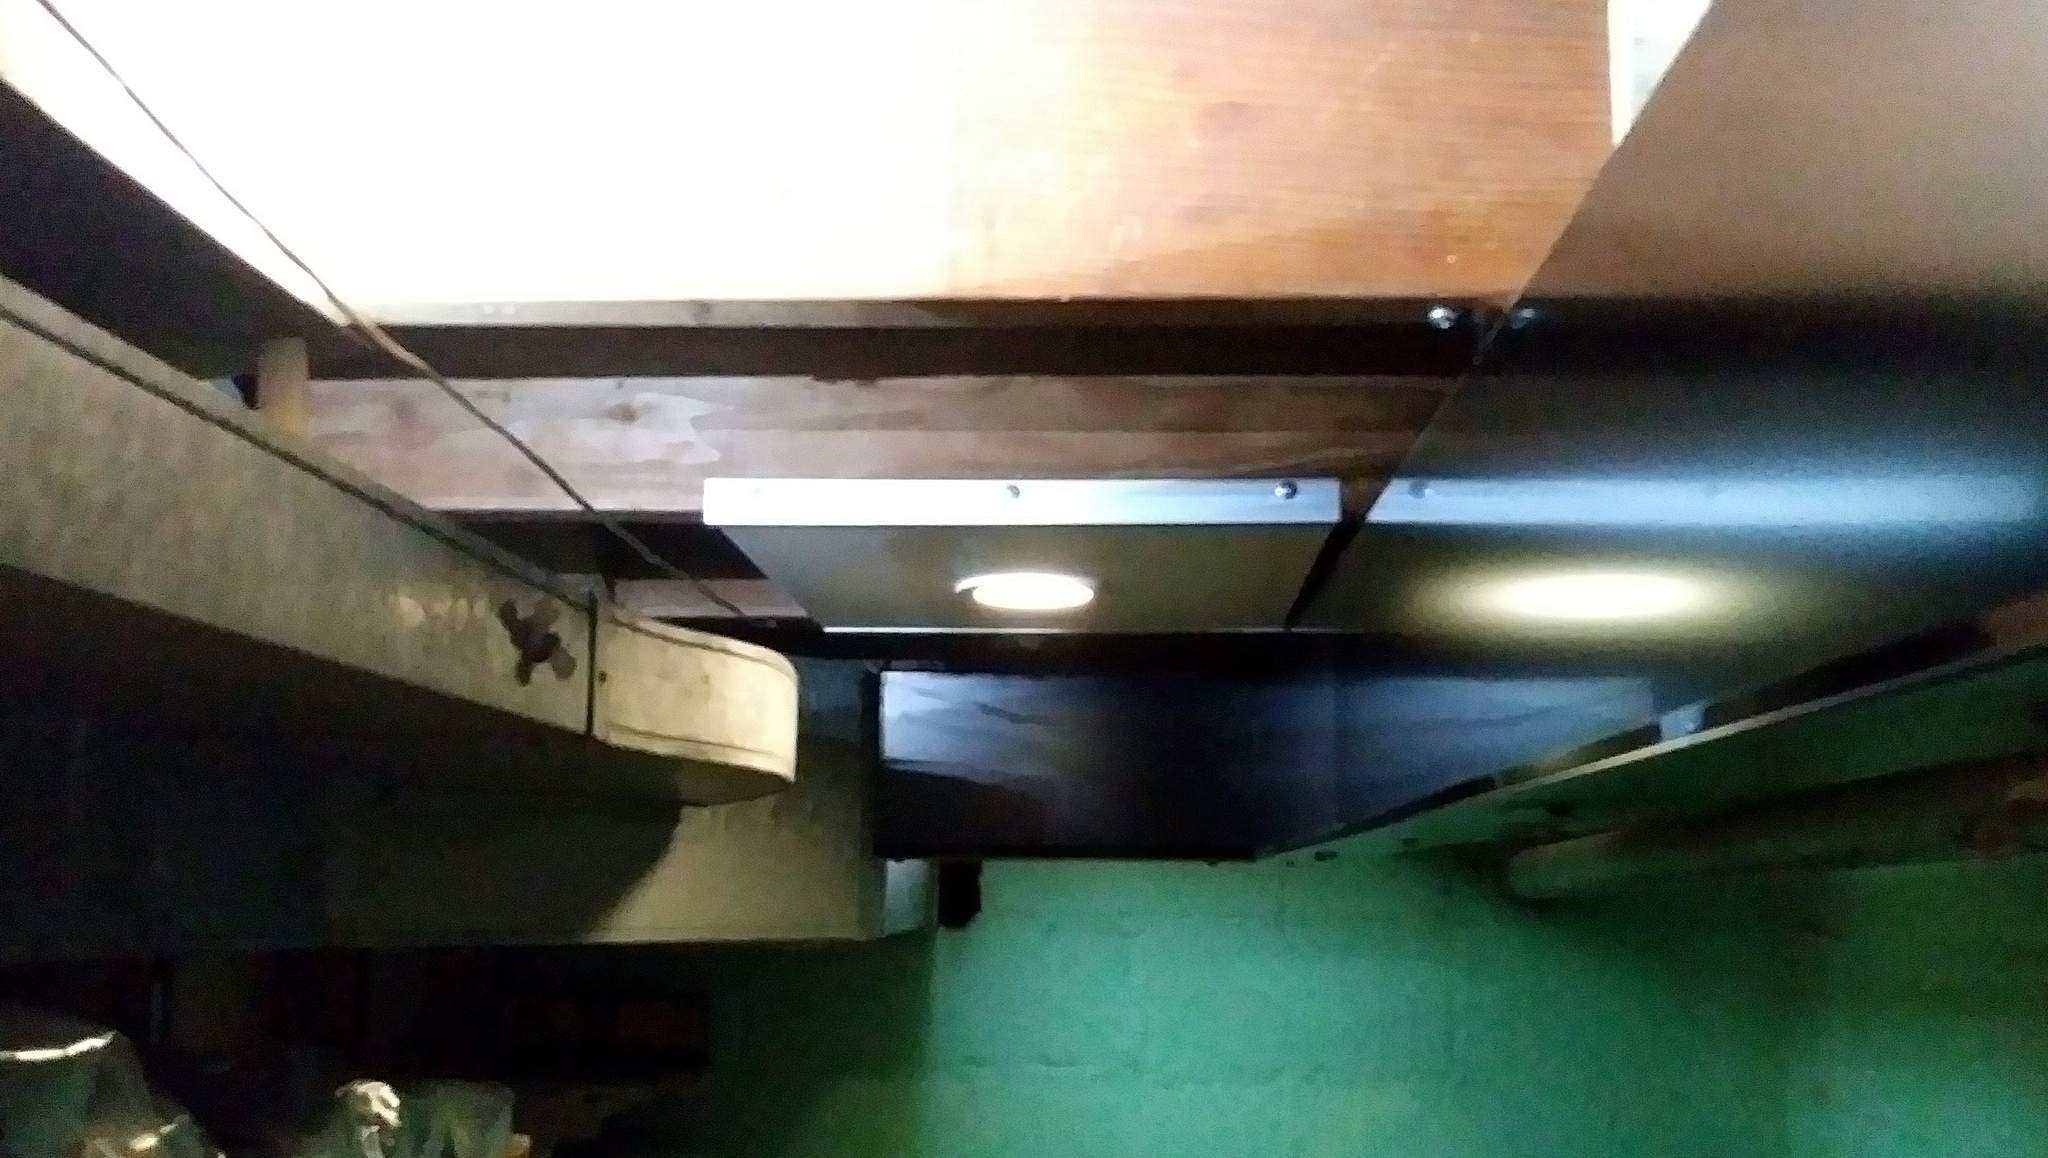
And finally, a closer look at the South end. The lightweight panels will cover these joists too some day…
I’ve decided to go with a WiFi based LED control system and 5050 LED strips for the mood lighting on the back side of the valence. I can’t believe how cheap the systems are. I was going to roll my own with Neopixels and a micro controller, but I’d be hard pressed to come up with something better than I can buy RTR for under $40 complete.
The lighting changes the whole look of the layout… Looks good…
yea, what whatsisname said…(https://www.largescalecentral.com/externals/tinymce/plugins/emoticons/img/smiley-cool.gif)
Sure is going to be a lot fancier place for an indoor layout than mine will be!
Doug Arnold said:
Sure is going to be a lot fancier place for an indoor layout than mine will be!
Not so sure about that Doug. I’m intentionally not showing the floor (https://www.largescalecentral.com/externals/tinymce/plugins/emoticons/img/smiley-surprised.gif)
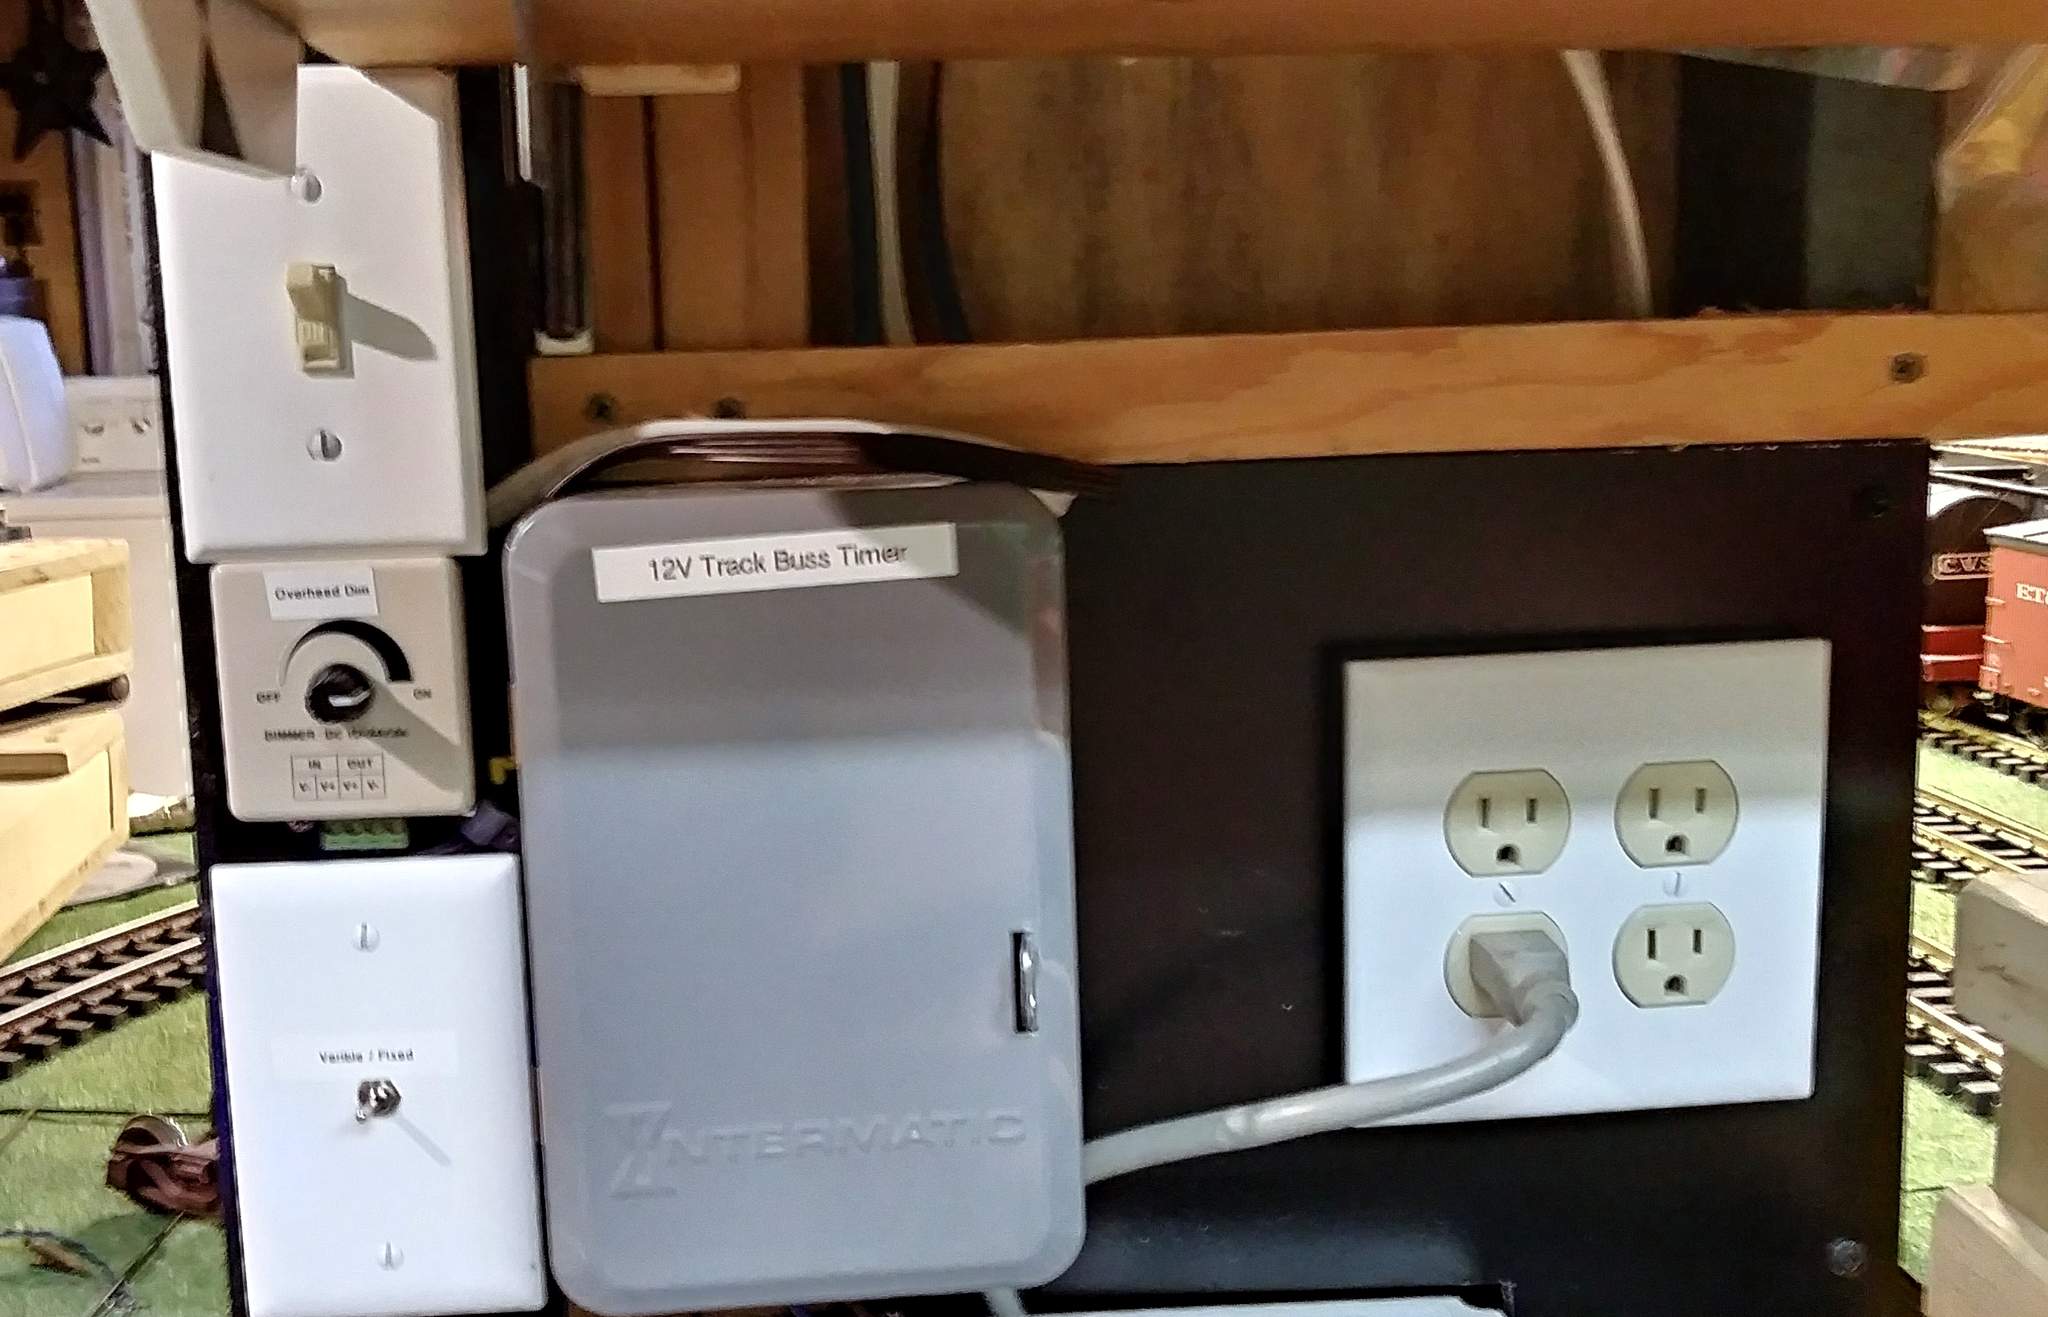
Forgot to add a picture of the updated lighting control center. The light switch controls AC power to the 24V supply plus a switched outlet in the ceiling. 24V feeds the bottom switch which selects feed voltage to either the dimmer in the center, or a DC-DC converter inside the bottom switch box. Outputs of both devices feed the LED down lights. Since I added the switch I’m much happier with the flicker free fixed dim setting. It may be my imagination, but since the DC-DC converter was added I don’t think the PWM dimmer is working as well as it did. I’m suspecting some feedback or interference from the output side of the DC-DC converter, so I’m going to add some diodes to isolate the outputs.
Its like Dr. Frankenstien’s Lab - “its alive!” Should have named the new pup “Igor”

It’s been a while since I’ve updated this post. I pulled the trigger on a 15 foot dual strip of 5050 LEDS. One row of warm white and one row of RGB. Also picked up a wifi controller that works with my tablet or phone and even works with Alexa. After a few days experimenting to decide if this was the product I wanted; I committed by cutting the strip and soldering wires to it. I used some scrap aluminum to bend mounting strips then screwed those to the framing on the back side of the valence. Since the controller supports both cool and warm white LEDS I also added a line of recycled cool white LEDS above the strip.
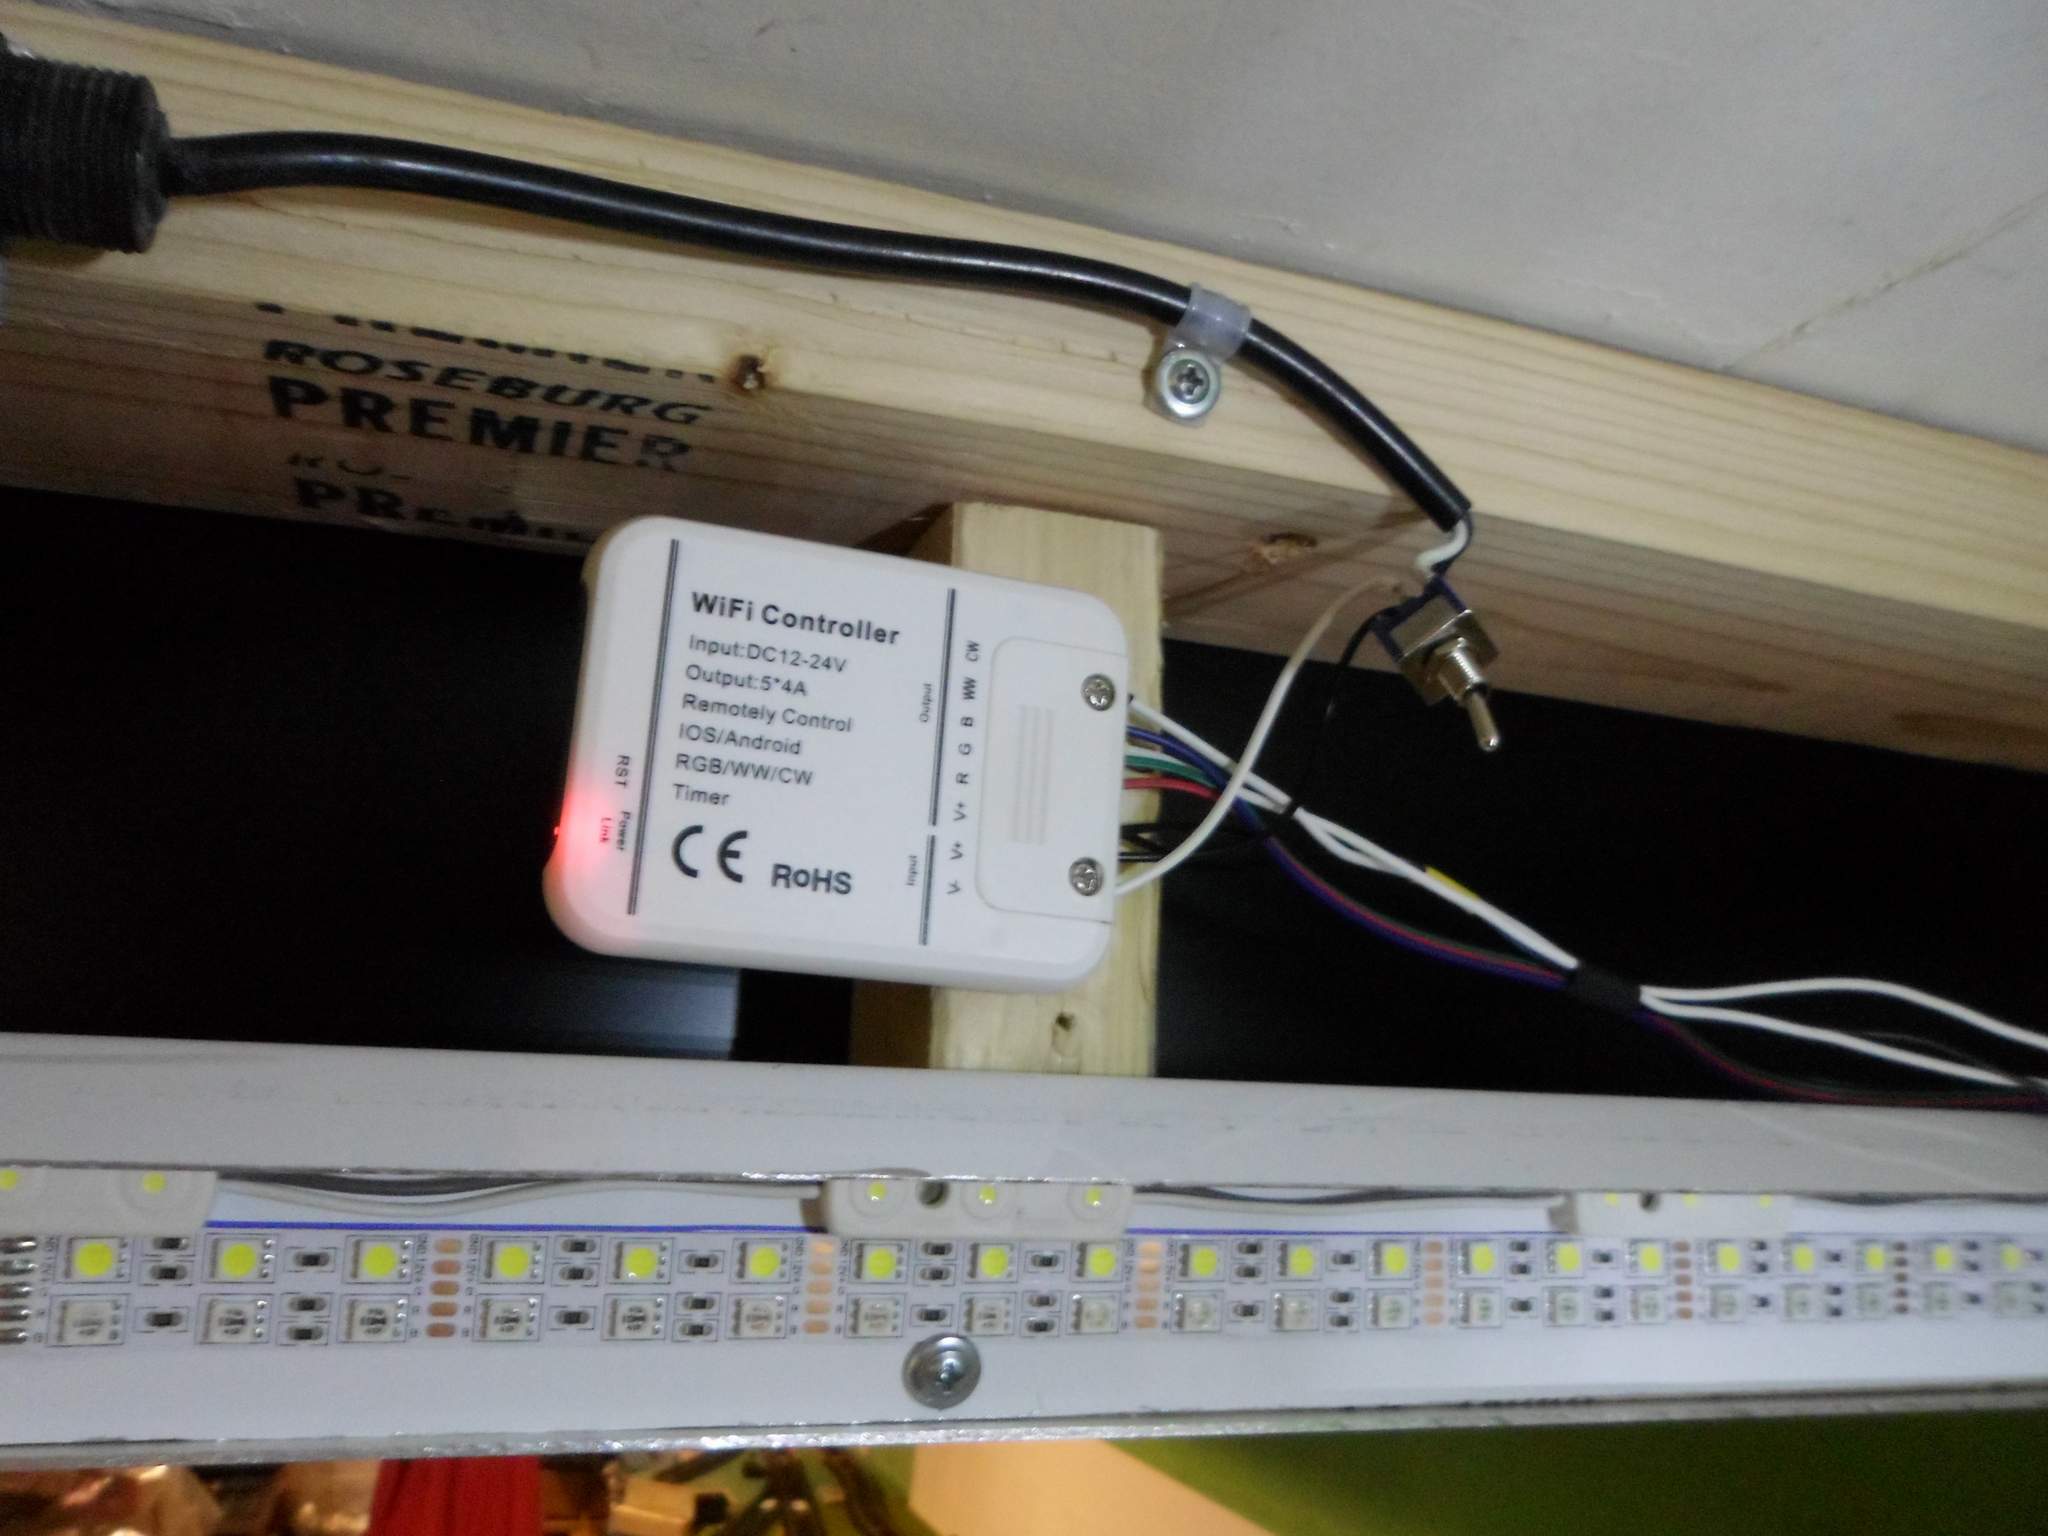

I’ve been playing around with settings. The Magic Home Pro app allows full control of hue and intensity. RGB on one screen and Whites on another. I’ll start experimenting with photography this weekend.