Large Scale Central

a trestle bridge

thanks to some kind of activity-fit, i am building again.
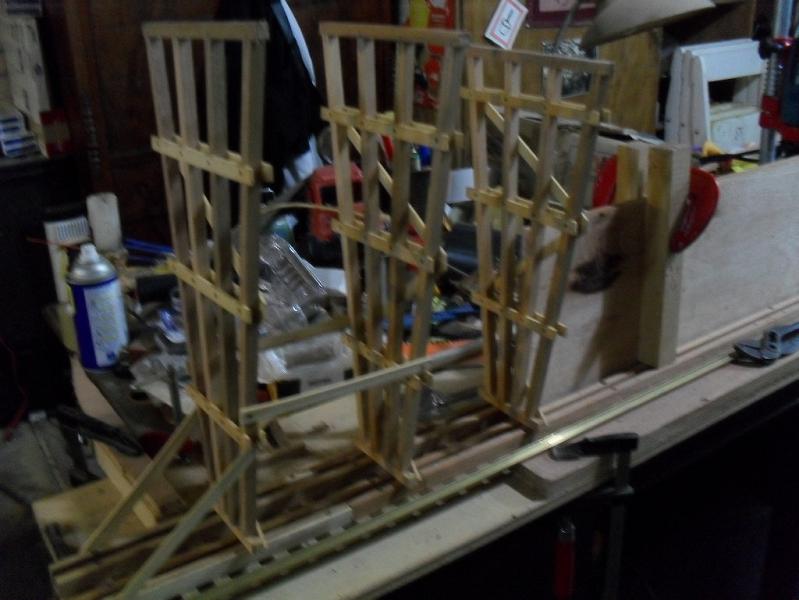
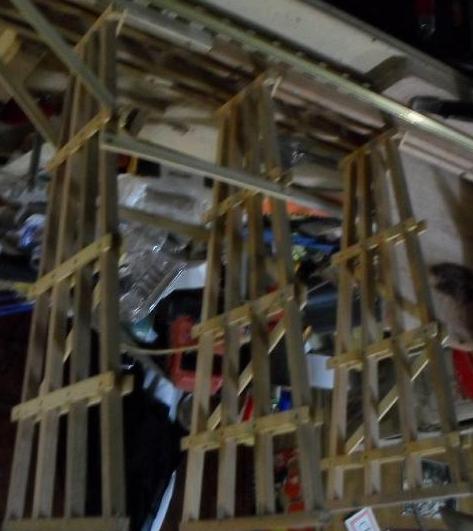
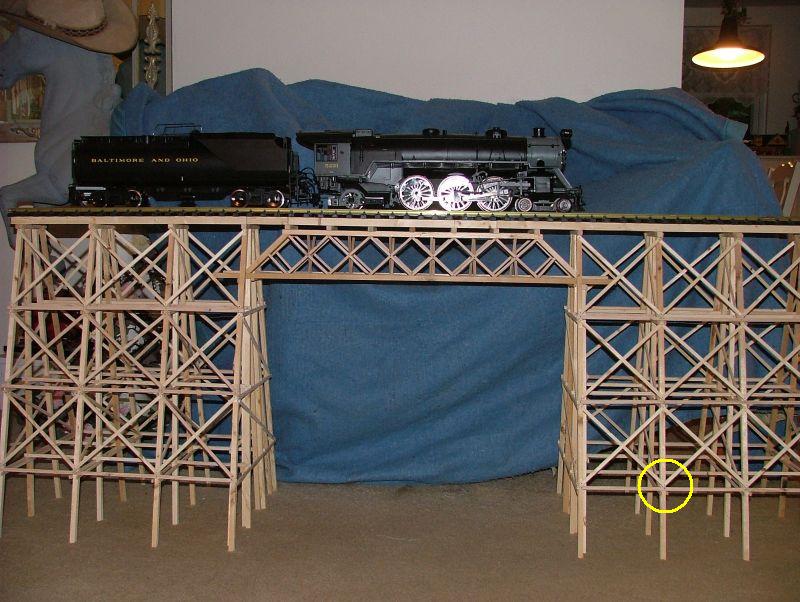
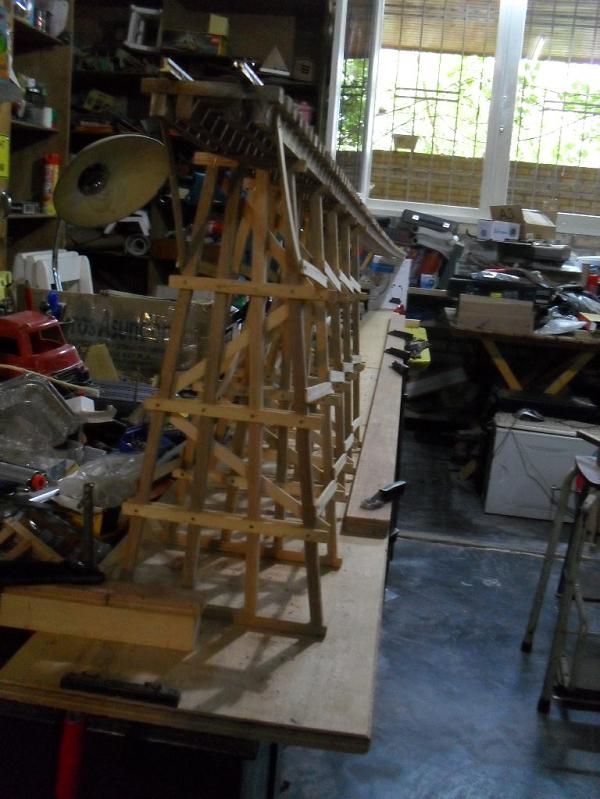
a ten foot trestle.

to stand on a downwards-slope of 6%, the trestle will be going up, as well with 6%.
so the highest trestle will be 18" high.
the distances between trestles will be 6".

on a quickly nailed together jig, i marked the different lengths for the various trestles.

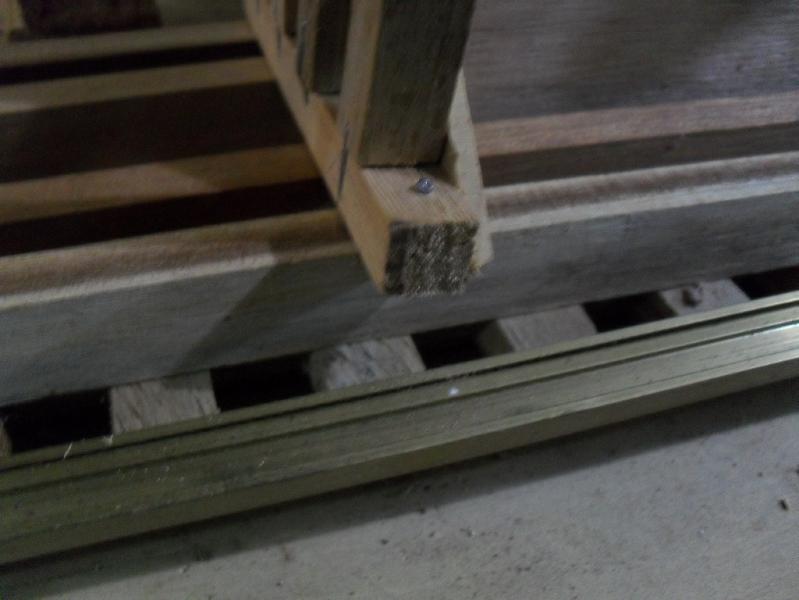
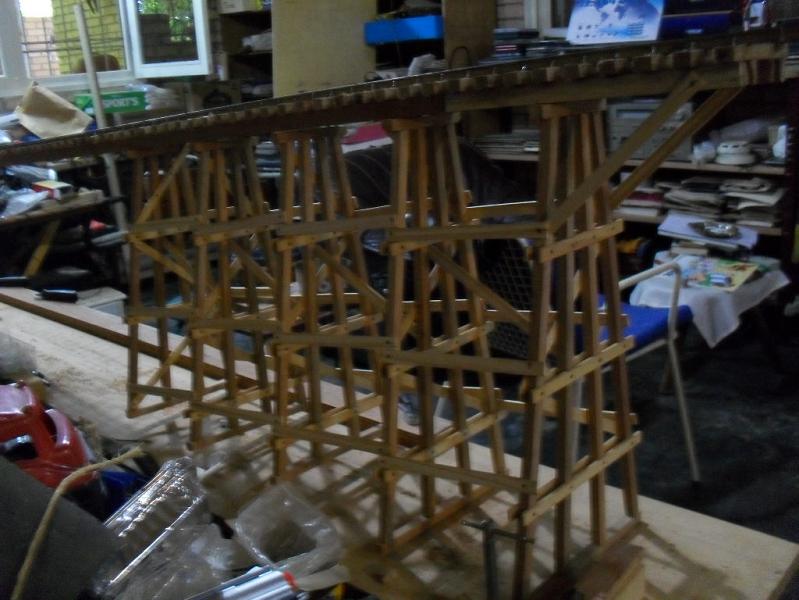
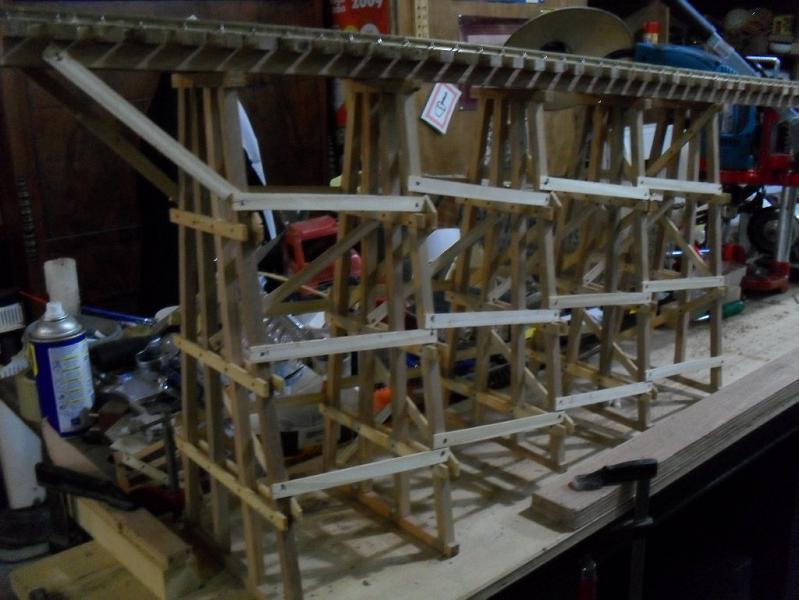
the ties, posts and beams (10 x 10 mm) are from cedar and the boards (2 x 10 mm) from

pine.

the posts are connected with cramps (just tackered), the boards are nailed on with

shoemaker nails.

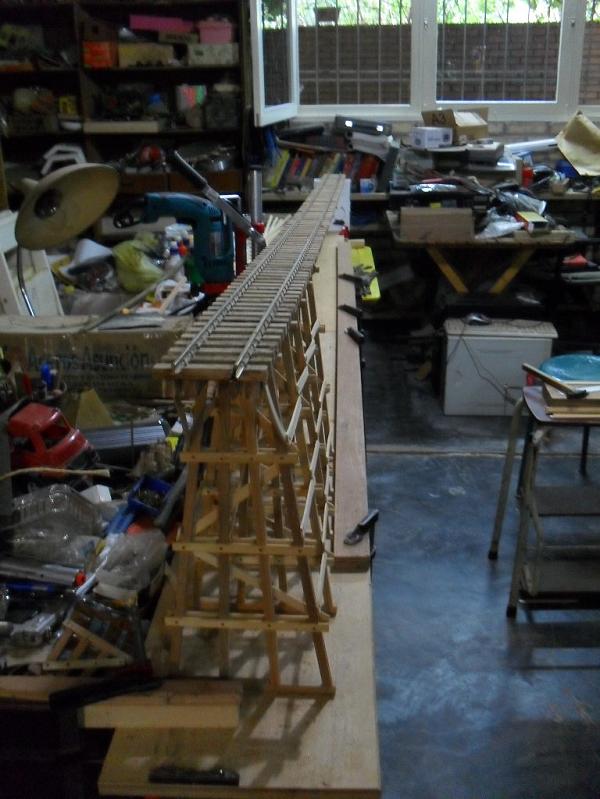
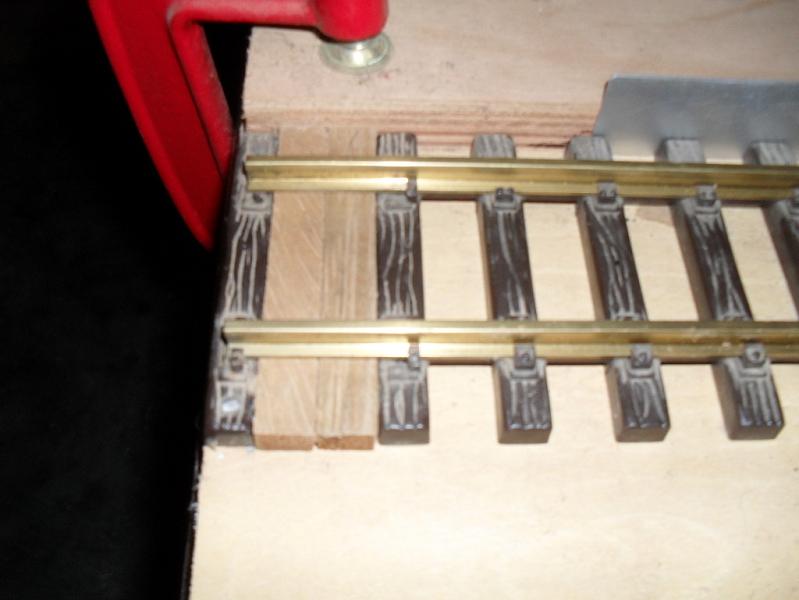
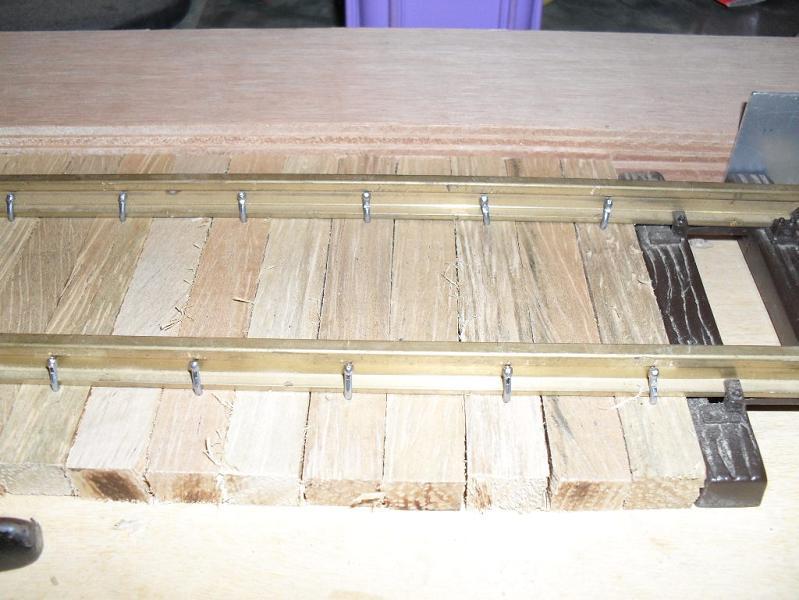
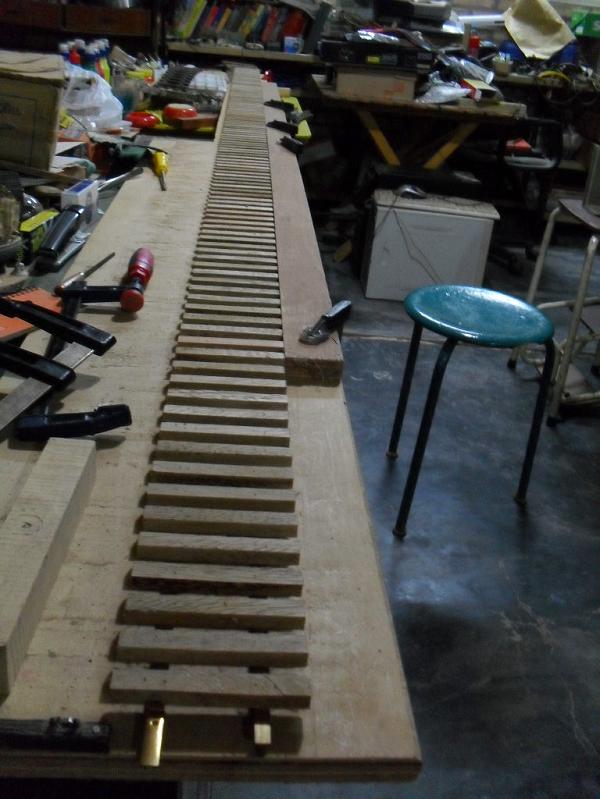
for the deck of the bridge (road"bed"?), i made another simple jig.
at the head i nailed on a single LGB-tie, on one of the sides i clamped a board as

arrestor.
such i could position two ties, fix them with the movable tieweb, nail every second to the

rails, and later take out the spaceholder ties.
(the 1 mm thick ruler beside the tieweb became necessary, because the carpenter cut

the ties 2 mm too long)
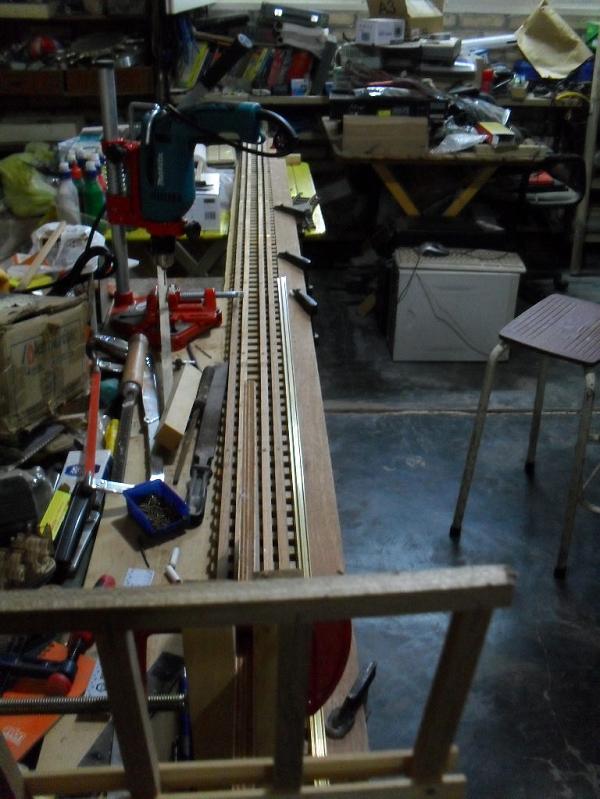
the rails are LGB 5’ long profiles.

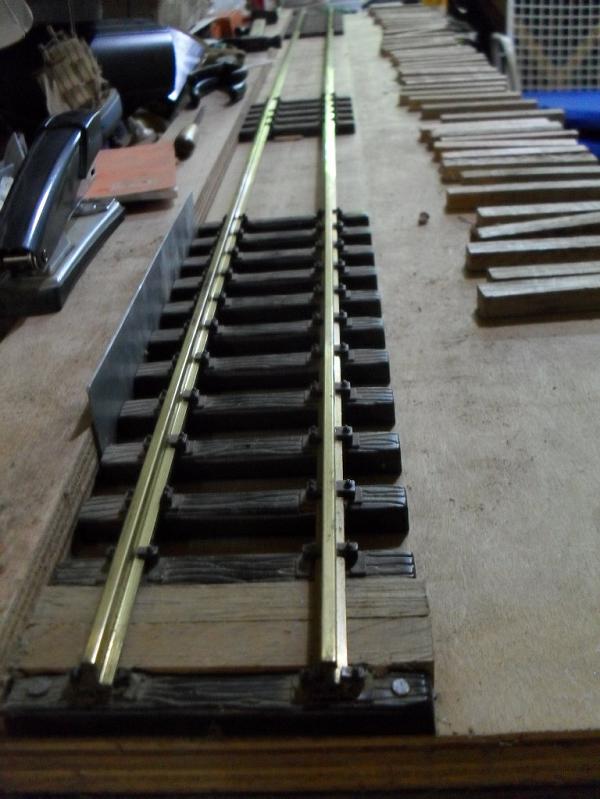
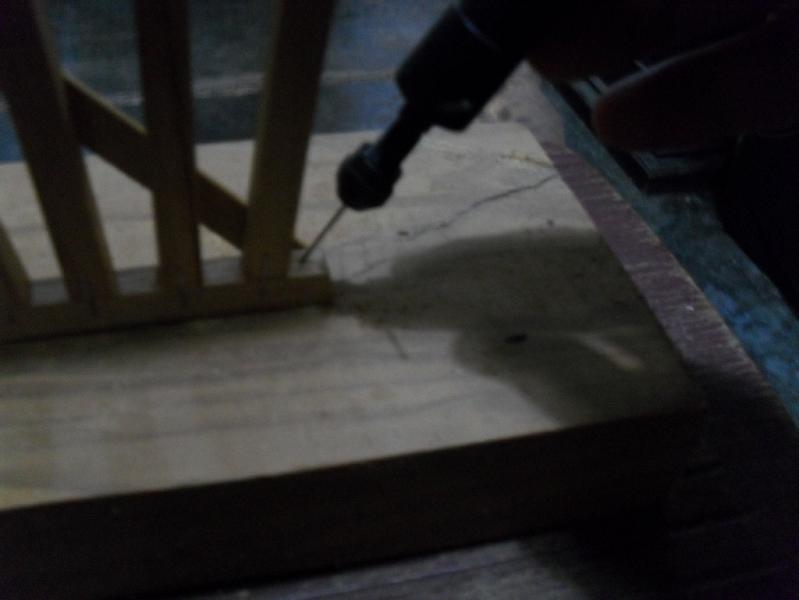
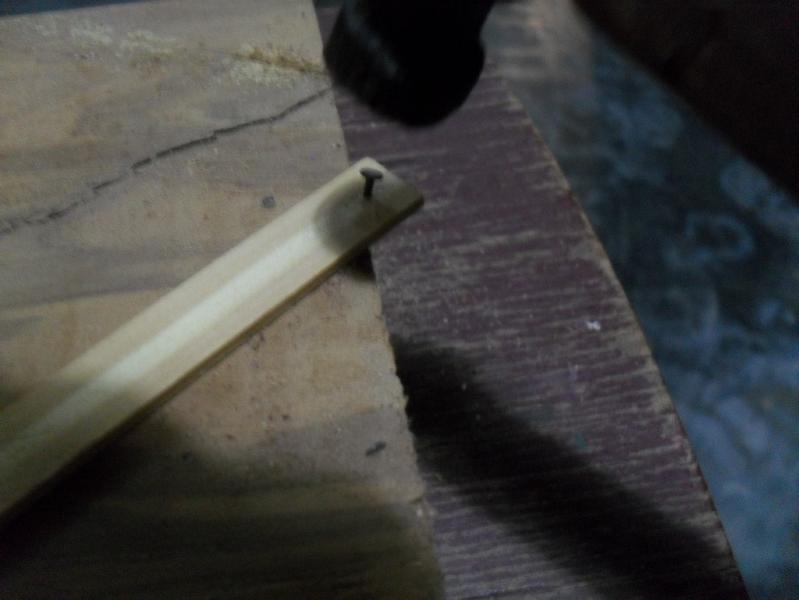
the shortest nails, i could get here, are a wee bit too long.
to pinch them off a bit, would have meant pre-drilling and a lot more work.
so i choose another way.

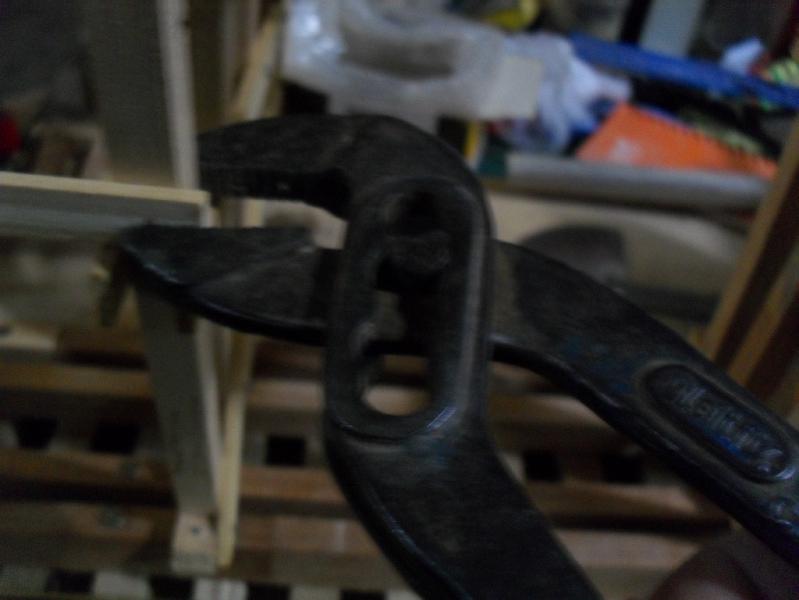
after lightly hammer in the nails (the surgical tweezers did prevent a lot of finger-hits) and

driving them in, using a setscrew head down and the hammer, i bent the nails sideways

over the railfoot with the pincers.

then i helt the pincers from above upon the nailheads and hammering on the grip of the

pincers, drove the nails down on the foot of the rail.

in the eyes of many, this will not look nice, but work under the assumption, that on a

bigger layout the general impression will supersede details.

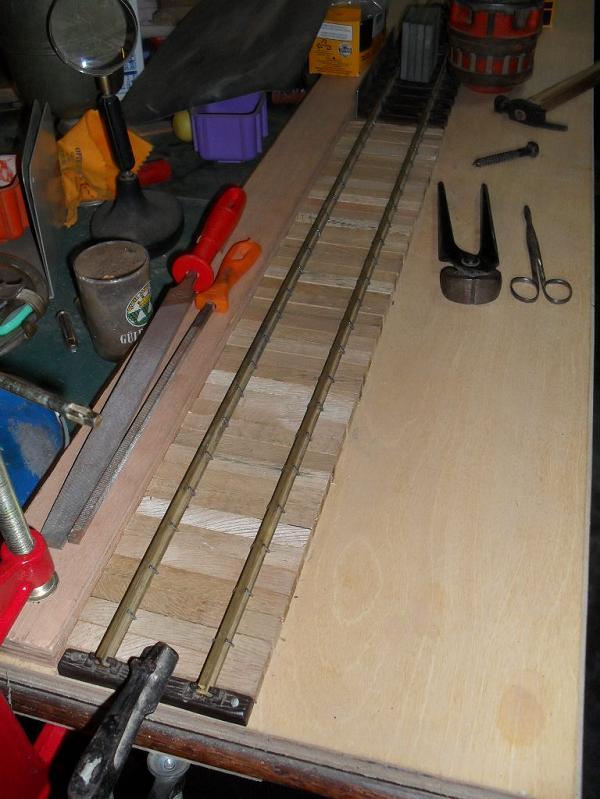
after i leveled the bench more or less, and prolongated it to ten foot, i connected the two 5 foot pieces with LGB fishplates, and screwed the beams to the ties.

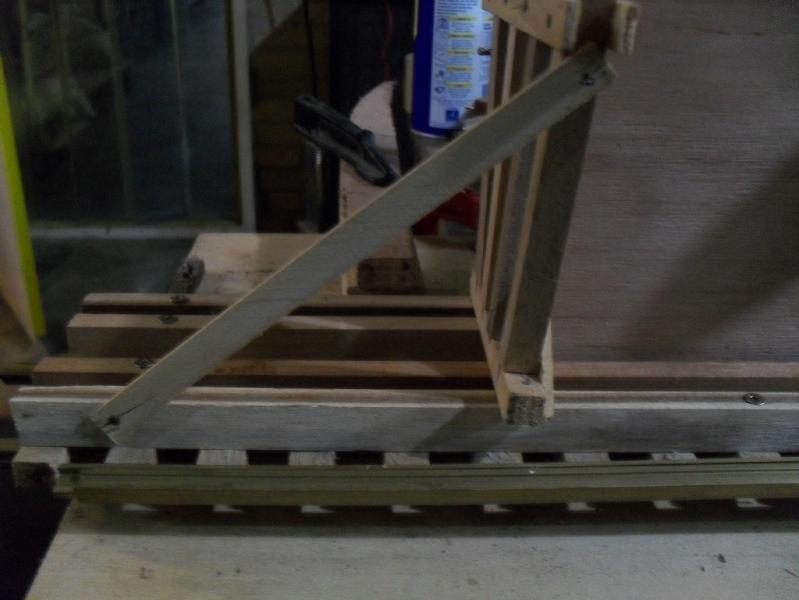
now comes the interesting part.
for the trestles to stand straight, when everything is finished, they have to be fixed a 3.5°

inclinated to the beams.

my new jig (a board, sawed to the correct angle, and hindered from falling over by blocks

clamped to its sides) seems to give the adequate inclination.
i sawed a little groove as arrestor for the file, filed a little inclination, and am ready to nail

the first trestle to the beam.

as soon, as i have repaired my flexible elongationshaft for drilling, i will continue…

3 Likes

edited - had forgotten some pics.

Looks great, Korm

a 6% grade, that’s healthy.

Looks good.

I went the lazy route with mine and didn’t make bridge ties, I just laid the track with the ties it came with.

thanks for the comments.

David, the 6% are tested for my situation and rolling stock.
nearly all locos are Stainzes with motorized tenders, drawing five foot of cars. (either five four-wheeled ones, four eight-wheeled cars or combinations of the two kinds)
locos and tenders will get additional weight to four and a half pound each.
(my only Bachmann loco died of a broken heart, trying to haul itself and the tender up that grade…)

Looks like your having fun!

Vic Smith said:

Looks like your having fun!

YESSSSIR!!

after predrilling i could easily nail the trestles to the running beams.

i used the same nails for this, that had to double as railspikes.

to stabilize the trestles, again i use the above mentioned boards.
tiny shoemakernails lightly hammered into the boards, and then driven into the posts not with a hammer, but with a adjustable tweezers, makes for good and stable connections.

now i just have to play around with the placement of the boards, to find an optical pleasing distribution.

Korm, I chose to follow prototype practice. It looked “right” to me.

Korm
Get a air driven pin nailer
Lots of nail sizes to choose from.
When using the pin nailer item being nailed doesn’t move to much!
You will never us a hammer and finnish nails again. :slight_smile:

David, that looks really good!
do you have a pic, that shows one of the connection points?

Sean, i have one of these. but either i am too stupid, or my compressor gives too much pressure.
with these fine pieces of wood, the nails fly straight through…

Lower the air pressure with an air regulator you can controll the gun with how much air you give it. less air nail will not go in so far.
The trestle looks great .

Korm,

Great to see you building again.

On my pin nailer there’s a slide on the side to set the hammer throw based on pin length used. I abuse my nailer and leave it out in the elements, heat and occasional rain. It doesn’t quite get them in all the way… I set them with a steel tool.

My advice; set the slide and weather the tool… well it worked for me.:wink:

A cheap Harbor Freight nailer and Porter Cable pins. HF pins are jamming junk.

There were lots of different prototypes…

John

Looks Phenominal.

I love trestle bridges!

hmmm…

hmmmm… hmmm… suggestions anybody?

sean, that sounds like a hightec solution. but i think, i will try that, even if John’s system lies more on my line of thought.

the nails i got for that thing can’t be very special. one pack has the “brandname”: Quality product…

but as you all can see above, i’m kind of stuck at the moment.
the only word, that comes to mind, how the first part looks, is “shitty”

I used an electric staple gun loaded with 5/8" brads. I glued the joints, then “shot” them to hold until the Titebond dried. The only place I used small finish nails was where the top of the post meets the beam, drilling and nailing from the top.

I also only used the track on top of runners. The deck you’re building will look impressive!

Here’s mine.

trestle

electric… well, maybe they’ll sell them here as well in the future.

a curved trestle - and it looks orderly and stable.
mine looks at the moment, as if the engineer responsable has studied social engineering…

Korm, that was a trestle I built for a friend of mine. The longitudinal supports rest on top of the cross braces for the bents, and the cross bracing is added last.

My trestle is curved, so the bracing is done a bit different since each piece is separate, instead of running for 2 or 3 bents.

Korm Kormsen said:

hmmm…

hmmmm… hmmm… suggestions anybody?

Nice work there Korm.
One question thro… just wondering from being an old truck driver, is there an escape ram if one lost the air brakes? laf… That’s steep. but will get trains down quick and fast to lower lever. Almost had to put in the lafing frog… but we love this guys work. lol.