Large Scale Central

South Fork Sawmill

Since I use the Freight Shed option to host my pictures here I have been reluctant to start posting this build addition to my railroad because of the warning by the site owner that all will probably be lost when he upgrades the site. This seems to be coming true as most of the photos I have posted over the last dozen years are already gone from the threads, making the information they contain pretty much useless. However this may last a while and maybe someone will enjoy it while it does. So here we go.

I have always wanted to model a complete sawmill complex for my railroad because of the visual interest and operating possibilities it will add. Also the historical interest, very few people now days have any idea how a mill in the 1920’s-30’s was actually set up and operated when the logs were supplied by rail. These mills had to cut thousands of board feet per day to make it pay and that took lots of log loads in and lumber loads out each day. At this time I have no intention of modeling operating saws and log carriages etc., just the buildings.

When I set up my first logging railroad in ON3 scale back in the 1980’s I based my RR names on actual prototype practice; The Shasta Pacific Rail Road, a common carrier, is a wholly owned subsidiary of the South Fork Timber Company who operates a private logging railroad over shared tracks with the Shasta Pacific. This idea comes from the historic Northern California company the McCloud River Lumber Company and their railroad the McCloud River Railroad.

Enough background blather.

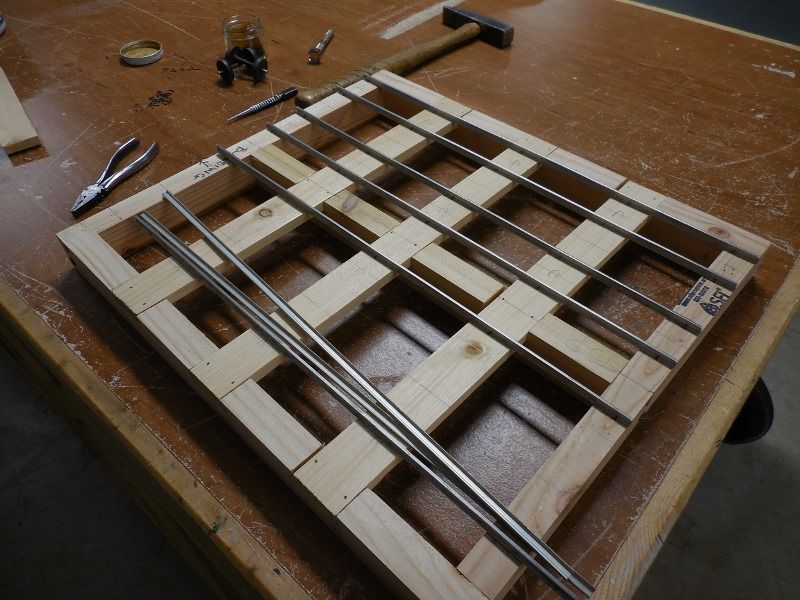
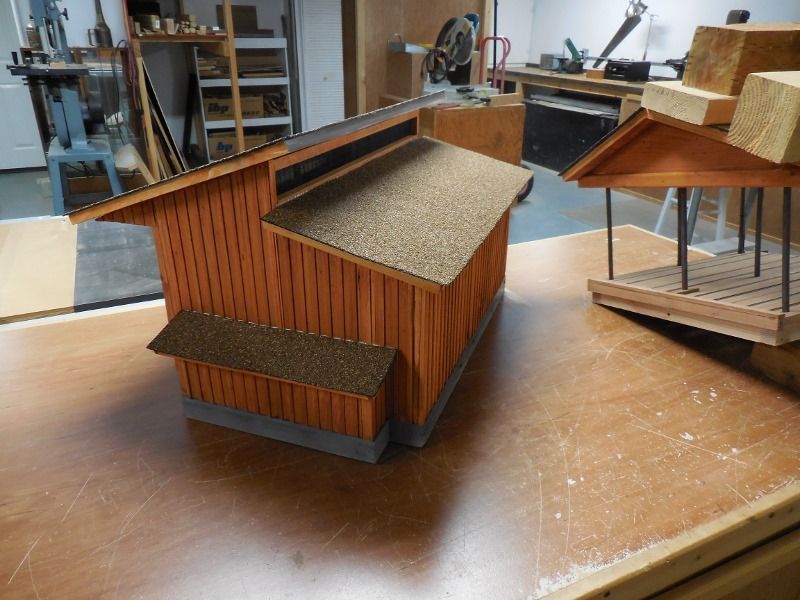
I started this expansion last November and have been working on it on and off through the winter weather. Once the structure was up and the track laid I had no idea what building I would start on first, that problem was solved for me by Dave Taylor and his Mik Build Challenge for 2021, the tin can builds. I decided on the water tower supply for the mill site, that build thread should be

here. Rick's MIK, 21

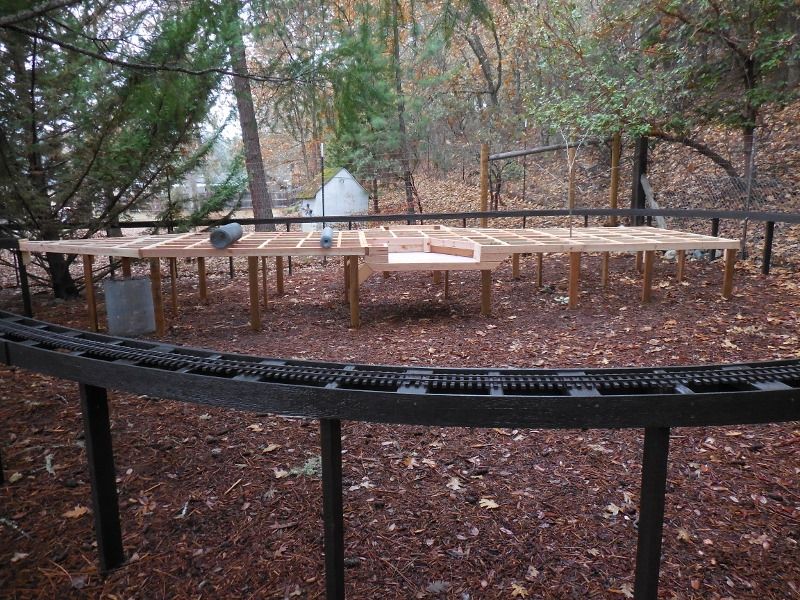
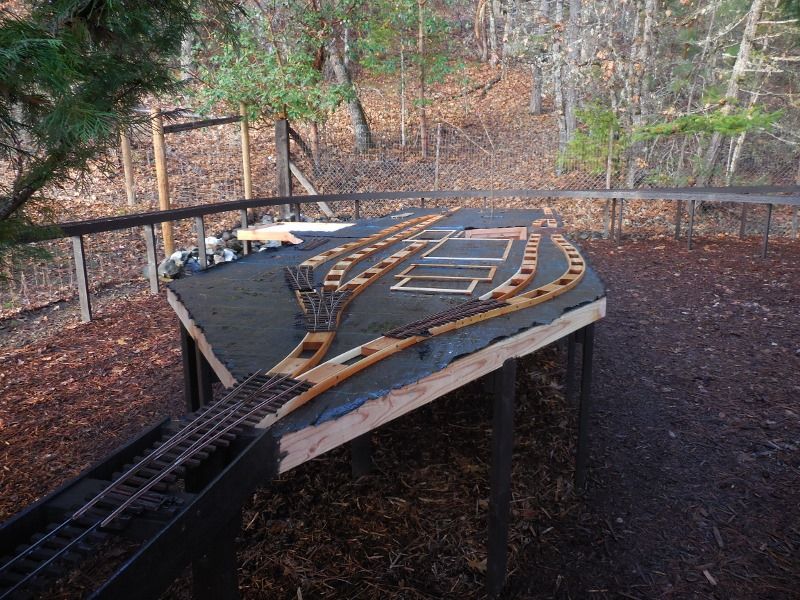
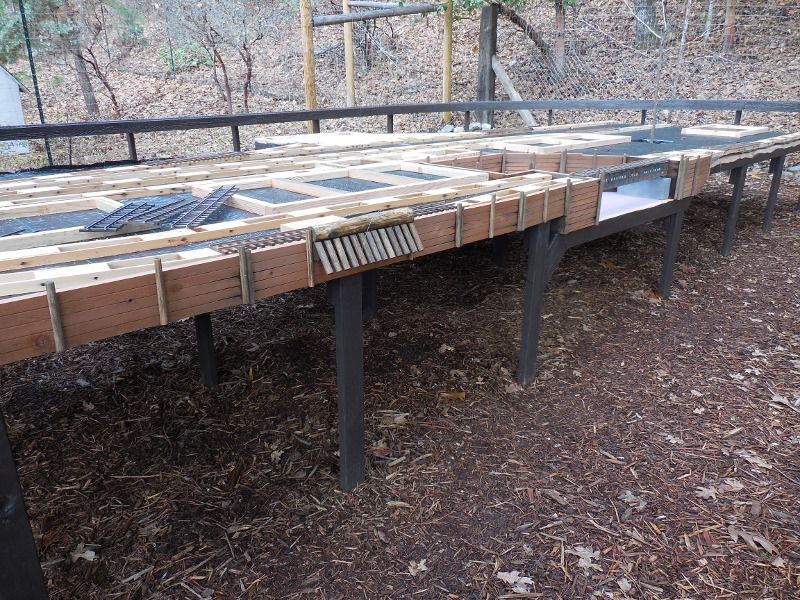
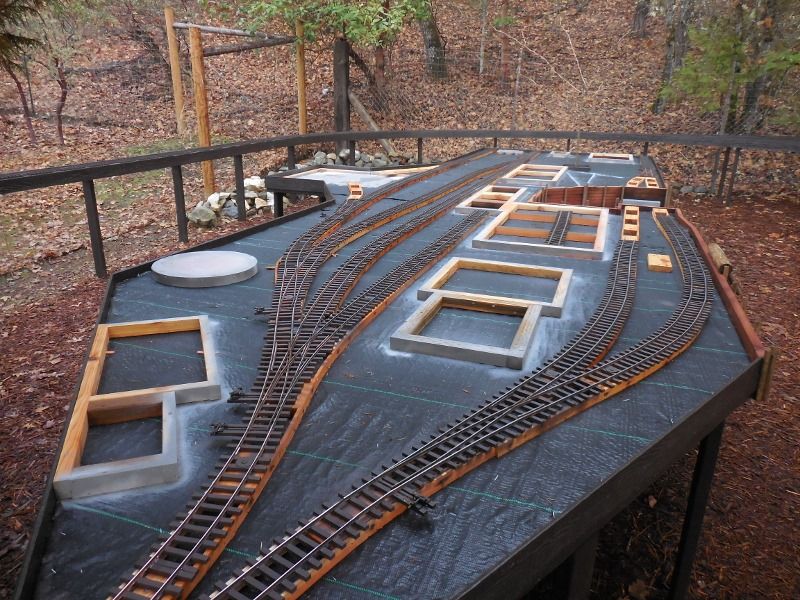
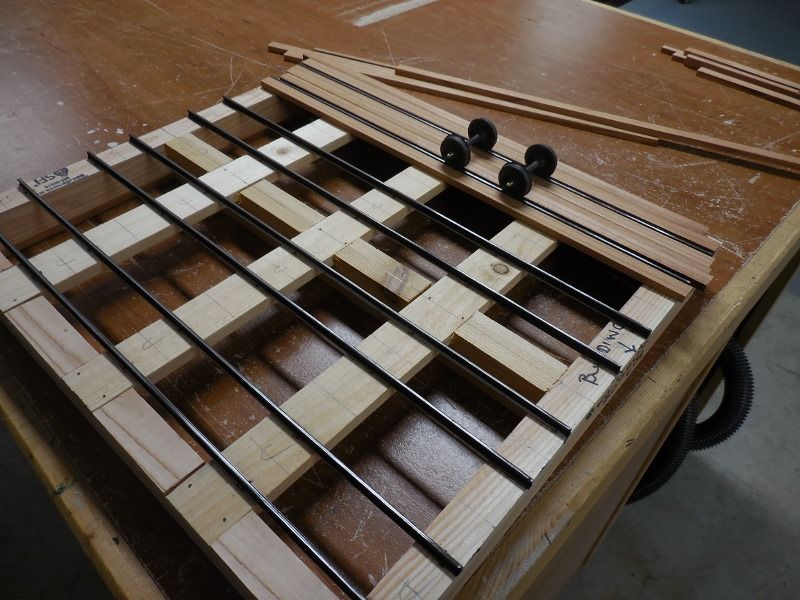
As I usually do, I started by using my CAD program (that’s cardboard assisted design) to get a feel for how things should be sized, laid out, and their possible visual impact. Based on the space available I ended up with a table design 7 foot wide and 27 feet long this seemed big but I really had to do some compressing to get most of what I wanted to fit.

I did a mockup using A scale of 3 inches to the foot to get the track laid out and flowing smoothly and to set the foot prints for the main buildings, I wasn’t concerned with building design at this point just how much room was available. Here are a few pictures of my mockup.

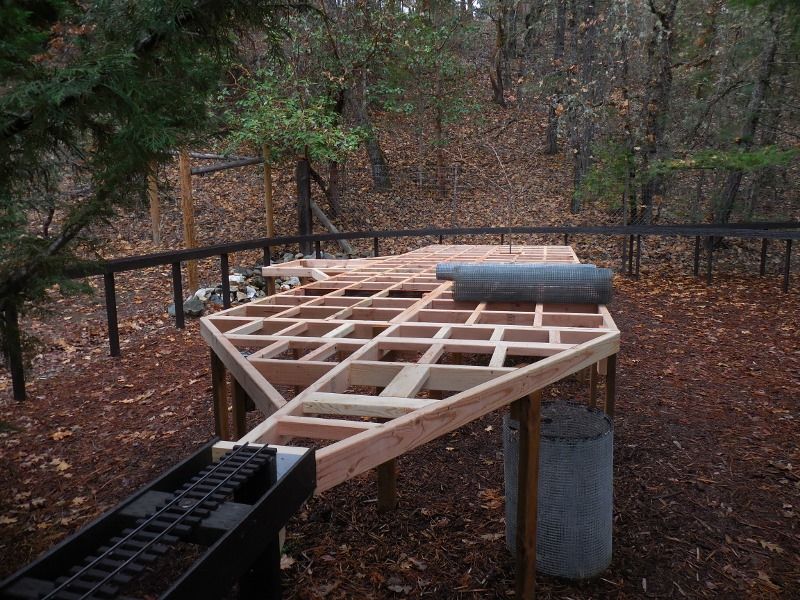
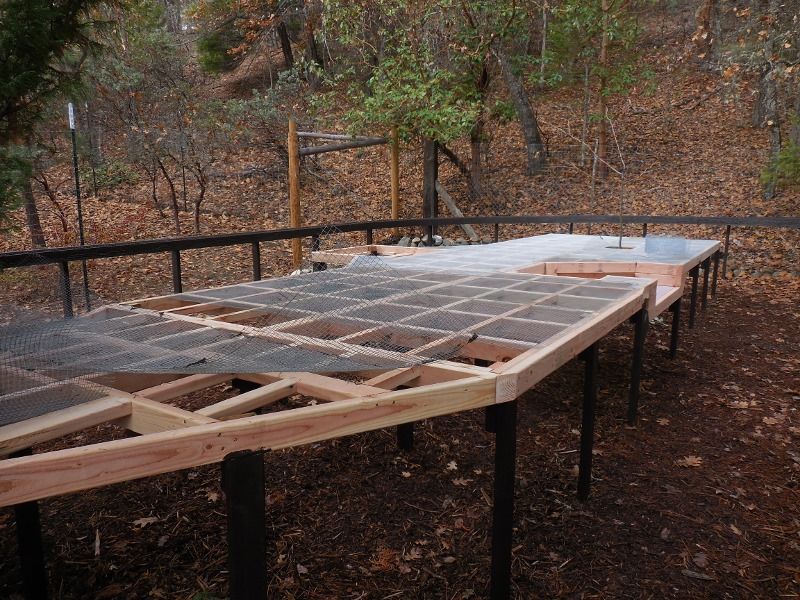
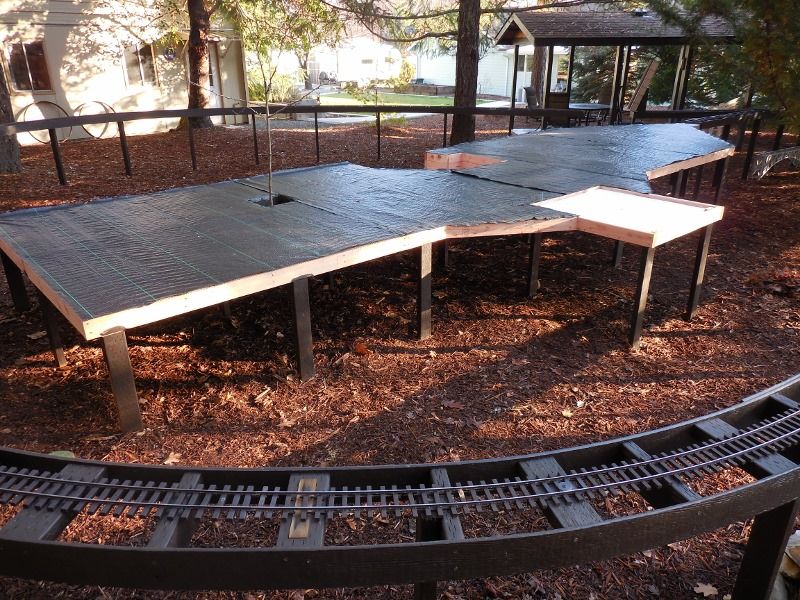
Next will be some actual construction pictures.

Thanks for taking a look.

Looks good Rick.I’ll look forward to progress

Bump it up to 7/8’s scale Rick, and I’ll come by and pick it up when its done.(https://www.largescalecentral.com/externals/tinymce/plugins/emoticons/img/smiley-laughing.gif)

Rick Marty said:

(that’s cardboard assisted design)

Cardboard can be such a handy thing.

Size of that sawmill complex is such that with a lead track and/or fiddle yard it could be a switching layout in and of itself.

Thanks for the comments guys.

"Cardboard can be such a handy thing.

Size of that sawmill complex is such that with a lead track and/or fiddle yard it could be a switching layout in and of itself."

Forrest, that is exactly my intention. As you will see in the following pictures I have a good lead track.

About the time I started construction the cost of lumber, even here on the west coast, had sky rocketed. An 8 foot 2x4 pressure treated jumped from 6 bucks to over 10 and common KD studs went from 2 plus to over 5 bucks, ouch. Hence my decision to use PT for the legs in ground contact and KD 2x4 stock for everything else. Another plus besides price the KD 2x are straight and stay that way not much twist and warp. The KD lumber may not last as long in the weather as the Pressure treated but having used the odd piece in a pinch on the old RR and the stuff lasted 10 years with little ill effect I just decided to chance it. Besides at 75 if this lasts 10 years, well that will probably be fine(https://www.largescalecentral.com/externals/tinymce/plugins/emoticons/img/smiley-laughing.gif)

Some over views of the Mill diorama construction.

Here is a view from the East side, the lead track is on the far left. The depressed area in the center is the log pond entering off the bay. The logs will be dumped in the bay and log boom pens will keep them contained for entry into the log pond area.

A view from the South where the lead comes in from the main line. On the table are rolls of 1/2 inch Hardware Cloth wire used to support the weed block and gravel fill.

Viewed from the North West you can see the push out for the turn table. The tree in the middle, well we have been nursing that little tree along for a couple years and Mom said it stays. So I figured why not, will look good and give some shade to the area as iot grows.

More later.

Rick

So cool. Following avidly.

Rick, if I had been smarter back in the day, I would have built my layout up on outdoor bench work as well!

I’ve been spending the last three days putting track back together, re-aligning, ballasting, etc.

It’s getting to be too much work at my age!

John,

I know what your saying, hence my decision years ago to go this way.

I have been spending the last couple days doing the same thing you are only I can do it standing up(https://www.largescalecentral.com/externals/tinymce/plugins/emoticons/img/smiley-laughing.gif)

Looks great Rick. The regular (KD) lumber will last outdoors a surprisingly long time so long as it can air dry and doesn’t contact the ground. I think you’re easily good for 10, if not 20!

@John et all: I don’t have much trouble working on the ground as long as I use knee pads, but moving or getting up, that’s a problem! My indoor and a little less than 1/3 of my outdoor are elevated. I turn left to go into the front yard on the ground. I could turn right and go out on benches into the back yard, and even purchased track to do that maybe 4 years ago, but it never happened. At this point, with my kids and grand kids on the other side of the country, new construction is probably not a good use of time and money!

Great start, Rick. Looking forward to watching your progress as always.

More pictures of the developements on the sawmill area diorama.

With all the framing complete, or so I thought, I started laying and stapling down the 1/2 inch Hardware Cloth.

With all the hardware cloth down I stapled the weed block fabric in place.

With all the basics done I started placing frames to show building locations and sizes and laying ladder roadbed. Way back when I first started using this table top method, Thanks Dick Smith, I used an 1 1/2 inch facia board rise above the table top and 1 1/2 inch ladder road bed then layed the track on that. I soon found that the ballast/fill wanted to drift away from the ties and seek a level with the rest of the fill. I started using a 1 inch ladder road bed and 1 1/2 inch facia board so that the top of the ties and the facia were all the same height, no more problems with ballast drift.

Don’t give up on me yet, the fun stuff is coming soon(https://www.largescalecentral.com/externals/tinymce/plugins/emoticons/img/smiley-foot-in-mouth.gif)

More progress pictures.

Here the cribbng and pilings are in place along the bay front as is the brow log and roll way for the log dump. The 3 ft bridge ( from the Port Orford Coast RR) is being test fit crossing the log pond entrance.

Most of the ladder roadbed and track is in place as well as the main building foundations. Also all the facia board is complete and painted.

It’s coming along

More later

Nothing like making it the kids problem when you’re dead.

Hell you got 25yrs on me!

I love it !!

Rooster said:

Nothing like making it the kids problem when you’re dead.

Hell you got 25yrs on me!

Shut up Rooster

I love it !!

Now that most of the work is done on the module its time for some more buildings. For what ever reason I decided to start with the dry kiln building and loading shed.

Here we are starting the platform/foundation for the loading shed. this covered area will have 4 tracks that feed carts in and out of the kiln and act as a weather protected area to load the dried lumber into box cars. I had an odd pair of trucks picked up somewhere that are 1 and 3/8ths back to back I think that would scale out to 36 inches in 1:24 scale and 30 inches in 1:20 scale, whatever they seemed a perfect size for the carts to run lumber in and out of the kiln, we will see those a little later.

Laying out the track centers and laying the decking, all old growth Redwood.

The deck is complete except for the roof structure and the carts are started. Getting a start on the kiln building, it is made from Western Red Cedar fence boards that I ran through the table saw with a dado blade and made a board and batten looking siding. The boards are only 5 1/2 inches wide so it takes some runners on the inside to hold everything together and hopefully flat. That is the down side of using these fence boards the are green and wet as heck so they are subject to shrinkage and warping as they dry. If you can get them tied down solid they will usually stay pretty well in place as they dry. Having said that I will show you later what the roof trim did when it dried.

Will follow up later with the finish of this structure.

Thanks for taking a look.

Looks great, Rick. Popcorn and coke in hand, feet propped up … carry on(https://www.largescalecentral.com/externals/tinymce/plugins/emoticons/img/smiley-laughing.gif)

The type of hammer and plastic wheel sets disturb me …

JUST SAYING

“The type of hammer and plastic wheel sets disturb me …”

Rooster, how so? Do you think a Tinners hammer could do something drastic to plastic?

Anyway a few more progress shots.

The doors are made of Styrene and painted with Cold Galvanizing then weathered.

The back side of the kiln building showing the motor shed and the air intake/exhaust opening between the roof lines.

More later.

Rick Marty said:

… do something drastic to plastic?

That’s a nice building. But mostly, my mind is now thinking, the phrase “drastic plastic” has got to be useful for something …