Large Scale Central

Rick's MIK, 21

Well, with all these great build ideas being posted I feel a little silly posting about a build as mundane as a water tower, but it is what I need for the railroad so I will go ahead.

My currtent expansion for the railroad is the South Fork Timber Companies Mill #1 and associated yards. If the weather will ever give me a break I will post about this expansion in my South Fork RR thread. The idea for this water tower has been in the “one of these days” file for quite some time and with the announcement of this years Challange subject it was to perfect a fit to not jump in. This is a utility water tower not a railroad water tank.

Pictures.

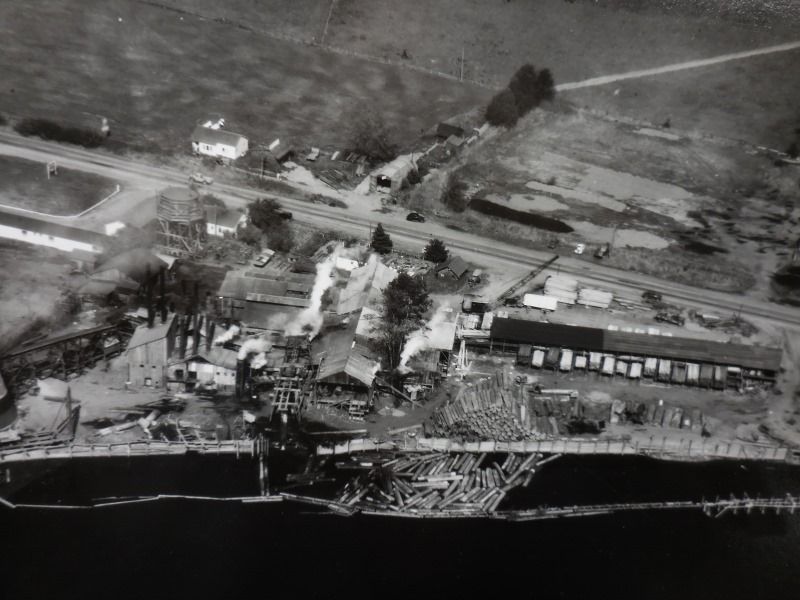
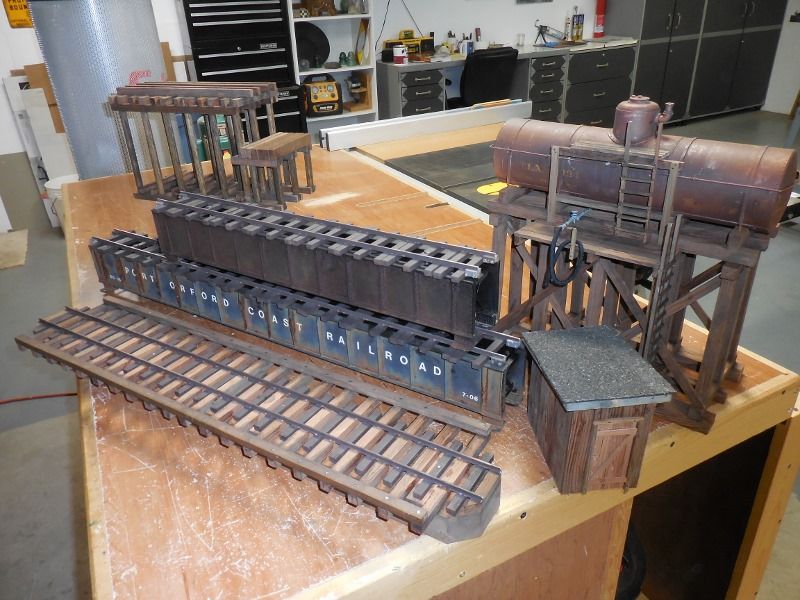
Here is a photo of the mill I am basing my mill build on even though there is no railroad associated with the one in the picture there will of course be a RR for my mill. The water tower I intend to build can be seen in the middle left hand side of the picture.

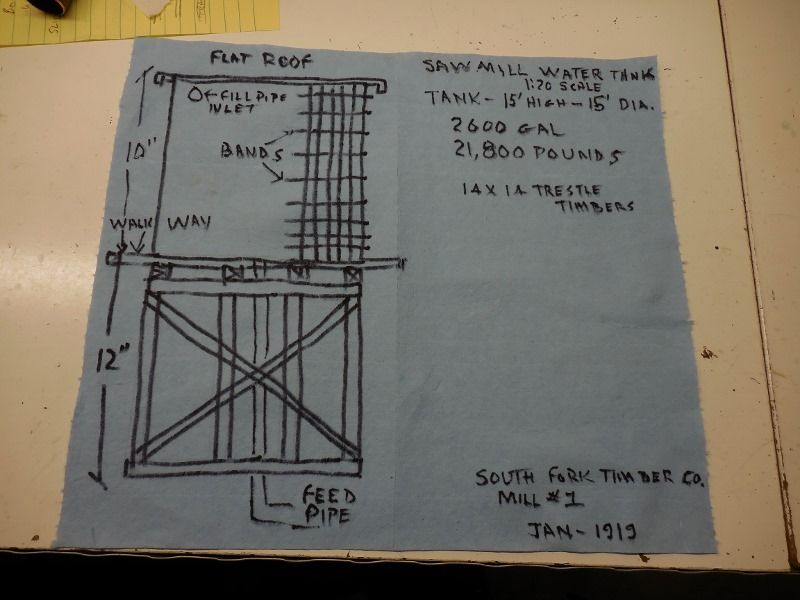
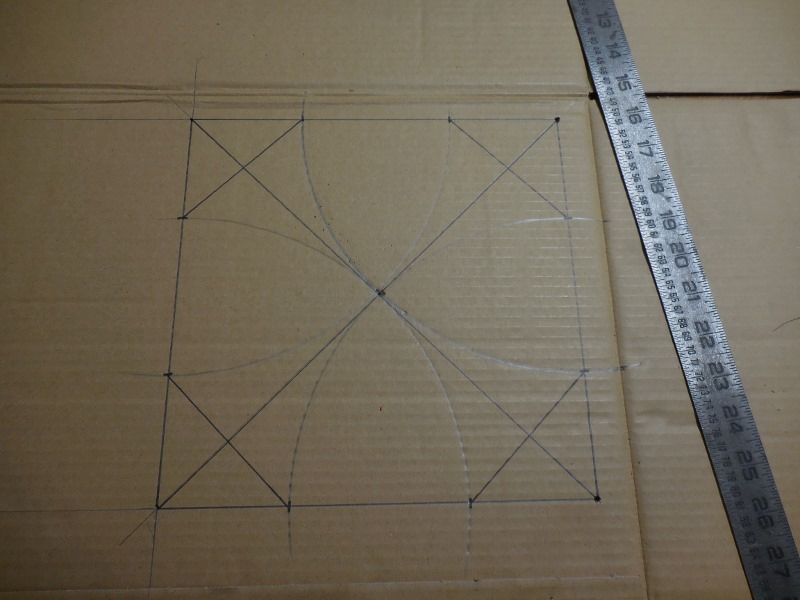
Napkin drawings. We have no napkins in the shop so I was forced to use Shop Towels, which, by the way, are pretty hard to write on with a Sharpie.

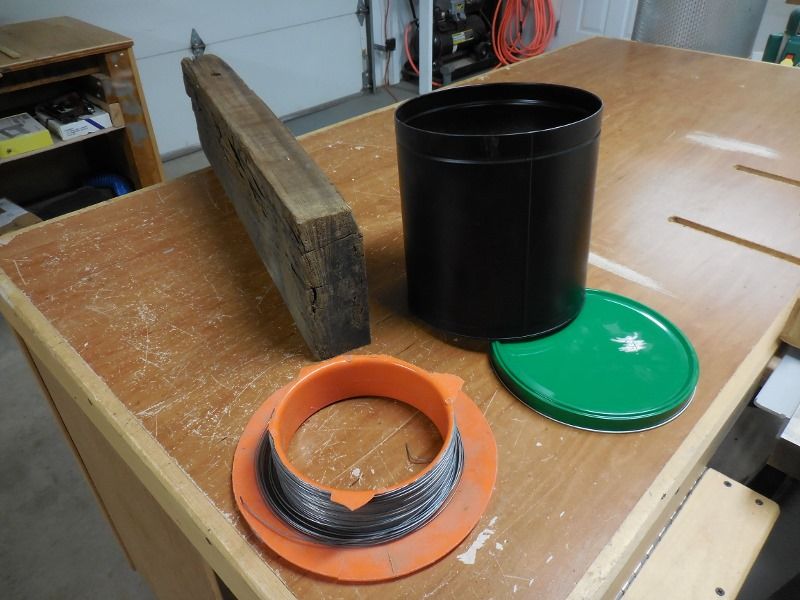
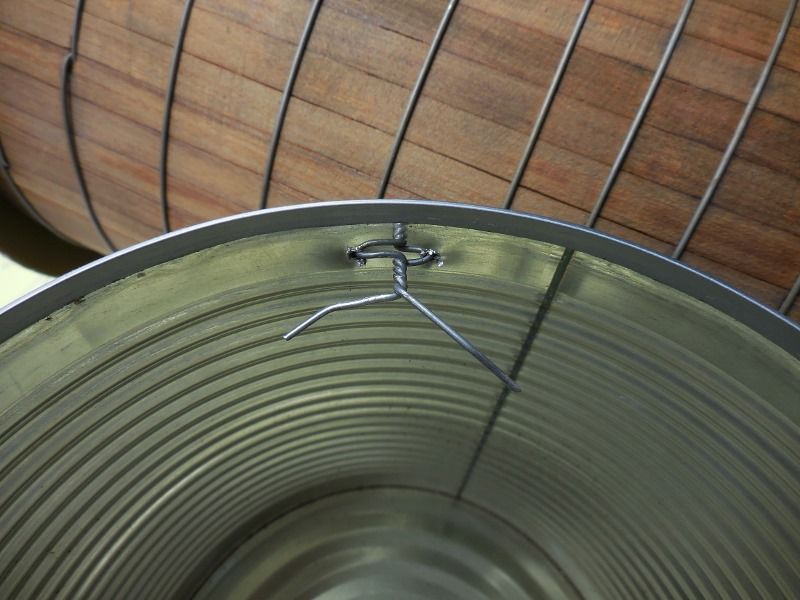
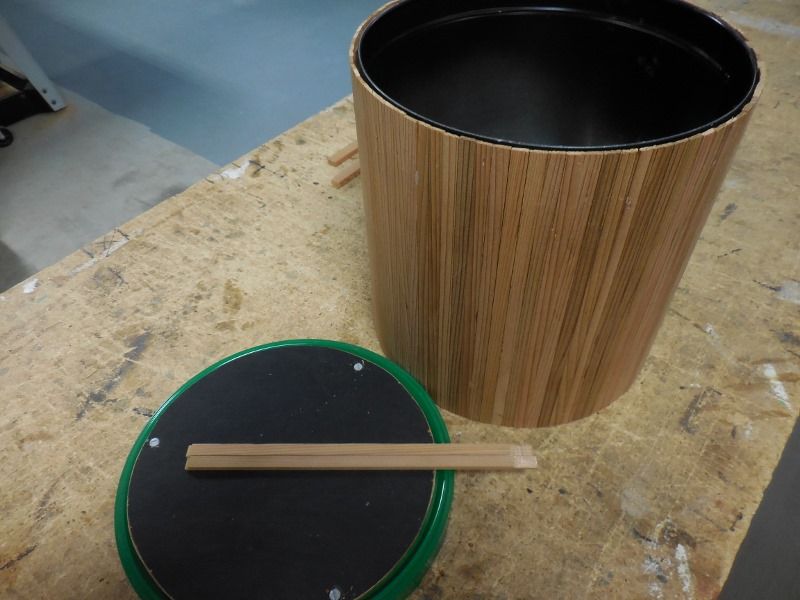
The “can” is one of those Christmas popcorn buckets, you know the type, we received as a gift years ago. The wife saves anything like this and several years later we painted it flat black and she used it as a plant stand extension in her wrought iron plant stands. About a year ago she no longer needed it and I set it on a shelf in the shop and waited, and look what happened.

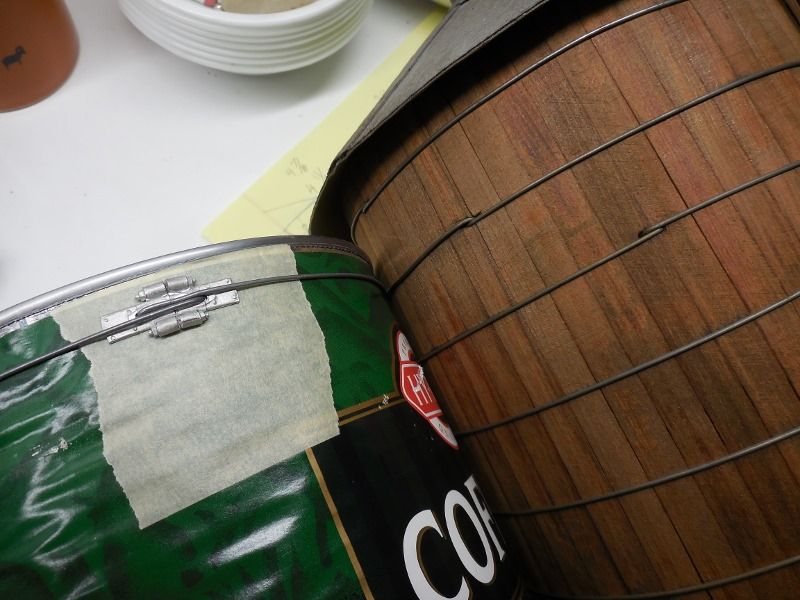
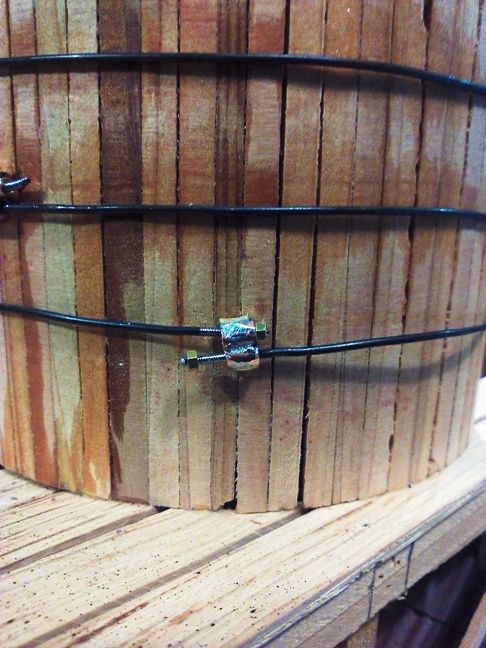
The chunk of old growth Redwood is from a water tank, how cool is that? The wire will be used for the bands, a little small but it is what I have, all other needed materials should be in stock.

This may turn out to be a no cost build

Well that’s the plan, nothing exciting but should be a fun build anyway. Well hell arn’t they all fun?

Rick;

That is a great project, and something you can use on the layout. When I saw your drawing, it made my mind jump to the water tank used in the old Petticoat Junction sitcom. If somebody is still considering jumping in with a Mik entry, that tank, complete with the swimming girls, would be a great entry.

Have fun, David Meashey

Looking forward to seeing your modeling skills bring this tank to life, Rick.

Rick,

I dont think you are capable of mundane. I look forward to your usual attention to detail. I expect scratch built tank bands. I did it so can you.

Shucks. I expect a working pump.

Jim,

If anyone could it would be Rick or Cliff.

Nice, really.

I’ll be curious to see how you make the bands…I have two tanks that need band replacement surgery.

Thanks for the nice comments guys but I don’t think this will be anything special, just a basic build to represent a water tank. Got to get this done so I can get back to the other mill site buildngs; turntable, log dump, oil tank, burner, offices, hog fuel bins, boiler house, main mill building, green chain shed, dry shipping sheds, kiln and boiler house, and ,and and------(https://www.largescalecentral.com/externals/tinymce/plugins/emoticons/img/smiley-laughing.gif)

Rick Marty said:

Thanks for the nice comments guys but I don’t think this will be anything special, just a basic build to represent a water tank. Got to get this done so I can get back to the other mill site buildngs; turntable, log dump, oil tank, burner, offices, hog fuel bins, boiler house, main mill building, green chain shed, dry shipping sheds, kiln and boiler house, and ,and and------(https://www.largescalecentral.com/externals/tinymce/plugins/emoticons/img/smiley-laughing.gif)

… and the list goes on and on and on and on … I know the feeling (https://www.largescalecentral.com/externals/tinymce/plugins/emoticons/img/smiley-yell.gif)Looks like you may need a few more water tanks of various sizes.

Hmmm, well if Dave can cheat I guess that opens the door for the rest of us(https://www.largescalecentral.com/externals/tinymce/plugins/emoticons/img/smiley-laughing.gif).

So I did a little proof of concept project also. In above posts tank bands have been mentioned, they are always a booger to get tight and keep them that way. I developed a method a few years ago that works really well for me but lacks a little in prototype finish, well OK a lot.

The tank on the right I did a year ago and you can see the band arrangement, works very well but lacks finish. I have a couple packages of Hartford tank banding details so I took some of the parts and re-worked them and came up with the product on the left mounted on an old coffee can. It still isn’t an accurate tank band connection detail but I think it is going to work and look far better than the bare lap.

This is what it looks like on the inside, just twist the wire to tighten, straightening the band as you go. You can get them super tight and they stay that way.

I mentioned earlier that this water tank build is for my new sawmill expansion and I need a ton of structures besides this tank. The weather has been so cold and wet lately that I have been working more on some of those smaller projects. A refurbished bridge from the POC and a new 2 foot bridge to cross the log pond, the trestle structure to extend the 2 foot bridge, an oil tank and pump house, and starting on a turntable bridge.

Having fun and staying warm and dry(https://www.largescalecentral.com/externals/tinymce/plugins/emoticons/img/smiley-laughing.gif)

I like the proof of concept, Rick. I think once you get them on the final tank along with some weathering they will look fine. Hmmmm, your oil tank, is there a photo of it running around on Pinterest? I could swear I’ve seen that before or at least its twin. That is where I got my original inspiration to build the elevated fuel tank. I may have some detail questions for you later down the road.

No not my picture Dan. It is a pretty common/standard design for a tank car on trestle. Only reason I built this is because a friend had givin me a junk AMS tank car in pieces so I thought why not.

I have another one that I built years ago from a Bachmann big hauler tank car that I use at my Camp Six location on my RR. I would show you a picture but it appears that the “old freight shed” location is now totally dead(https://www.largescalecentral.com/externals/tinymce/plugins/emoticons/img/smiley-cry.gif)

If I might interject Rick this is one of the bands I made for one of my earlier Challenge projects. The are 100% functional and I think look right also. The wire is threaded on each end run through a couple pieces of brass tubing that are soldered onto a piece of brass sheet metal. Threaded with a nut on each end and they can be tighten like the real deal. This one is not fully tightened yet but you get the idea. I did a little tutorial on it so have more pictures of the process if you want.

Great idea Devon, but I’m to lazy to do 12-14 bands that way(https://www.largescalecentral.com/externals/tinymce/plugins/emoticons/img/smiley-foot-in-mouth.gif)

Fair enough

Devon Sinsley said:

Fair enough

I think Devon just volunteered to build them for you. Problem is he won’t get to it until 2022 or later.

Well finally something to show.

I first cut all the staves and they had to be rabbited on both ends for the bottom can bead and for the lip of the lid to slide down between the can and the staves. The lid had to have a plywwod disc as a filler because the lid is recessed and I need a flat surface to attach the roof planking. The plywood disc was painted and covered with 2 coats of Titebond III for water protection. Cladding the can took waaaaaay longer than I thought it should. I could only place about 10 staves at a time and had to let the E6000 dry so things wouldn’t shift around. On the up side it took just a bare minimum of glue because the wire bands will hold everything tight, on the down side there is nearly 100 staves on the tank.(https://www.largescalecentral.com/externals/tinymce/plugins/emoticons/img/smiley-laughing.gif)

While waiting for glue to dry a started several other smaller parts of the build.

I had decided on an octogon shaped roof so I laid out the pattern in my CAD (cardboard assisted design) program to get the cut sizes. The edge of the roof will have a 1/2 inch lip down to help hide the lid to can connection.

The roof edge beams cut and glued and getting ready for the planking.

While the roof frame was drying I sanded the staves all smooth and did the layout for the bands and where the connecting plates will be. I started at the bottom with 1/2 inch spacing then went to 3/4 inch spacing then to 1 inch spaces, sort of like a real tank is done.

Got started cutting the stencil for painting the name on the tank. I used 1/2 inch stick on lettering placed on 2 inch masking tape and cut out. I will try to carefully lift the tape from the cutting mat and wrap on the tank, fill in the letter centers and hit with several light coats of white spray paint.

Time to start thinking about the actual details of the trestle construction, the shop drawings aren’t very clear(https://www.largescalecentral.com/externals/tinymce/plugins/emoticons/img/smiley-foot-in-mouth.gif)

Now that is one of the original CAD systems. Its like gravity … never takes a day off (https://www.largescalecentral.com/externals/tinymce/plugins/emoticons/img/smiley-laughing.gif)Nice glue up on those very tiny staves and excellent job on cutting out the letters.

Nice craftsmanship, very nifty and meticulous. Love it.