Large Scale Central

WSRR 2020 Mik's Build Challenge Leroy's

Ken Brunt said:

Dan Hilyer said:

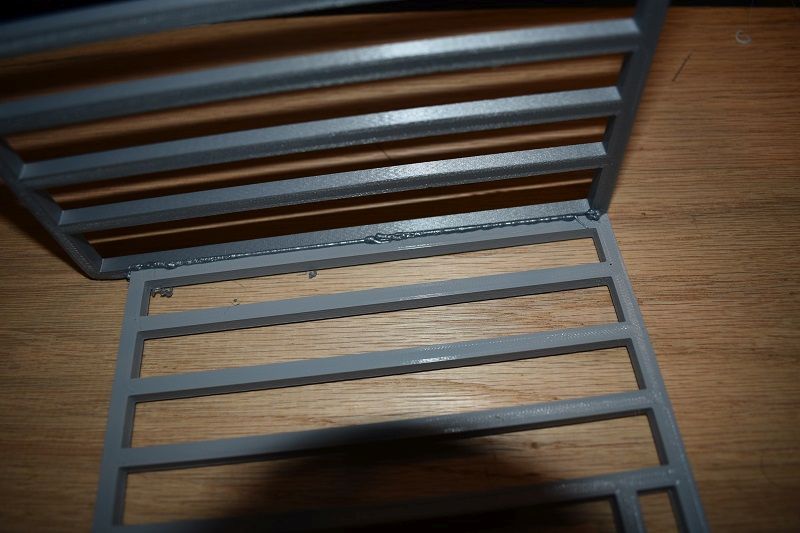
BTW: each print is labeled so I can keep up with where it goes and whats been printed. I think you can make it out in the photo below. Its ‘1 E2 F’. 1 stands for building 1, E2 is east wall back section and F indicates that end of the wall goes toward the front of the building. All the prints are listed in a spreadsheet with needed quantities, qty per print, # of prints required, # prints printed, # prints remaining, print time per print and filament used per print.

This is getting way to technical for me. I lost ya on "1 E2 F’ thing…(https://www.largescalecentral.com/externals/tinymce/plugins/emoticons/img/smiley-wink.gif)(https://www.largescalecentral.com/externals/tinymce/plugins/emoticons/img/smiley-cool.gif)(https://www.largescalecentral.com/externals/tinymce/plugins/emoticons/img/smiley-surprised.gif)

I’m starting to feel that way myself, Ken (https://www.largescalecentral.com/externals/tinymce/plugins/emoticons/img/smiley-surprised.gif)

Devon Sinsley said:

Awesome Dan, Just very cool. If you said what you are gluing it with I missed it.

Devon, initially I am using an exterior grade CA glue, but I am going to back that up with something else but I want to experiment before I reveal the added method/ Hopefully I’ll have all the parts on Tuesday and I will give it a go.

Dan Hilyer said:

Devon Sinsley said:

Awesome Dan, Just very cool. If you said what you are gluing it with I missed it.

Devon, initially I am using an exterior grade CA glue, but I am going to back that up with something else but I want to experiment before I reveal the added method/ Hopefully I’ll have all the parts on Tuesday and I will give it a go.

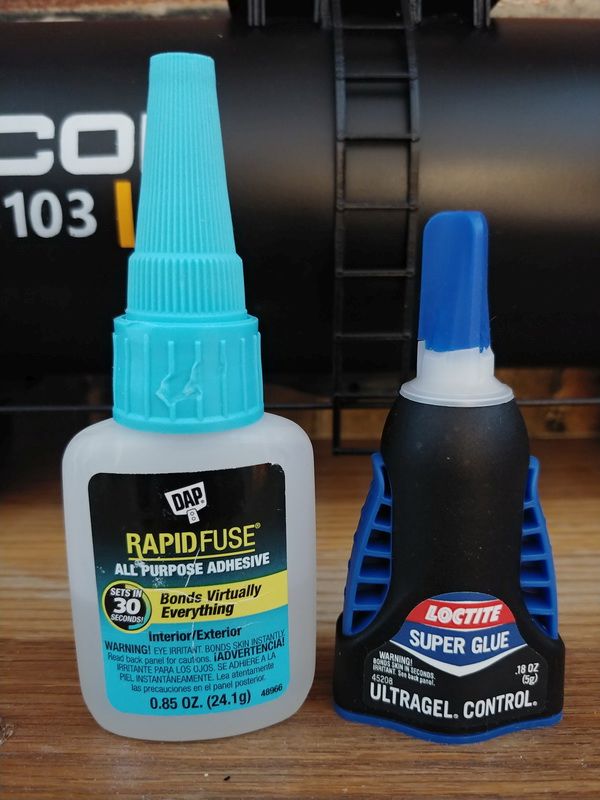
FWIW I do a lot of “mixed media” 3d model construction gluing PLA, Wood, Nylon, Steel, Brass, White metal, Carbon fiber, ABS, PVC, Polystyrene etc. and these are the two adhesives I use most. The DAP product is more pliable so I tend to use that in areas that may take a whack.

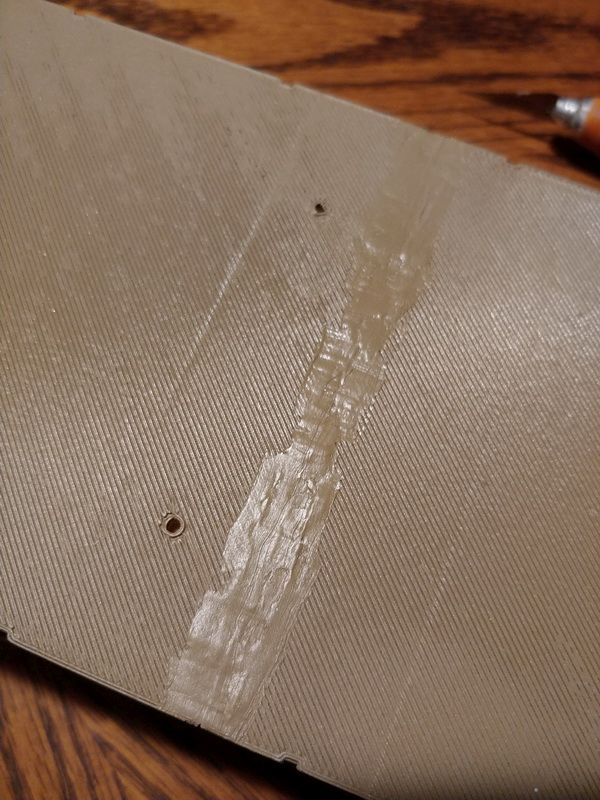
Yes those are teeth marks.

OUCH !!!(https://www.largescalecentral.com/externals/tinymce/plugins/emoticons/img/smiley-cool.gif)

Dan, I use the DAP product and the ape brand (https://www.largescalecentral.com/externals/tinymce/plugins/emoticons/img/smiley-laughing.gif)

But thank goodness my bottle didn’t come with any teeth marks.

Sure Looks to me that the two brands come out of the same “bottling plant”.

Dan,

I have been meaning to ask you. . .what are you going to use for a power source for your RR. Most use tack power or battery. . . but considering you live in Alabama and they haven’t “discovered” electricity there yet I was wondering what you were going to do? I mean there is pushing it or using coal.

I mean you must not have electricity, you are having to build an outdoor oven to cook with after all.

Vic might be able to make you a real nice bamboo outhouse.

Hahaha, you’re funny (http://www.largescalecentral.com/externals/tinymce/plugins/emoticons/img/smiley-tongue-out.gif)How deep did you get in that bottle tonight? (http://www.largescalecentral.com/externals/tinymce/plugins/emoticons/img/smiley-wink.gif)

I’ll have you know that we most certainly have electricity and this man runs it (http://www.largescalecentral.com/externals/tinymce/plugins/emoticons/img/smiley-surprised.gif)

Its not 11:00 on Tuesday but its close enough, so as promised I have an update on an alternate method to glue all the 3D printed parts together, or in this case, weld all the parts together. Back story, the other day while wondering around the internet, yes, I do that from time to time, go figure, I stumbled across an ad for a 3D pen. Now I was aware that 3D pens existed but never had a use for one. For those not familiar with 3D pens they are merely a hand held 3D printer used for drawing, writing, art, etc out of plastic just like a 3D printer. Below is a video example.

SEE THE NEXT POST FOR THE VIDEO

Why do videos disappear if you edit a post containing one?

Anyway, as I looked at the pen I asked myself … “Dan, could you use the pen to weld the parts together” … Self said … “why not” … and I replied … “Self, it just seems to logical and easy, that’s why” … sorry, I’m rambling. So I turned to u-tube and did a search on welding PLA with a 3D pen and low and behold there were many videos of folks doing just that. Now why didn’t I think of that, hmmmmm.

Well, I ordered me self a 3D pen and gave it a shot and it works like a charm.
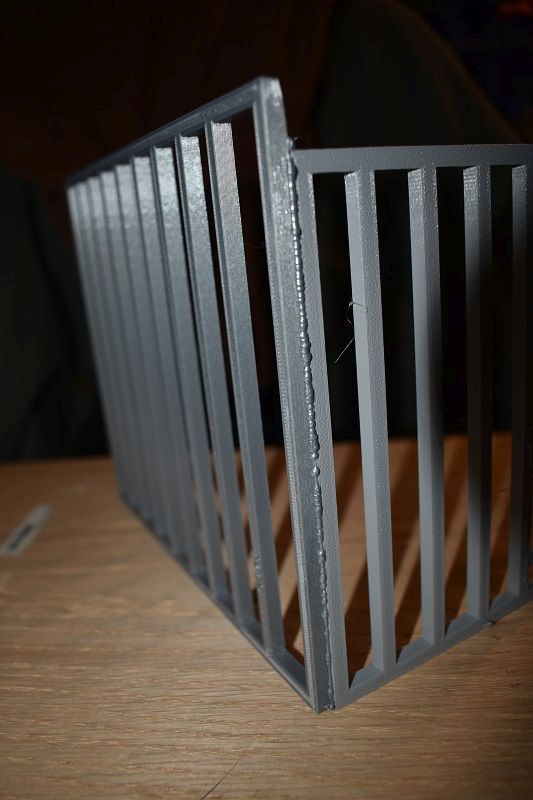
Yeah, I know it looks like a bull’s a$$ tied up with a barbed wire fence, but the strength is exceptional. Like any good weld or glue for that matter, the parent material breaks before the weld. I think with a little practice … the welds above were done about 2 minutes after unboxing the pen with no practice … one could make the welds look like real welds. Also, it would help if the designer of this project would have taken the welding into account and beveled all the mating surfaces to provide a place to build up the weld and still have a flat surface (http://www.largescalecentral.com/externals/tinymce/plugins/emoticons/img/smiley-yell.gif)Wonder if I can talk him into starting over (http://www.largescalecentral.com/externals/tinymce/plugins/emoticons/img/smiley-undecided.gif)

EDIT: The pen uses the same filament as the printer so no additional supplies needed.
Here is the u-tube video

That’s a really cool idea, Dan! Looking forward to see how you perfect it. Please let us know what the winning technique is (presumably a combination of how to create the pieces and how to wield the pen).

Jim, the first improvement is being able to see the damn weld (http://www.largescalecentral.com/externals/tinymce/plugins/emoticons/img/smiley-wink.gif)Like real welding, which I have quite a bit of experience at, you have to be able to see what you are doing. The practice run you see I did with no additional lighting and I need to take my contacts out so I can see close up. Wielding the pen and speed are the next 2 techniques I will need to conquer to really make improvements. I think the ultimate improvement will be in design. The way the current parts are designed, the weld will protrude from the parts. On the interior that’s no problem, but on the outside it will interfere with the siding. But hey, this is all a learning process and I’m having fun (http://www.largescalecentral.com/externals/tinymce/plugins/emoticons/img/smiley-laughing.gif)

Dan would it be helpful to put a bevel or chamfer on the edges to be welded in the design process do that when you weld you can lay it in the bevel and then sand flat. Is what you are doing on the surface or are you getting penetration with the weld so it can be taken down flat.

I could see a lot of possibilities with this thing.

Dan Hilyer said:

I stumbled across an ad for a 3D pen. Now I was aware that 3D pens existed but never had a use for one.

I’ve often considered getting one as they go on sale quite often but thought the same thing. I must say though, It hadn’t dawned on me to use it for joining.

When I built the SW1500, I “welded” by laying a piece of filament along the joints and then gliding over them with a soldering iron.

Before that I tried spin welding like some models I built as a kid. FAIL.

Interesting stuff,

Back in the late 80’s or maybe early 90’s the HVAC industry thouught that plastic duct work would be the comming thing so we went to school and learned how to cut and weld plastic for fabricating duct fittings, hell we were way ahead of the curve(https://www.largescalecentral.com/externals/tinymce/plugins/emoticons/img/smiley-foot-in-mouth.gif)(https://www.largescalecentral.com/externals/tinymce/plugins/emoticons/img/smiley-laughing.gif) I may even have an old text around here somewhere on the process.

My thought at the time was "how in the h–l is this plastic supposed to hold up in an attic that reaches 140-160 degrees, I do believe that is what killed that new innovation in the HVAC industry(https://www.largescalecentral.com/externals/tinymce/plugins/emoticons/img/smiley-laughing.gif)

Devon Sinsley said:

Dan would it be helpful to put a bevel or chamfer on the edges to be welded in the design process do that when you weld you can lay it in the bevel and then sand flat. Is what you are doing on the surface or are you getting penetration with the weld so it can be taken down flat.

I could see a lot of possibilities with this thing.

Now, Devon, buddy, here you are picking on us hicks from Alabama but at least we can read (http://www.largescalecentral.com/externals/tinymce/plugins/emoticons/img/smiley-tongue-out.gif)Do they not teach basic reading skills in Idaho? For instance, when I said and I quote …"Also, it would help if the designer of this project would have taken the welding into account and beveled all the mating surfaces to provide a place to build up the weld and still have a flat surface (http://www.largescalecentral.com/externals/tinymce/plugins/emoticons/img/smiley-yell.gif)Wonder if I can talk him into starting over (http://www.largescalecentral.com/externals/tinymce/plugins/emoticons/img/smiley-undecided.gif)… (http://www.largescalecentral.com/externals/tinymce/plugins/emoticons/img/smiley-tongue-out.gif)

Sorry, another one of those floaters across the plate that I couldn’t resist (http://www.largescalecentral.com/externals/tinymce/plugins/emoticons/img/smiley-laughing.gif)

Yes, absolutely it would help if I had beveled the mating surfaces to account for the weld. If time wasn’t a factor I would go back and reprint some of the parts but not enough hours left. I will add a bevel on all the trim pieces that will need external welds since they have not been printed yet. I see a lot of possibilities with this process. One other benefit with this is, like real welding, you can tack parts together to see if everything fits right and then permanently weld. If you need to take the tacked parts a part, just heat the weld with the pen or even a soldering iron set to the right temp and pull apart.

Dan, your weld looks much better than mine. Same concept though.

Rick Marty said:

Interesting stuff,

Back in the late 80’s or maybe early 90’s the HVAC industry thouught that plastic duct work would be the comming thing so we went to school and learned how to cut and weld plastic for fabricating duct fittings, hell we were way ahead of the curve(https://www.largescalecentral.com/externals/tinymce/plugins/emoticons/img/smiley-foot-in-mouth.gif)(https://www.largescalecentral.com/externals/tinymce/plugins/emoticons/img/smiley-laughing.gif) I may even have an old text around here somewhere on the process.

My thought at the time was "how in the h–l is this plastic supposed to hold up in an attic that reaches 140-160 degrees, I do believe that is what killed that new innovation in the HVAC industry(https://www.largescalecentral.com/externals/tinymce/plugins/emoticons/img/smiley-laughing.gif)

Rick, my wife is in the HVAC business and I’ve often asked her why in the hell would you run duct work carrying cold air in a space that gets 140+ degrees … makes no since to me. I think the trend today is to insulate under the roof with open cell foam insulation which will reduce the attic temps here in the south to 80-85 degrees during the summer. I would not have believed that would work until my best friend remodeled his house and took the batt insulation out of the attic (between the ceiling joists) and sprayed the underside of the roof. Wow what a difference and his cooling bill actually went down.

Yeah some how I missed that. I have a brain cloud that’s my story and I am sticking to it.

I know, man. Just trying to do my part to keep your spirit up, give you something to smile at. Always thinking of you and always in my prayers.