Large Scale Central

Waverly Southern RR Mik's Build Challenge 2017

The last two nights have been rough, weather wise. We were fortunate not to have any severe weather at our home, some were not so lucky. I think I got a little over 5 inches of rain on Friday night and then another 2 yesterday and last night. Good weekend to be inside working on the challenge build. Thanks for the pointers. I started with the kit that Micro Mark sells. I have looked at the higher end resins, but decided I would keep it simple until I get more comfortable with the process and my skills. I really enjoyed making the castings even though it was more difficult than I realized. I made a few mistakes, but nothing that impacted the final product.

I do have a question: what do you use to clean the casting to remove the mold release?

Like all plastics that are either cast, injected or molded, there is a possibility of mold release residue on the plastic. A lot of cases it matters not before painting. I think that it is more dependent on the plastic type and blend. If in doubt, a simple washing in warm soapy water, followed by a good rinse, and dry will remove any residue.

I didn’t bother, but should have washed them first. I will for those that have yet to be painted.

Dan I am excited for you. As a newbie to casting I agree it opens up all sorts of doors

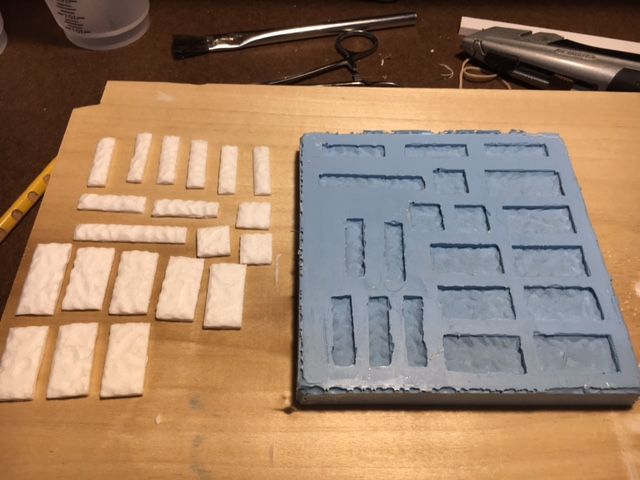
Ok, so here is the finished mold after I had cleaned all the residual flashing that had gotten under the master stones.
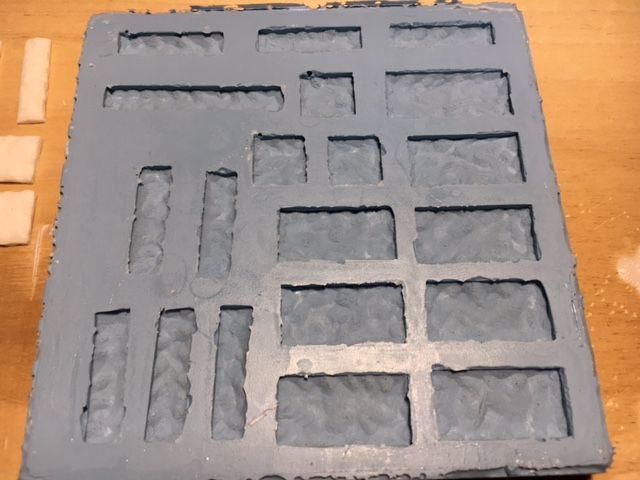
As stated earlier, leaving a gap, ever so small as it was, under some of the stones allowed the mold material to run under them and leave a thin film of silicone rubber. In this case it simply presented a cleanup issue and a pain in my rear. Lesson learned.

So, next I sprayed the mold with mold release and let that dry per the instructions and then mixed the resin and poured it into the mold. Second mistake. While pouring the resin, I got in a hurry and poured too much and it went everywhere. Luckily, I had prepared for a spill so the mess was limited to just the mold. But now I had a film of resin all over the top of the mold. I took a straightedge and removed what I could but I couldn’t get it all. Oh well, nothing else I could do at that point but wait and let it cure. I left the resin overnight and pulled the stones this morning. To my complete astonishment, they actually came out and looked like stones. I did have a lot of flashing around most of the stones due to my incompetence, but that simply took some time and a razor knife to cleanup. Here they are.
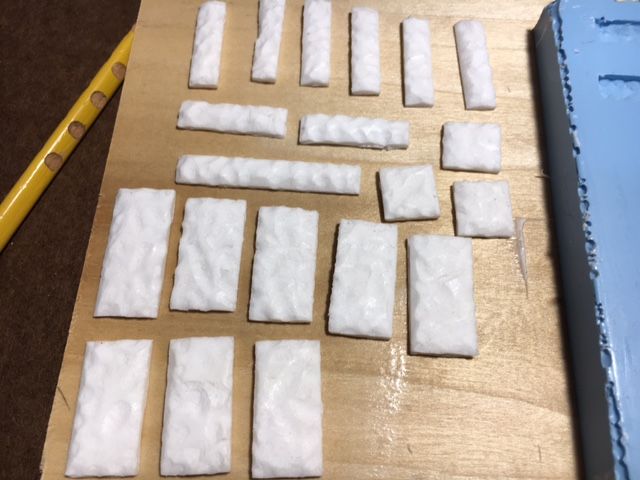
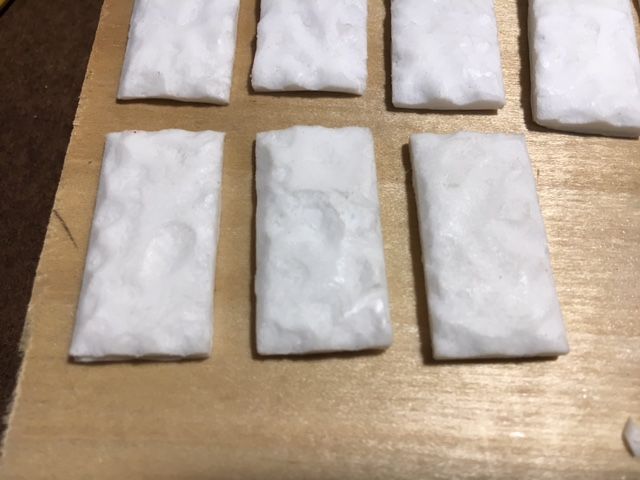
All in all, I am pleased with the outcome. I still have to make quite a few more stones to have enough, but that is just a matter of time now. I am already thinking of other ways to utilize this new found skill. Again, thanks to all of you who have posted information here on the resin casting process. It has helped immensely.

Welcome to the contest helping and learning is what it is all about…

John

Very Nice Dan. I am starting to get into this casting stuff. Made several mistakes, but its fun to learn…

Nice progress Dan. (http://largescalecentral.com/externals/tinymce/plugins/emoticons/img/smiley-cool.gif)

very nice Dan. You have just learned a useful skill

Thanks for all the positive encouragement guys. Now I have a question. What would you use to repair a tear in a silicone rubber mold? Yes, I made another boo boo. I poured a larger mold yesterday so I could cast more stones at once and when I went to remove it from the mold box I got in a hurry and tore one side about an inch or so. It is still very much usable, as a matter of fact, I have resin in it right now. I just want to repair the tear so it will not get any worse. Thanks for your input.

John Caughey said:

Welcome to the contest helping and learning is what it is all about…

John

John, you are absolutely correct. I love to learn new skills. I often tell my son, to his dismay, that if I could earn a living going to school, that is what I would do each day.

you might try taping (200 mph red duck) the mold. The problem with it’s repair, is the silicone which helps release the casting, it’s slippery.

Red Duct tape is supposedly the stickiest …

John

Thanks for the suggestion John. Due to where the tear is on the side, duct tape won’t quite work. The mold works perfectly well like it is, I just have to be careful moving it so it will not tear any further.

Dan, Try CA on the tear, You may have to do it before every pour.

Dave Taylor said:

Dan, Try CA on the tear, You may have to do it before every pour.

I’ll give that a try.

Dan Hilyer said:

Thanks for all the positive encouragement guys. Now I have a question. What would you use to repair a tear in a silicone rubber mold? Yes, I made another boo boo. I poured a larger mold yesterday so I could cast more stones at once and when I went to remove it from the mold box I got in a hurry and tore one side about an inch or so. It is still very much usable, as a matter of fact, I have resin in it right now. I just want to repair the tear so it will not get any worse. Thanks for your input.

John Caughey said:

Welcome to the contest helping and learning is what it is all about…

John

John, you are absolutely correct. I love to learn new skills. I often tell my son, to his dismay, that if I could earn a living going to school, that is what I would do each day.

Should fix it up like new:

http://www.tooltopia.com/loctite-37467.aspx?utm_source=google&utm_medium=cpc&utm_campaign=paid_search_google_pla&scid=scplp8488194&sc_intid=LOC37467&gclid=CjwKEAiA8JbEBRCz2szzhqrx7H8SJAC6FjXXUKxVNTNlUuyfPx_4BTdOfG6S9KCx54E6LKlamZacLRoCf-Lw_wcB

Ok, here is a quick mock up of the tank. Keep in mind that nothing is fastened together including the wood structure and not all the wood structure is there yet. I just wanted to get a feel of size and proportion. The bottom base will be covered with our stone. I think I will simulate a large stone slab for the top of the base that the wood structure sits on. I hope to get the wood framing started tomorrow. I still have to determine what to make the spout out of and how it will actually work.

More to come.

Here’s a thought on mold repair. I haven’t tried this but should work. Not much sticks to silicone. But silicone attaches to silicone very well. We know that when making two part molds we must use rubber to rubber release agents to keep them from becoming one part molds. So why not mix up some of the mold rubber and paint it into the tear and tape it or whatever to “clamp” it until the rubber sets. Should form a monolithic mold. You could do this at a later date when making another mold so as not to have to mix a batch just for that.

Any error in my thinking?

Devon Sinsley said:

Here’s a thought on mold repair. I haven’t tried this but should work. Not much sticks to silicone. But silicone attaches to silicone very well. We know that when making two part molds we must use rubber to rubber release agents to keep them from becoming one part molds. So why not mix up some of the mold rubber and paint it into the tear and tape it or whatever to “clamp” it until the rubber sets. Should form a monolithic mold. You could do this at a later date when making another mold so as not to have to mix a batch just for that.

Any error in my thinking?

Sounds solid to me.

Been doing some more casting this week. Made some corner stones and some edging stone. I plan to use the edging to wrap the top of the stone foundation to simulate a stone slab on which the wooden superstructure will sit.

I think I have finished casting and cutting all the required materials to finish. Now its just a matter of putting it all together. Here is what I have so far. The base and tank have been put together with PVC foam board, I have started gluing the planks on the tank itself and the wood structure is done except for the floor joist which are cut and ready to be added.

Plan to start laying stone tomorrow.

Looks real good Dan, I like the corner stones.