Dave Marconi said:Hoarder!!!
E-mail sent Jon
1 Like
Jon Radder said:I think the roof supports look great!
Thanks. I can easily come up with these ideas in my head but translating them to solid materials is always a bit dicey :D
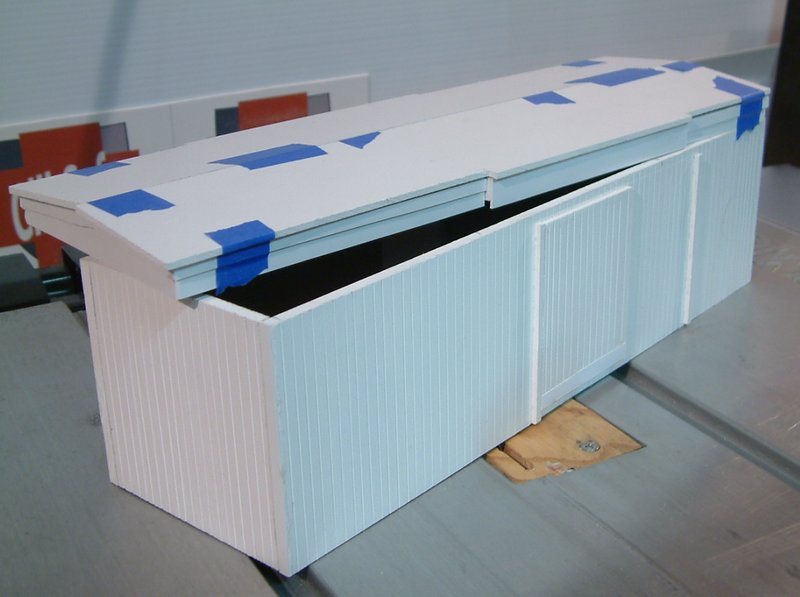
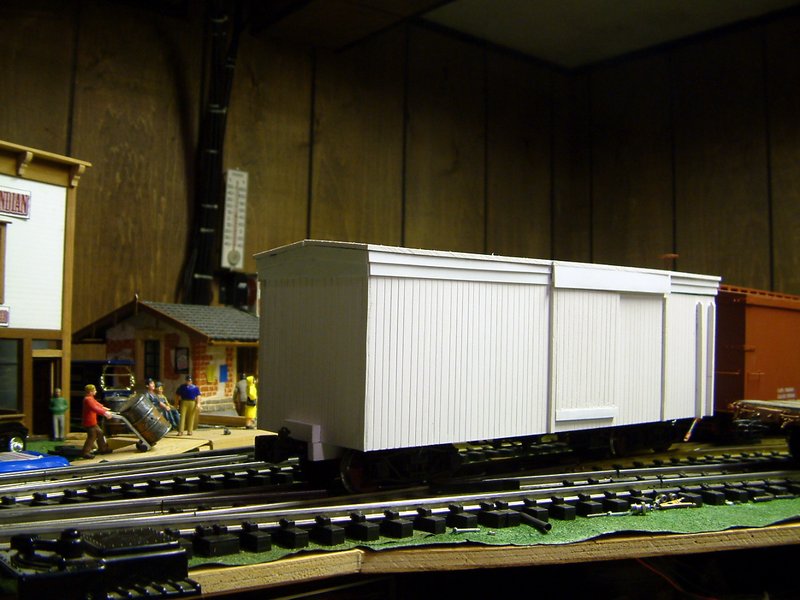
Photo dump of Monday’s work… Status as of this morning. Roof panels not attached yet - They needed another trip through the saw to fix overhang issues…
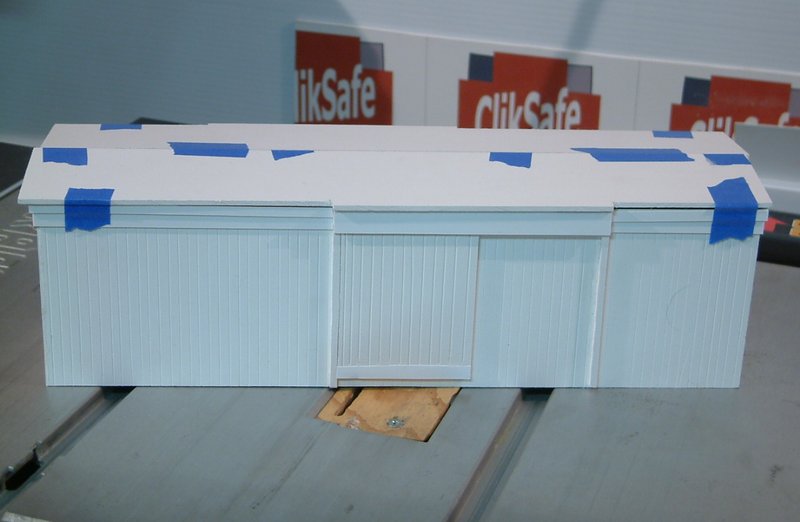
And speaking of issues. I didn’t exactly get all of the trim lined up at the corners. I’ll fix this the best I can with spot putty…
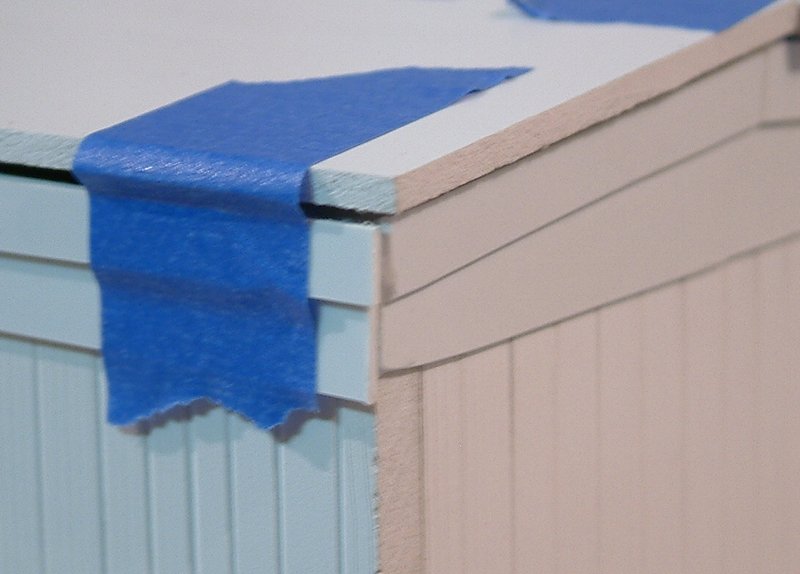
In this shot the but end of the right side was covered with styrene to fix a length mistake. I wish I had made that mistake twice…
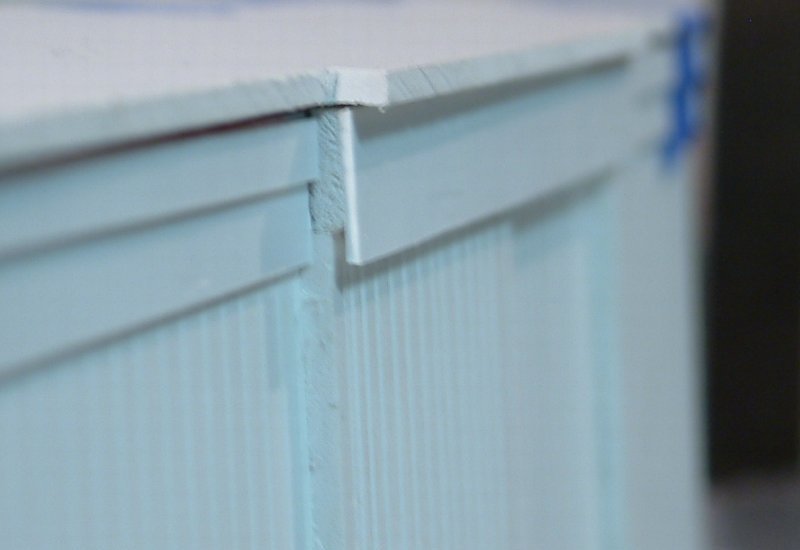
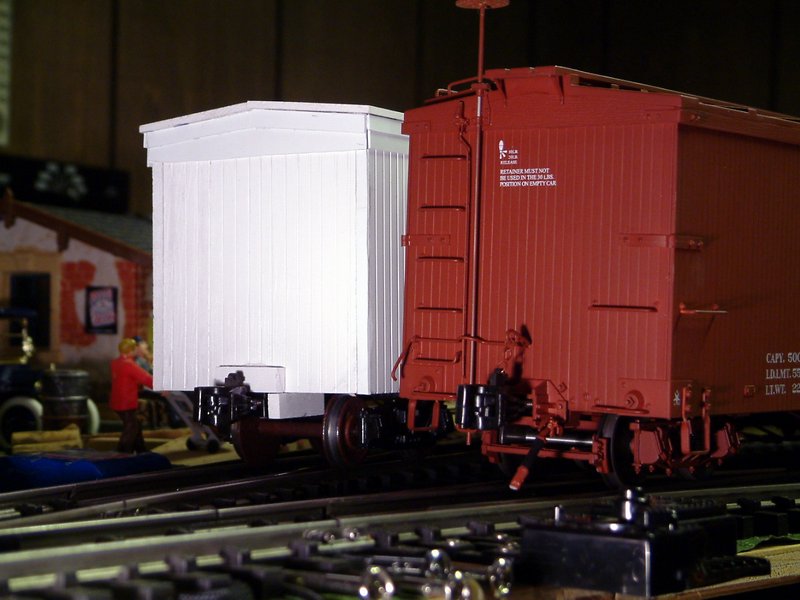
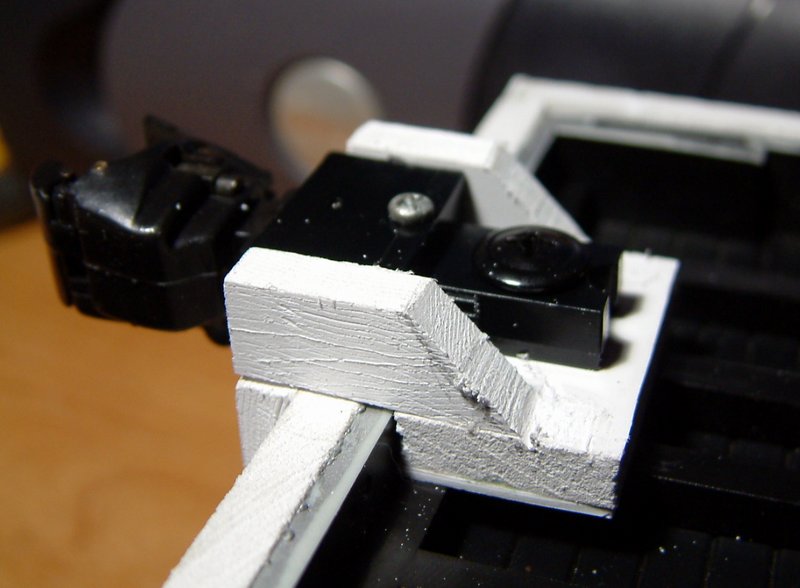
A close up of the door slide cover…
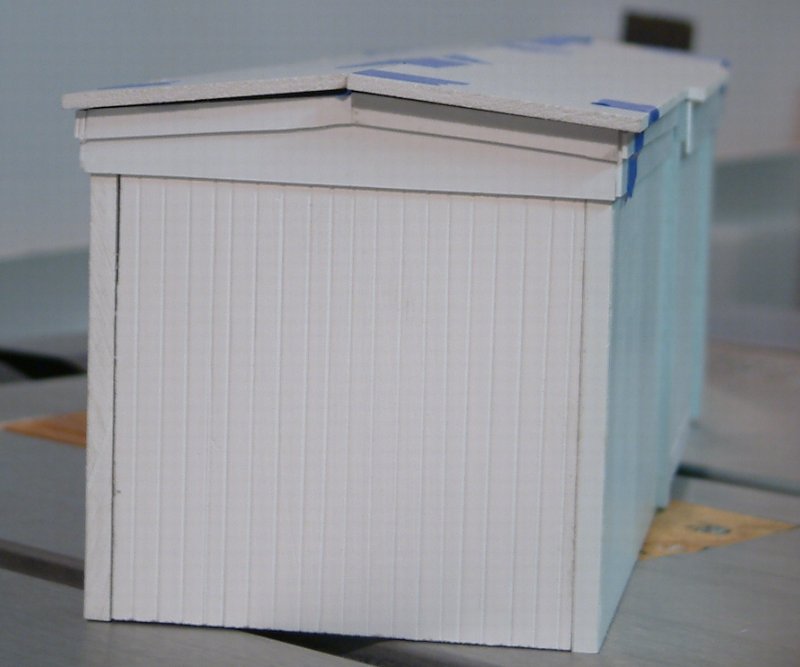
And finally. how the roof will come off. The door will not be operational…
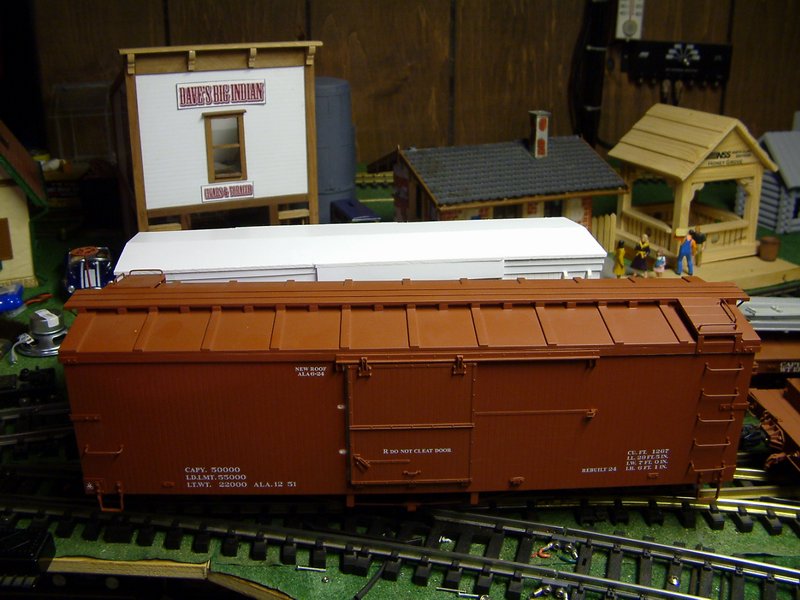
As discussed earlier, this car is quite a bit shorter than the EBT car that inspired it. I really like the ladders found on many wood cars. As seen in the photo below EBT put their ladders on the right…

I’m thinking since I have so little room on the right because of the door stop, I may just put them on the left to balance the car out. Opinions?
Jon Radder said:These pictures are over 24 hours old! :)
Photo dump of Monday's work...
David Russell said:NOT! The pictures were taken this evening. The work they show was finished under 20 hours ago! So there !!!!Jon Radder said:These pictures are over 24 hours old! :)
Photo dump of Monday's work...
On the right… and the car is looking good
Right is right. I just poured through hundreds of photos and could not find a single example with ladders on the left.
Working on ladders tonight. I haven’t decided which method to use to make them. The Chandler method is simpler, but the Strong method is more prototypical for EBT cars. Bruce Chandlers “mass produced” ladders…
Kevin Strong’s free hand bent wire ladders…(MLS photos seem to be gone)
(http://1stclass.mylargescale.com/eastbroadtop/Box154/Box15411.jpg)
(http://1stclass.mylargescale.com/eastbroadtop/Box154/Box15408.jpg)
I did a test of Kevin’s method on some scrap. The copper wire I had in-stock seems a bit too light and I need to work on getting the nails to go in straight. Pilot holes would help  My test results are too ugly to post. If I can get it to look better I might take a picture!
Maybe a combination? Put some NBW castings nearby?
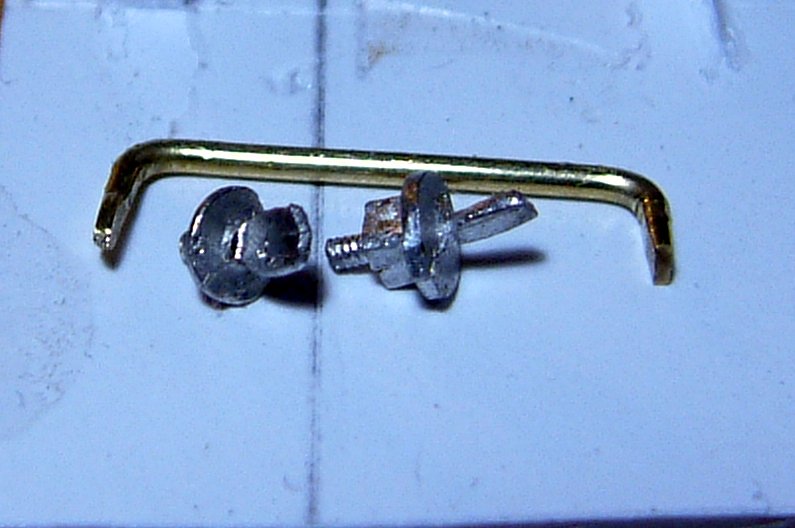
In the 60’s and sunny here today. I ran trains outside rather than working on the model. I almost ran out to try and find some 18 ga. wire and some tiny nails to further experiment with the Strong method but decided staying home and enjoying the weather made more sense After it got dark I did some experimentation with Bruce’s idea of adding a casting. Digging though my stash of castings I did find some ladder rungs with nut detail, but they are were too wide and I didn’t have enough for the car. I did find a pretty good stash of NB & NBW castings. After trial and error of trying to get them to look acceptable with a bent rod rung, I think I hit on it. After cutting the rung to length I put it in a smooth jaw vise and flattened the end using a 3 foot pipe for leverage on the vise. With a pair of smooth jaw pliers I did the same to the stud on some NBW castings. Mounting holes were pushed into the foam board with a mini screwdriver, then a notch was made to let the brass rod to recess below the ladder edge. Finally a modified NBW casting was pushed in with the rod. This is a lot of work but the end result is pretty good. Here is my proof of concept test ladder with both styles installed…

On the left, my execution of the Strong method is pretty poor. The wire is too light and I only had track spikes, no round head nails small enough. The modified Chandler method looks better to me…
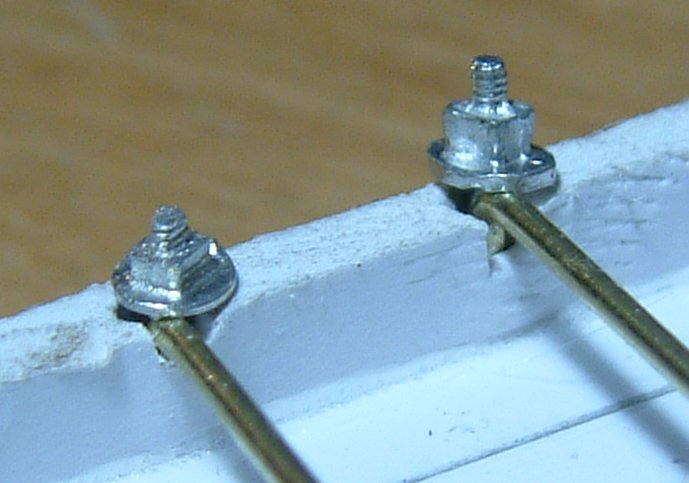
Funny, even wearing my Opti-Visor I didn’t notice that the NBW castings were different This shot shows the elongated hole and the notch to allow the rod to sit down below the ladder edge…

And finally, a couple of close ups of the business end of the parts…
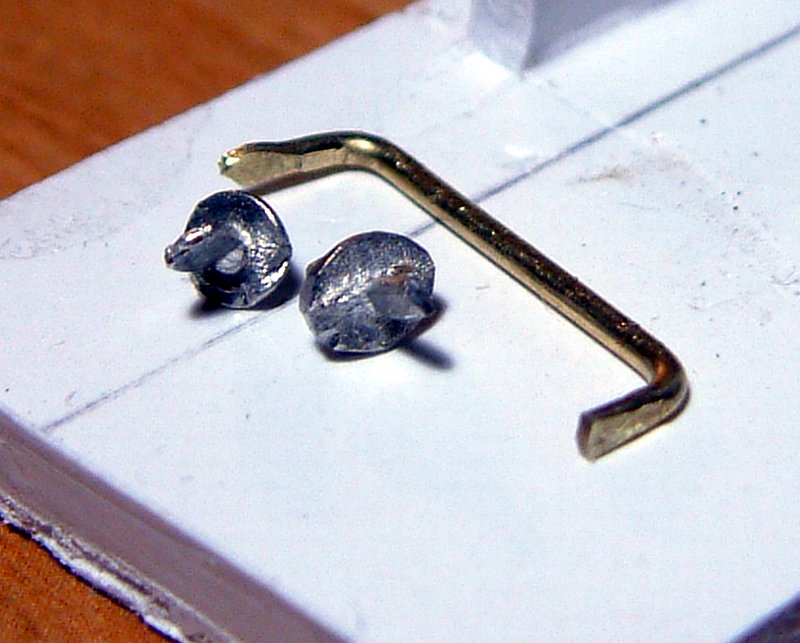
So it looks like i have a bit of work to do in cutting and flattening rod 
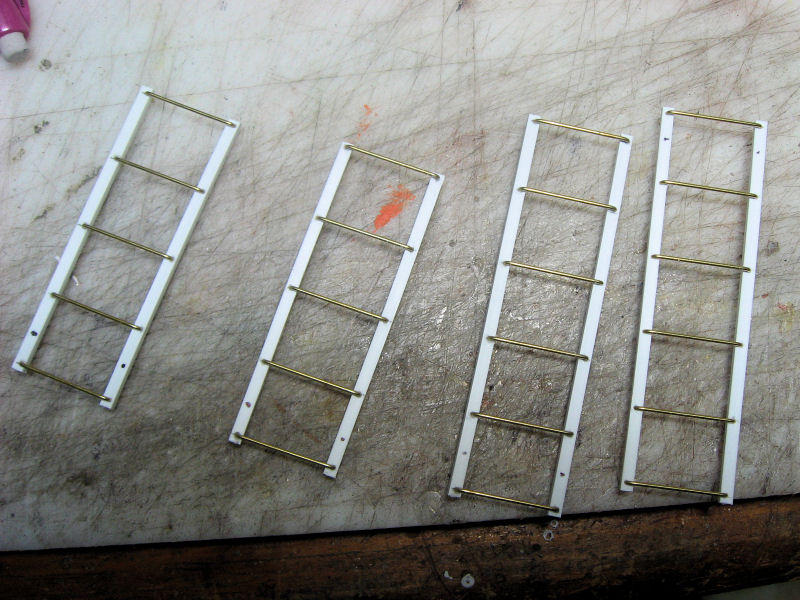
LOTS of pictures Still not decided on a ladder method we took a ride to Micheal’s today. I picked up some aluminum wire, some eye pins and some “mini brads” which are actually paper fasteners. BTW - if you go to Micheal’s to buy wire, look in the framing section NOT the jewelery section. 50 Ft for $3.99 Vs. about 4-5 feet for $2.99! Armed with new materials I did some more experimenting…
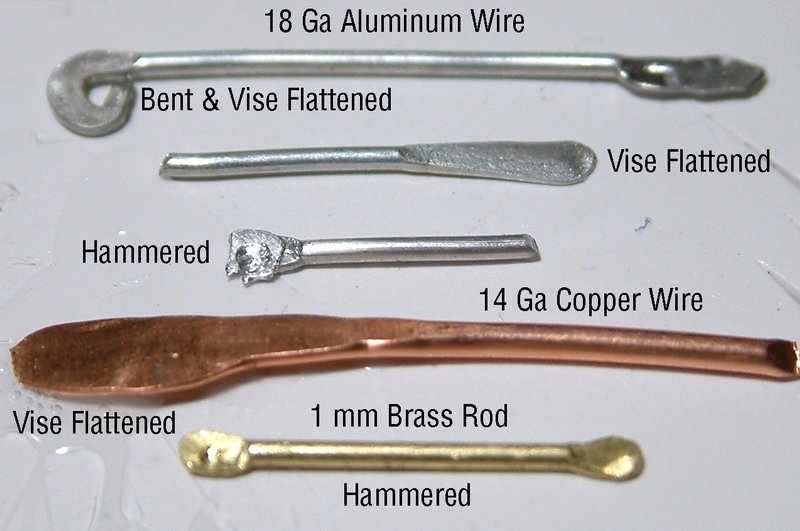
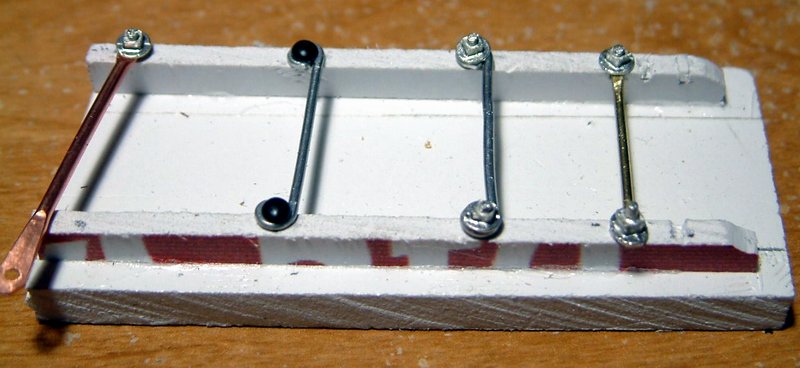
I really tried to use the hammered brass rod like Bruce did on his hoppers, but my NBWs require a 5/64" hole and I just couldn’t get a big enough end on the brass. Copper worked, but it’s not my favorite look. Here are some of the above methods installed…
The first one looks the best to me. Cutting the recess is a bit tedious and unfortunately I don’t have enough NBWs to do the job. The Aluminum wire bends pretty easy and looks pretty good even if the rod is off-center to the casting, but again I’m short castings.

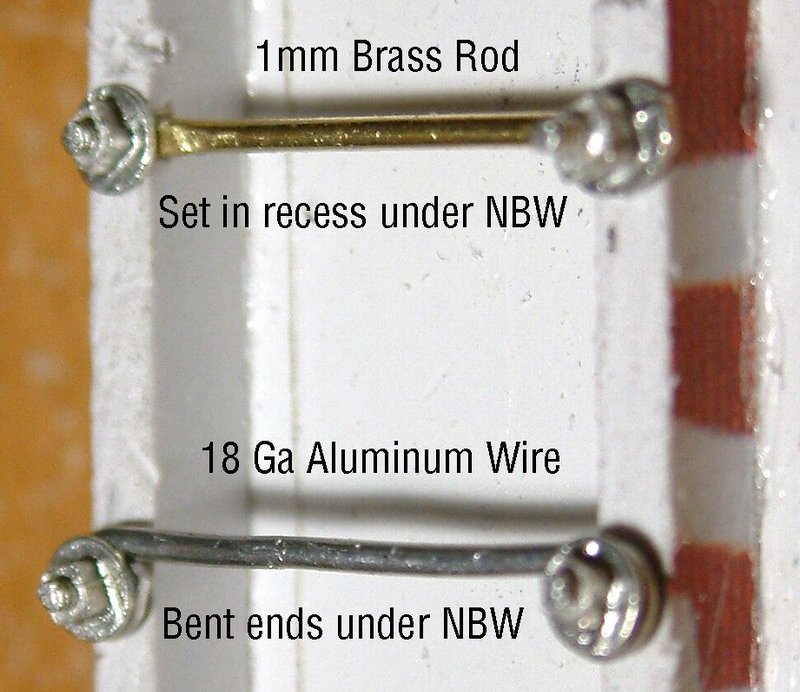
The top sample in the photo above is the fastest install. A small hole needs to be drilled as the “brads” are too soft to use like nails. The copper wire is big enough that I can get a good end on it for drilling. It’s a good look, but a bit too large for this application. The drilling is also labor intensive. So, my #1 choice based on easy of installation, cost and look is the Aluminum Wire / Brad combo. Close second is the brass rod in the recess. If I had enough NBW’s that would probably be #1. Here they are side-by side…
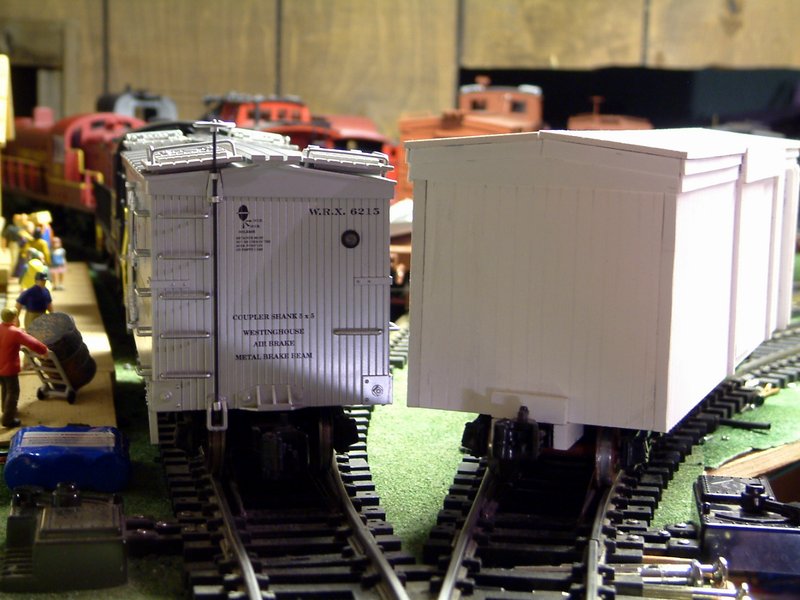
I made a conscious decision not to get stalled while deciding on the ladders. A lot of my previous projects hit a wall when I got stuck on a small detail, then l lost interest. I figured the best way to keep this car moving was to put couplers and wheels on it One I did I took it down to the indoor division for some comparison photos. Here is a “roster” shot in the yard coupled to an AMS car…
Height comparison to the AMS car…

Comparing length with the AMS car. This is a “shorty”. I think I’ll name the car Shorty after Roosters recently departed dog…
And finally, and end comparison…
It may be short, but it’s longer than an EBT 2-bay
This time I decided to model the draft timbers. Unfortunately the wheels are very close to the end on the Delton frame and the timbers interfere with wheels in even shallow curves…
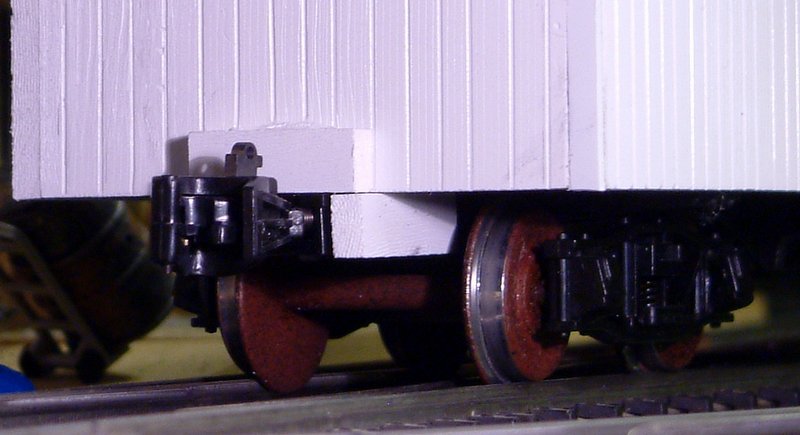
And finally, a comparison to an example of the donor car…
Back upstairs I hacked off the back of the draft timbers. With a little clean-up this should allow a little more swing of the trucks…
Not sure what I’ll tackle next. The end rod needs to be fabricated and maybe some cast details will go on while I’m making my final decision on the ladders.
Lookin’ good Jon. What’ll it be lettered?
Neat. I like the way the recessed ones look. That’s got to be a whole lot easier than the way I did it. Who’s NBW castings?
Jon,
Nice model.
Thanks for the tip about the aluminum wire.
I have tons of Accu knuckles if you need more.
Thanks guys
Richard - The car will be lettered for the CVSRy similar to the one Bruce did. I have to figure out where I can fit in Shorty.
Bruce - Those NBWs are from Rodney. He sent me a bunch of samples several years ago. I think his casting venture fizzled though. If I go that route I’ll end up using Ozark #29 NBW’s. I only have 3 left so didn’t use them for the test. That is by far my favorite look of the bunch.
John - Still working off the stock of knuckles from our last deal, but if I have anything you can use I’m game for more
Bruce’s C.V.S.Ry. car…

I think the data is a bit too big, but it’s tough getting much smaller in vinyl.
1 Like
That’s coming out great Jon.
Have you considered Phil’s NBW.
That’s about all I use now, except if I need larger ones.
Very nice work Jon,
I like the details you are putting into this model.
Alec
great re-build, Jon… 