Real nice Jon. A fine brush, a can of red paint, and hours of patience should start you towards the faded, worn look you want 
It’s the “hours of patience” that I’ll have a hard time finding. We’ll see what it looks like this time next year!
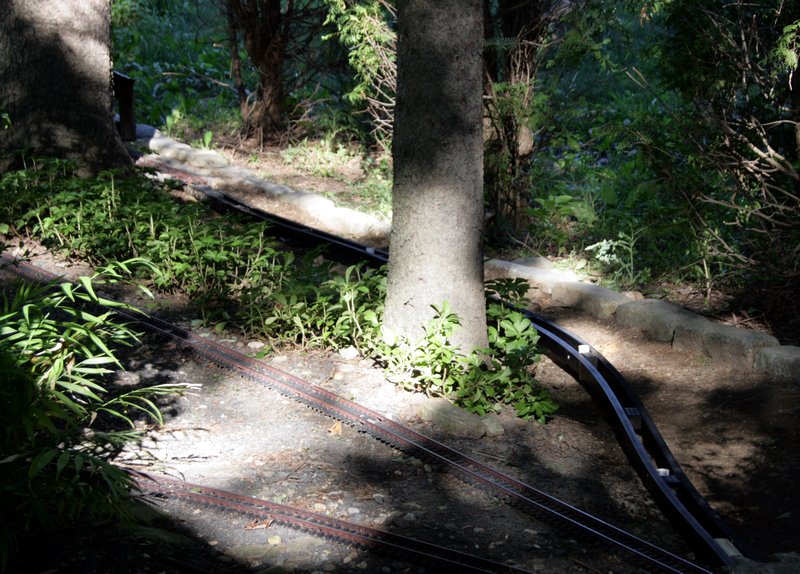
Yesterday, just before the thunderstorms rolled through the MOW Crew removed the mainline switch for maintenance and began working on the sub-grade for roadbed leading to the new track. With a little luck the house will be on-line before the end of the weekend.
Thanks for the info, It has been many years and a new smaller house. I am looking to start my second layout, the first used 4x4’s under the track. Curves were the worst to make. that PVC looks a lot easer to use. Second I wouldn’t paint it, clear coat. the weathering looks wonderful.
Good luck on your new layout. There are lots of people on here using the PVC Ladder roadbed so it should be easy to get your questions answered. I’ll post a few progress pictures of the short section I’m constructing to show a few details.
EDIT to add: Bruce Chandler’s J&B Build Log is here: http://www.largescalecentral.com/forums/topic/6204/search/view/page/1 In it you will find several great tips and ideas for PVC Ladder Roadbed.
For those of your familiar with PVC ladder this installment will be old news, but since Jasher was interested in the method I’ll document a few of the steps I use.
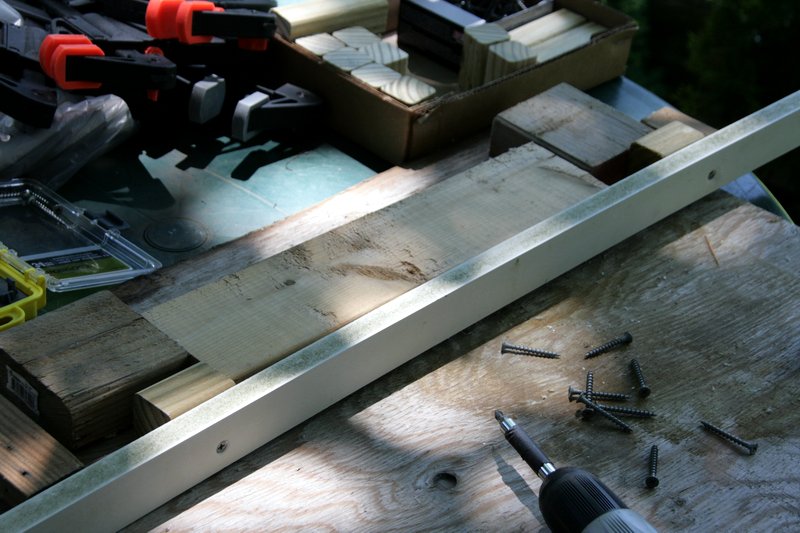
Following Bruce’s lead I built a jig for adding the 2x2 PT spacer blocks to one side. My jig is not as pretty as Bruce’s but it works…
(http://lsc.cvsry.com/post4/EngineHouse07-05-14_01.JPG)
Once one side is assembled it’s put in place and bent to the final curve. I’m using 1" PVC pipe scraps as stakes this time. They drive much easier than the 2x2 PT wood stakes I’ve used previously…
(http://lsc.cvsry.com/post4/EngineHouse07-05-14_02.JPG)
Once all the stakes are in place the temporary grade is set and held with teporary stakes and clamps…
(http://lsc.cvsry.com/post4/EngineHouse07-05-14_03.JPG)
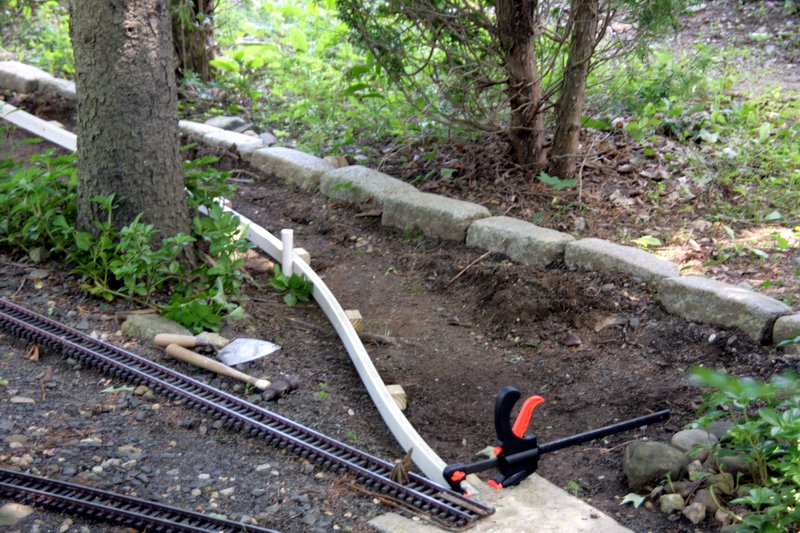
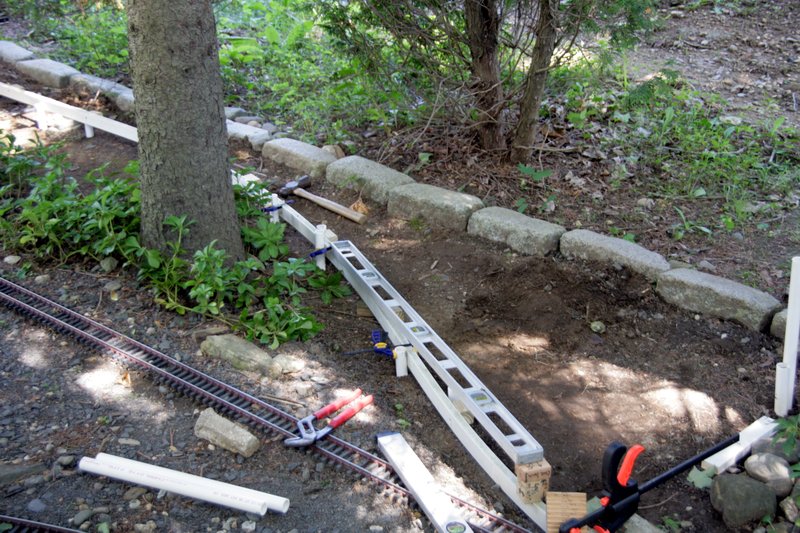
At this point a camera setting got changed by accident so a bunch of photos were unusable. The next step was to come along with the other side of the ladder, set the side-to side level and screw the two halves together wihich then holds the curvature.
I like to paint my ladder so it doesn’t show when ballast or back fill gets thin. The entire section was moved into the yard for flat black paint…
(http://lsc.cvsry.com/post4/EngineHouse07-05-14_04.JPG)
When the paint dried the ladder is repositioned, final grade is set and the ladder is screwed to the stakes…
(http://lsc.cvsry.com/post4/EngineHouse07-05-14_05.JPG)
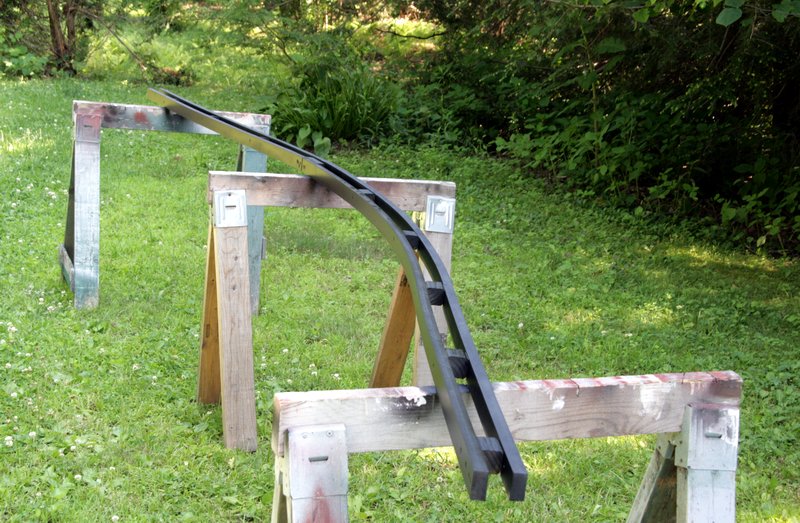
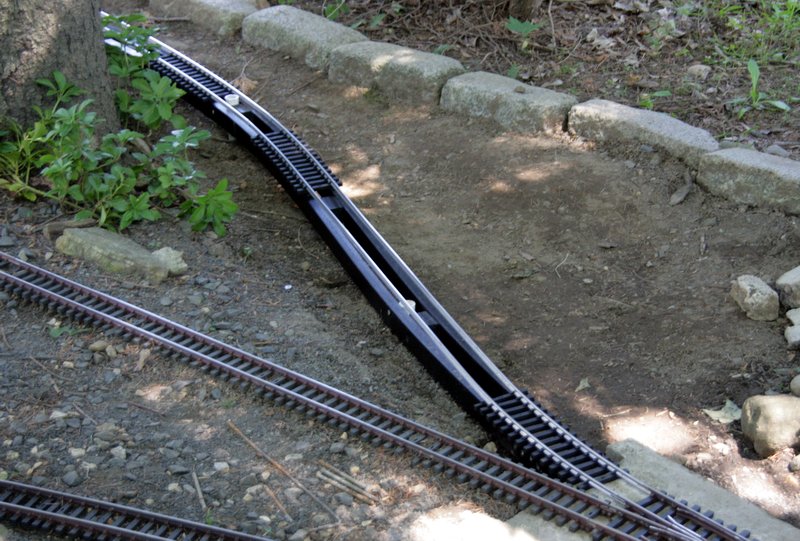
Tomorrow I’ll bend rail to follow the sweeping curves of the roadbed.
Sunday all the rail was bent and a test train was gingerly run over the temporarily placed spur to make sure the 6% grade was passable. here is the bent track in place with just enough ties to hold it together.
Switch end…
(http://lsc.cvsry.com/post4/EngineHouse07-06-14_01.JPG)
House end. Main on the left…
(http://lsc.cvsry.com/post4/EngineHouse07-06-14_02.JPG)
This shot shows the last "straight section a little better. It has some quirky bends. At first I was going to try and make a straight work, but decided to follow the roadbed and add a little interest…
(http://lsc.cvsry.com/post4/EngineHouse07-06-14_03.JPG)
After dark I placed all of the ties and masked for paint. This evening I painted all the sections and rail clamps. A thunderstorm blew in just as I was finishing so no pics or further progress today.
When I was figuring the grade I couldn’t figure out why it was so much steeper than the main (6% Vs 3%) so I shot my laser from the rail head at the house to the main. I was surprised to find the main was 4 inches lower than the house track!
Thanks for the Tips and techniques you use. Sorry for setting the thread into a side track 
Jasher Chalker said:
Thanks for the Tips and techniques you use. Sorry for setting the thread into a side track
Your welcome! No need to apologize, thread drift is expected, and some say required, on this site!
Last evening I back-filled inside the ladder with concrete scraps and crushed stone, then laid the track down. Again I didn’t get pictures as I worked until almost dark.
Tonight I’ll attach the track to the ladder and perhaps run another test train or two. I will be needing lots of fill dirt as the ladder is three or more inches above existing grade in some places.
Jon, personally I like the look of meandering track. I intentionally meandered my track heading into Shannon. Watching the train cars wiggle their way along is so much more interesting then watching a train on arrow straight track. And even when the track is empty, its more visually interesting (to me) to have it meander a bit then to be laser sight straight.
I love your work and I am jealous.
Jasher Chalker said:
Thanks for the Tips and techniques you use. Sorry for setting the thread into a side track
Were on page 5 and thread jack is legal past page 3 I believe but I need to check the rule book too be sure.
Welcome aboard Jasher
Looking good Jon.
Thanks guys!
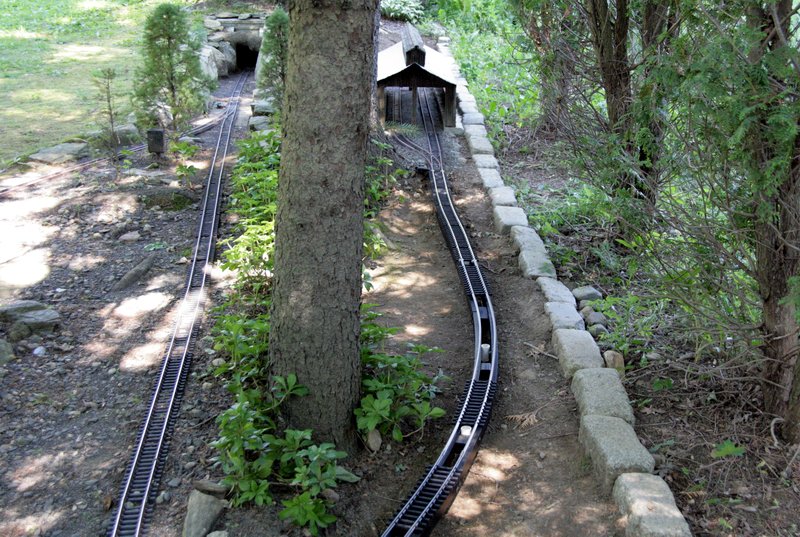
Track is attached to the ladder and I got some of the back filling, ballasting and a little landscaping done tonight. All the while thunderstorms were near, but no rain, so I kept on working at tasks that could be aborted quickly if the skies opened up.
I decided to take a chance and bring out a test train. My mobile clearance gauge (Bachmann 45 Tonner aka Dizzie) did great pulling 4 cars up the steep grade. It just barely fits through the door on the diverging route and is close on the straight route - but it fits! That means everything I own will fit!
The house will hold about 8 cars under cover and the tracks will probably hold 9 or 10 depending on clearance at the switch.
For operations purposes this will be an industry. Not sure what yet. Time to update TrainOps!
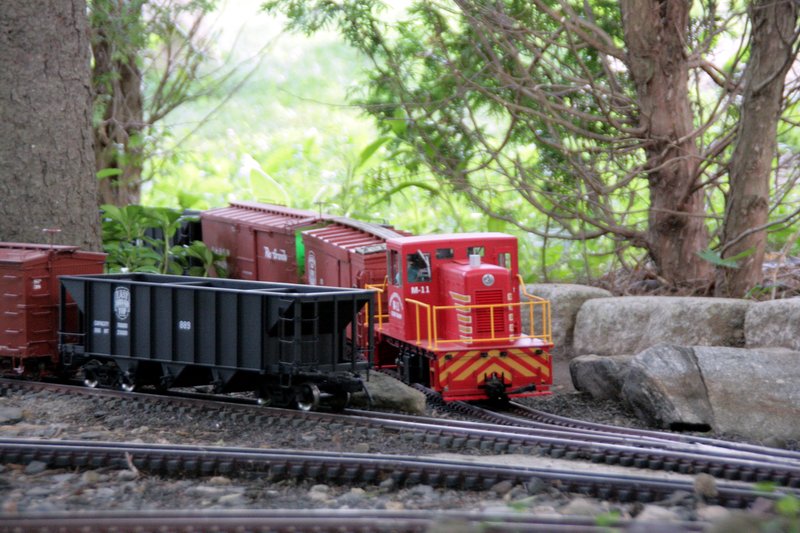
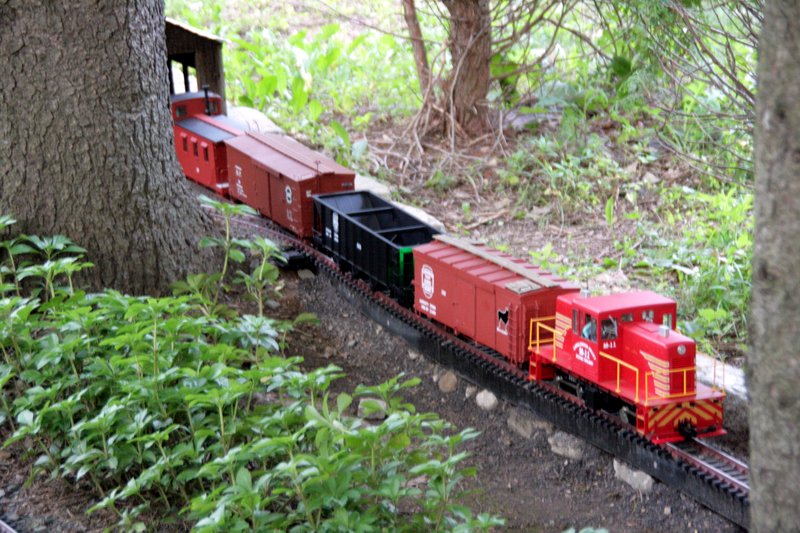
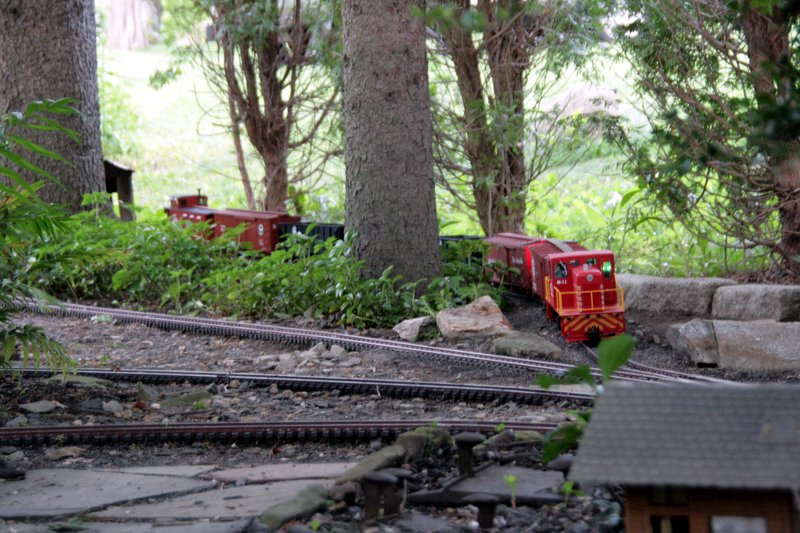
No work today, only the first revenue train and plenty of photo ops!
Here M-11 shoves the first cut of cars up the steep grade…
(http://lsc.cvsry.com/post4/EngineHouse07-10-14_01.JPG)
More than 4 cars and M-11 begins to slip as the track straightens out…
(http://lsc.cvsry.com/post4/EngineHouse07-10-14_02.JPG)
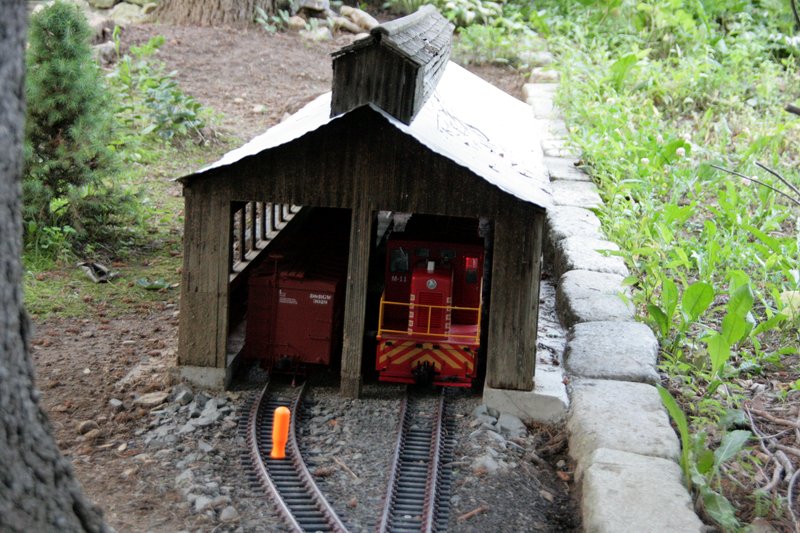
I’m going to need a Close Clearance sign! M-11 just barely clears the center post…
(http://lsc.cvsry.com/post4/EngineHouse07-10-14_03.JPG)
Last night, while waiting for the thunderstorm that never came I planted the BFR on the left. I picked it out of the lake 2 years ago and it has been waiting for a spot since. The area to the left of BFR is waiting for some mulch…
(http://lsc.cvsry.com/post4/EngineHouse07-10-14_04.JPG)
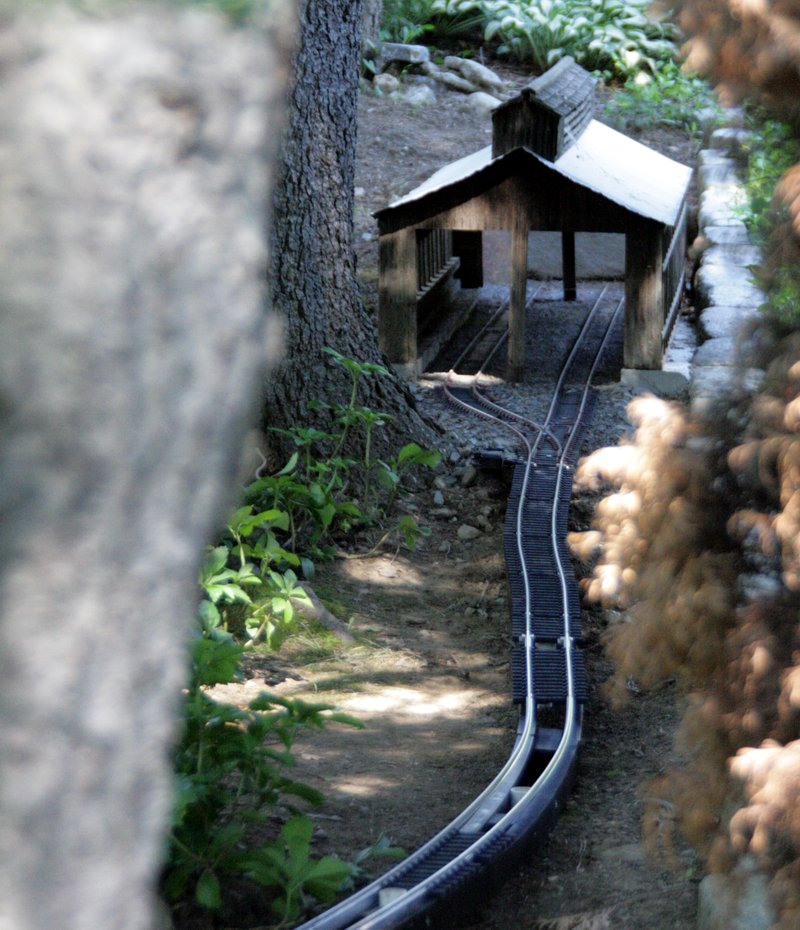
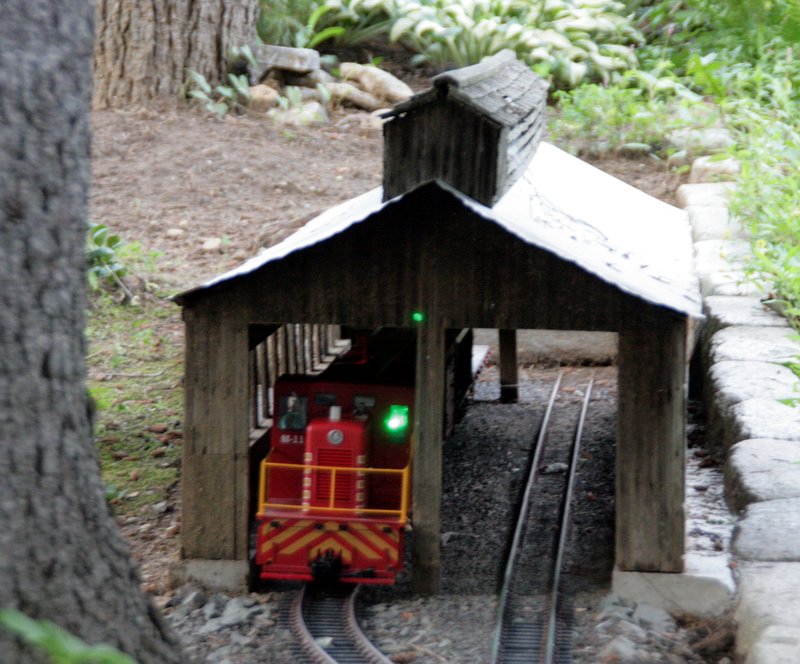
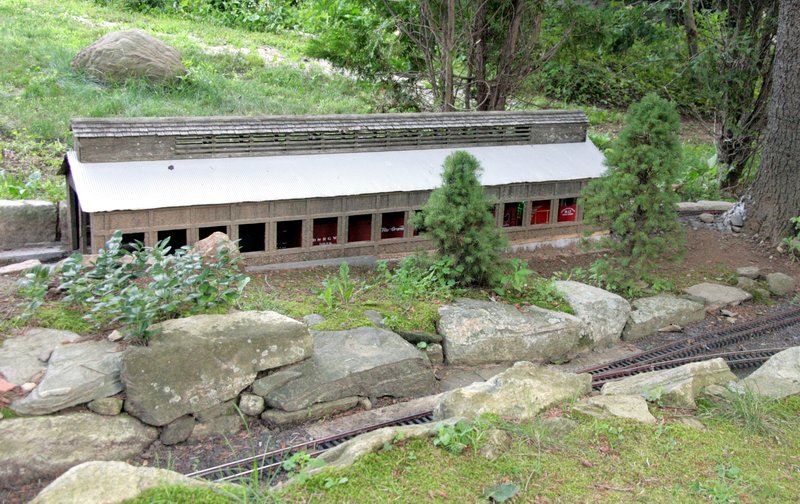
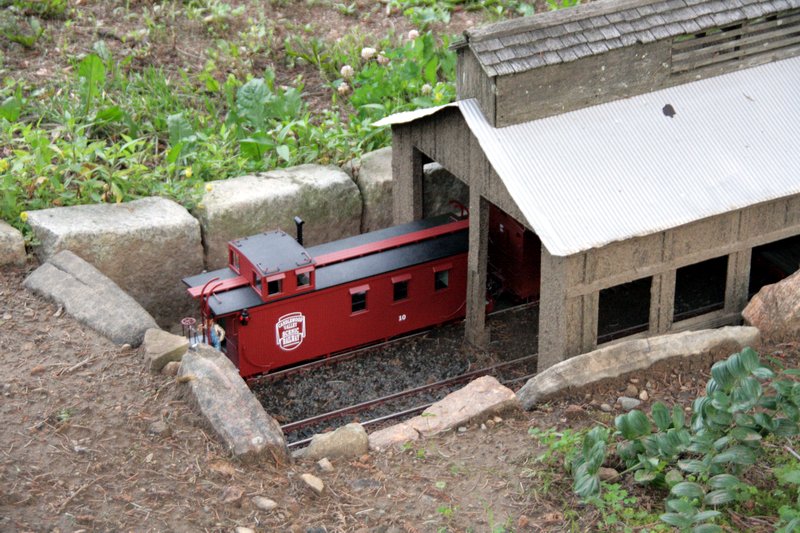
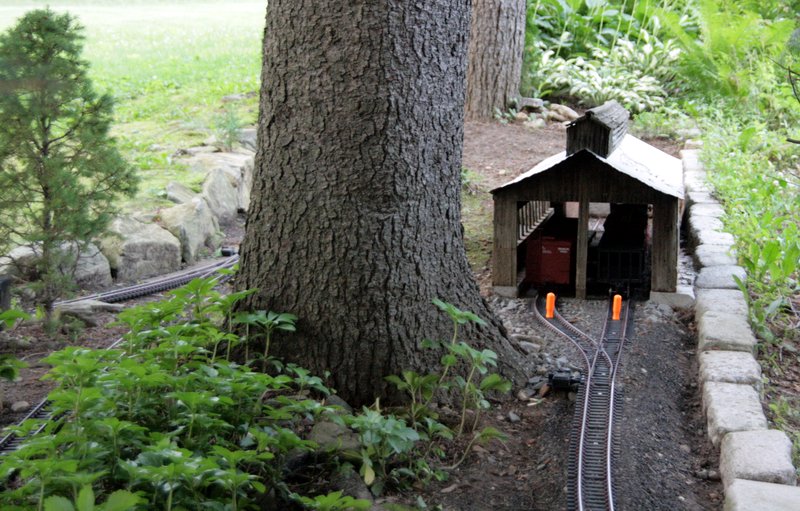
M-11 is in the house! Close ups show the dirt splash from recent downpours. I guess I have to learn to rinse my buildings before pictures!
(http://lsc.cvsry.com/post4/EngineHouse07-10-14_05.JPG)
(http://lsc.cvsry.com/post4/EngineHouse07-10-14_06.JPG)
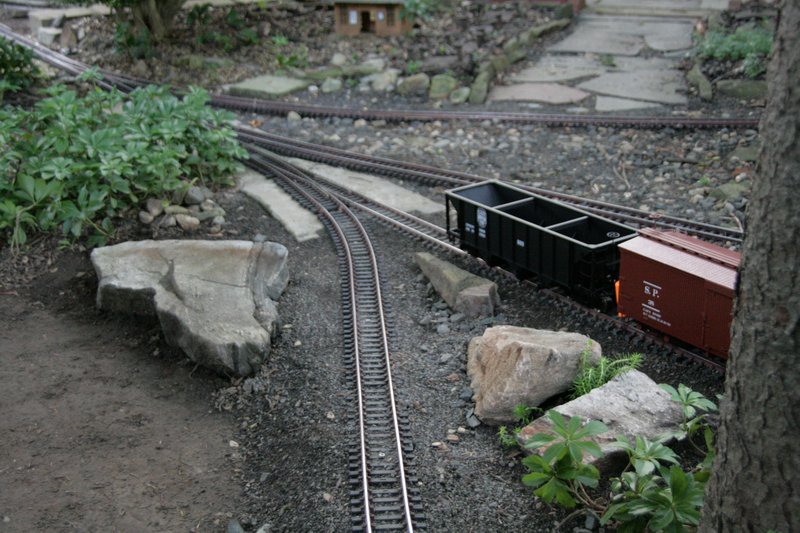
M-11 shoves the second cut into Track 1. The area on this side of the track will get dirt fill this weekend to cover the ladder…
(http://lsc.cvsry.com/post4/EngineHouse07-10-14_07.JPG)
End of Track!
(http://lsc.cvsry.com/post4/EngineHouse07-10-14_08.JPG)
M-11 fits a little better on track one, but is still close. The Orange pick tool is acting as a derail on track two. The house is almost dead level, but if somehow a car got as far as the switch, the grade quickly goes to 6% and potential disaster at the bottom curve…
Revenue cars delivered, derails in place, M-11 has returned to the main…
(http://lsc.cvsry.com/post4/EngineHouse07-10-14_10.JPG)
A few “hours” later, M-11 returns to pull the cars for the trip home. On the down-grade M-11 can handle them all in 1 cut…
Jon,
When you harvest BFR can you only keep the females over 6"? What do you use for bait? We only have undersized, male BFR over here…
Engine house looks good.
Craig, if they are undersized, how do they qualify as true BFRs ???
I use cheeseburgers and beer for bait. Quest for Rock and Rock Quest II are documented on this page of an old thread: http://www.largescalecentral.com/forums/topic/15149/easing-the-grade-on-coal-dump-cu/view/post_id/154414
Jon Radder said:
Craig, if they are undersized, how do they qualify as true BFRs ???
I use cheeseburgers and beer for bait. Quest for Rock and Rock Quest II are documented on this page of an old thread: http://www.largescalecentral.com/forums/topic/15149/easing-the-grade-on-coal-dump-cu/view/post_id/154414
That’s why they are ‘illegal’ and you’ve got to throw them back! High quality beer or just the cheap stuff? If it was me I’d be going for the high quality micro-brews!
Nice job there Jon. Don’t rinse your buildings down they look more natural the way they are. I think I’m going to have to use your and Craig’s method of finding BFR’s especially the beer. Most of the rocks on my layout have come from the old Northern Pacific right-away that traveled between Mullen, Idaho and Taft, Montana. Great looking and all sexs, I mean sizes.
Jon
Looks real nice.
You could put some small stone next to the building to cut down the splashing.
Looks great Jon
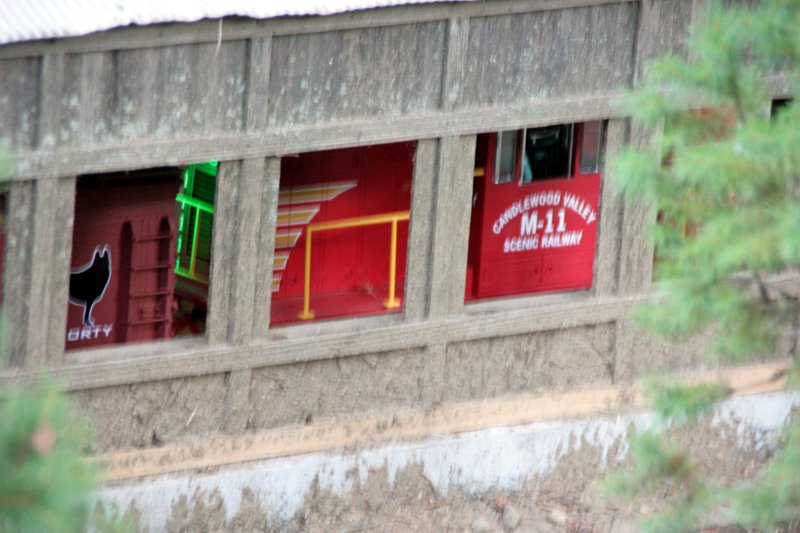
As for an industry we used to have a forging plant real close to hear and the one main building of the old Wilcox Forging plant looks a lot like your structure. A grain processing plant comes to mind as well if you feel like adding towers and all. Also nice to see Shorty!! THANKS!