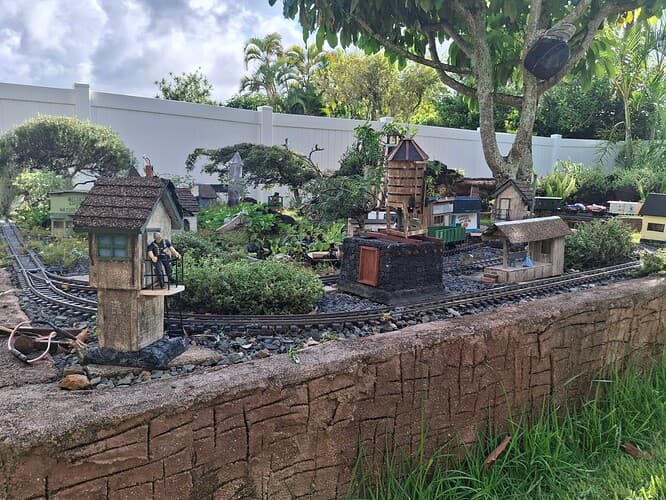
This was one of those long-delayed projects that I last referenced Triple O - 2026 Plans & Objectives. My father-in-law made these simple towers about 10 years ago to power the mainline and passing siding in the harbor town of Haluku’ilio (Dog Wallow). Acts of Dog a few years ago had left them stripped of signals, signal arms, access platforms, and ladder. Below is the more battered of the two:


A bit of solid core wire once ran up the dog-chewed (but saved!) signal arm to a plastic signal. Raising the signal, raised the light switch, powering the track. Simple, fun, and visual, it also forces interaction with the railroad to run trains, something that I have come to enjoy.
Like with our other rehabilitation projects, the real challenge will be to repair, replace, and improve based upon our learning while allowing the original creator’s handiwork to show through. A key element of this will be to make these removeable to assist in their long-term preservation. This means that the delicate wooden stairwells that once ascended these towers will not be replaced (I did keep the parts! The pups left us enough to make one stairwell for some future project…just not this project.). It also means buying a couple two prong trailer fittings to allow us to take these on and off the layout. I’ll also make foam bases, carved and roughed to look like rocks, to enable the wires to come out the bottom and run where they need to run against the future date when I promised I’ll bury all wiring (HA!  I crack me up!). Visually, it will make the foundation consistent with most of our other work, too.
I began yesterday, still in the waning grips of the 'flu. For the ladder and safety rails, I borrowed from an old Garden Railways article the idea to use wire fencing material. This worked Eric’s 2025 Mik - Ke Ka’aahi o Luna Nana / Inspection Locomotive , so I rustled up some of the remainder.

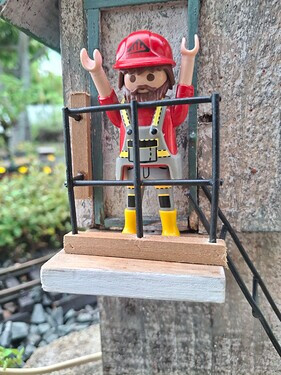
I worked over a section with a Dremel-mounted wire brush and cut tow ladders and two sections of safety railingsMy 1:24 helper shows the results.


Then I spent 30 minutes looking for one of the ladders and the material to make a replacement. Enter Kid-zilla, who scolded me for working while sick, told me to look in the shed (I had put the material away), and proceeded to cut a new ladder.

While this was going on, grabbed a hand saw, ruler, scrap timbers, and a surviving bit of signal arm to make a new signal arm.

I also glued in place a replacement platform which I had cut, sealed, and sanded some weeks ago before tossing it into a project bucket with the old parts.

Today, rather than trying to install the safety railings in situ, I decided I would mount the safety railings in strip wood then glue the assembly to the platforms, only to find almost my drill bits were missing and eventually snapping one of the wood bits.

The picture above shows it just before an epoxy repair to give an idea of where I am going.
Out of drill bits, out of two-pronged connectors, and nearly out of construction adhesive. That’s it for now. I could start working on the bases, but I don’t want to do that until the wire connectors are in place. Once this is all done, the remaining issues will be making the signals work as they used to (up for on / horizontal for off) and whether or not to try and blend the colors of the new wooden parts with the old ones. As I write, I wonder why it never occurred to me to take on this project earlier as a project-between-projects? I had kept the dog-chewed parts for measurements; even I can use a razor saw and mitre box; and everything I needed was more or less on hand.
Updates as progress merits!
Eric