Large Scale Central

The Build of GF&BF Railroad

I am not much of a blogger but I will do my best to try to provide updates as best as I can.

The origin of the name: Since the start of my wife and I dating we began using the modern day acronyms of GF and BF. After we became married we still continue to refer to each other as such mostly because we view ourselves more of a dating couple than a married one.

The layout: We choose to do a perimeter style layout with the track running along the fence line of the back yard. Teresa will be adding landscaping of bushes and flowers along with little village settings consisting of anything she finds that interests her. The track will be floating to accommodate for the temperature fluctuations that will occur throughout the day. We are using ten foot brass flex track with Rail Clamp connectors.

Schedule and Budget: We don’t have a schedule or a budget. I am prepping the rail bed in manageable sections as I make time to work on it. We purchased most of what we needed up front though I have had to make a few additional purchases along the way. I started out with the LGB MTS Type III with a wired hand held controller but am now switching over to the Piko Central Controller with a wireless hand held. This will make it easier to watch and control the train in any part of the yard.

The whole purpose of us doing this is to have a summer project and to add some excitement and coolness to the backyard. We are in it for the fun of it and will be approaching this as a novelty rather than a model railroad.

Some pictures of the initial scouting and surveying of the first pieces of track to be laid.

This is a raised garden in the corner I choose as the starting point of the track. I had to bend around the radius of the garden wall with opposing turns on both ends. I used standard curve and straight pieces for reference to see how it would look.

The preparation of the roadbed required removing the grass and adding a plastic edging liner to prevent the grass from growing up through the track which will be sitting on mulch.

Nice start. Just make sure your track is far enough away from the fence and the wall so your train cars don’t hit them. In the one picture the track looked pretty close to the fencepost.

Nice start Mark.And David put out a good word on the clearance issue.

What they said, Nice start on the railroad…

Let me offer a word or two from the voice of experience.

I put down a layer of newspaper and 2 layers of landscape cloth as a base before any sort of track base, and I still have WEEDS coming up. So if you are going to mulch, prepare to weed a lot!

Mulch is not a very stable base for trackwork.

Test run your stuff to make sure your clearances are good, as other have said you awfully close to those planter walls.

The newspaper idea works very well under gravel as well, which is what I would recommend (3/8" crushed gravel) as the base. It keeps weeds from establishing deep roots.

I agree with Joe, do not use mulch for your roadbed, you will regret it. You will never be able to keep your track level. Use 3/8 inch minus crushed rock, instead.

Yes, crushed rock. The pea gravel they sell at landscape centers doesn’t lock together, but crushed rock does.

Too close to a wall or a fence really limits the scenery i.e. instant crash with elements that have no relation to the railroad. The other item I notice: tight radii because the track follows the circumference of the garden as in this instance

A larger radius would allow some scenic features and/or structures outside the curve without appearing cramped or squeezed against the wall or the fence. And it wouldn’t hurt to have a straight section between the RH and the LH curve.

PS On the base, dig the trench deep enough to get rid of all the fine grass roots and weed roots. plenty of crusher fines will make for a solid road bed.

I agree with HJ… I see you are trying to get it to follow the building, but use a bit broader curves, at least 5 foot radius… you will thank me later.

A lot of people have started too tight and regretted it later.

Greg

It looks like you hit the rails with a full head of steam Mark but I also see problems in your future like others have already pointed out with their friendly suggestions.
The trouble with a mulch roadbed is every time it rains you will have bits of mulch on your track that will need ot be cleaned off before you run a train. Also what will you do when the mulch breaks down and you need to add more next year. Messy. I use 3/8 grey stone that pretty much stays in place.
Clearance is also an issue. As you interests and RR expands so will your equipment. it is amazing how much of a car can overhang when going over a tight curve.
My current track setup has been in place since 2008 and this weekend I made improvements to a 30’ section by replacing a 12000 series switch with a 16000 and easing tight curves with a wider radius. This is the third time doing this and the trouble was lack of funds in the beginning which meant tighter curves and switches.
Another problem I see is when people walk up to the garden to see or pick and they kick or stand on your track and possibly damage it. I really like how your track follows that curve though. it is a shame you can’t get track on top of that wall. Our trains look better the closer they are to the eye.

Besides all that you are off to a good start. Happy RRing

I learned very early on, to keep mulch away from my layout. I had it all over, beyond the ballast. it looked great. Then rain, wind, people walking around put it up on the rails. I will never use mulch again.

“Mulchest thou not,” sayest Bottino.

And here it is a few weeks later and this is the first time I have had to post here.

We have decided once I tested with a section of track to go with a bed of 1b crushed limestone instead of mulch under the track.

As I have been bending and laying the track I have been making test runs to make sure the clearance is good.

I am working at this as time, weather and motivation permits. If I have motivation by the weather is bad I assemble track sections in preparation for the next sections I will be working on or I have spent some time adding power and lighting to a passenger car. I also do a lot of thinking while standing looking at what we have accomplished and what we still want to do.

Because of how the brass expands 5/8" over 100’ I needed to provide a way for the track to easily float as the sun heats it up during the day and it cools off during the evening. I used 12’ long composite decking boards with brown color to lay the track on along the long sections of the fence. I joined each section with a splice underneath to keep the ends from warping up. I added a expansion section I got from Rail Clamp, http://www.railclamp.com/#!/~/catego…=0&sort=normal since it is designed to allow the track to slide within the section.

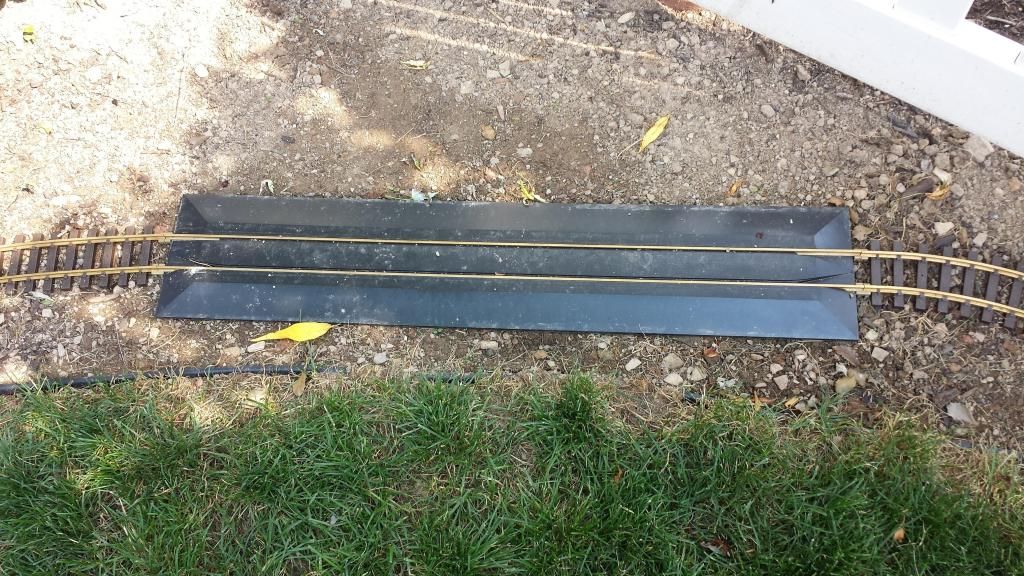
For the door into the house and the gate in the fence I got these walkable sections custom built to match each location also from Rail Clam. Thanks to Dave Maynard for recommending them for this.

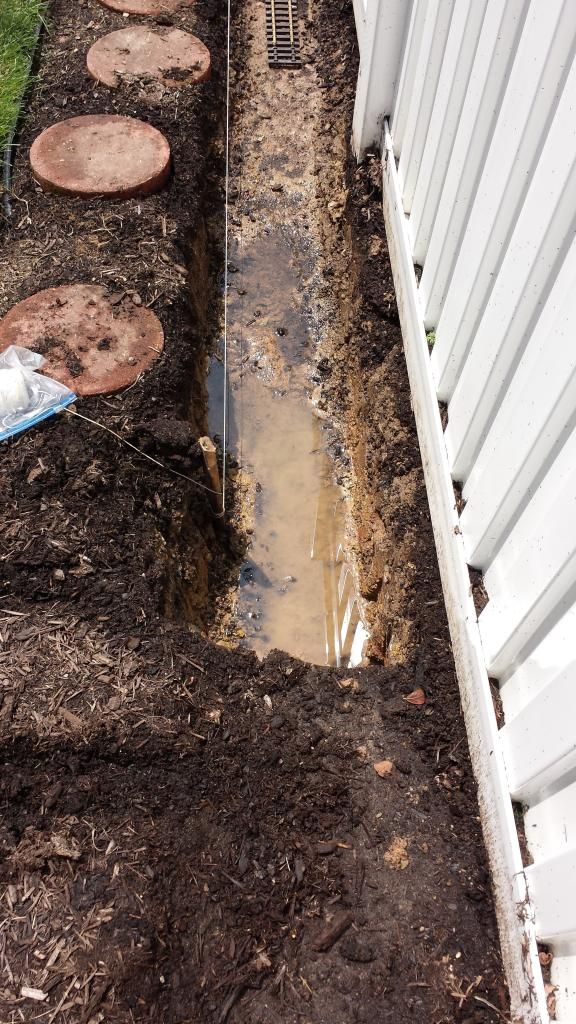
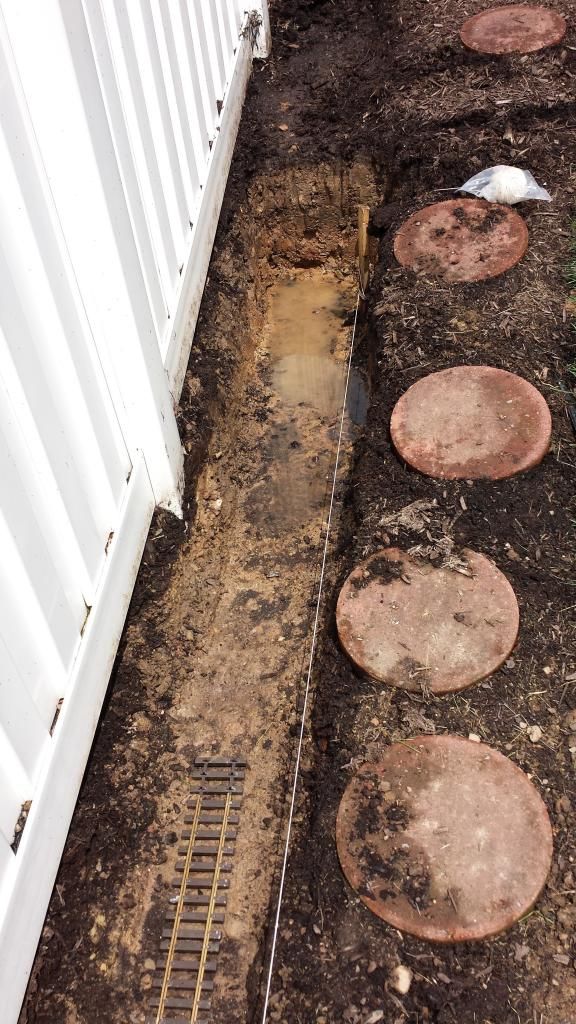
Here is the new challenge, the west entry side of the tunnel is clay which is horrible for water drainage so I am going to have to dig deeper and install a French drain to run the water out of the area when it rains. The east entrance is in great dirt near the blueberry bushes and drains well.

This is the section between the tunnel and the garden on the west side.

Here is what I ran into with the clay after a storm