Wow! That really turned out good!
Jon everything is looking really nice. Really brings everything to life. I have to thank you for starting this because If it was not for this thread I would have never gotten lights hooked up on my layout. I still need to add some boxes in the ground so it easier to find the connections when I need to.
I cant wait to see everything lite up in a dusting a snow.
Thanks Shawn. Glad I inspired you. Going back to the top of the thread I have Kevin Strong to thank for inspiring me. Wall Station and the new(ish) platform will come in before the first snow. Everything else stays out. I have them on a timer; they light up about 4:15 so they are lit just after the sun goes behind the mountain, and stays on till after sunrise so I can see them while I am getting breakfast.
I only used a box at Wall Station. That was my first install and I just used wire nuts for connections. It will be upgraded to plugs before re-installation in the spring. Everything else was set up with plugs, but I need to come up with a nice small box to contain the plugs to help keep dirt out of the connections.
Great weather today and Marilyn needed me out of the kitchen, so I decided to work on lighting.
Last weekend I pulled the Engine House back out to caulk up the window openings in an attempt to block some light leaks and keep pine needles and grit out of the space between the glazing and the inner clear wall. In my haste I forgot to unplug the lights before lifting the house. I was reminded of that by the slight resistance as the plug pulled apart. When the house was placed back on it’s foundation and plugged in the lights no longer worked.
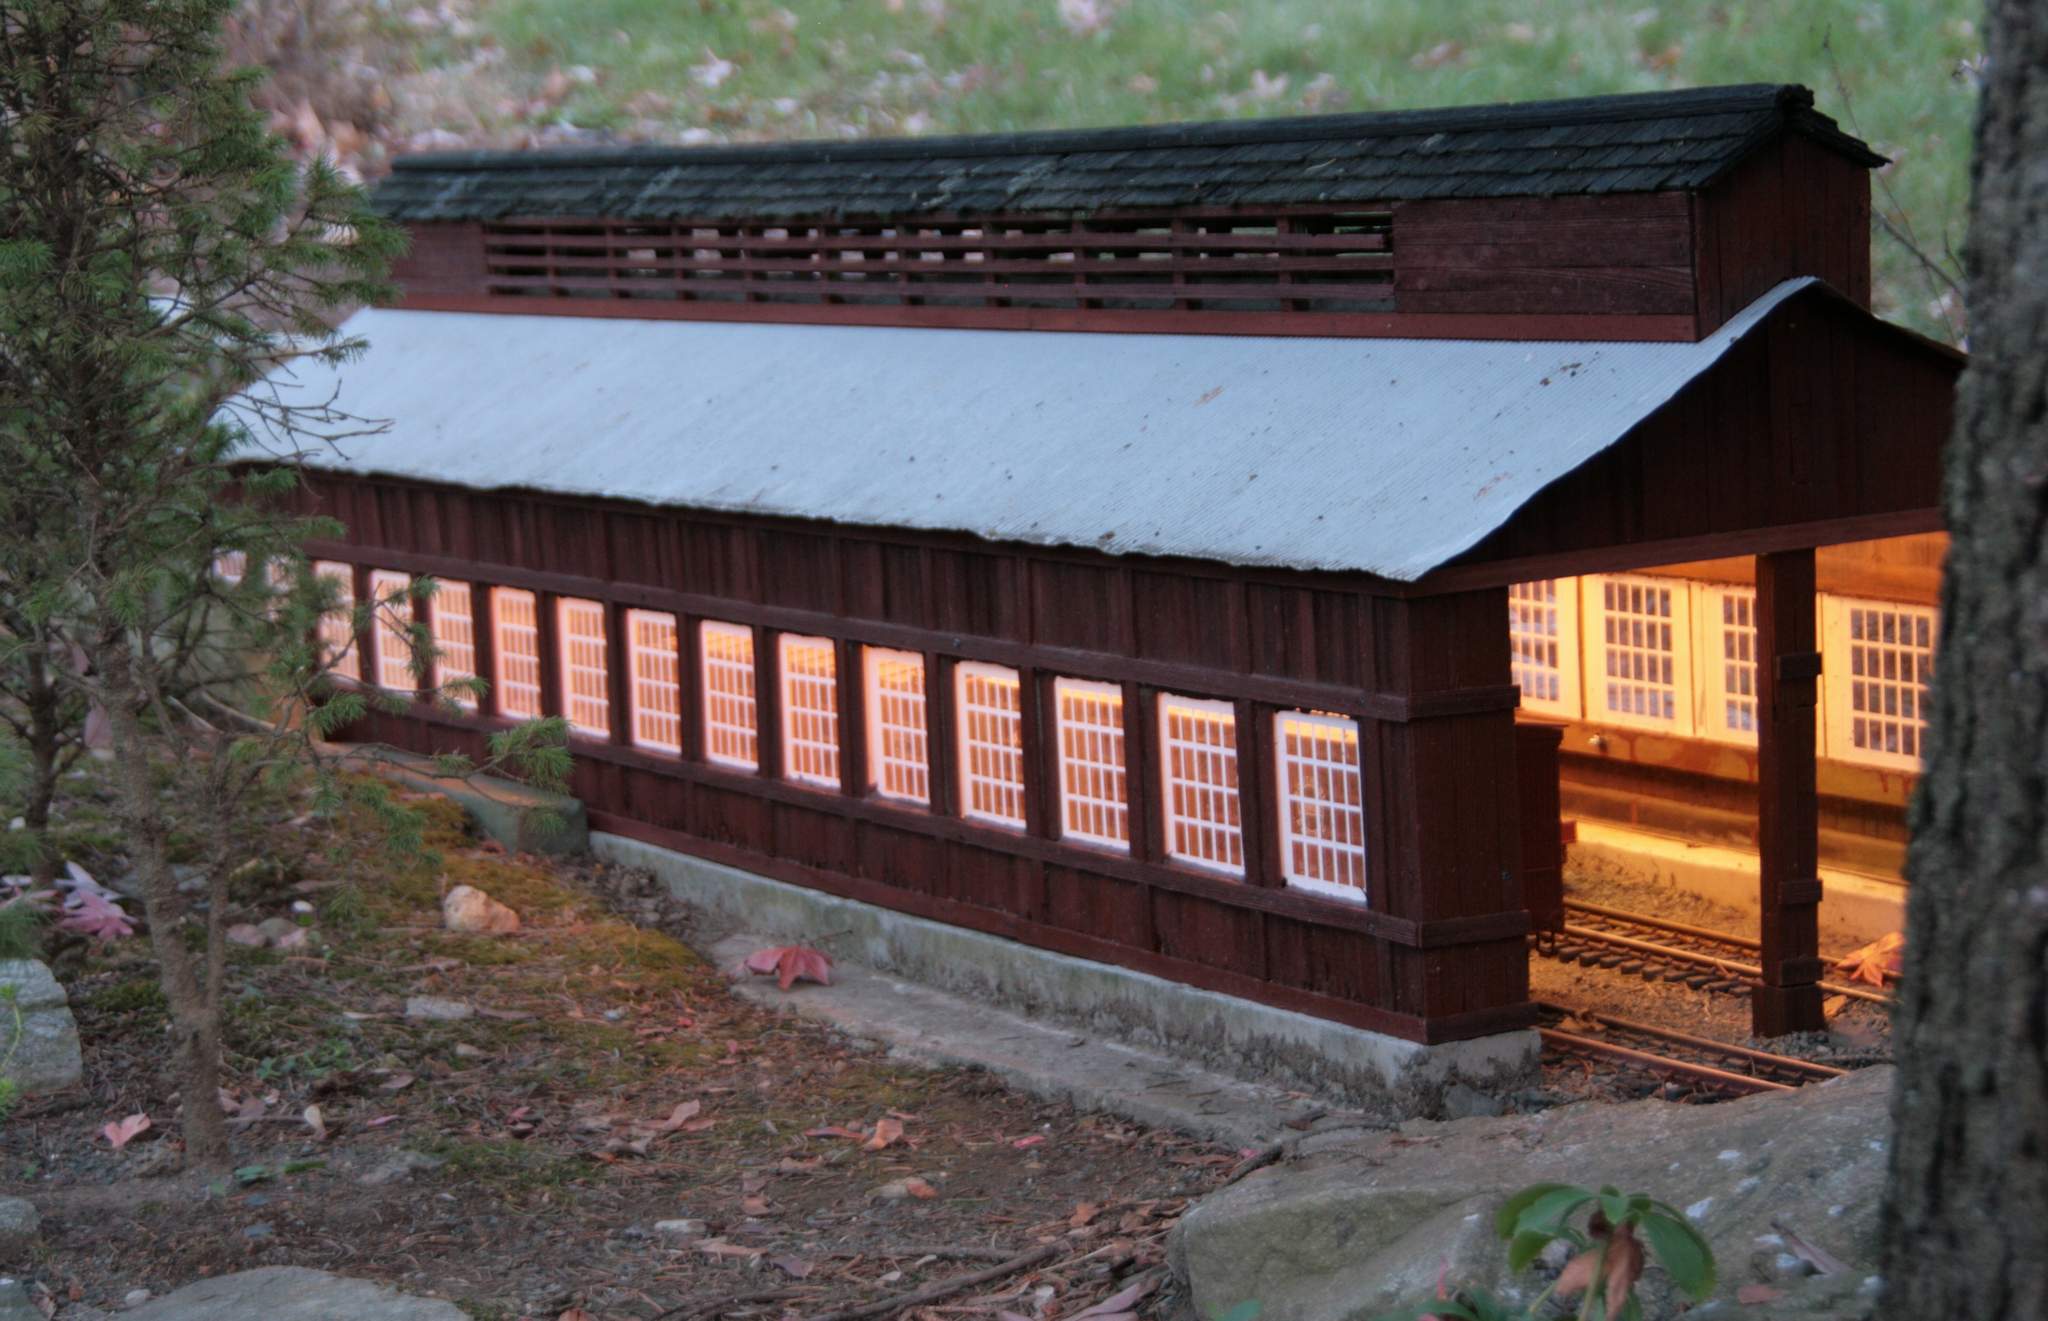
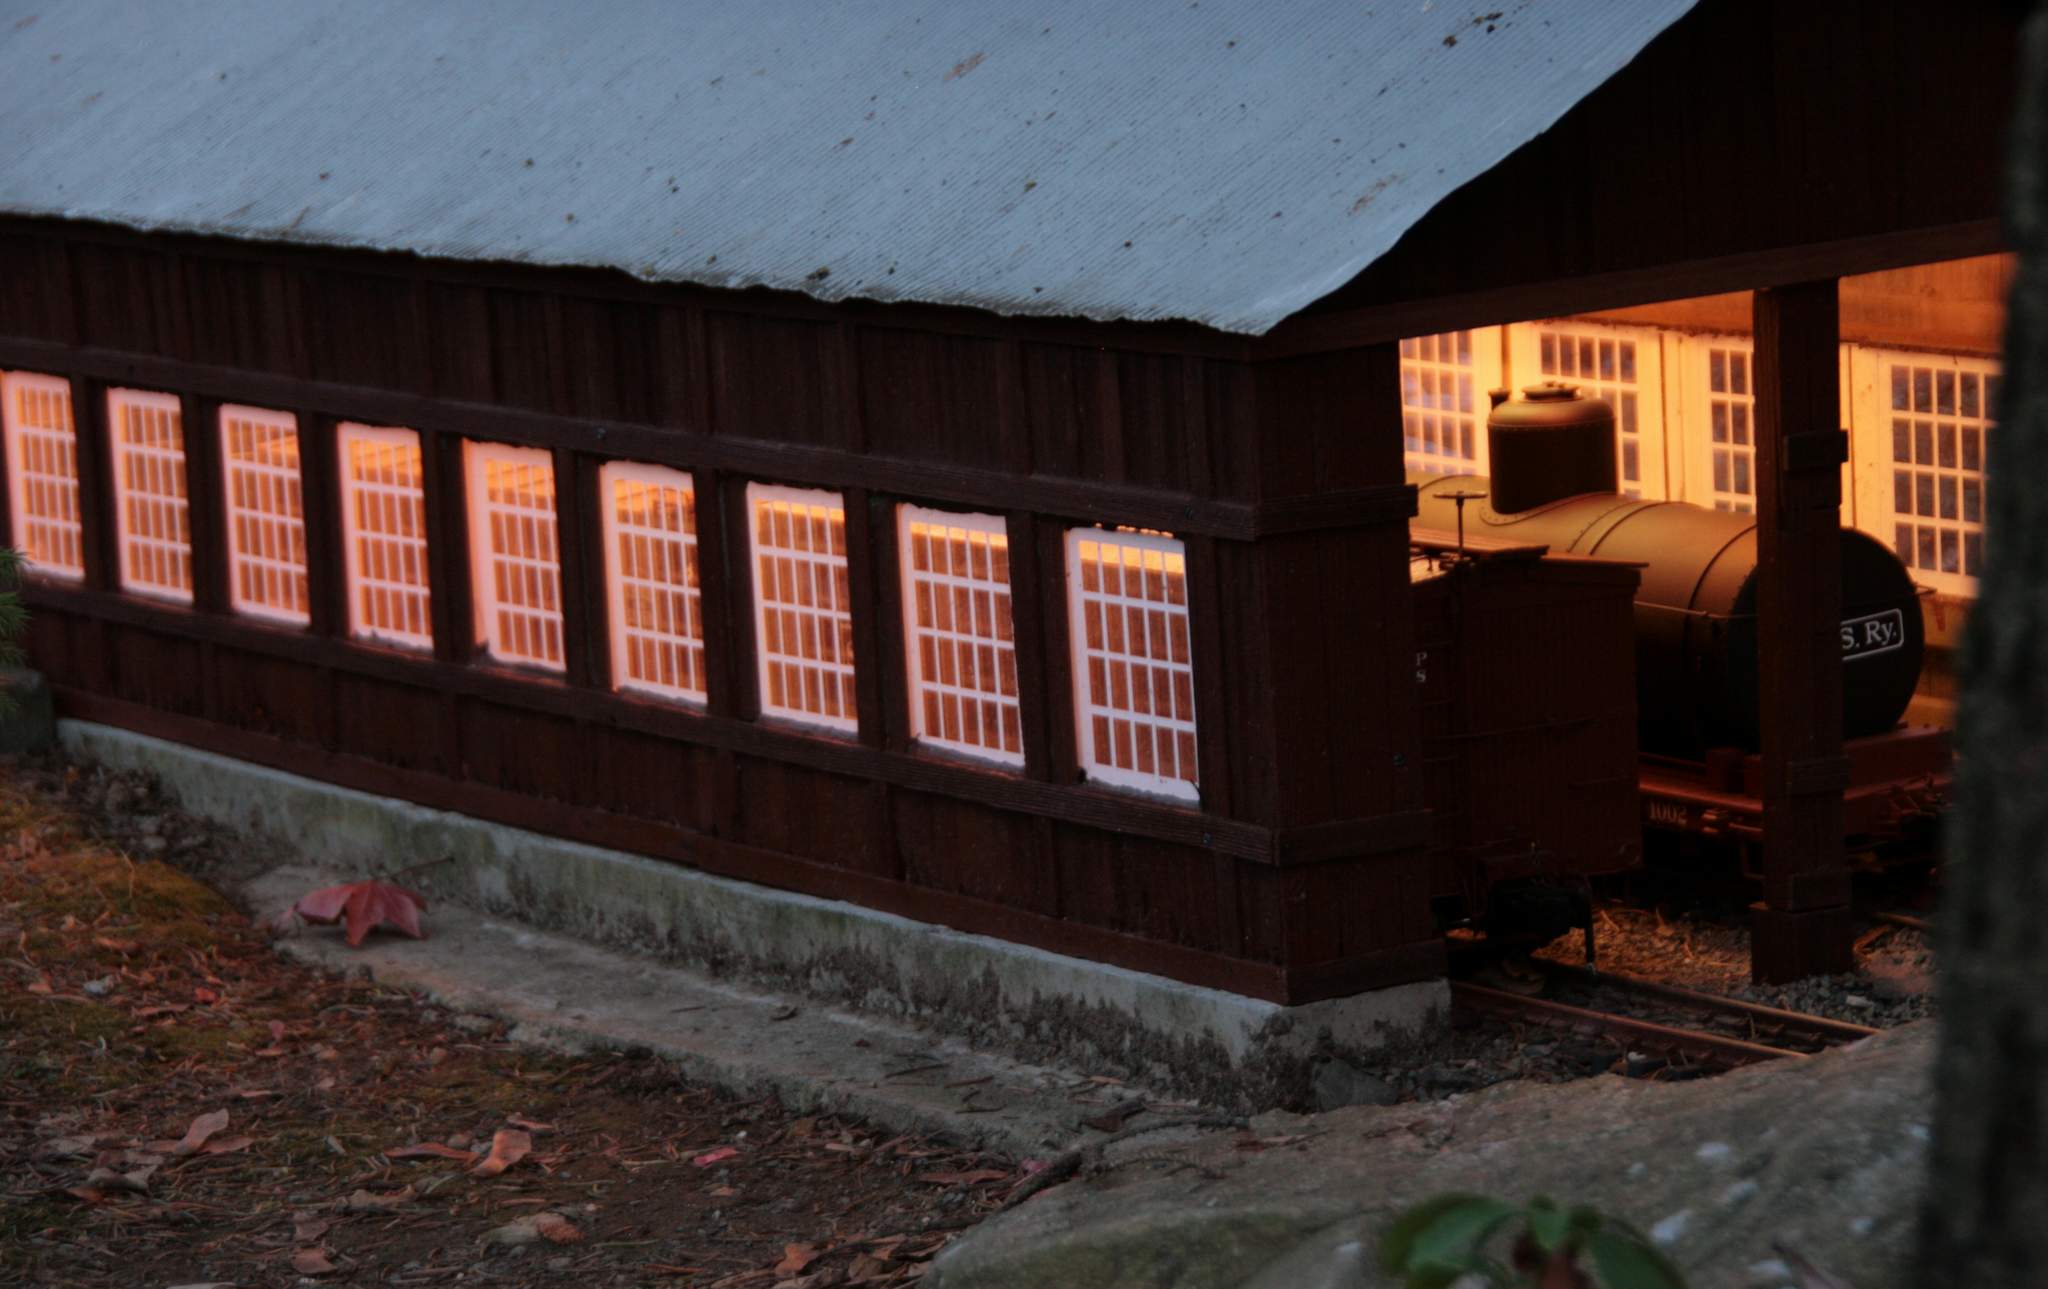
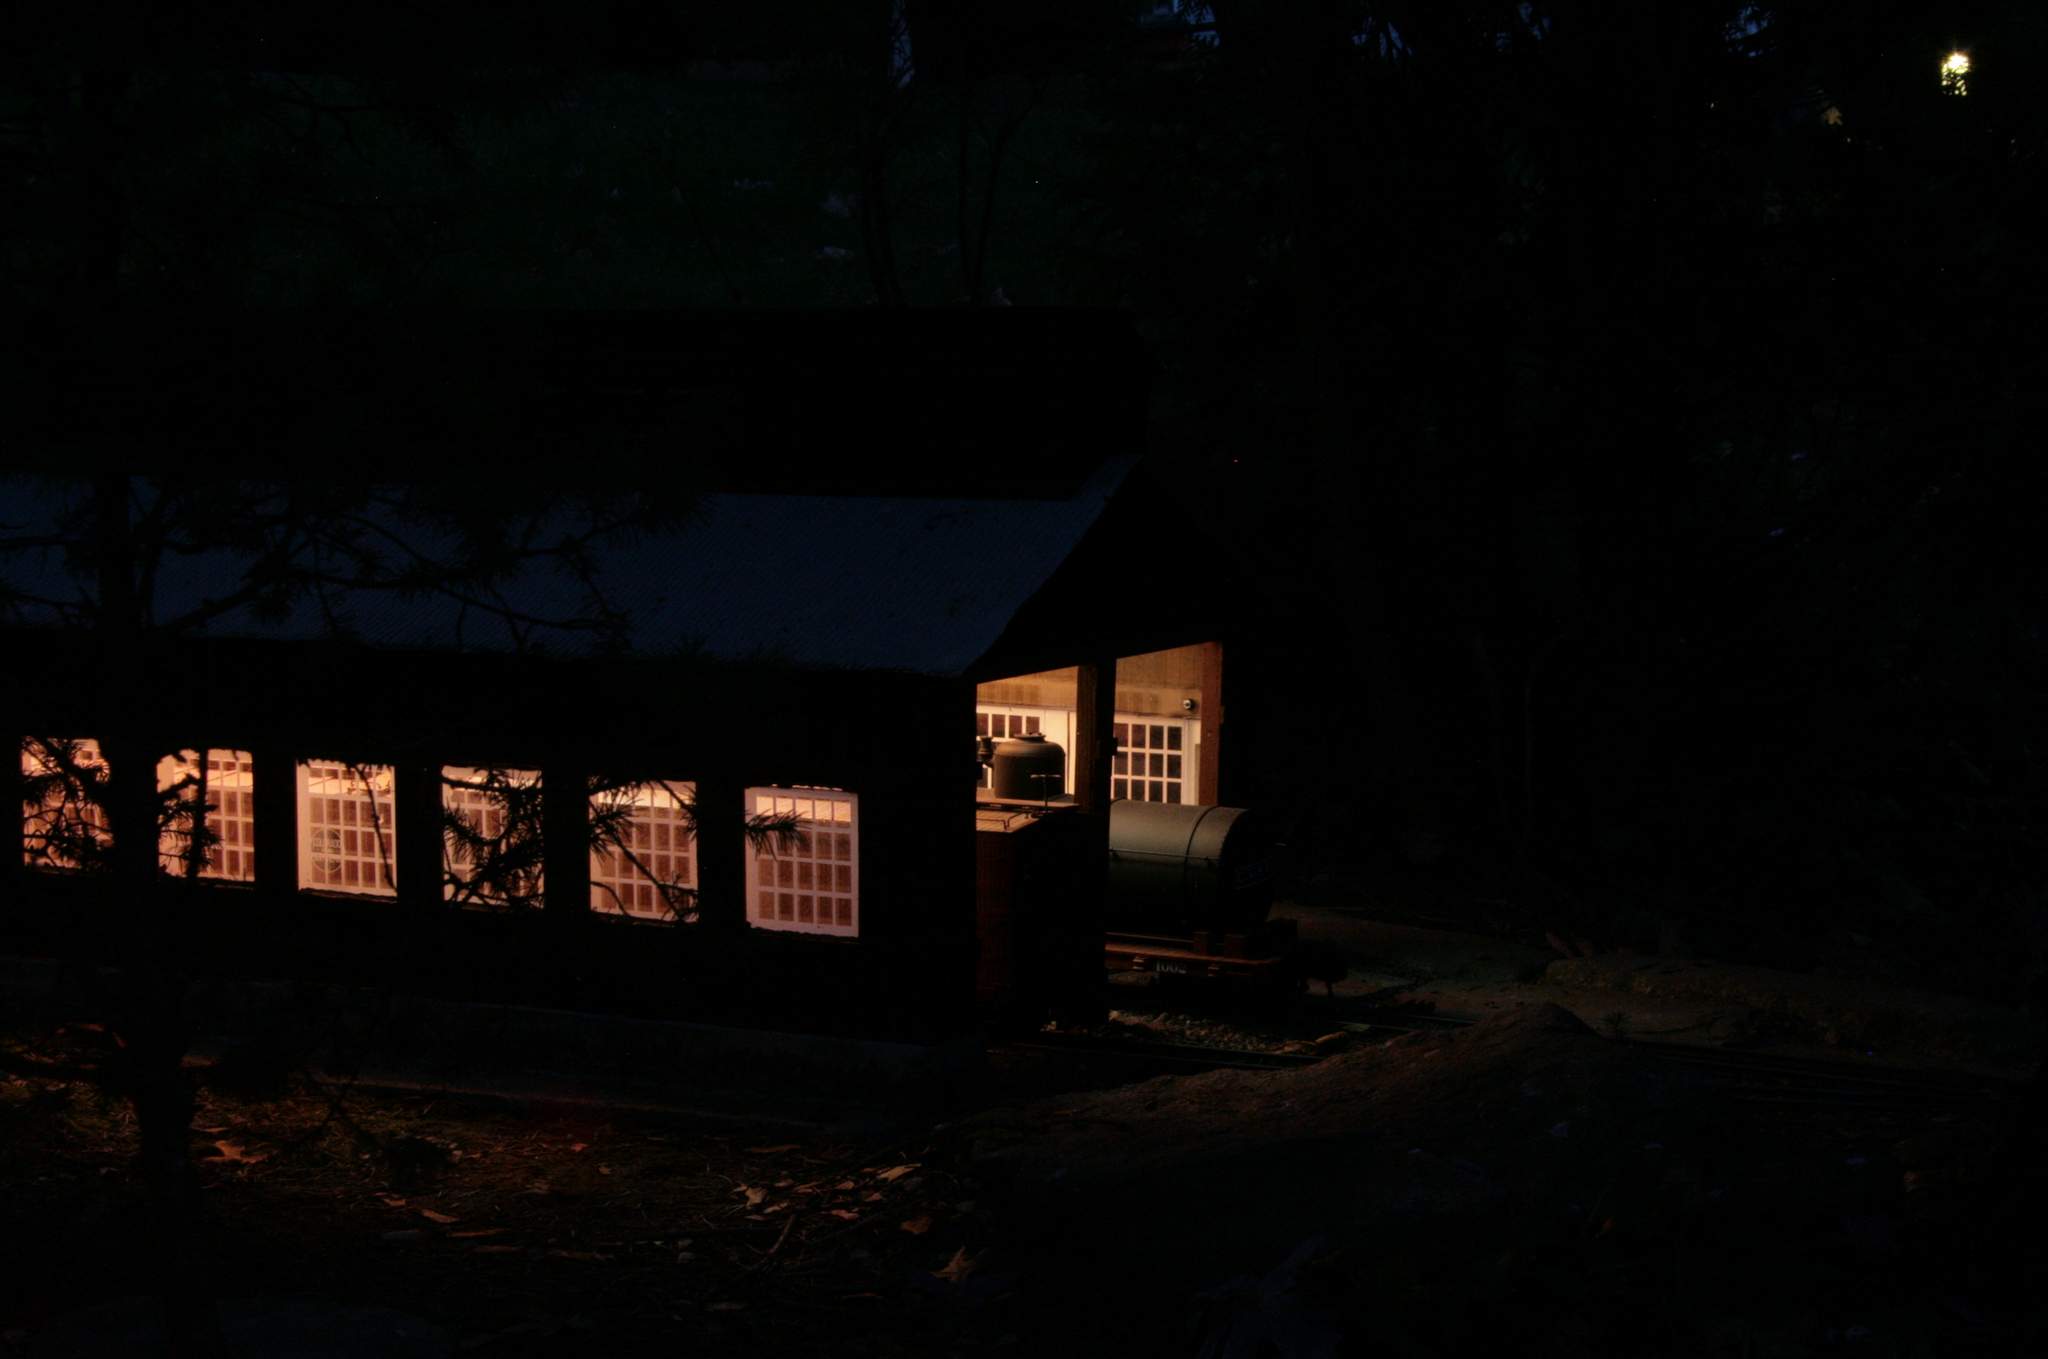
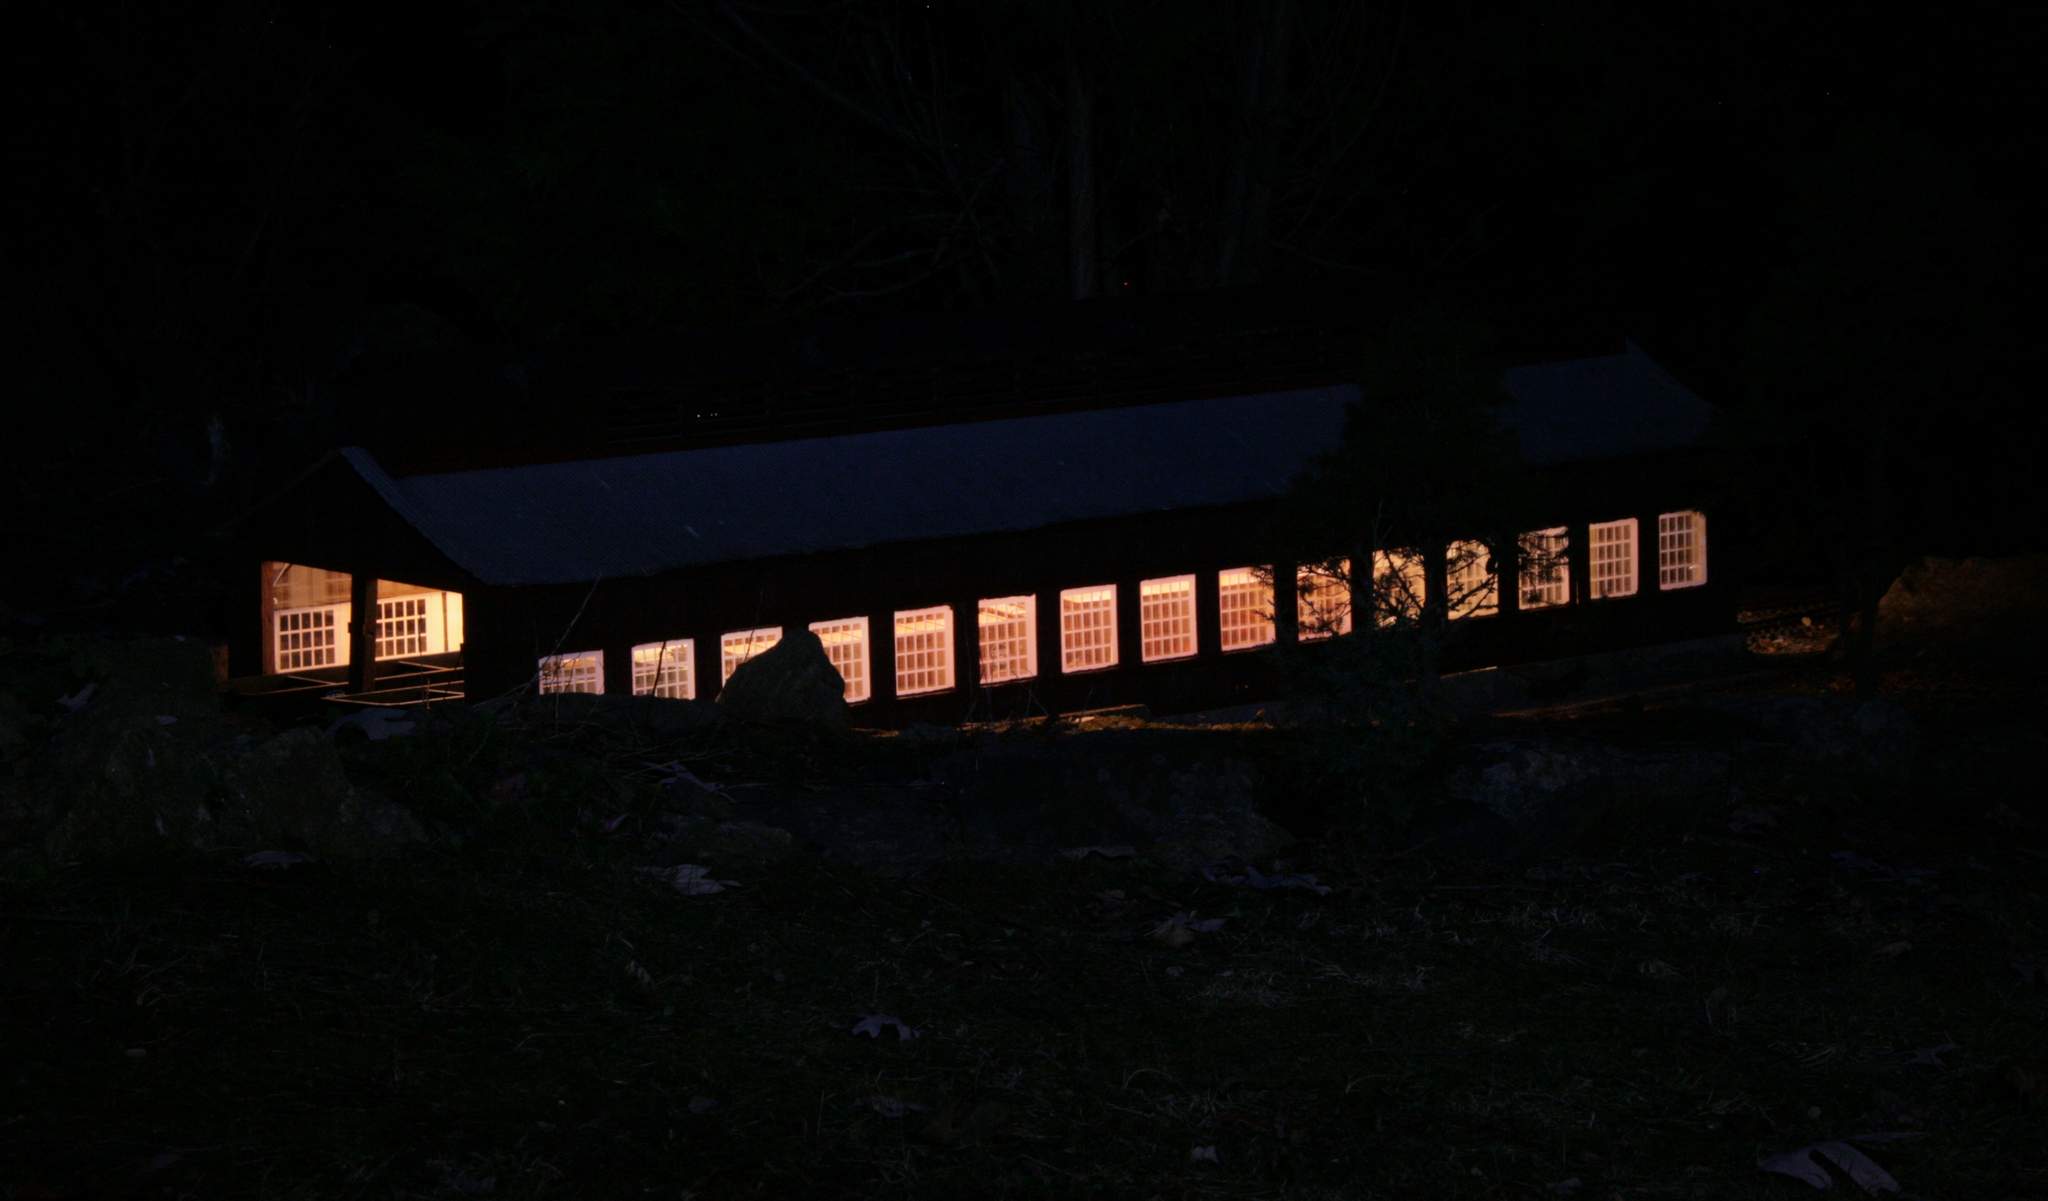
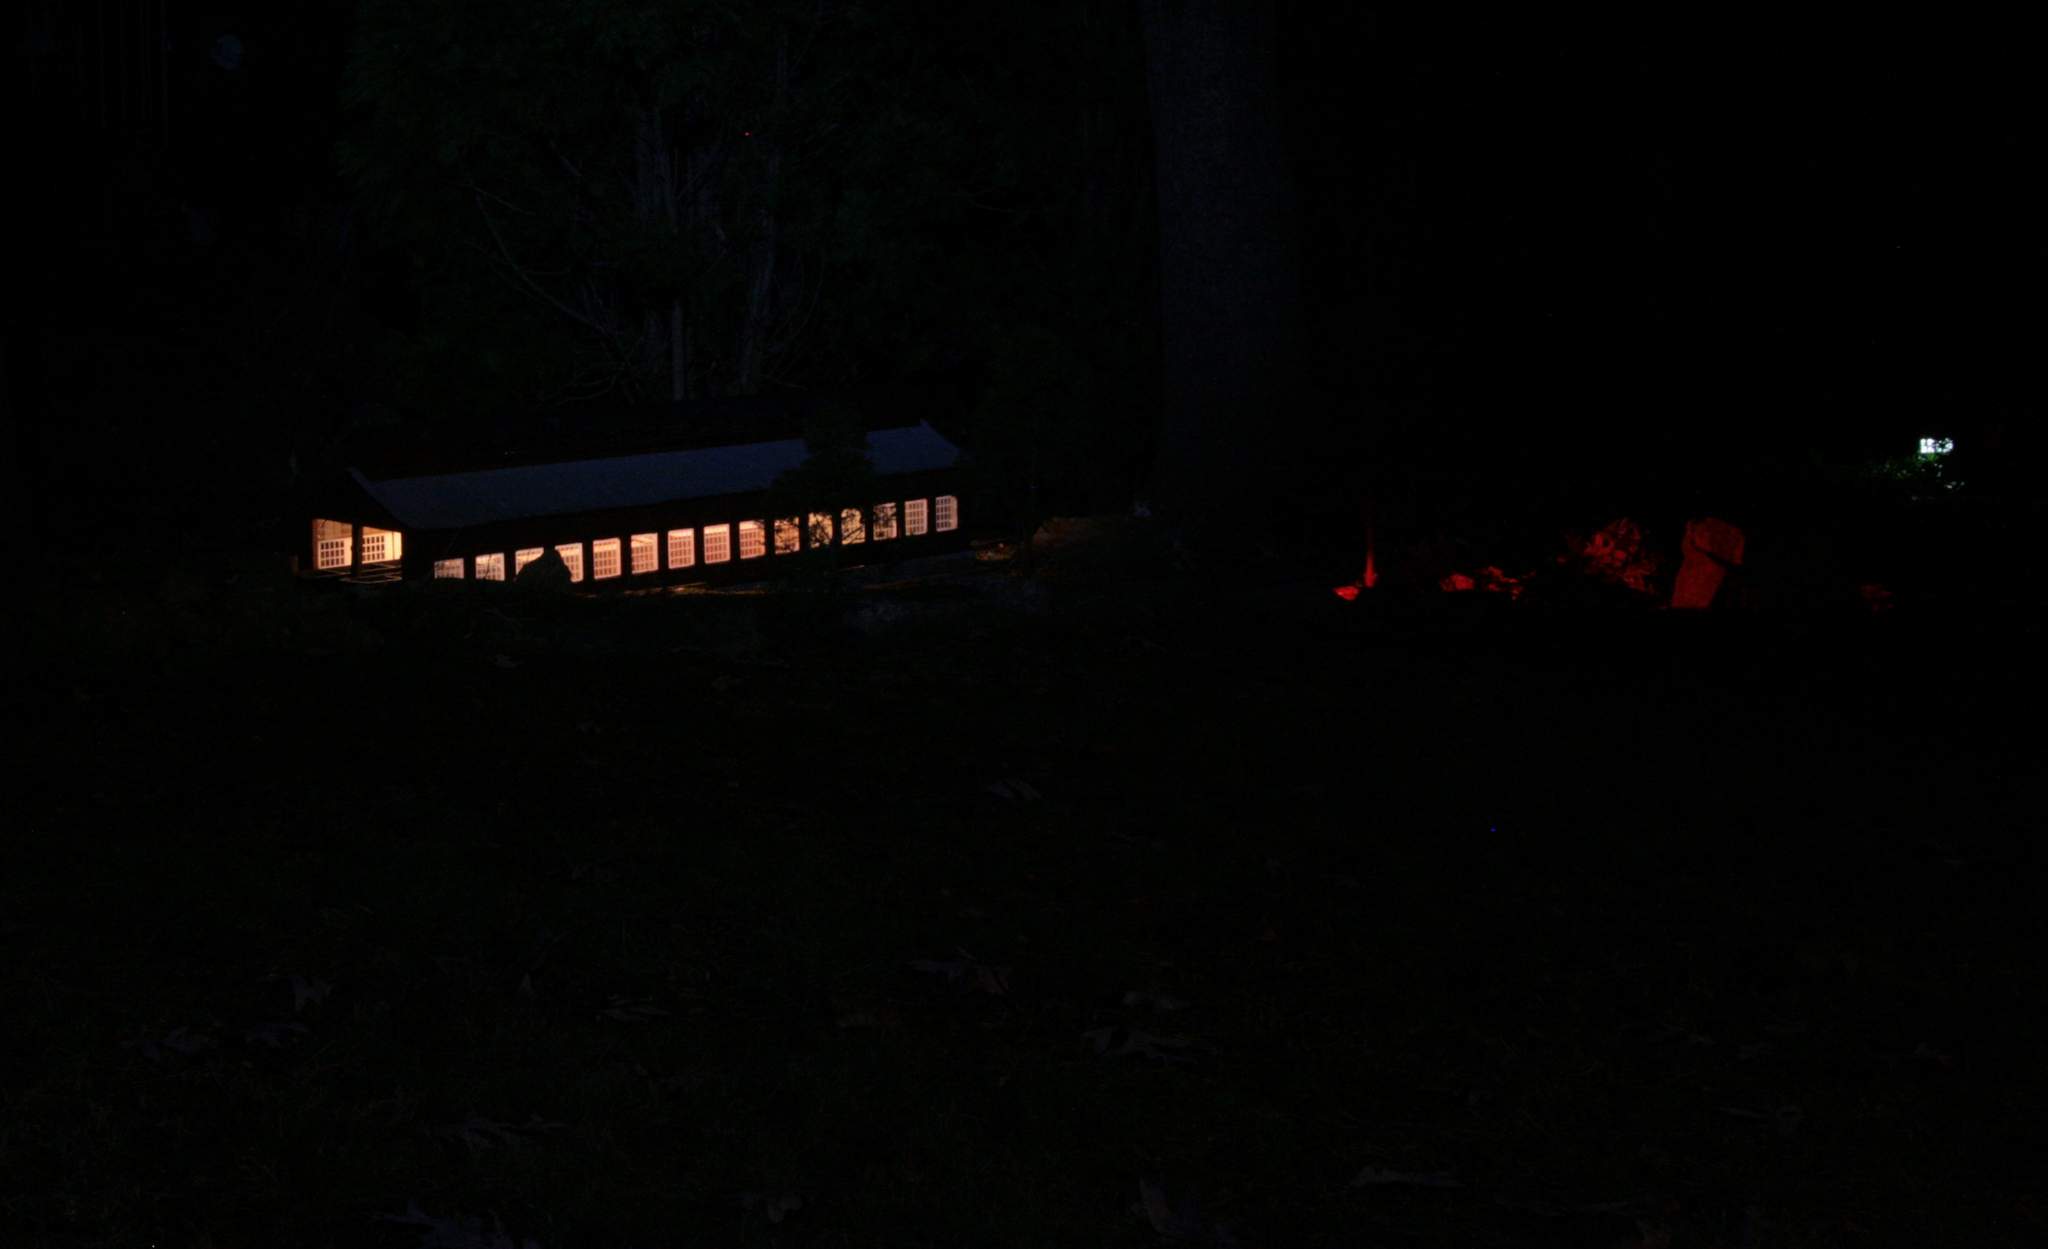
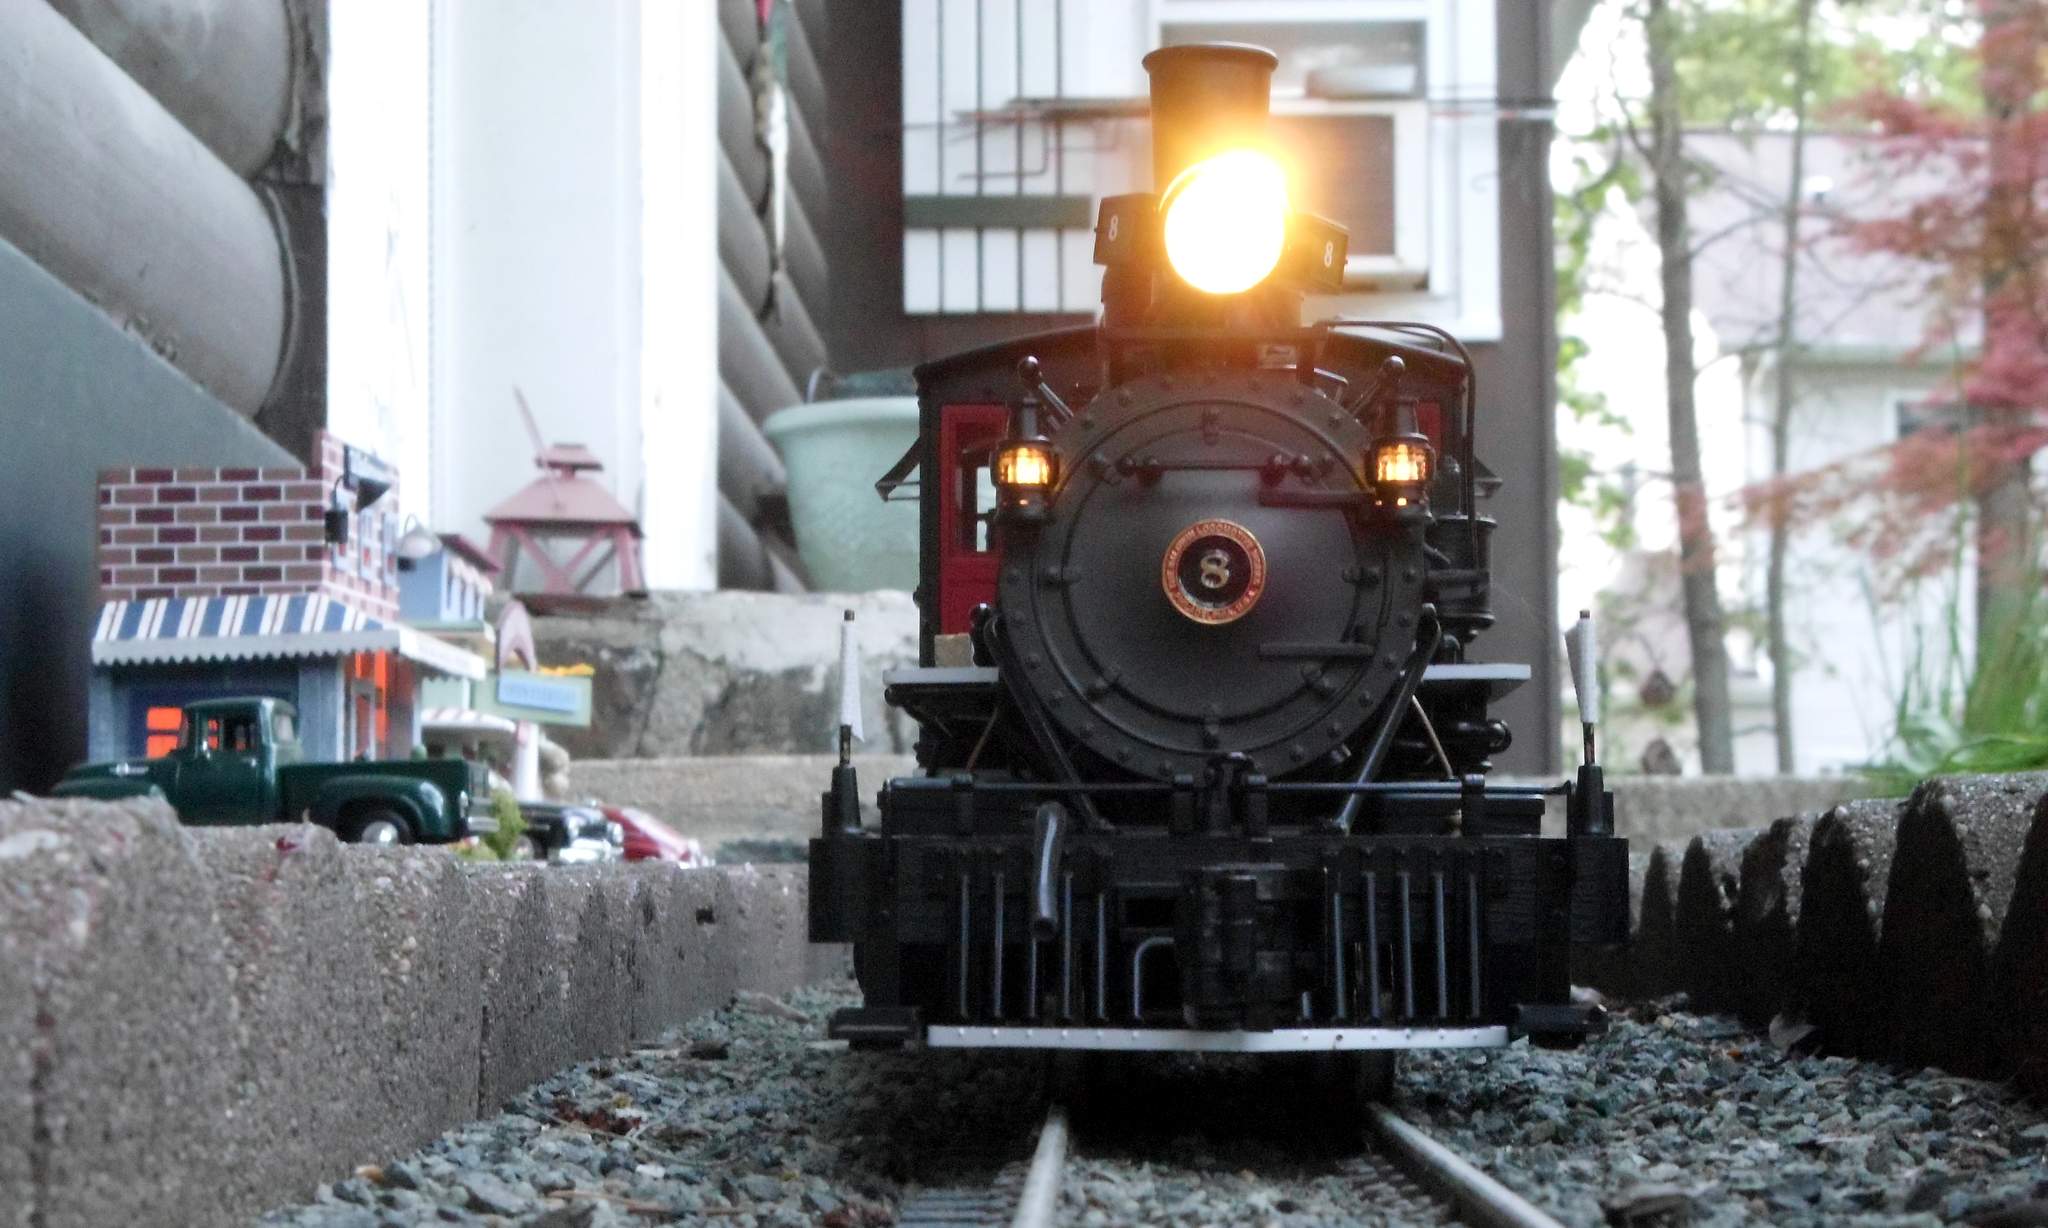
Today I troubleshot and remedied the lighting connections. When that was done an equipment move extra was called to shove a half dozen cars into the structure for evening photos. Here are the results. I began shooting from a tripod at dusk. The first group taken while there was still a little light used auto exposure settings. Once it started getting dark I switched to manual. Some of them are 5 second exposures. A few utilize an LED flashlight to simulate moonlight on the roof. These are quite a bit better than the previous quick hand held shots with my pocket camera.

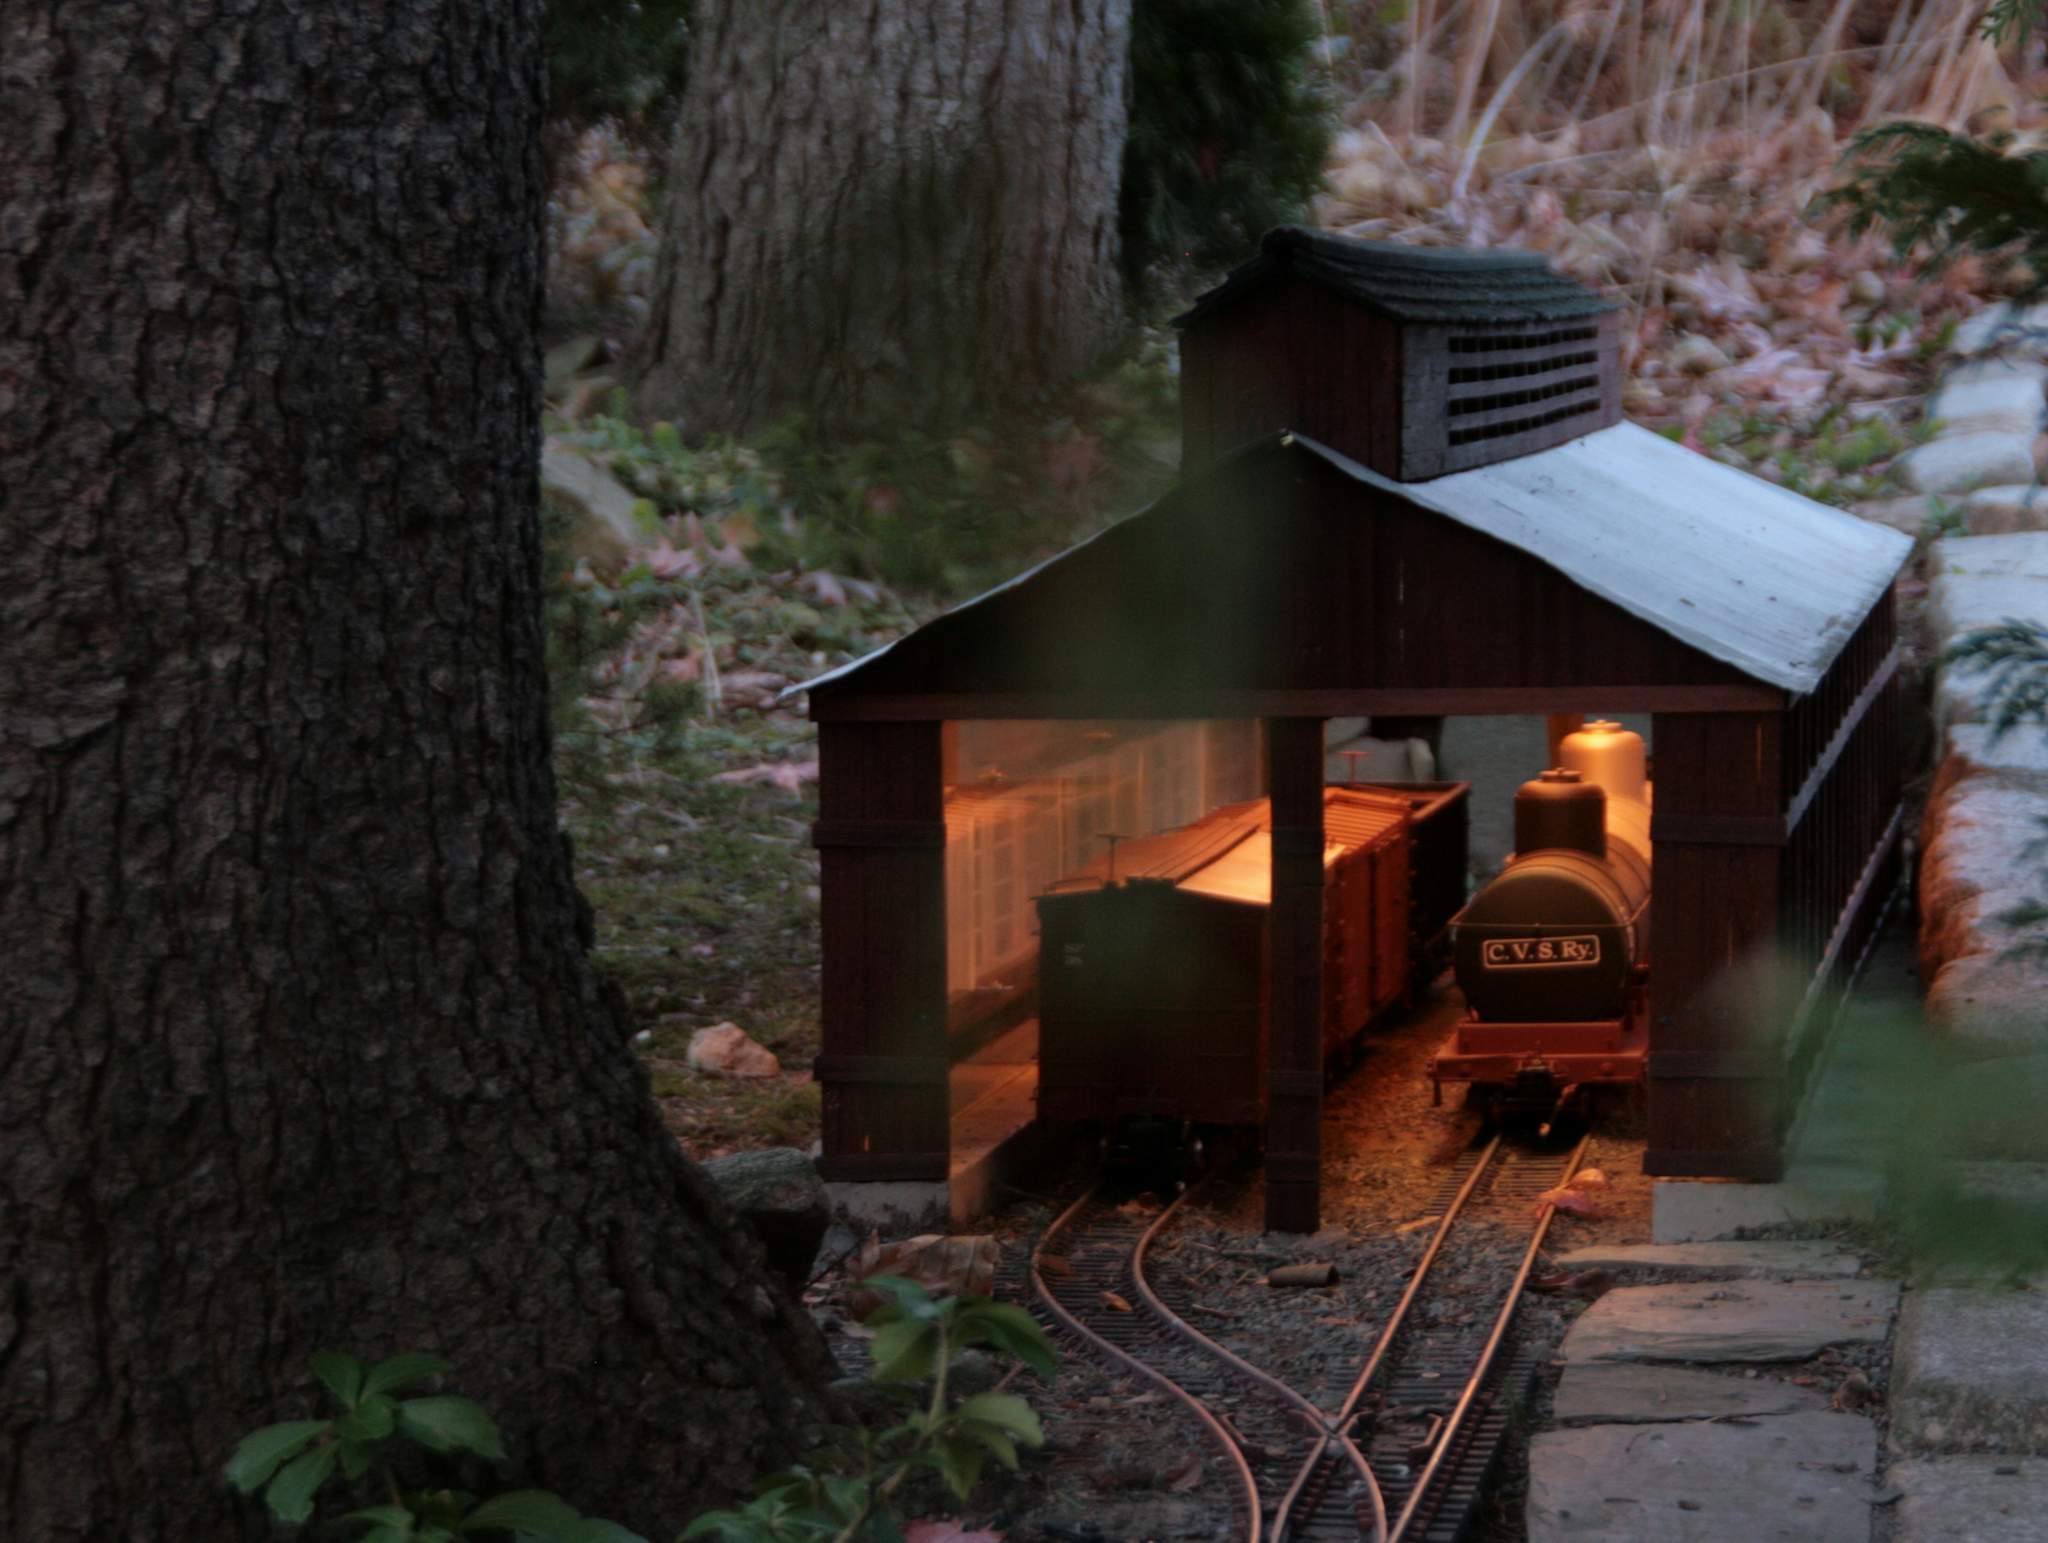
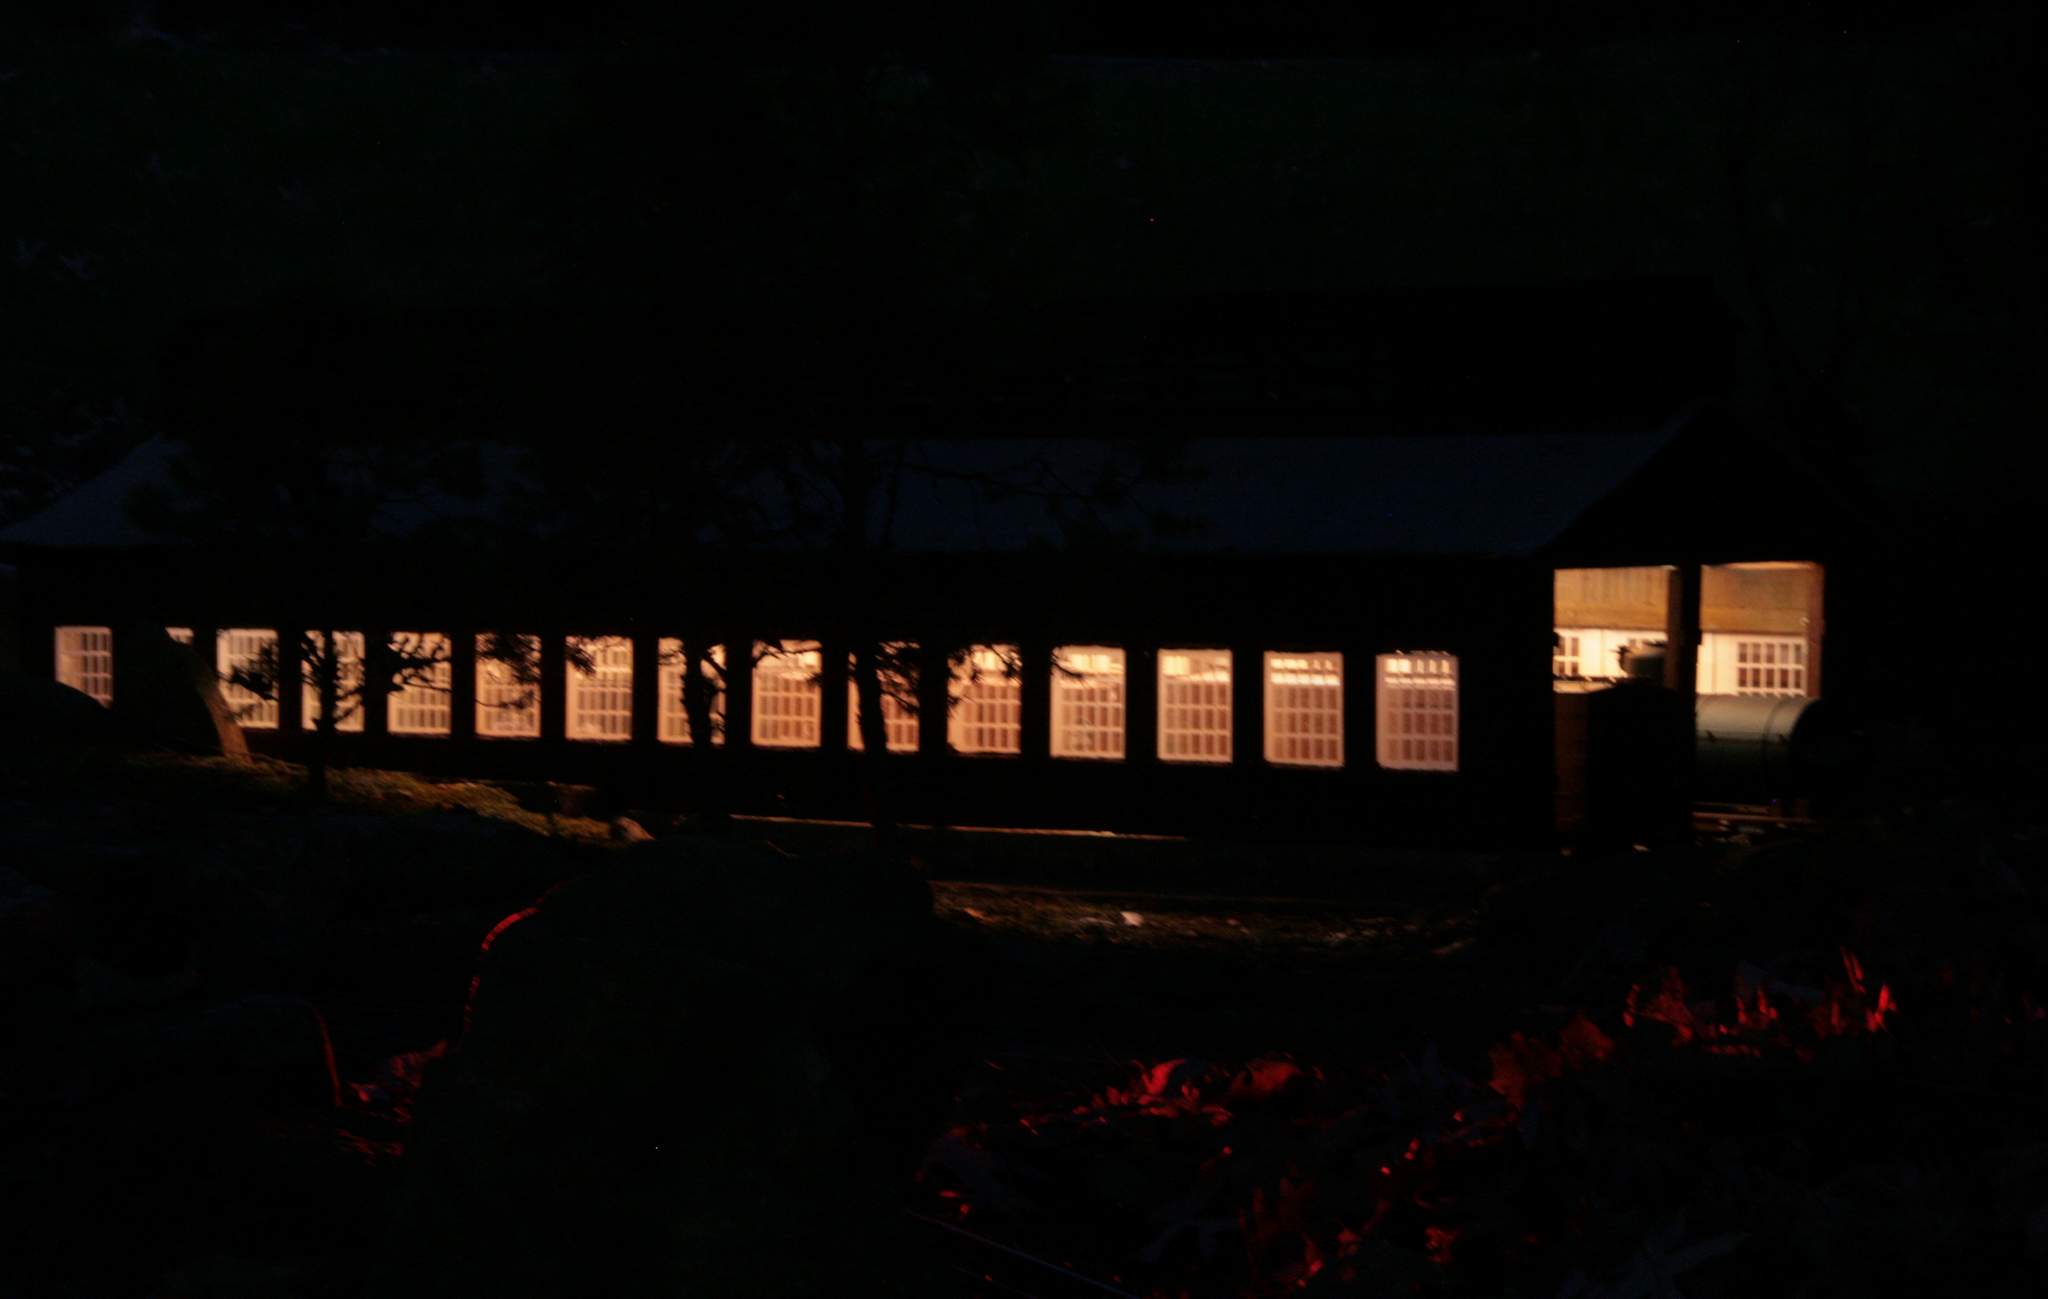

In this last shot you can see the switch tower at Indian Hill Junction in the background at right. This is the view from the street in front of my house…
Nice lighting effects.
I am guessing you have seen the light leaking out of the first window on the left hand side… Great job, cool, really cool pictures and great information , Thanks, Pete
The other left. Far right window in these pics. Vinyl mullion does not cover up to the frame. I caulked it, but needs more.
That works. Lighting adds a lot to a layout.
For Ric
Ric Golding said:
Morning Jon,
Just reread this whole thread. What a great project! I can’t wait to see some Winter scenes with a coating of white on the buildings. Should be a very impressive photo. Your photography and documentation is really outstanding.
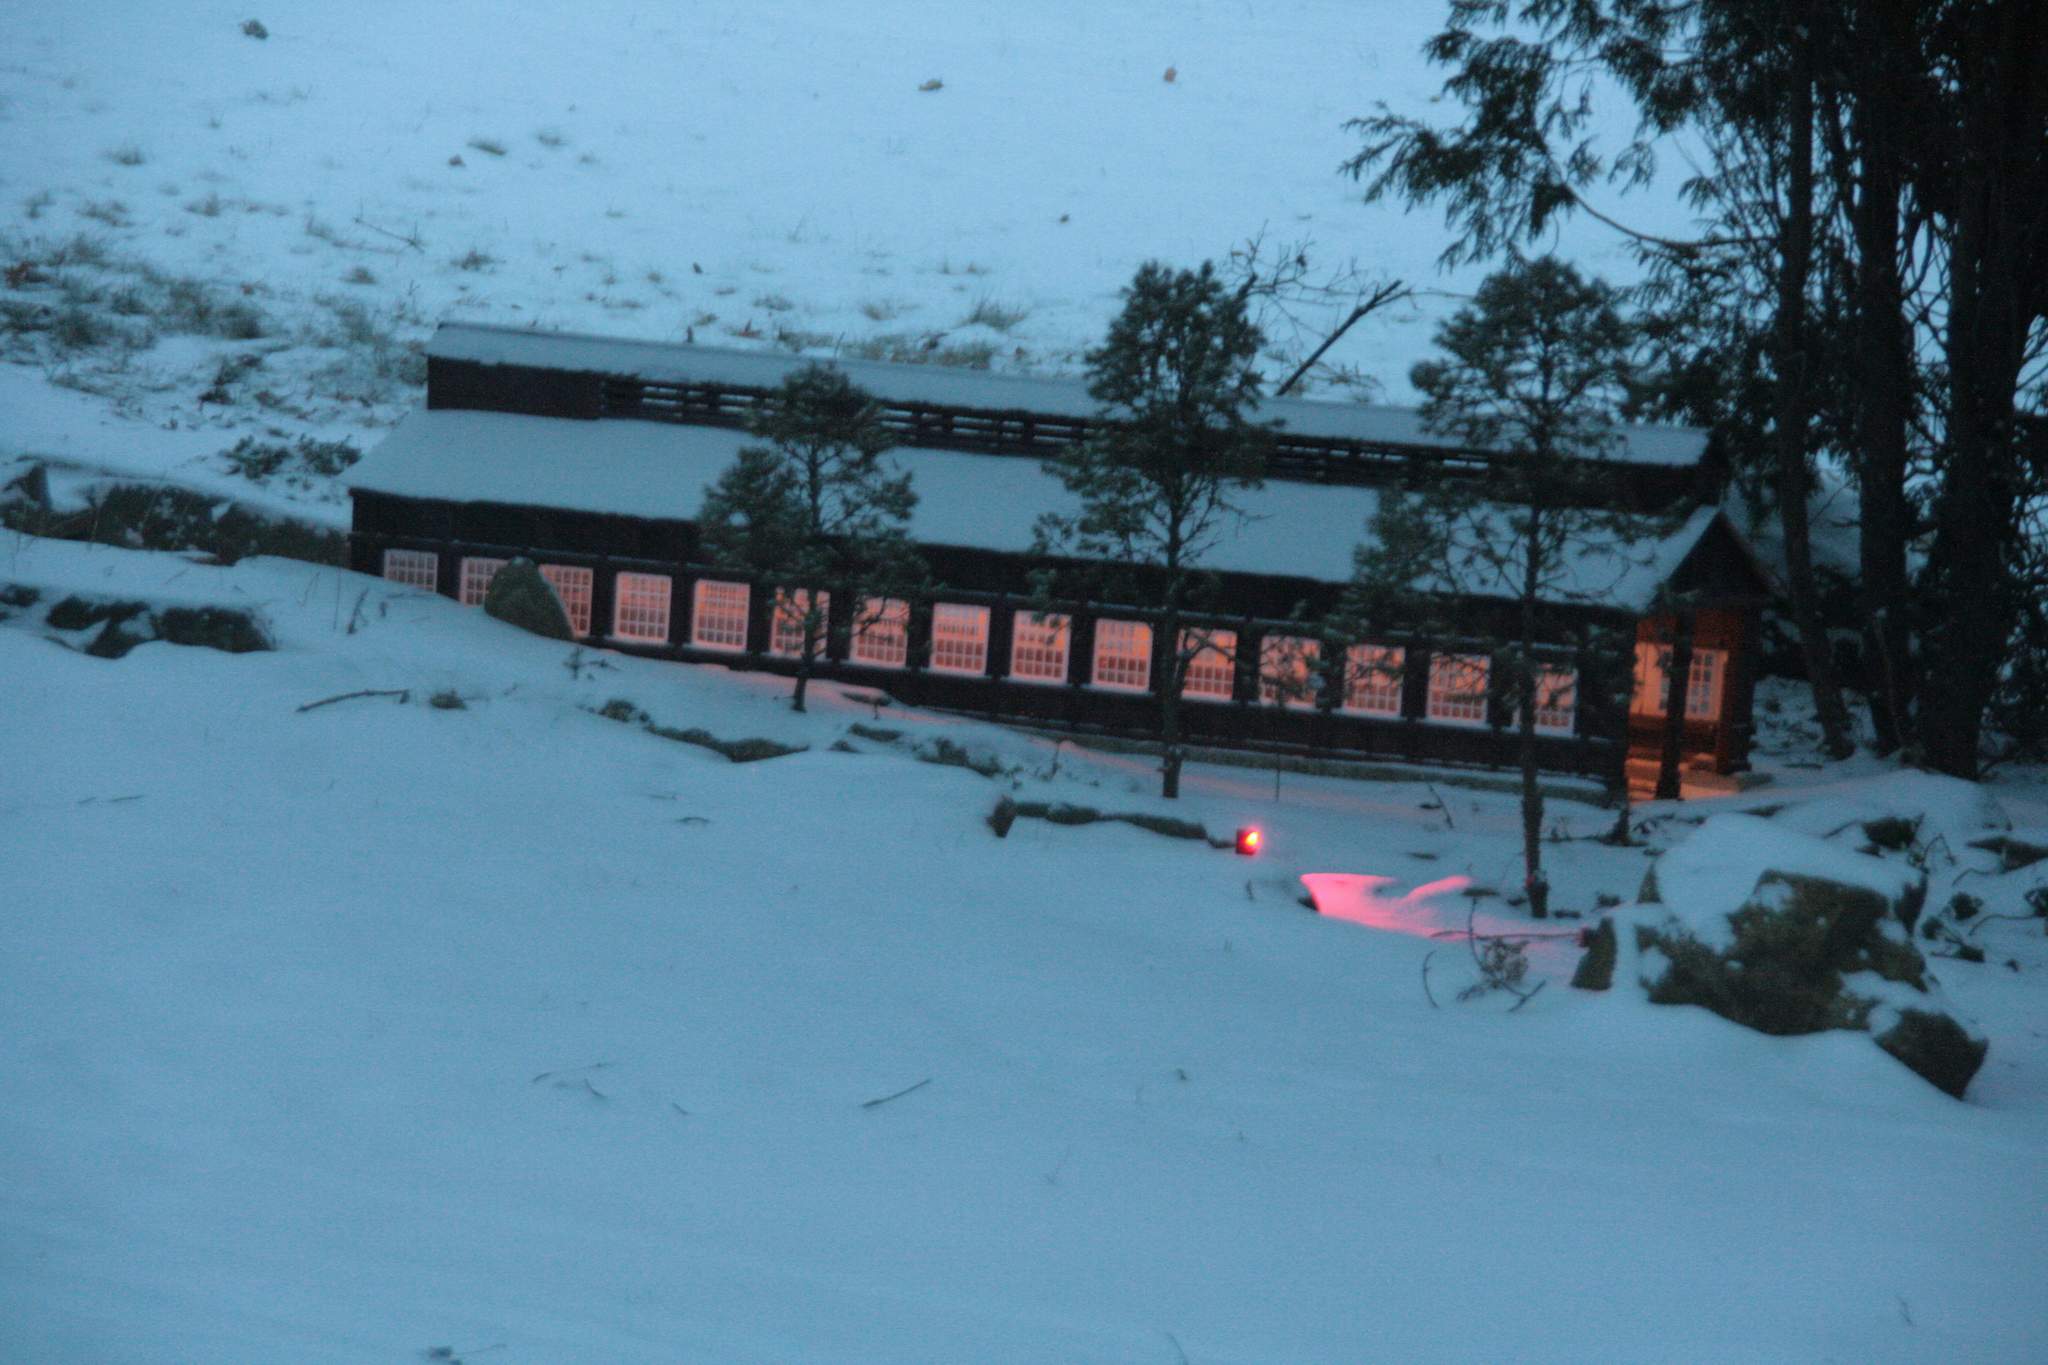
Taken this morning just about sunrise - heavy cloud cover ans snowing. I did not go outside, taken through an open window…
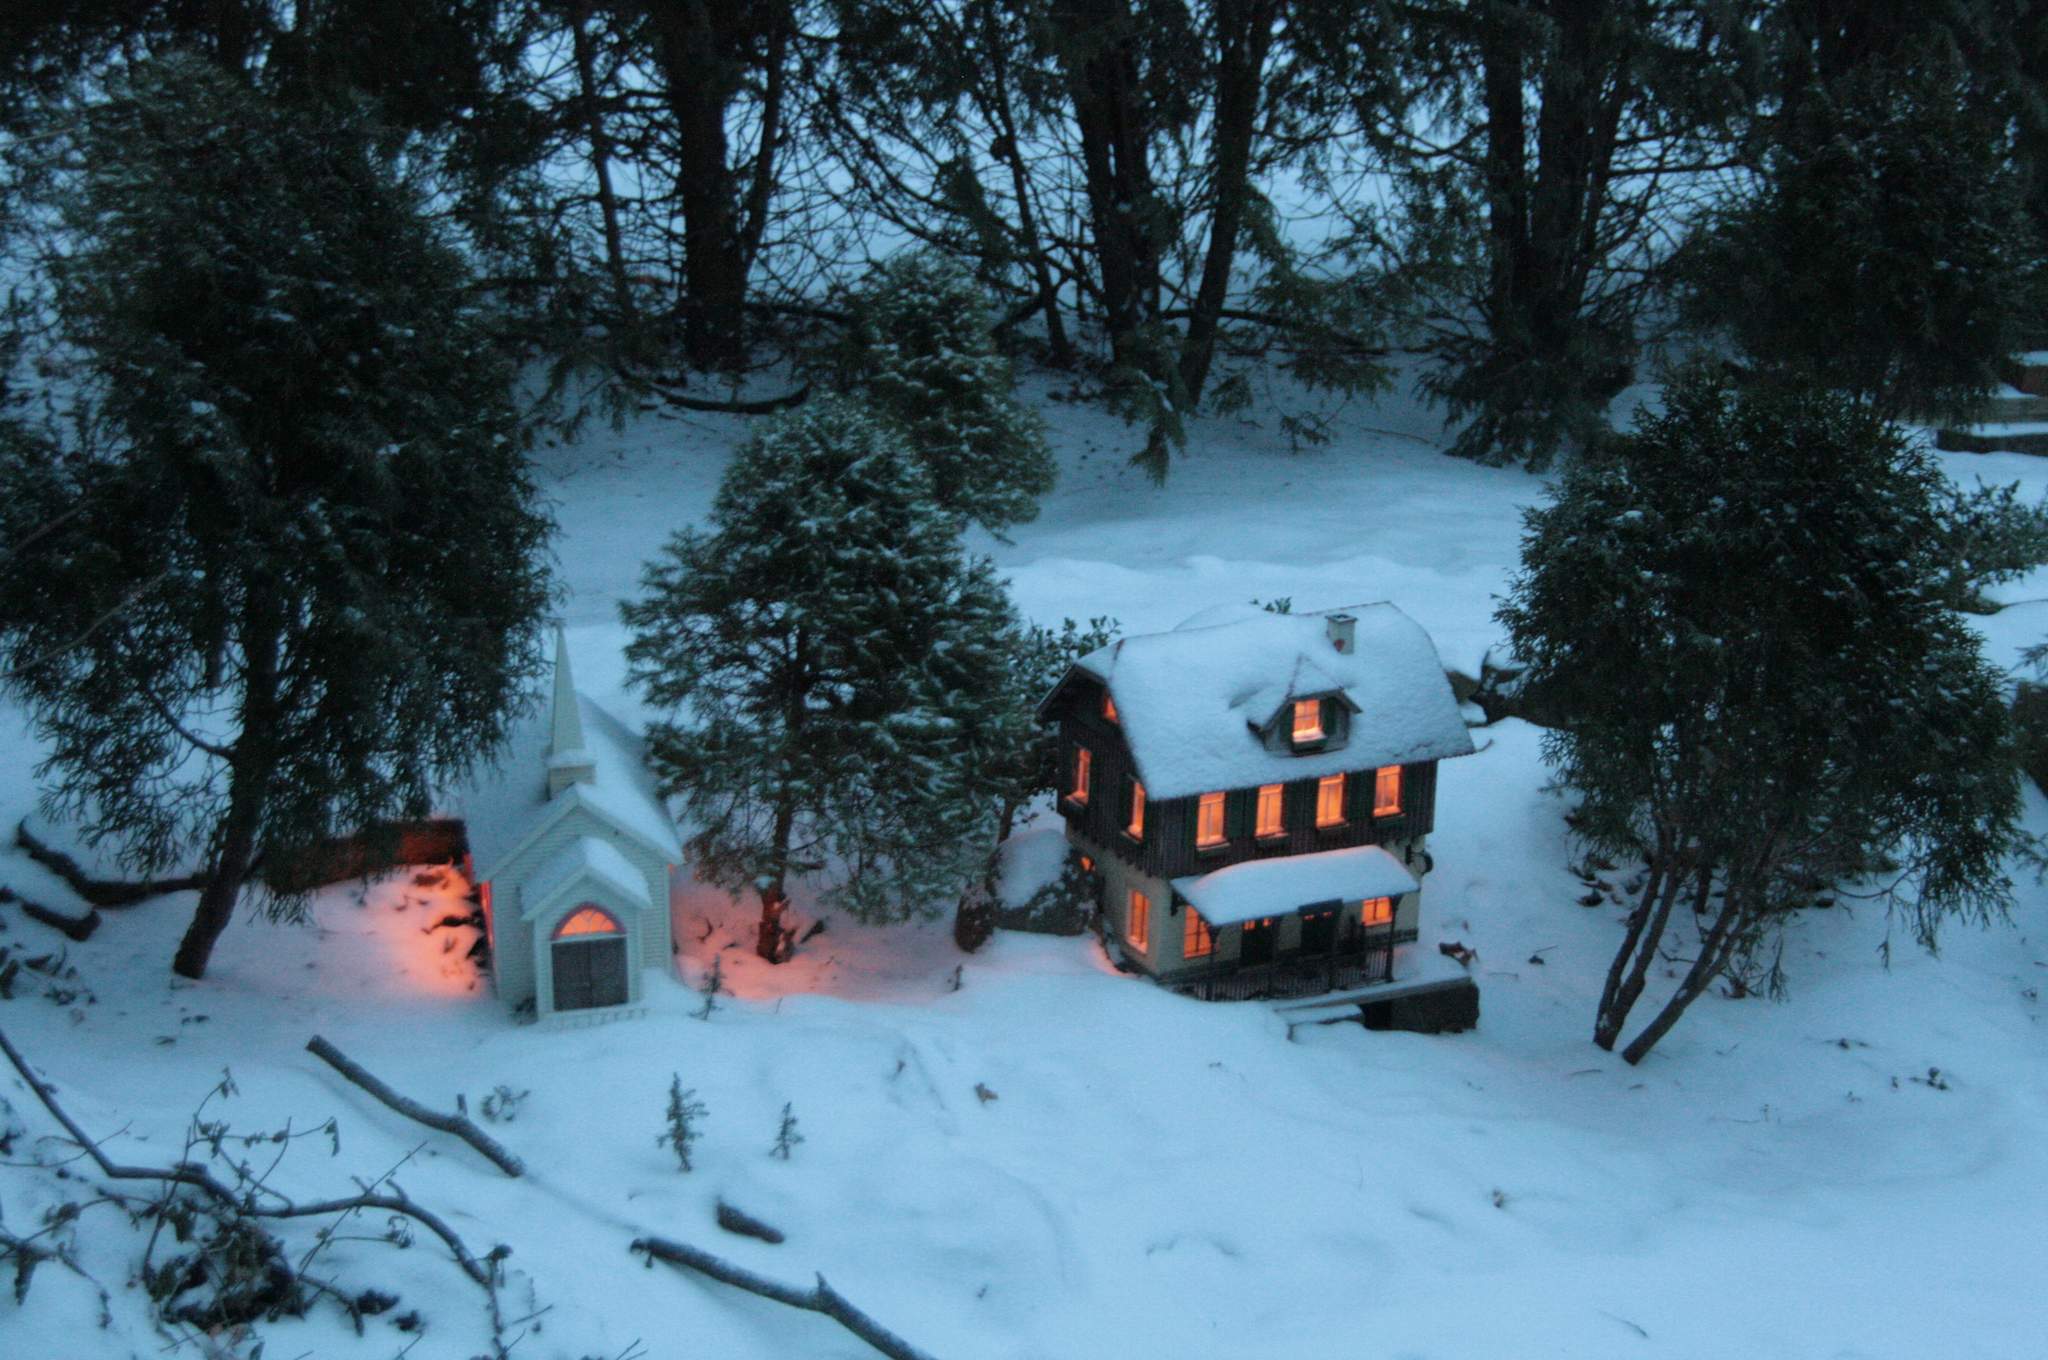
Taken through two panes of glass. Snow has now covered the bottom lens of the low signal…
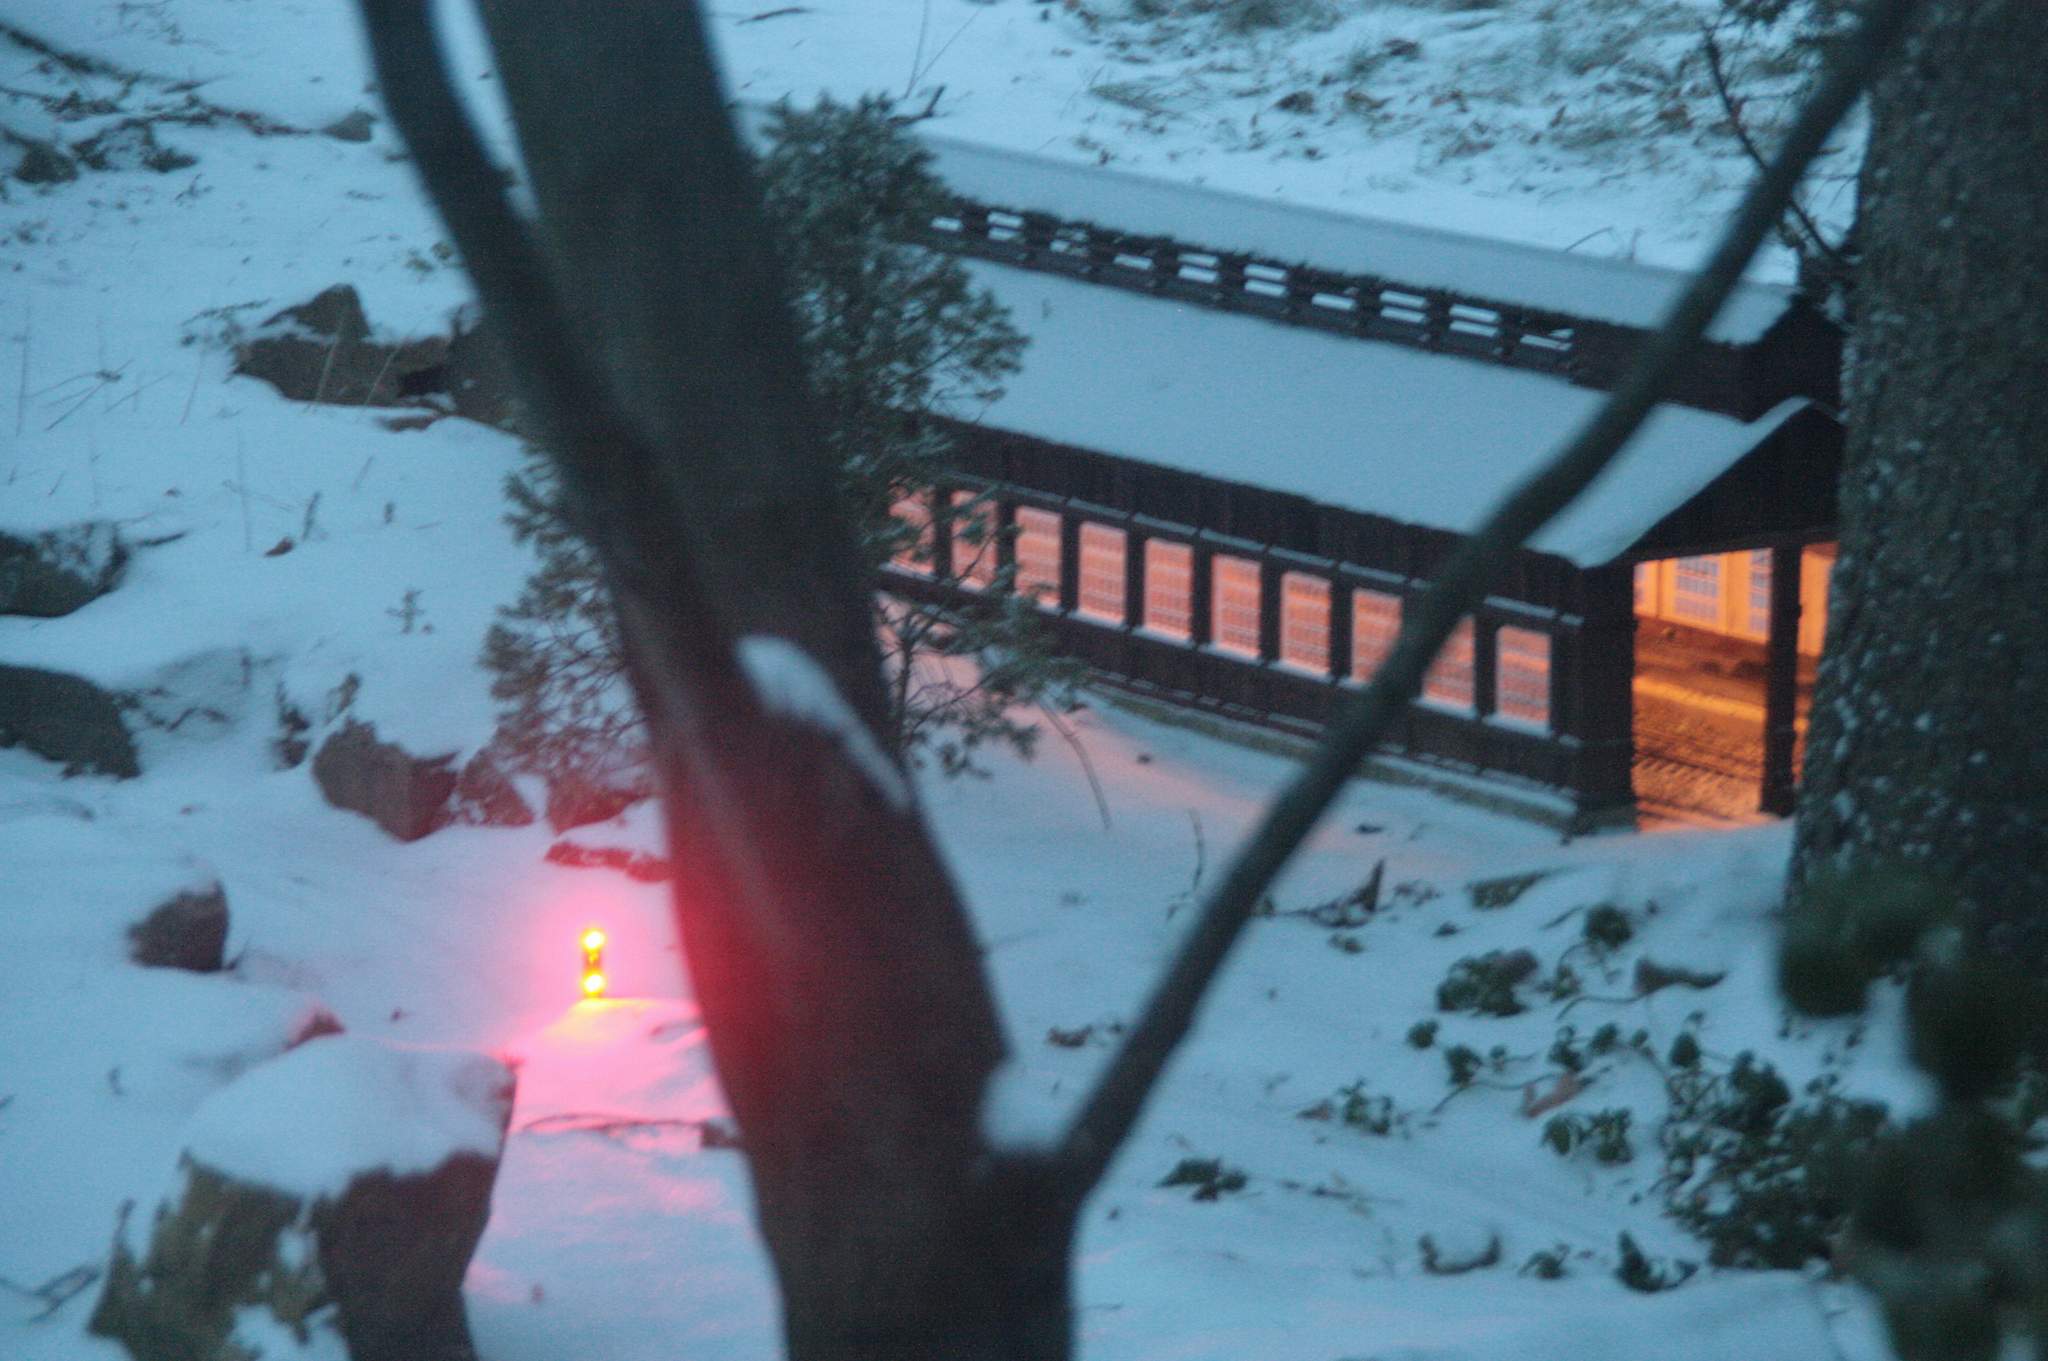
Taken from the front door, just open enough to stick the camera out…
Today is a snow day from work. Propane stove is cranking down in the shop; going to update the lighting in Wall Station and add plugs for easy connection / removal then place them on the indoor division for winter.
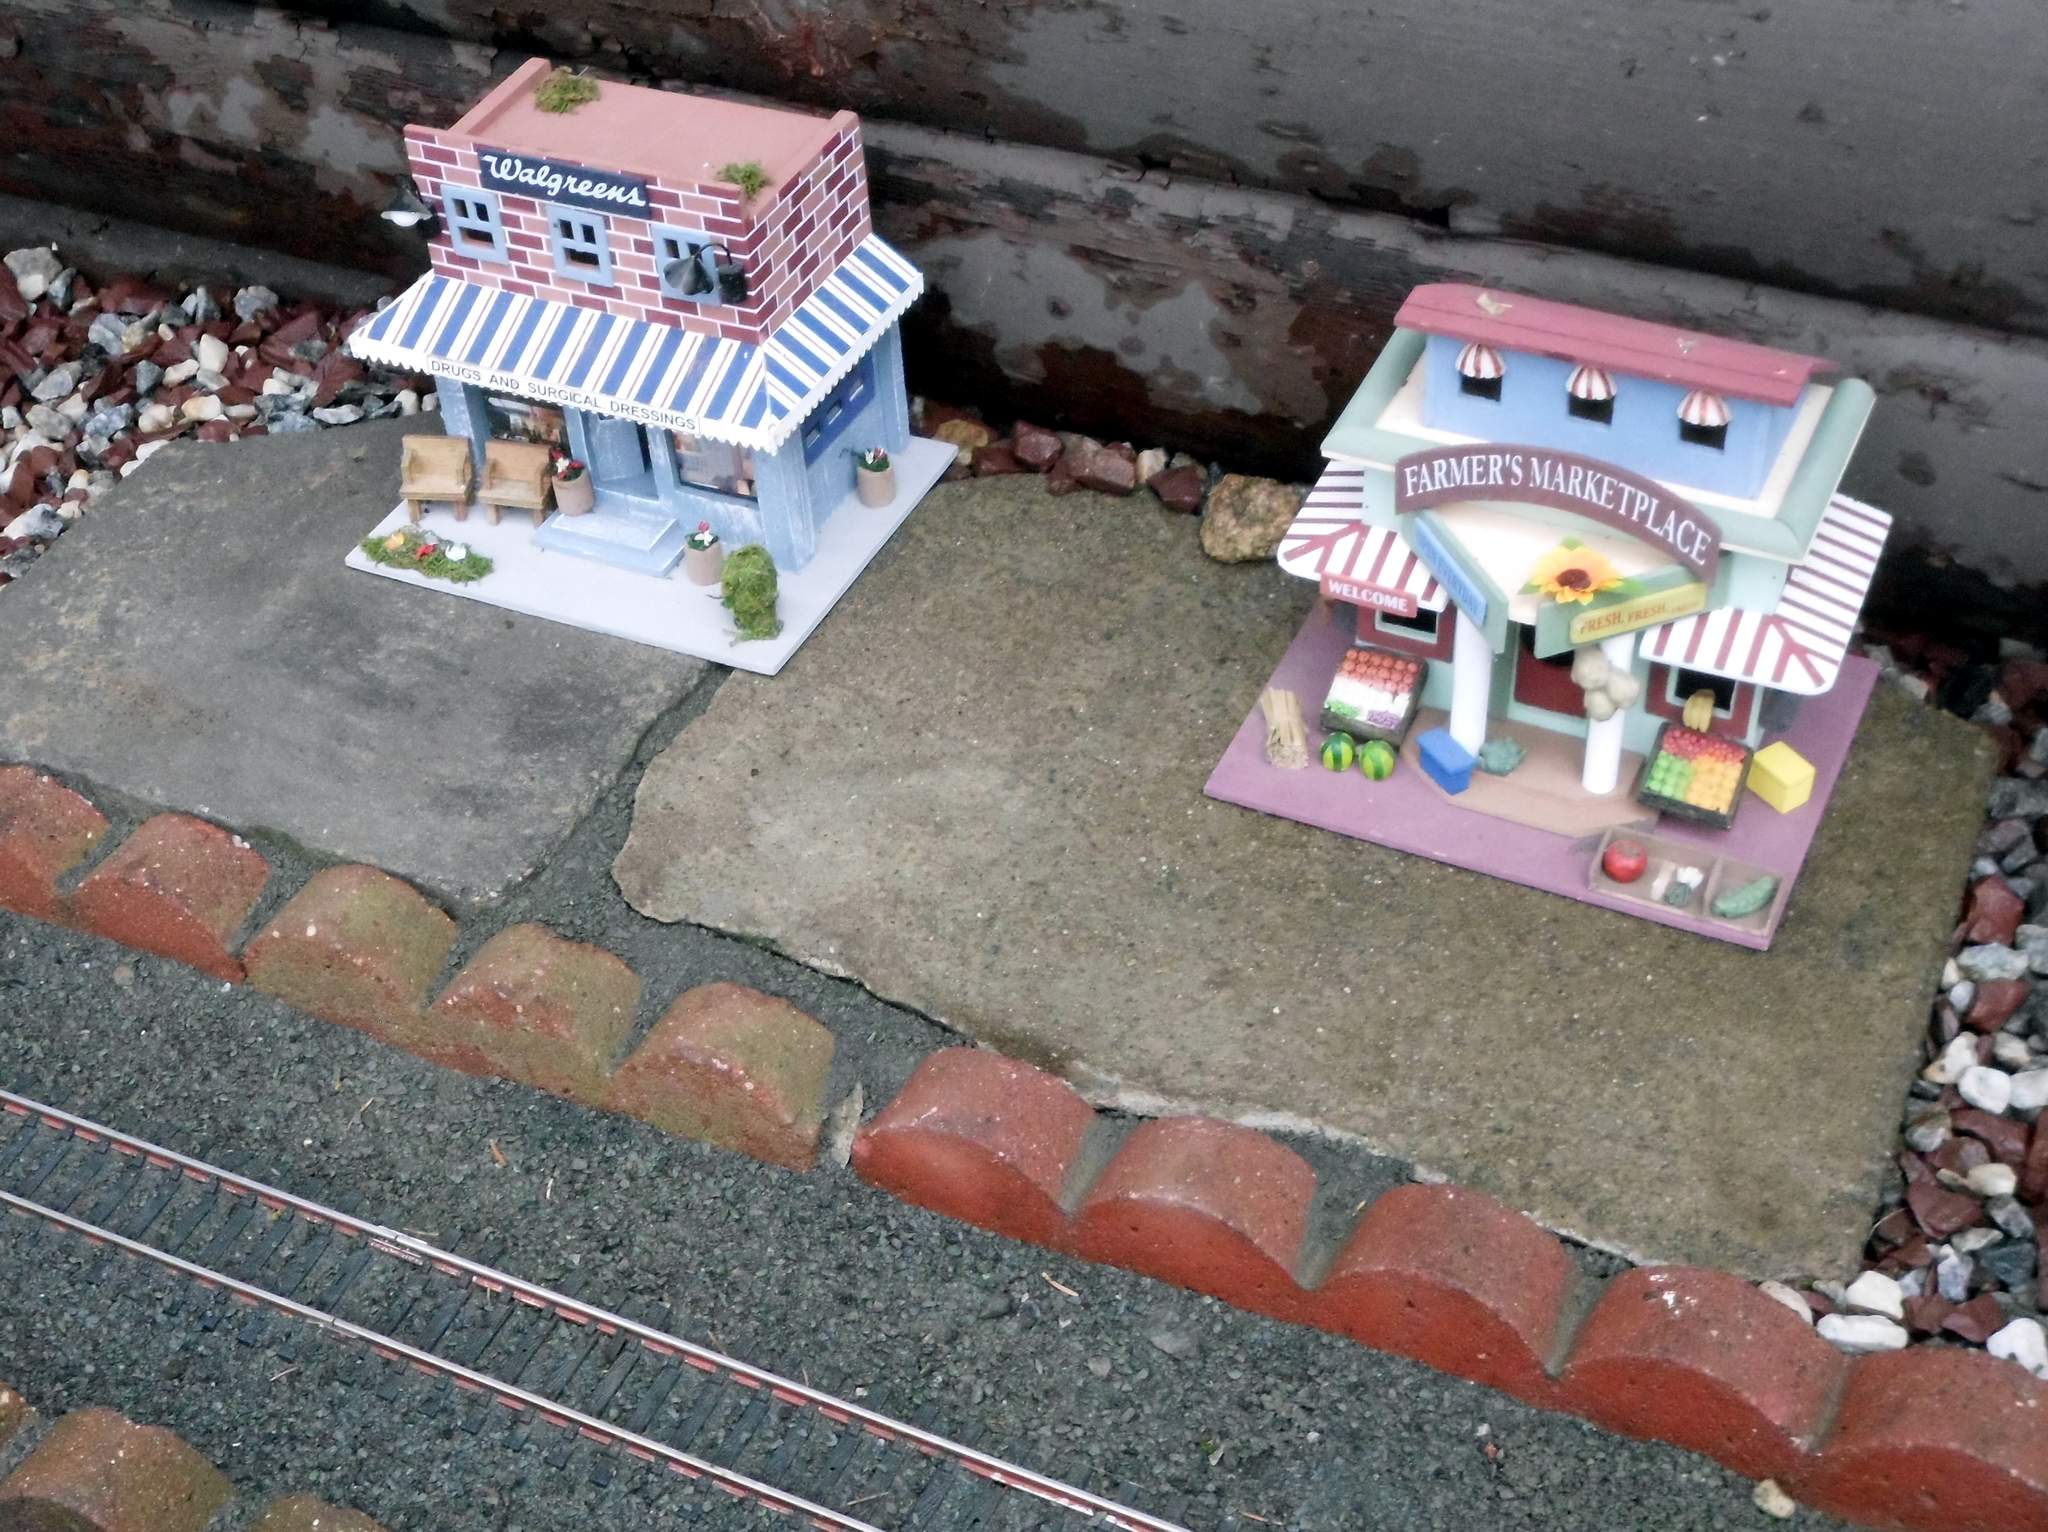
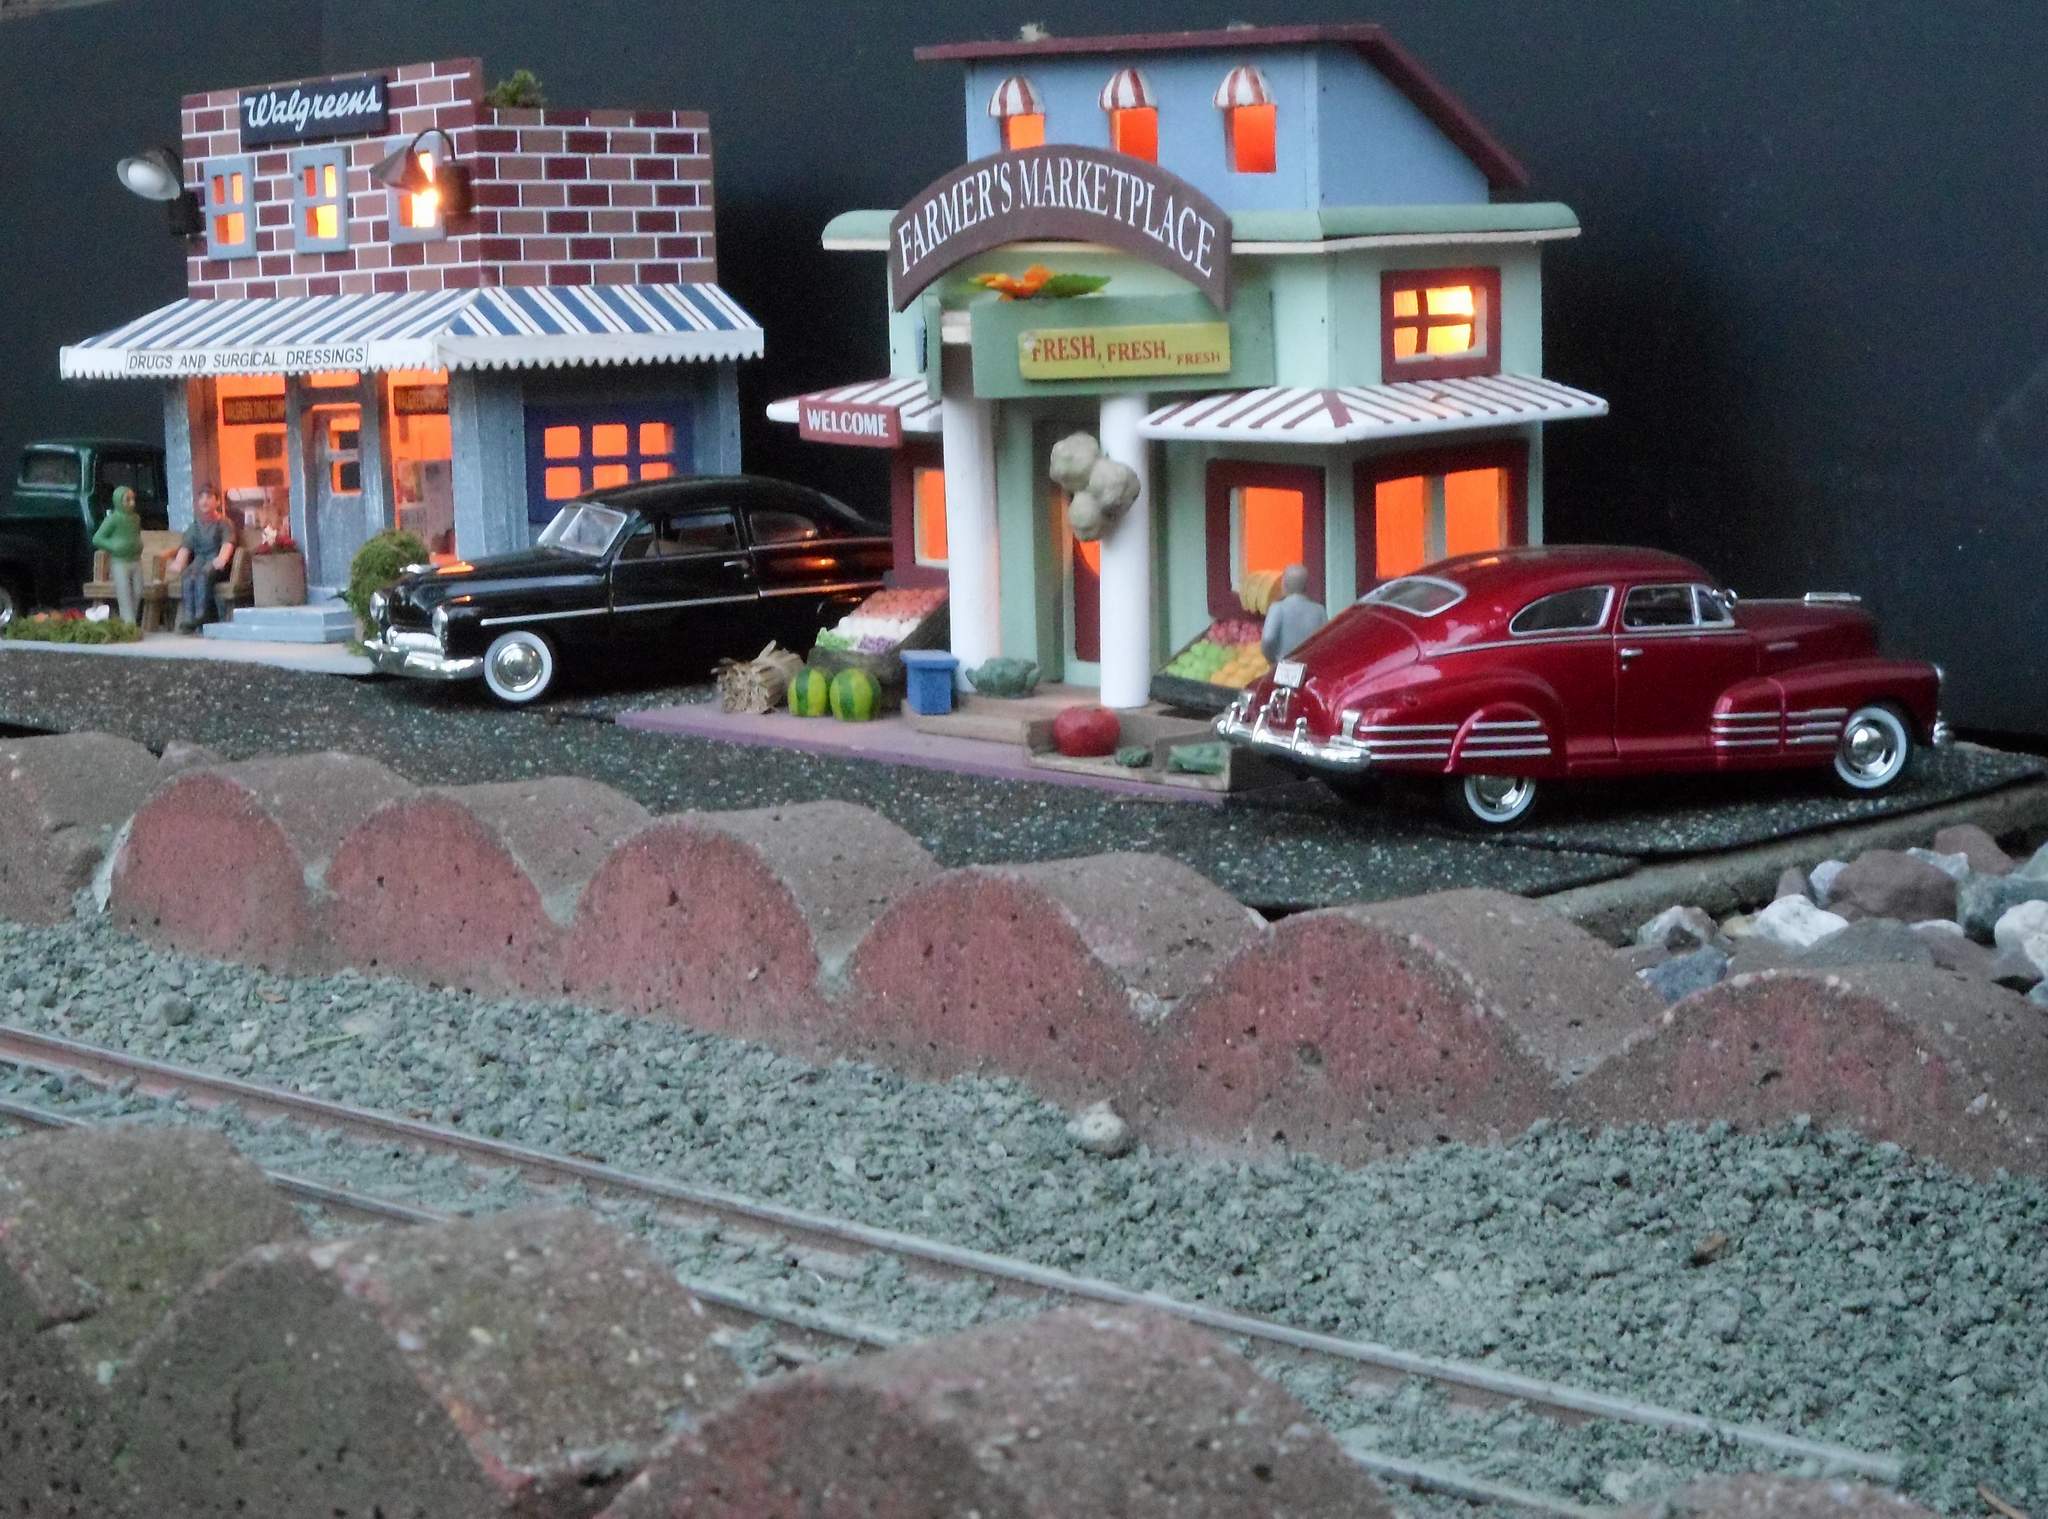
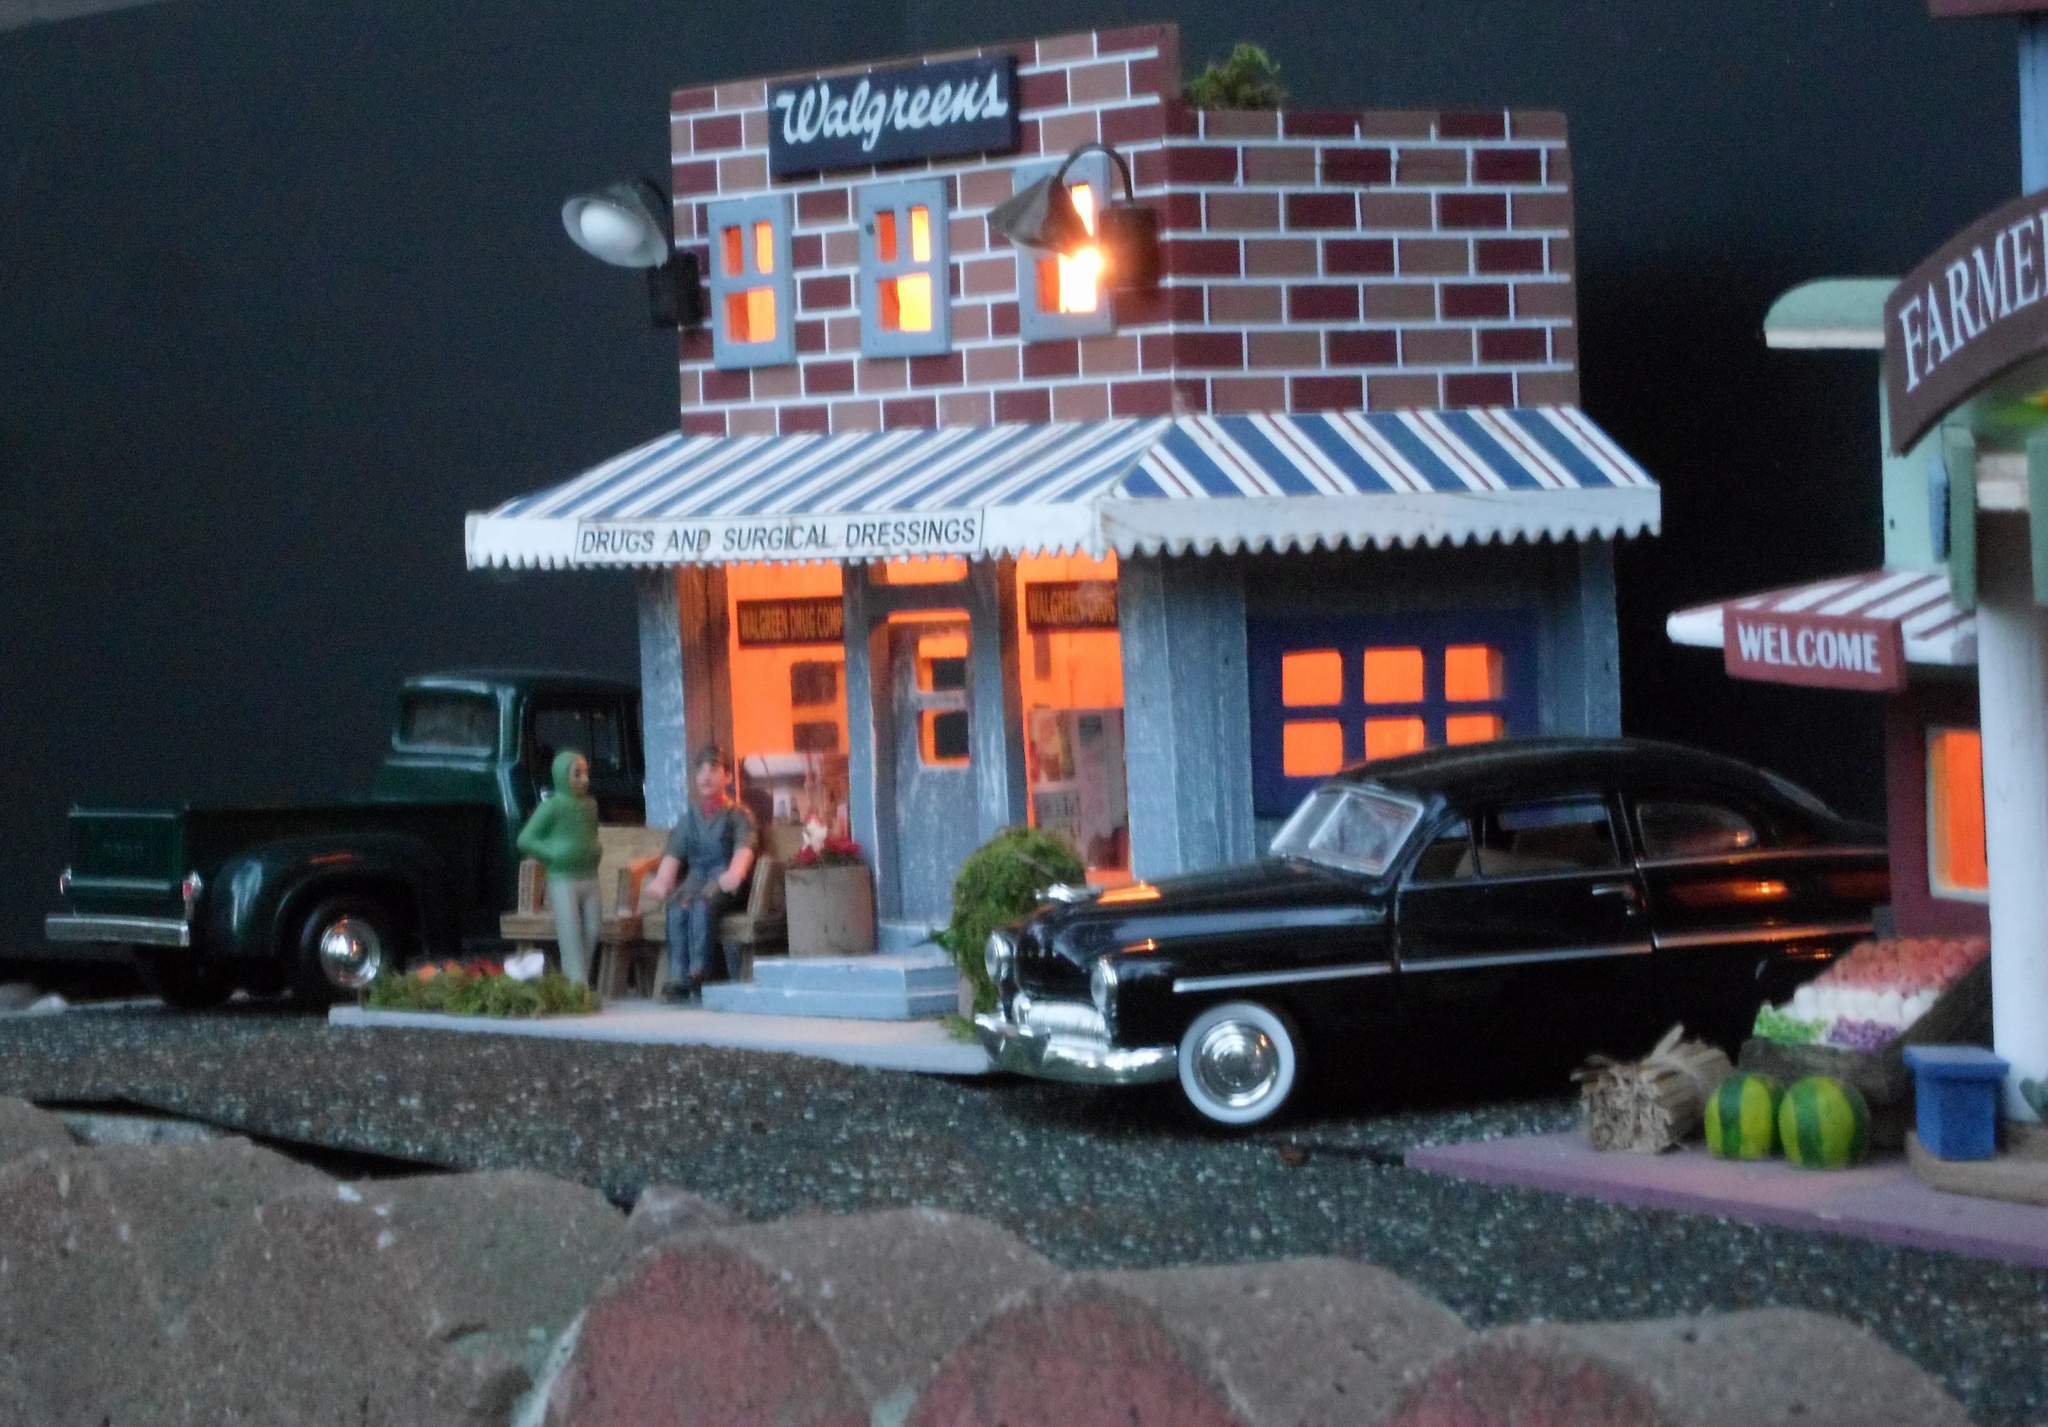
Walking in the front door the other evening I was thinking I need something lit where cars are spotted for Northville Foods on the North tail of my wye. Looking around at my building inventory and parts pile I really didn’t have anything that could be finished quickly. Several years ago my wife picked up some whimsical retail stores at the Christmas Tree Shop. I’m not a big whimsical fan and although cute, they would have taken a ton of work to scale them up, make them serious and weather worthy. I don’t really have room for them on the indoor division, so they have been sitting on a shelf for several years.
I decided to see what they would look like in the dark lit up and they aren’t bad. I asked Marilyn how she would feel if I put them outdoors and they self destruct in one season. She was OK with that so a plan was hatched. Over the last few days I have wired them up with 12V grain of wheat bulbs wired in series as pairs so they aren’t so bright and last more than a few days. Wires are taped to the back of the building out of view. I didn’t take a pic of the back side as it’s not pretty!
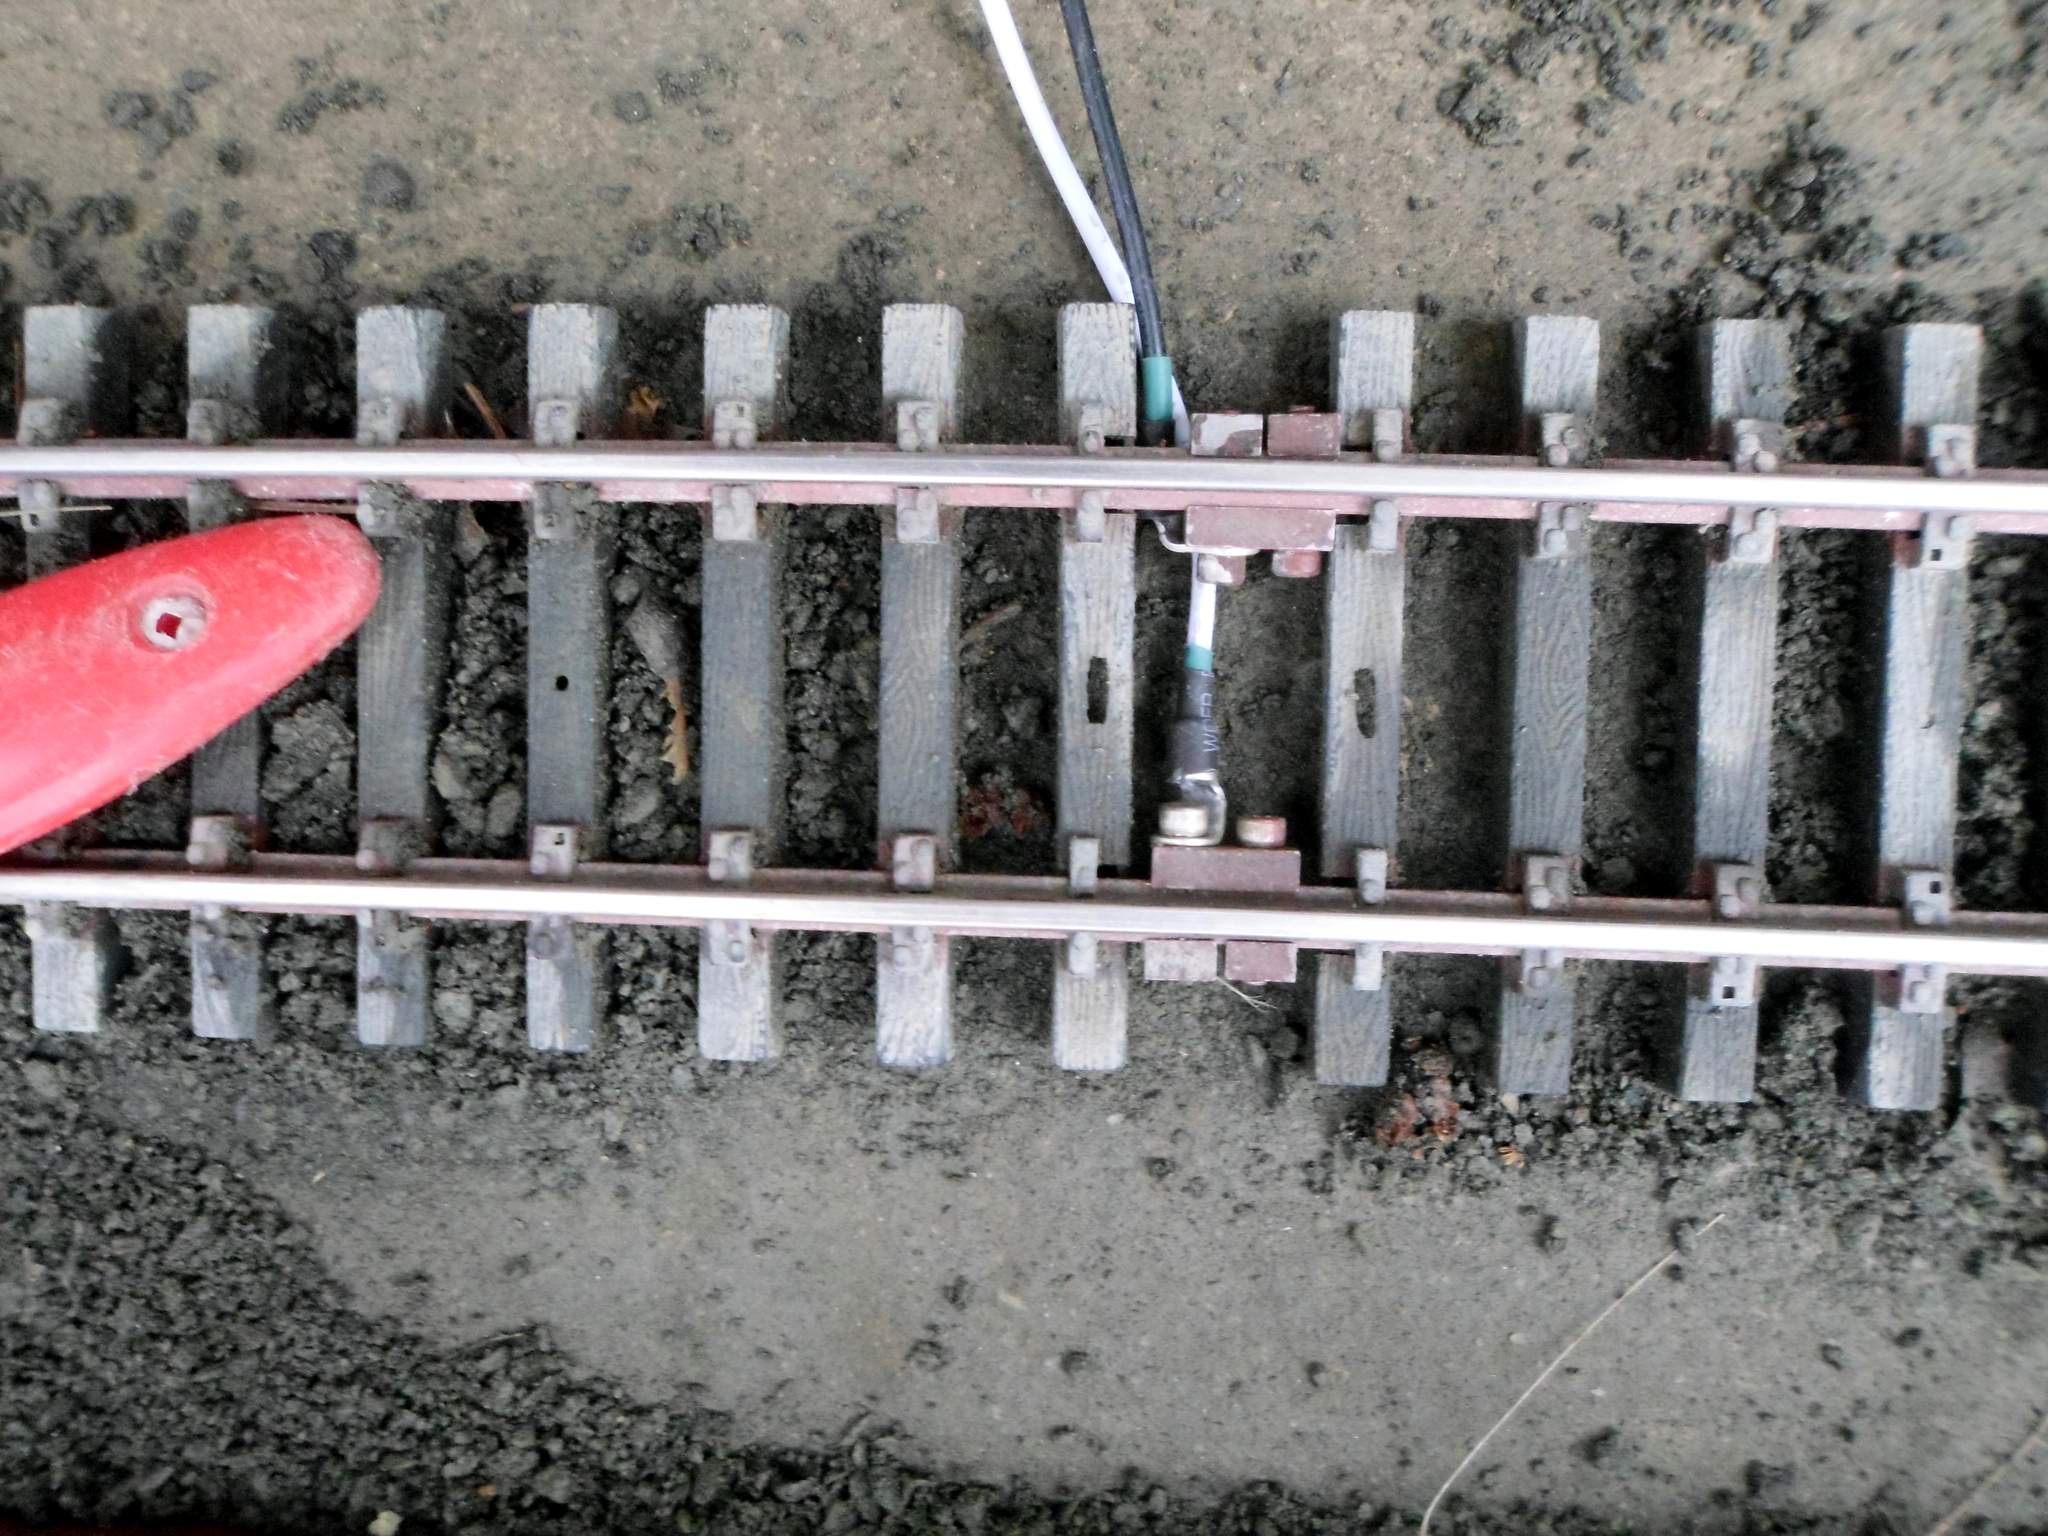
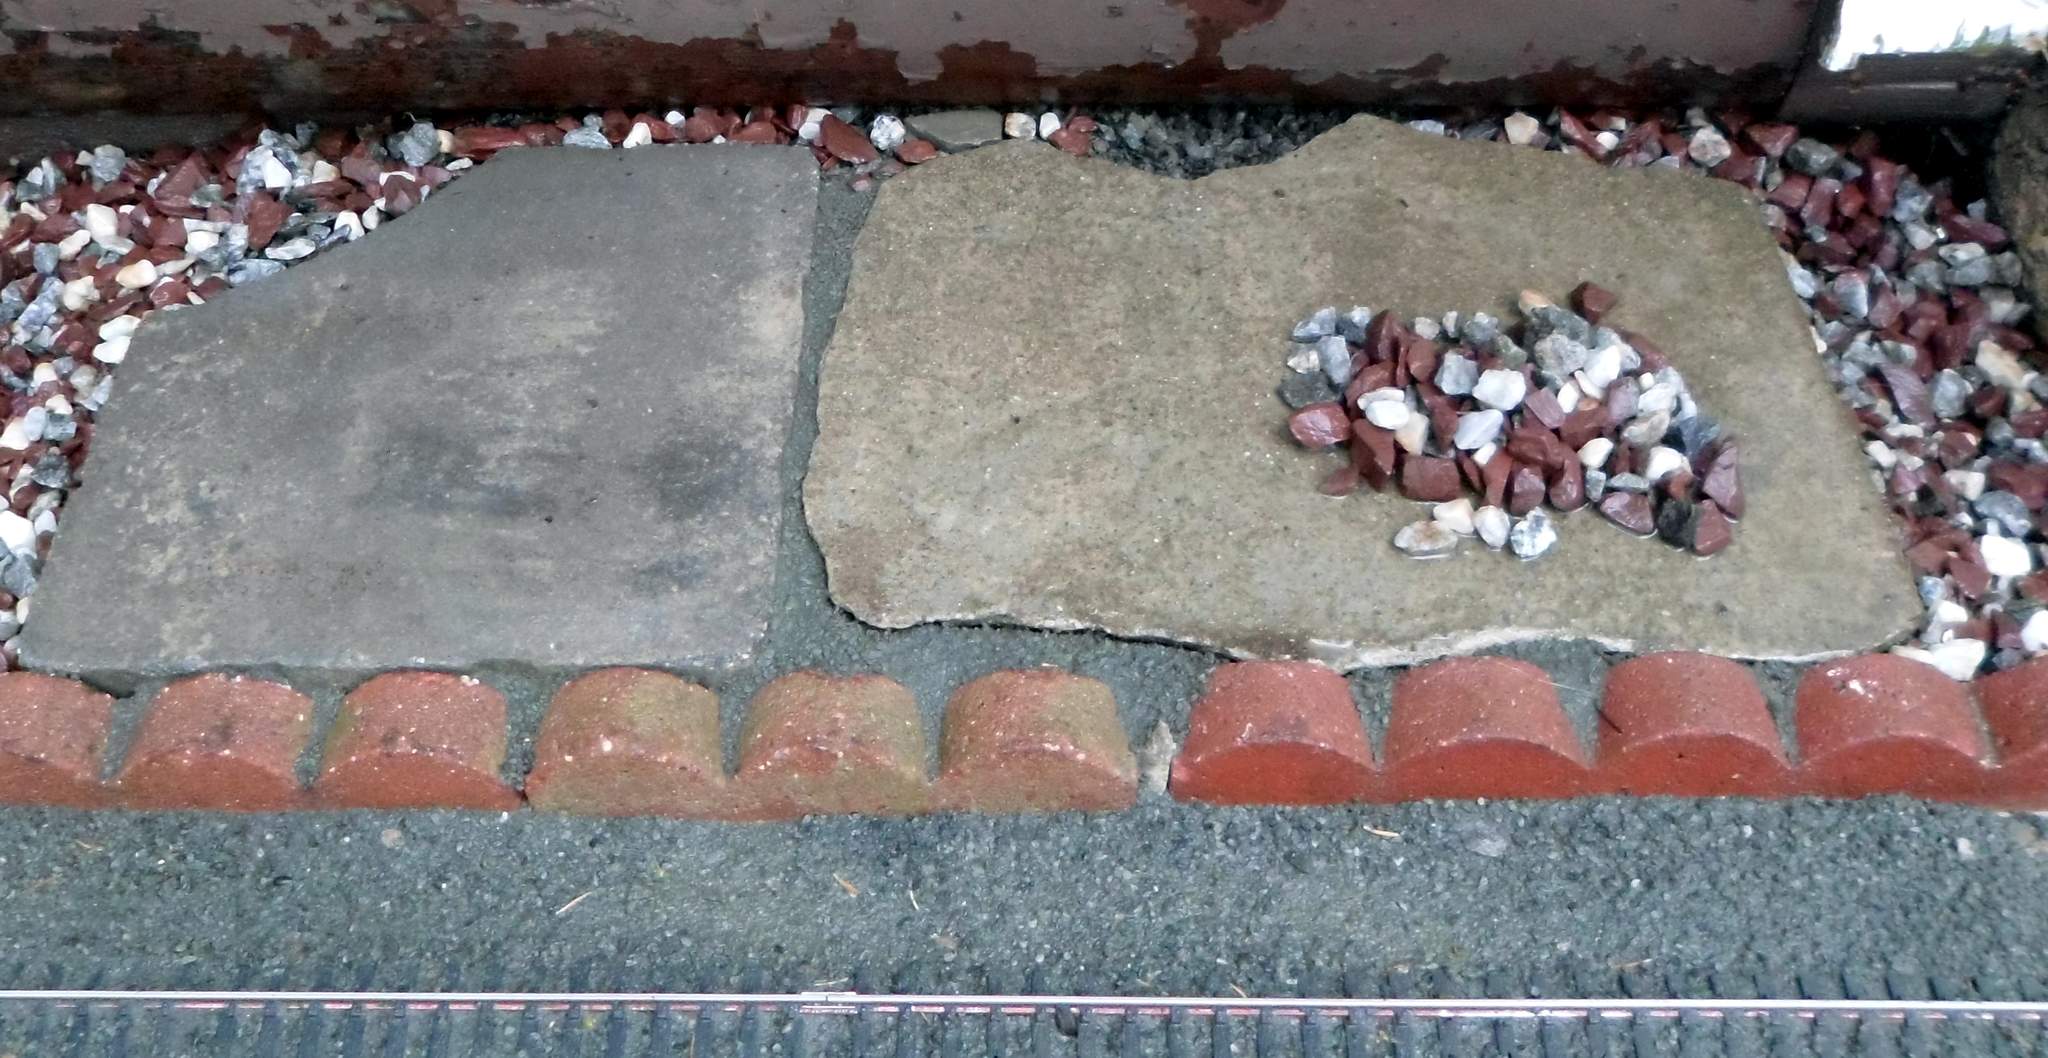
Today was a damp and dark day, but warm enough to work outdoors. I dug up several square feet of stone ground cover. Of course I had to sift all the silt and debris out of it, screening it twice then washing with the hose. I dug up some concrete pieces that would do as a base and began working to set them level. But first, the electrician was called to lay in the power. Ring terminals on SplitJaw Clamps take power from my 12V track buss. The clamps just fit in the joiner gap of Aristo ties…
The other end is set up with plugs so buildings can be brought in if needed…

Excavating done ready to set the bases…
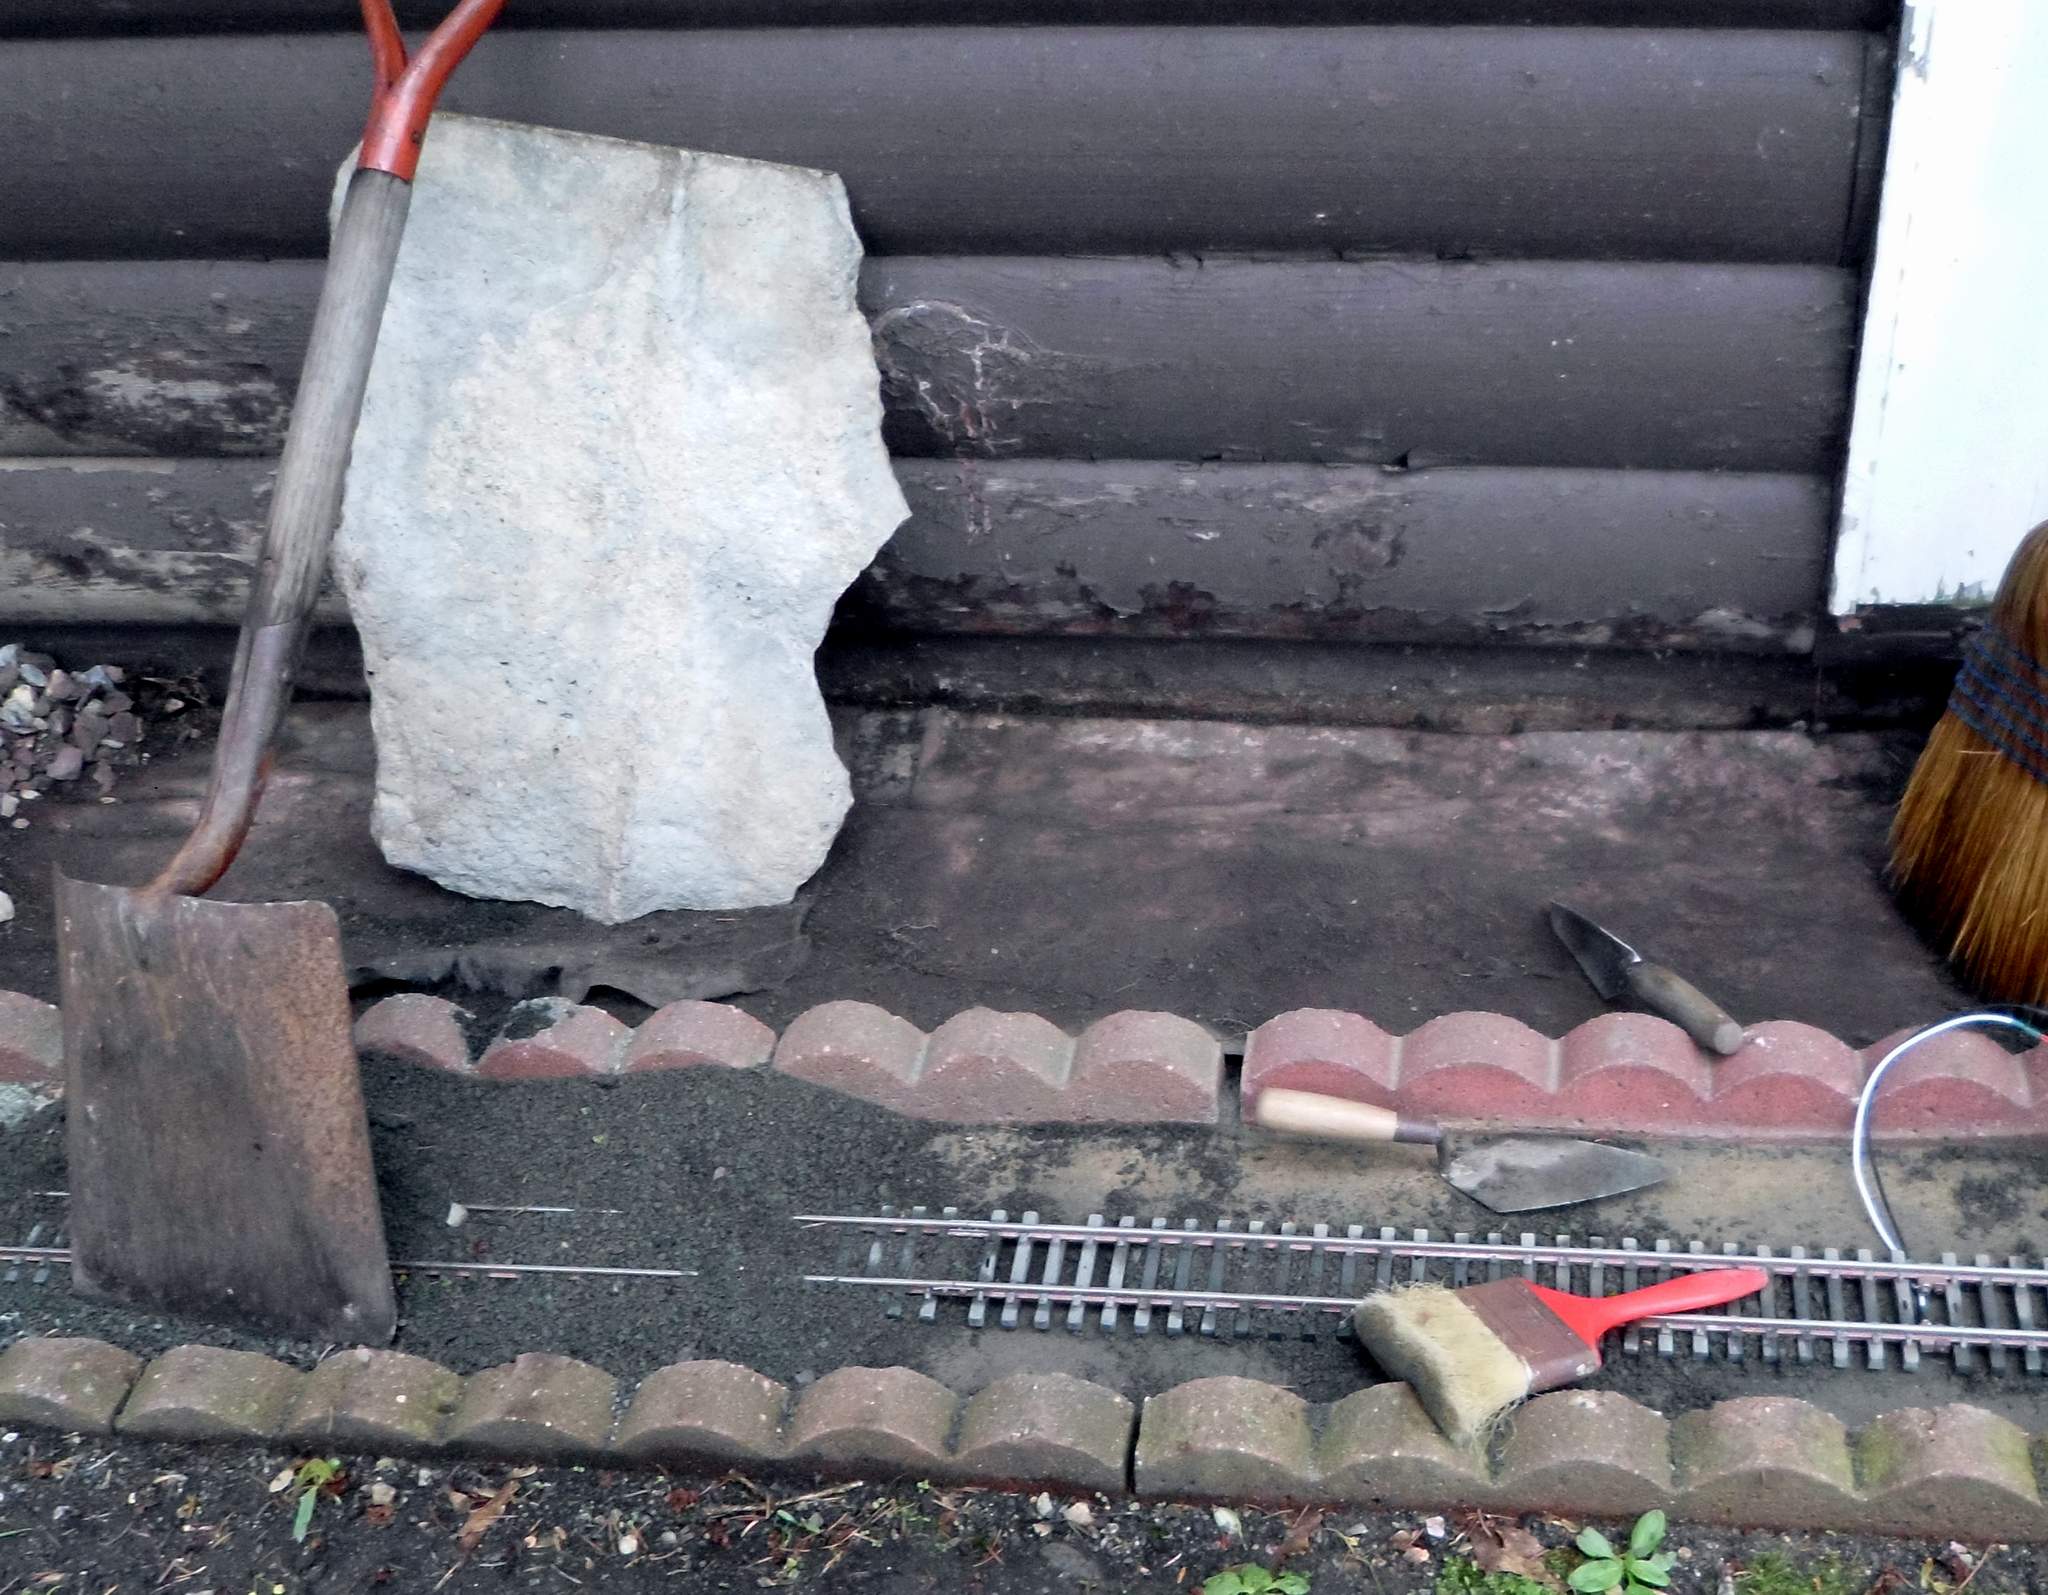
Bases set, clean stone and ballast in place; ready for structures…
I told you these were whimsical and not the correct scale, but they add some life…
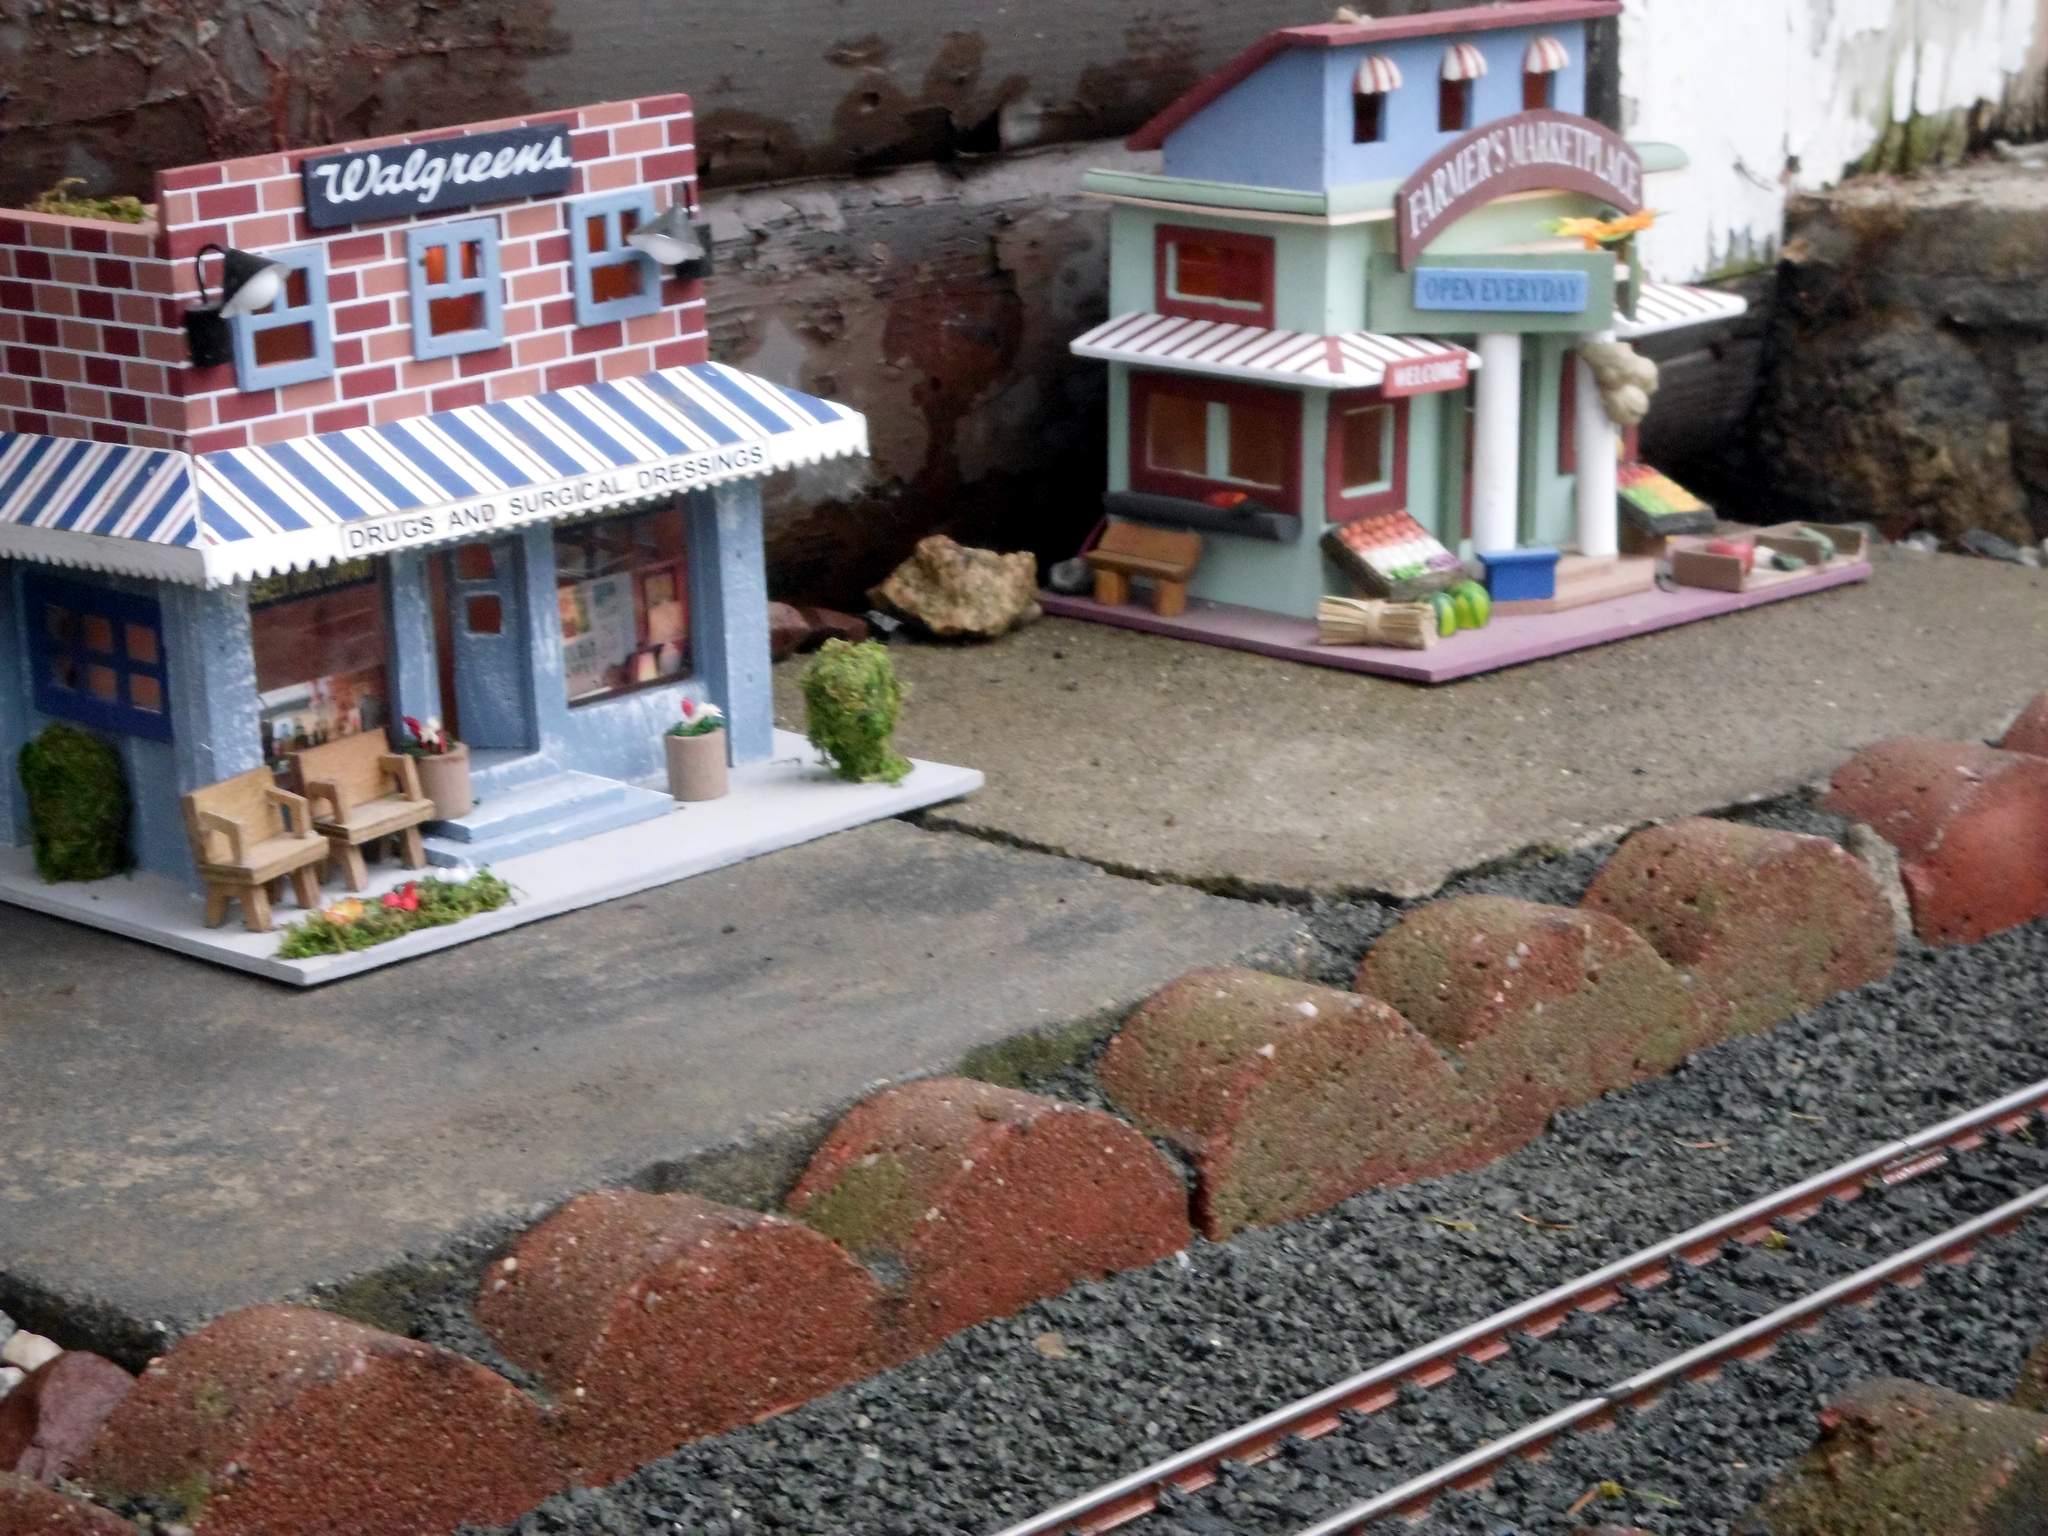
Lit up at dusk…
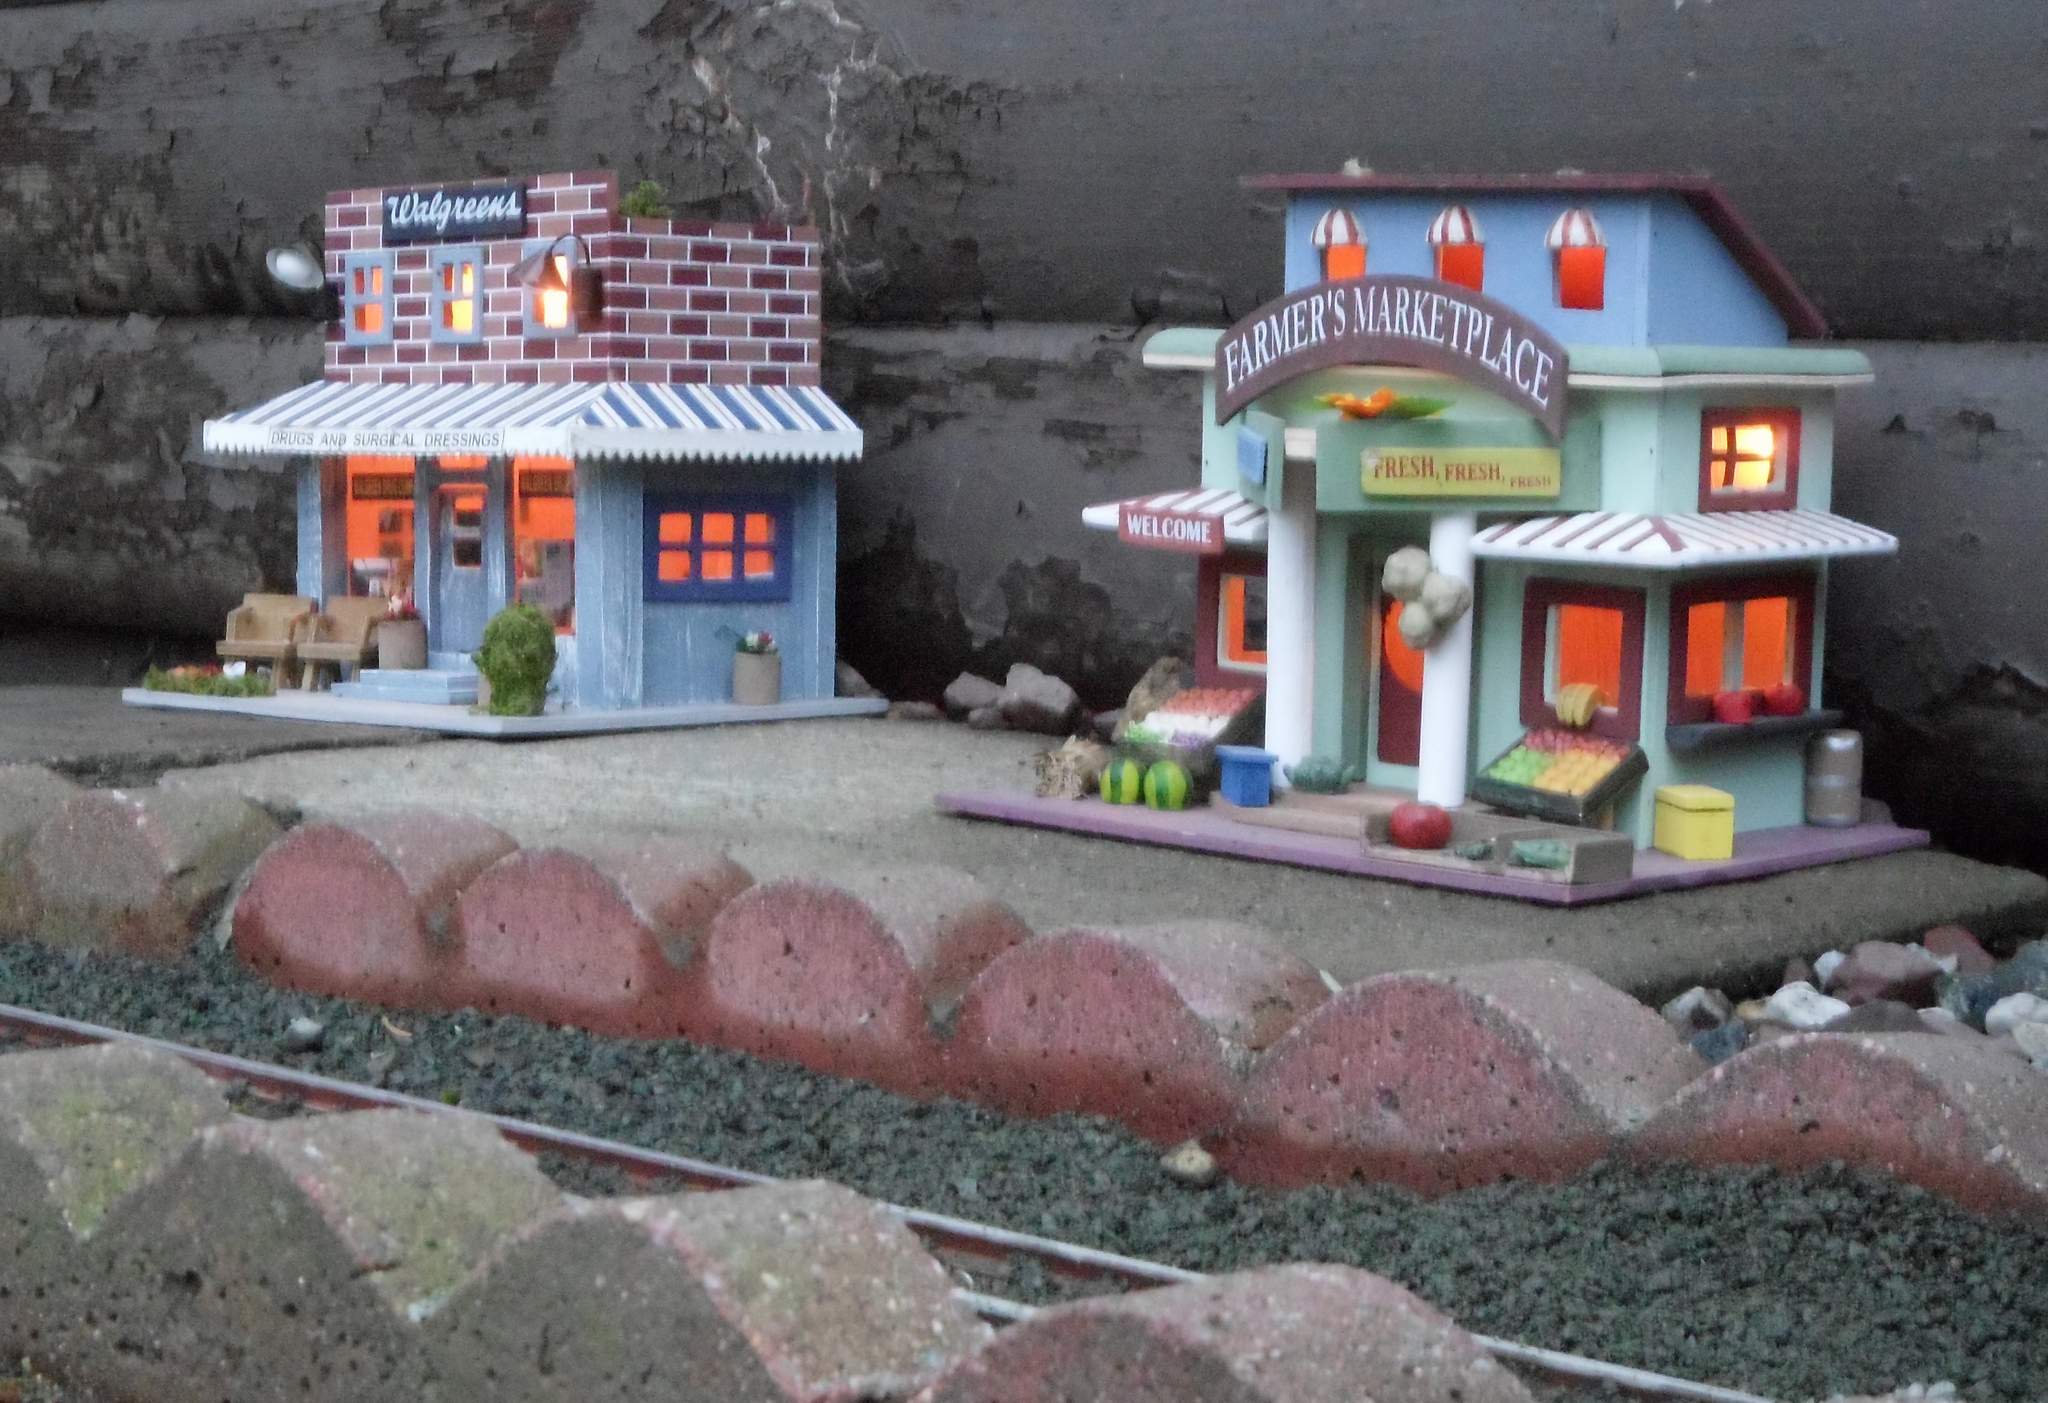
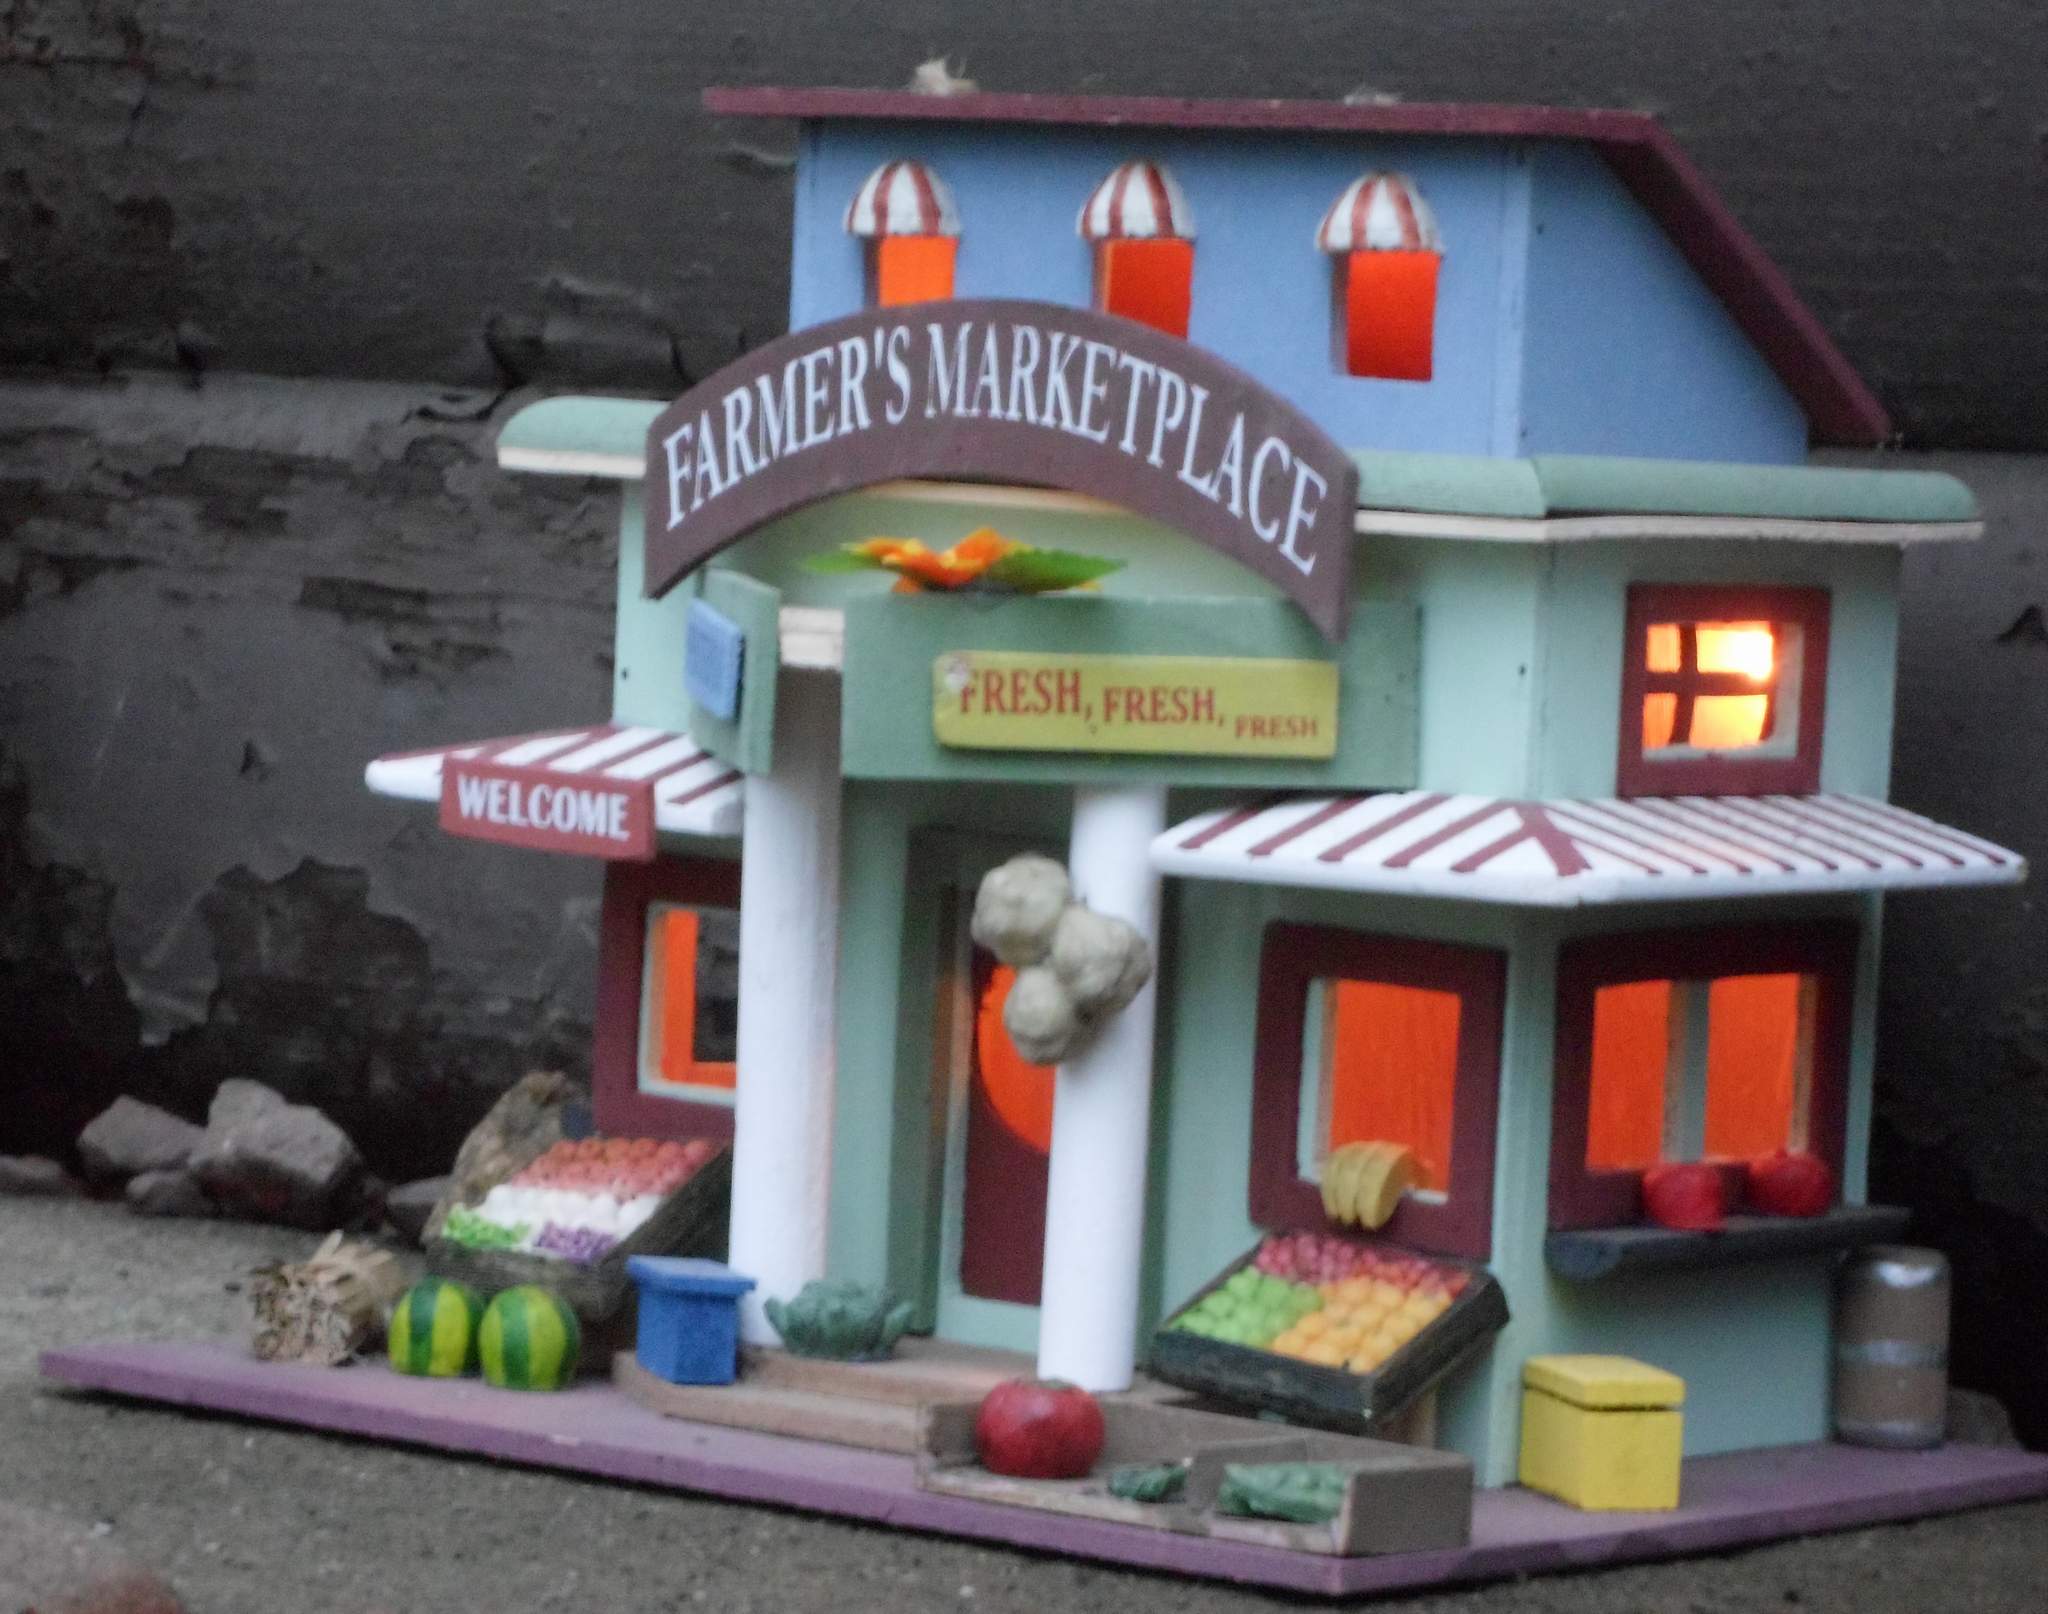

Now I need to paint the house, or add a back drop, or both (https://www.largescalecentral.com/externals/tinymce/plugins/emoticons/img/smiley-surprised.gif)This will do as place holders until I can build a proper structure for here. I am hopeful they will last the season as they don’t get any direct rain here, being under the eves.
Cute has never been an adjective I strive to achieve, but thanks. When I first started looking at this scale on the Aristo forum and later MLS, I was never much of a fan of cute railroads, and there are a bunch that are very well done. I preferred a more realistic approach even if it meant that the railroad was sparsely populated with structures like mine. But then, I’ve gone through a lot of changes since one day last October when I officially became old. Maybe I have a soft spot for cute after all.
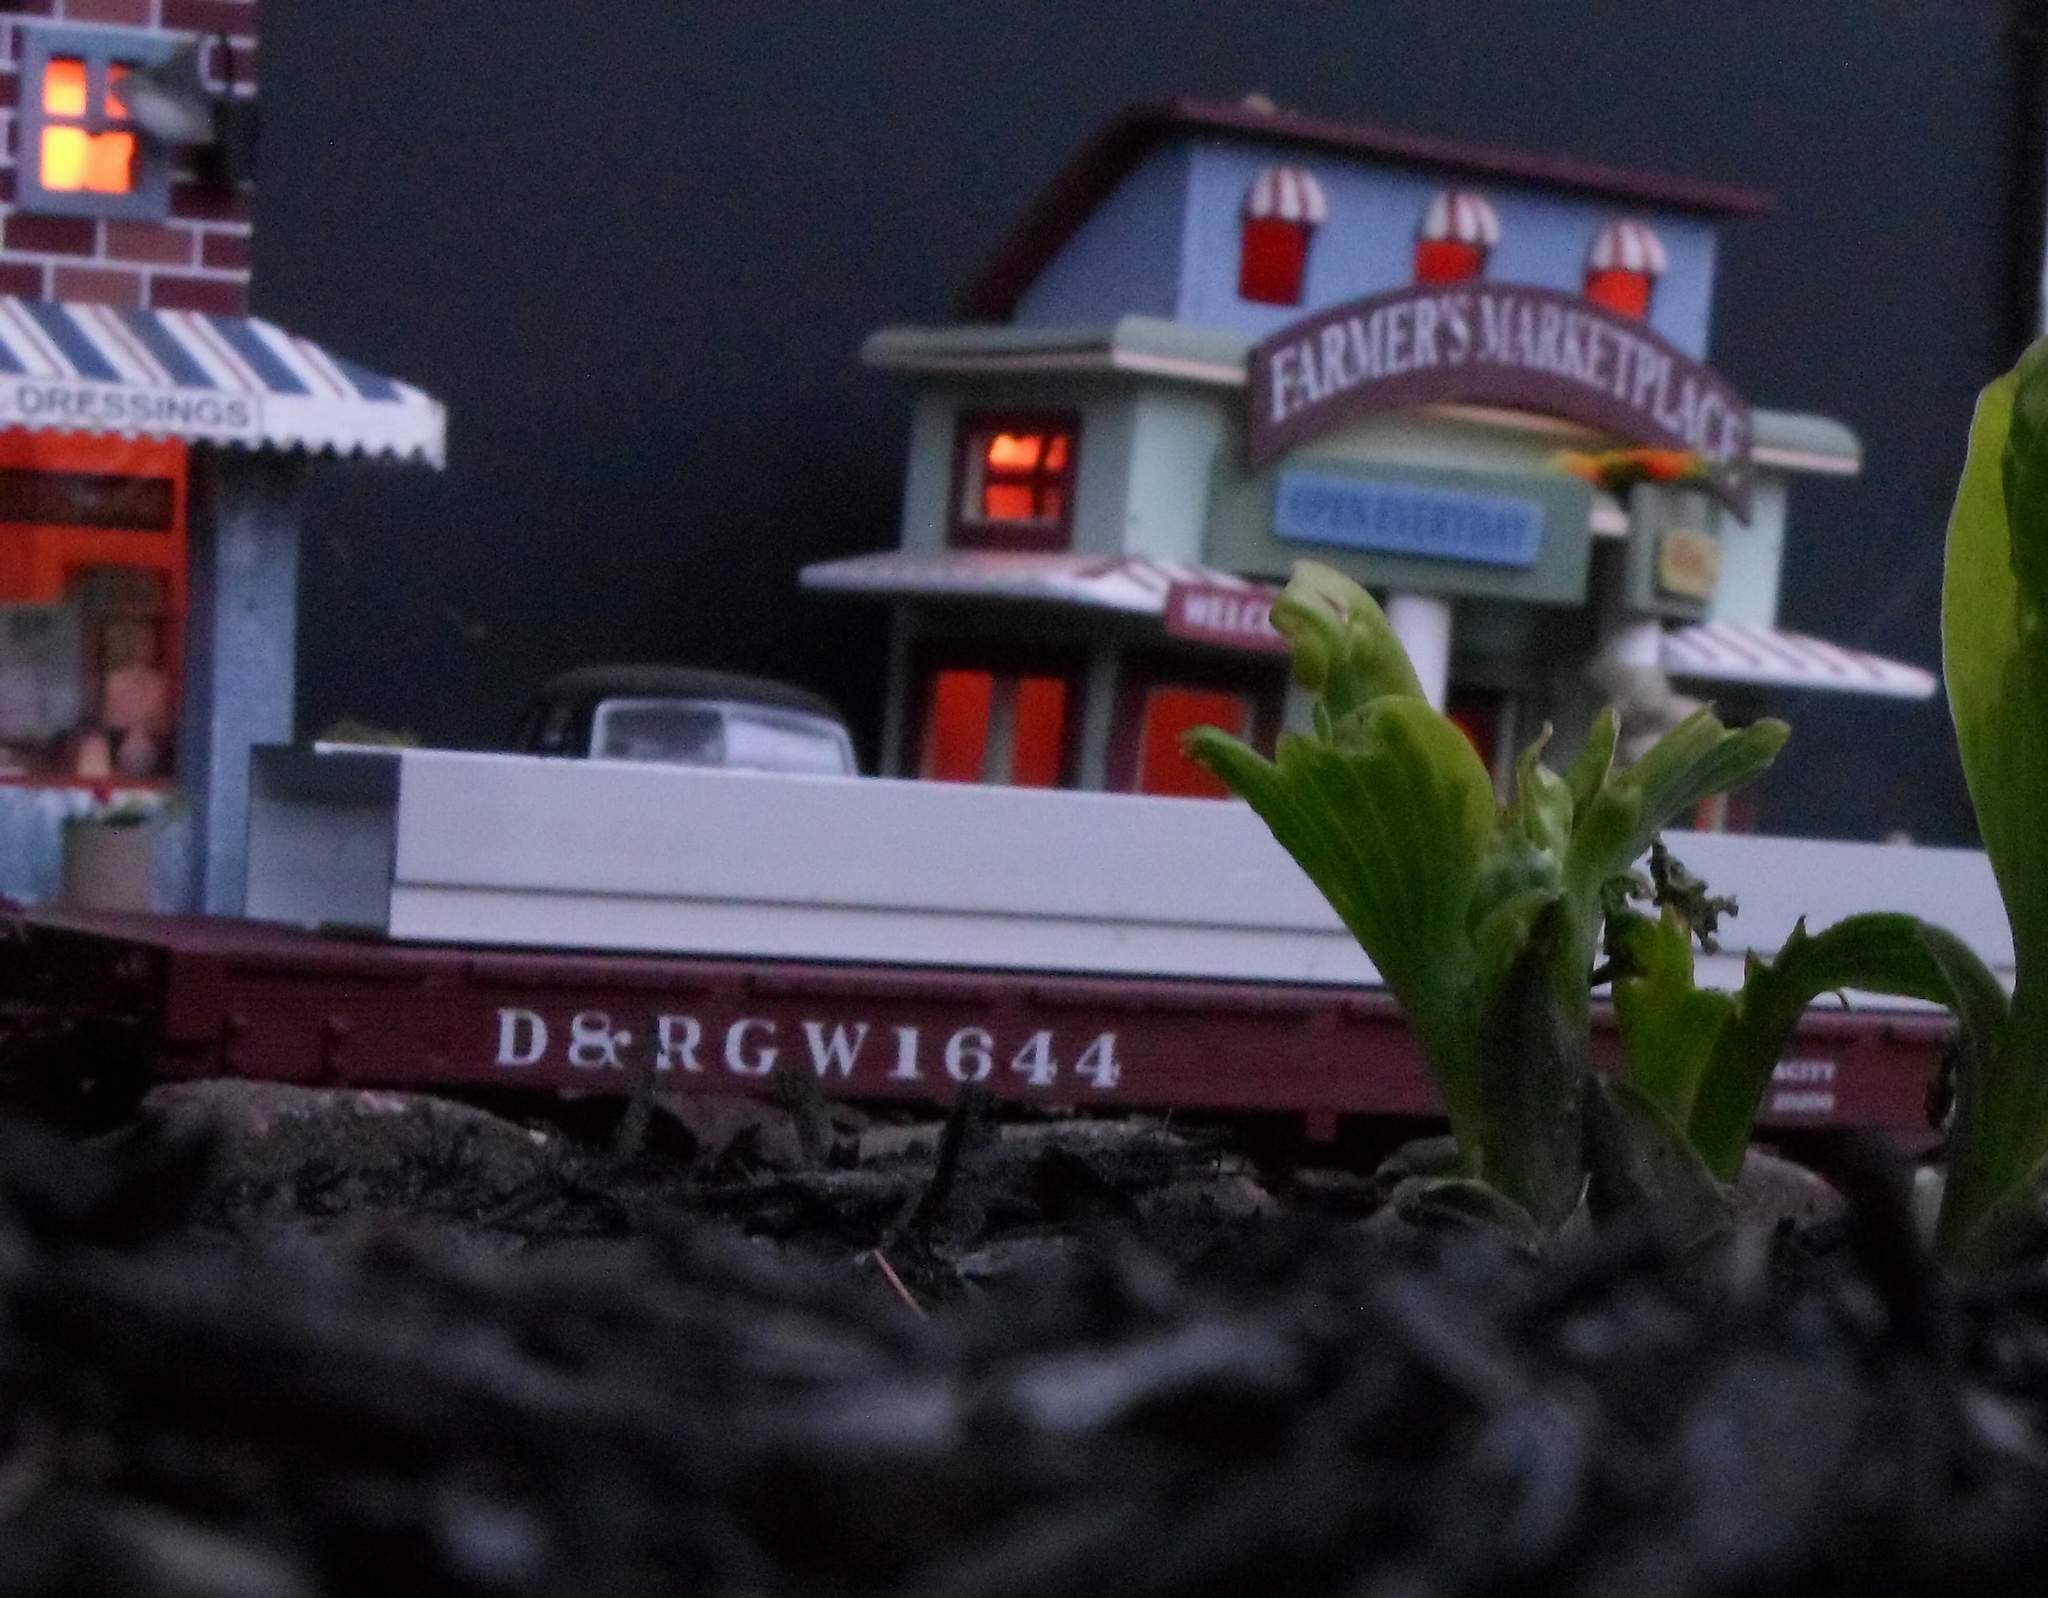
I’ve had a stack of roof shingles laying around for some time. I walked past them yesterday and decided that this scene needs a road. And, if you have a road then you need vehicles. I dug out a box of 1:24 die cast I put away 11 years ago. If your going to go out of scale, you might as well go in a big way. I’m just happy this stuff is finally being used. I need to get the big camera out for some good night pictures since having more night picture spots was the motivation for this scene in the first place. In the mean time, these dusk pictures will have to do…


Beautiful! And very cool!
More pictures. I was planning on setting up a scene with the train for some after dark pictures, but Mother Nature talked me out of that with very cool evening temperatures just as the sun was going behind the mountain. These point-and-shoot test shots are all I got. It’s funny how you don’t notice details like the missing R in my herald graphic until you take a close-up photo…

Ballast, weathered rails, and great old-era 1:24 cars…you are my hero.
That locomotive shot is MONEY!!! don’t knock the point and shoots, either that or you are just really good with them!
Thank you Pete. I like the loco shot too, but it has it’s issues too. No glad hand on the loco and too much of my house in focus. This is a Samsung 12Mp. It takes pretty good shots, but when I do a side-by-side comparison to the better glass on my DSLR, it really is like night and day. I was busy in the Electric Shop tonight. Pics in the morning.
Vehicles have lights - so the next logical thing to mess with is making the die cast cars light up. Not all of them lend themselves to this upgrade, but a '55 Nomad I have does, so first an experiment. Open it up and tape some GOW bulbs behind the plastic headlight lenses…
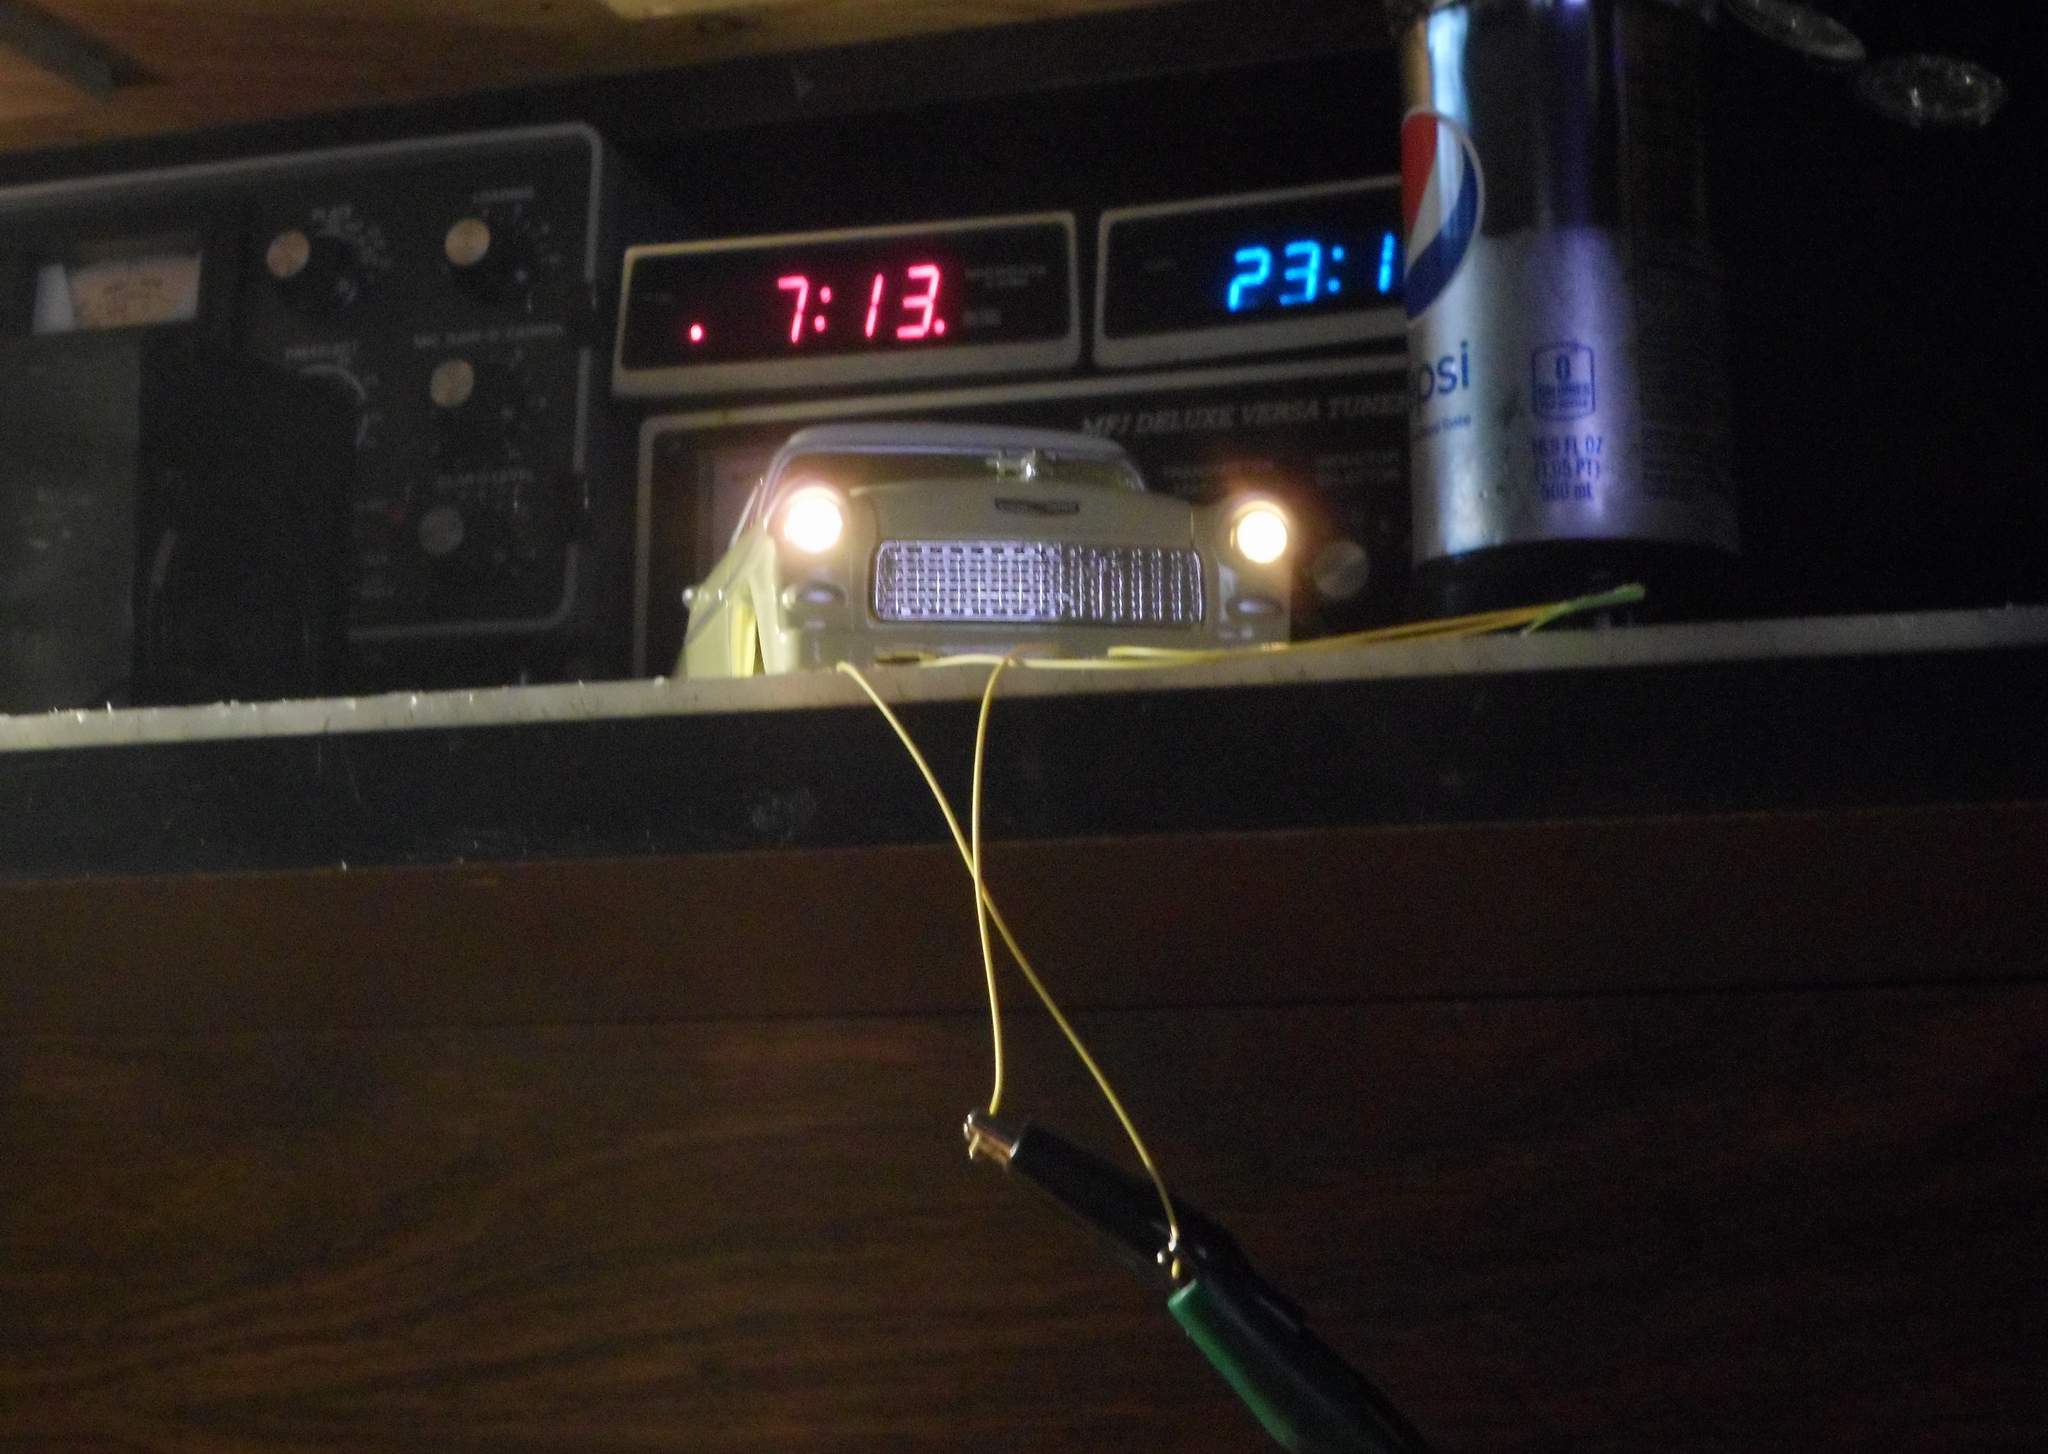
Not bad. Worth going further; so I used hot glue to hold the bulbs in place…

I was thinking about gluing on a cover to keep from also illuminating the interior of the body; but I left that for later while I used more hot glue to tuck the wires out of view where the chassis would still fit on…
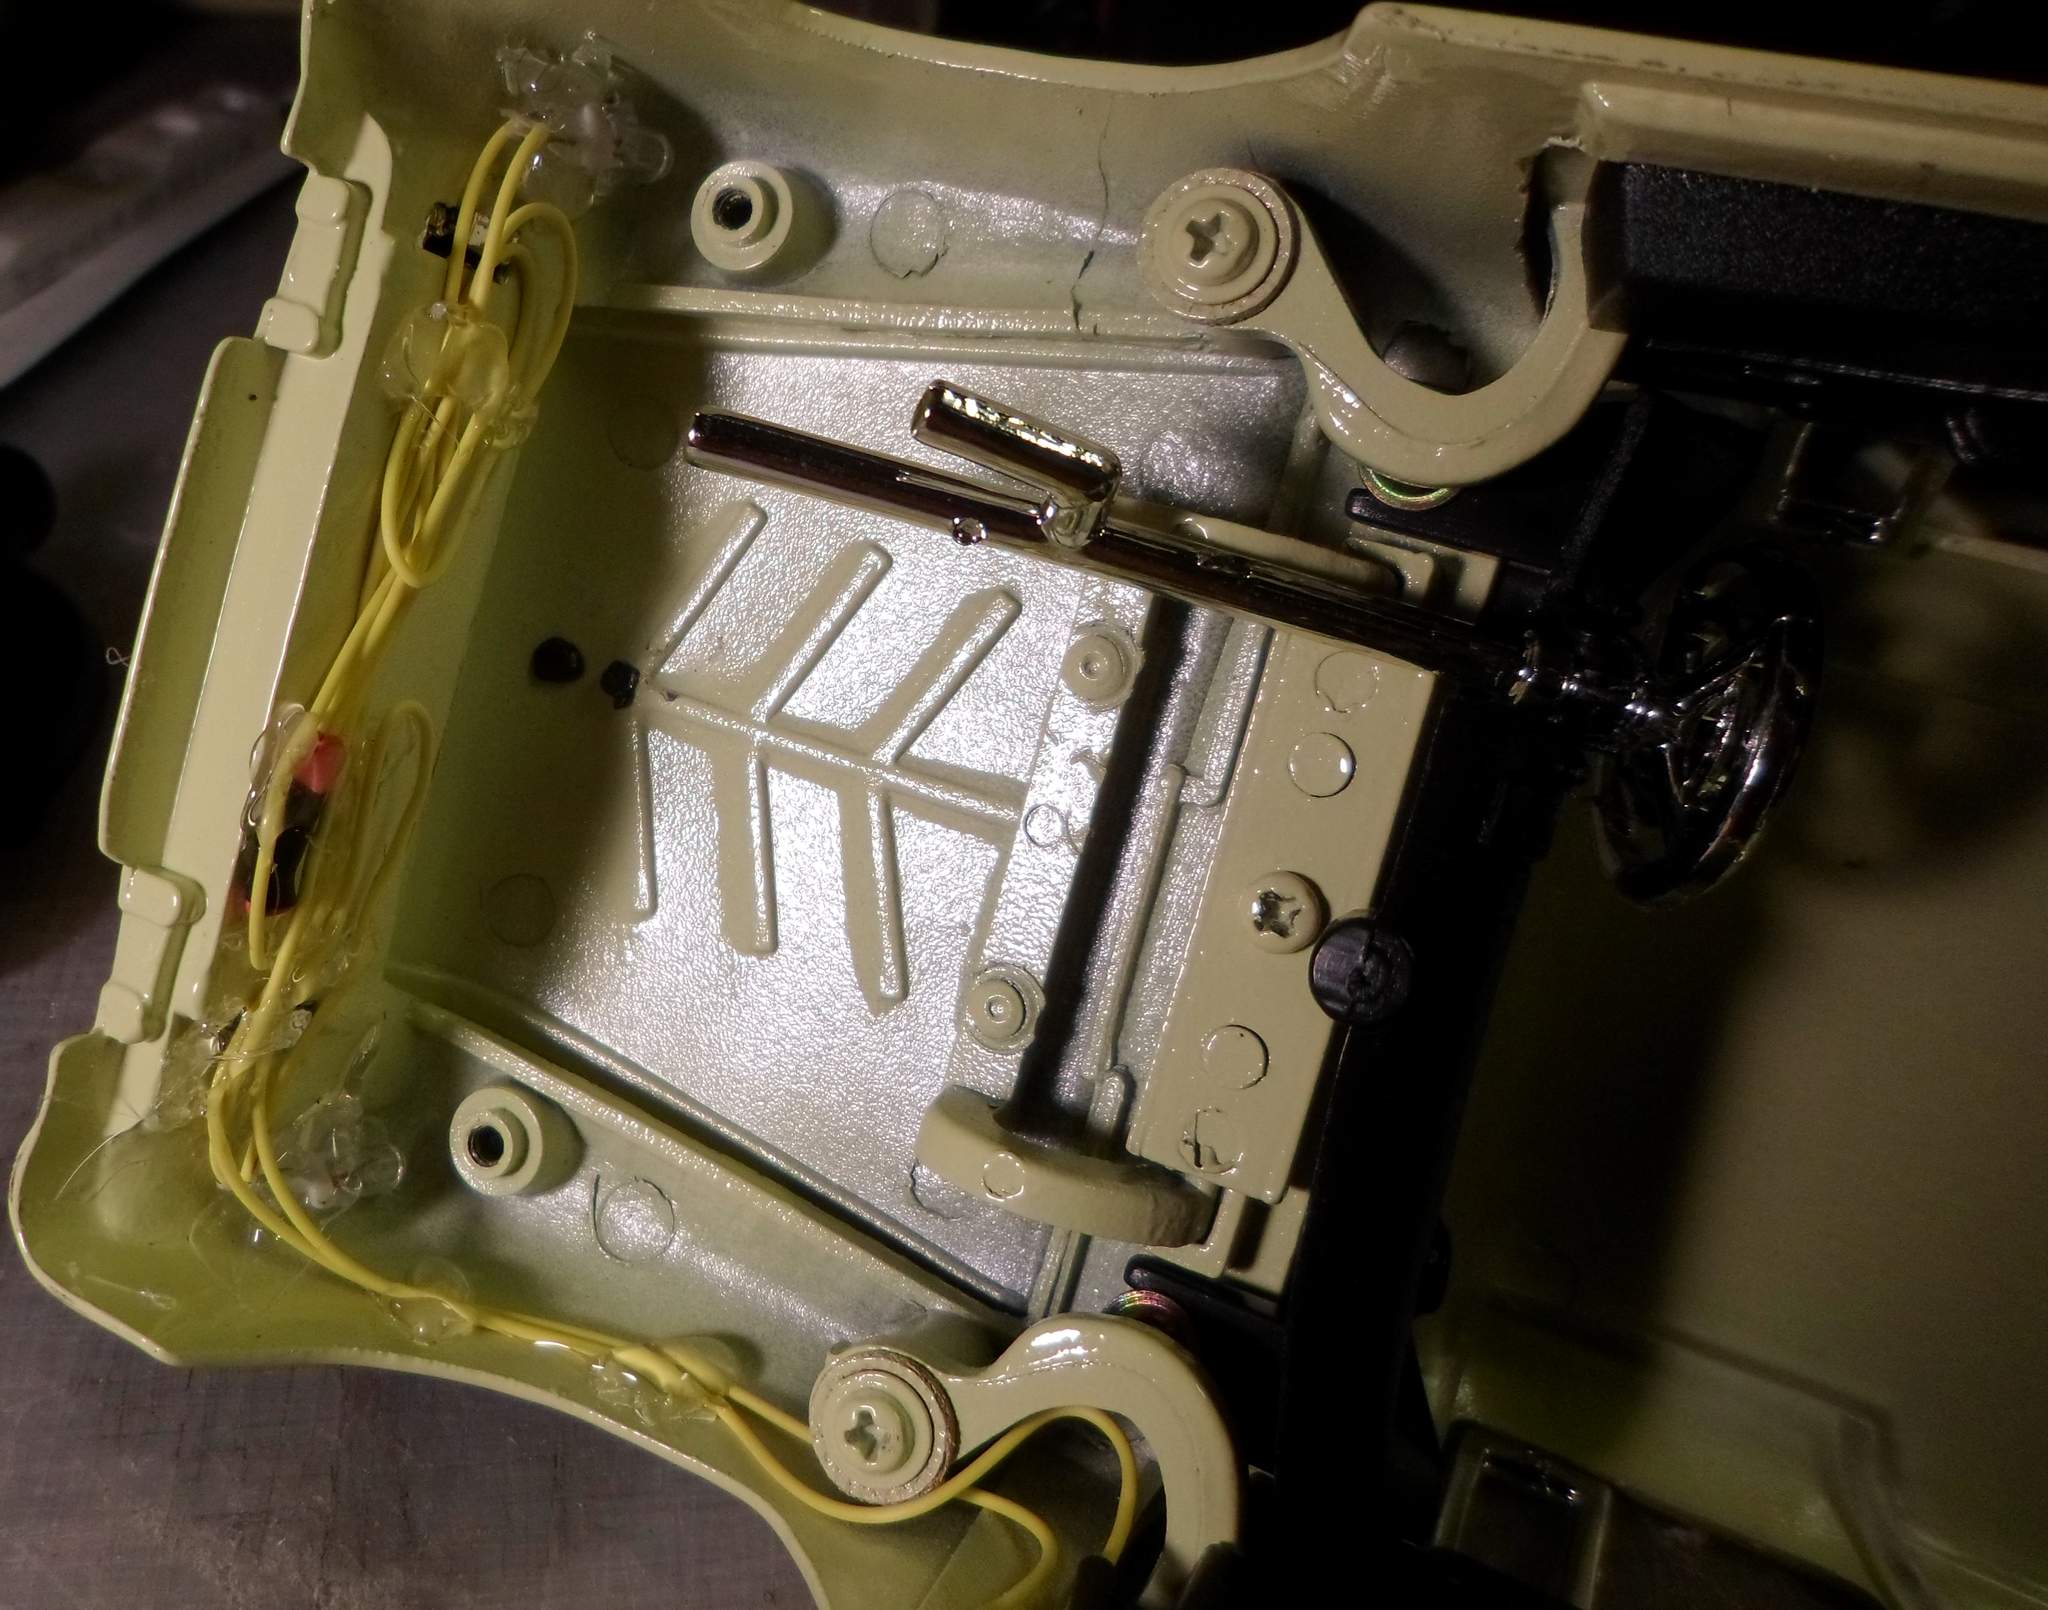
I popped the chassis back on for a fit and function test. I kind of like how the engine compartment is illuminated with the hood up, so no light blocks for now…
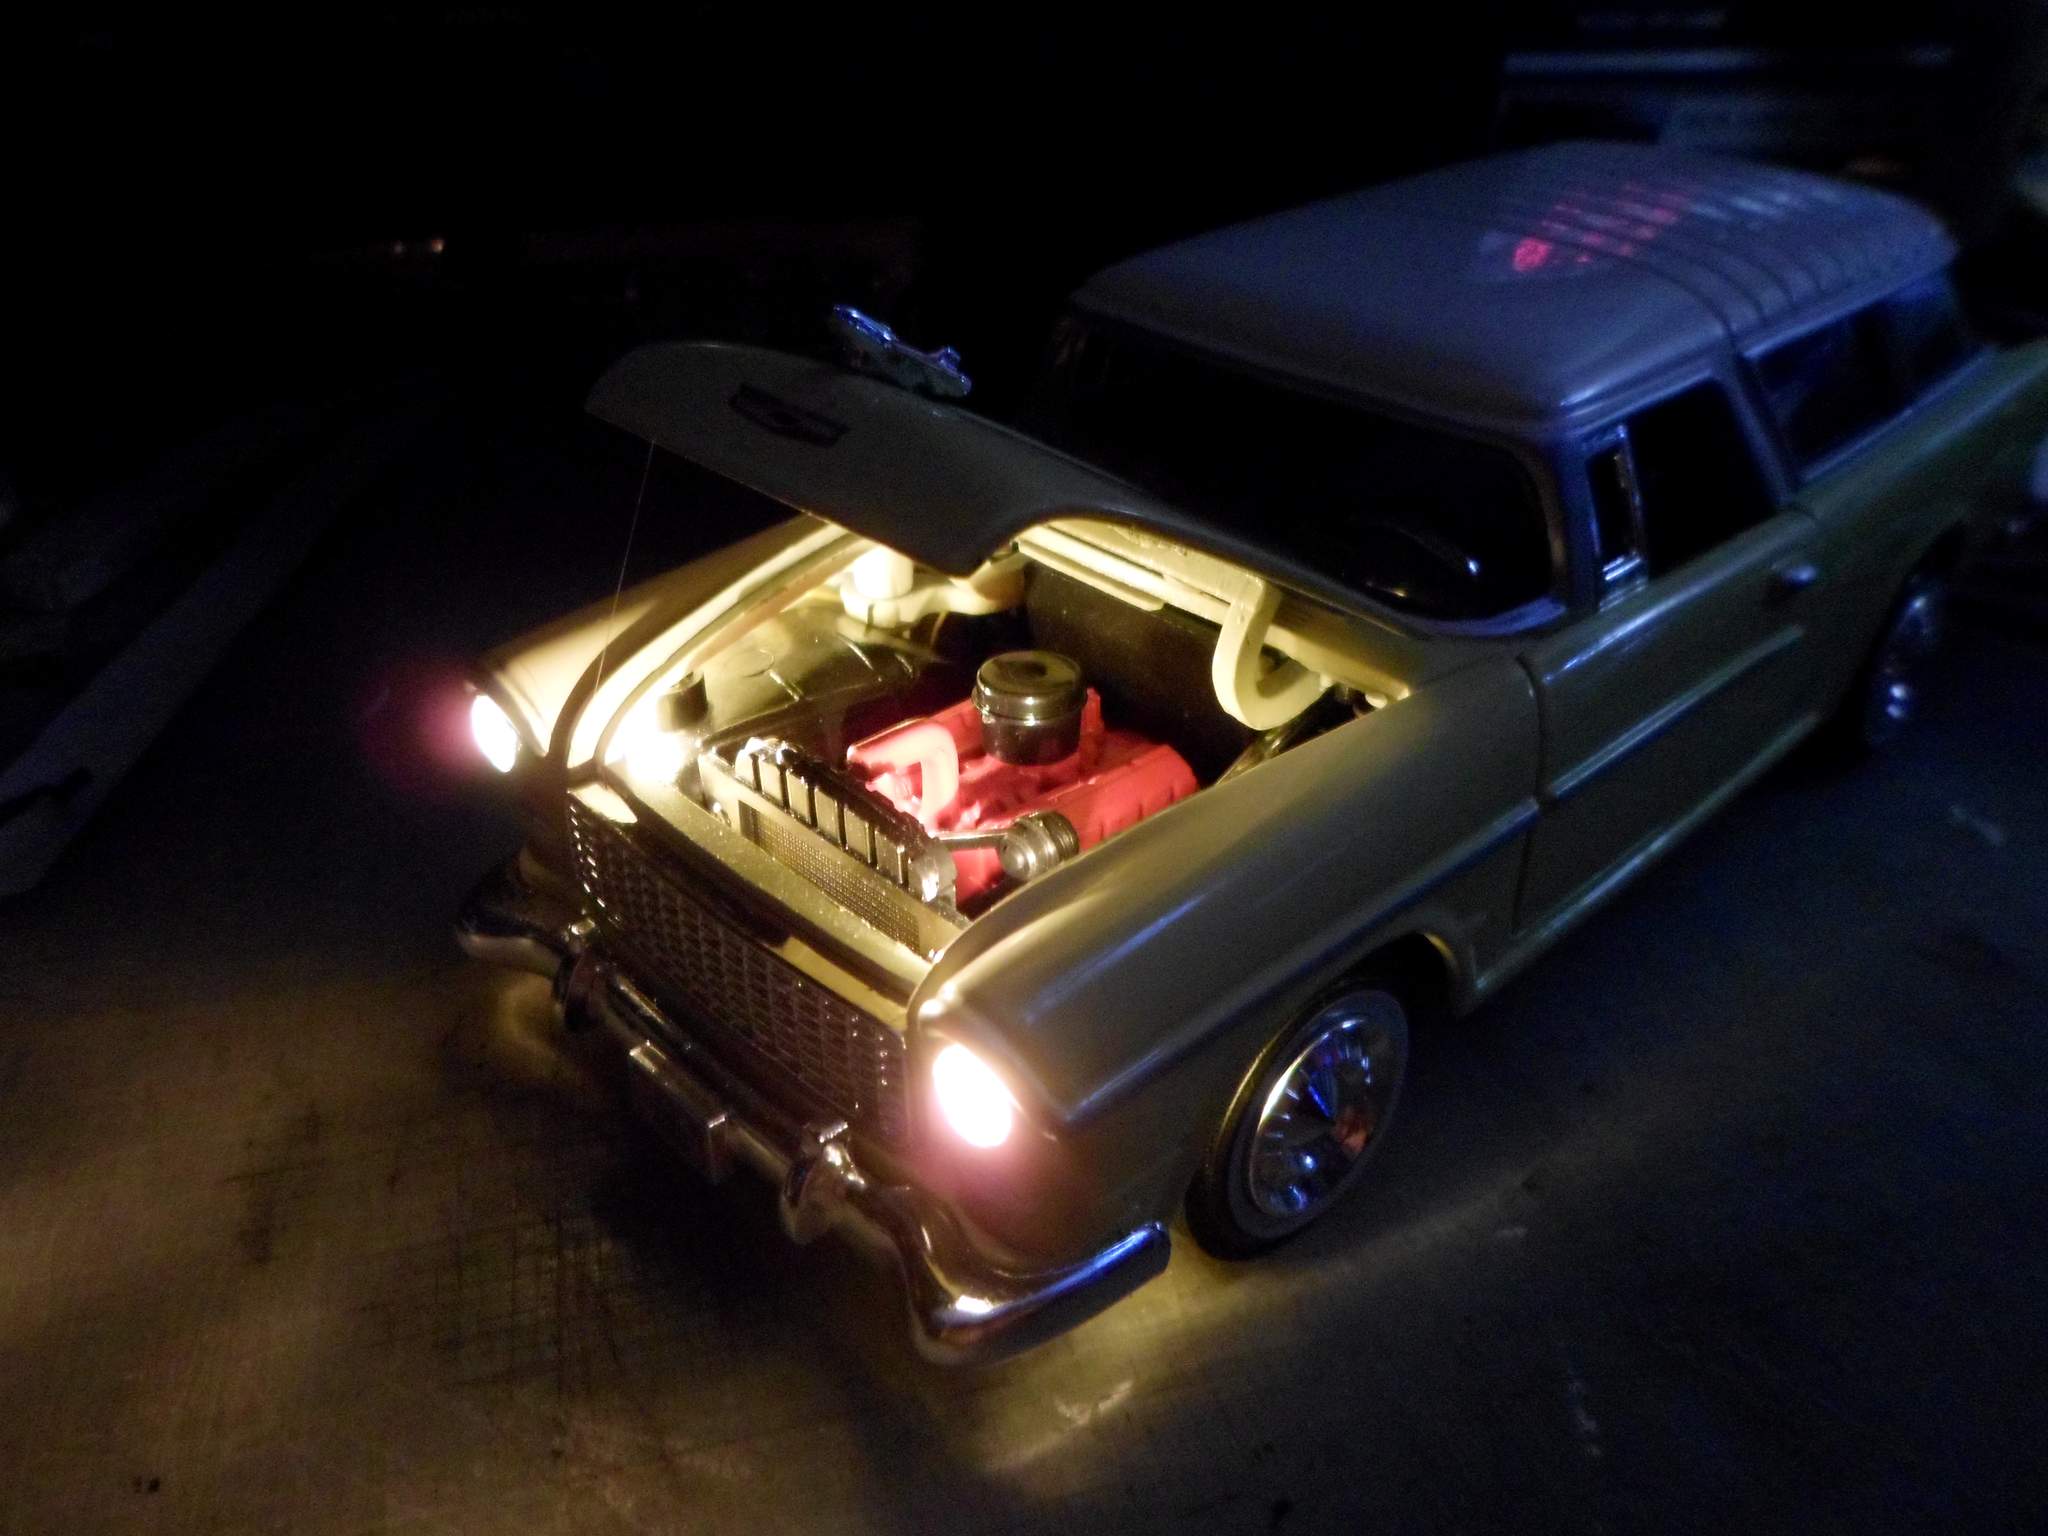
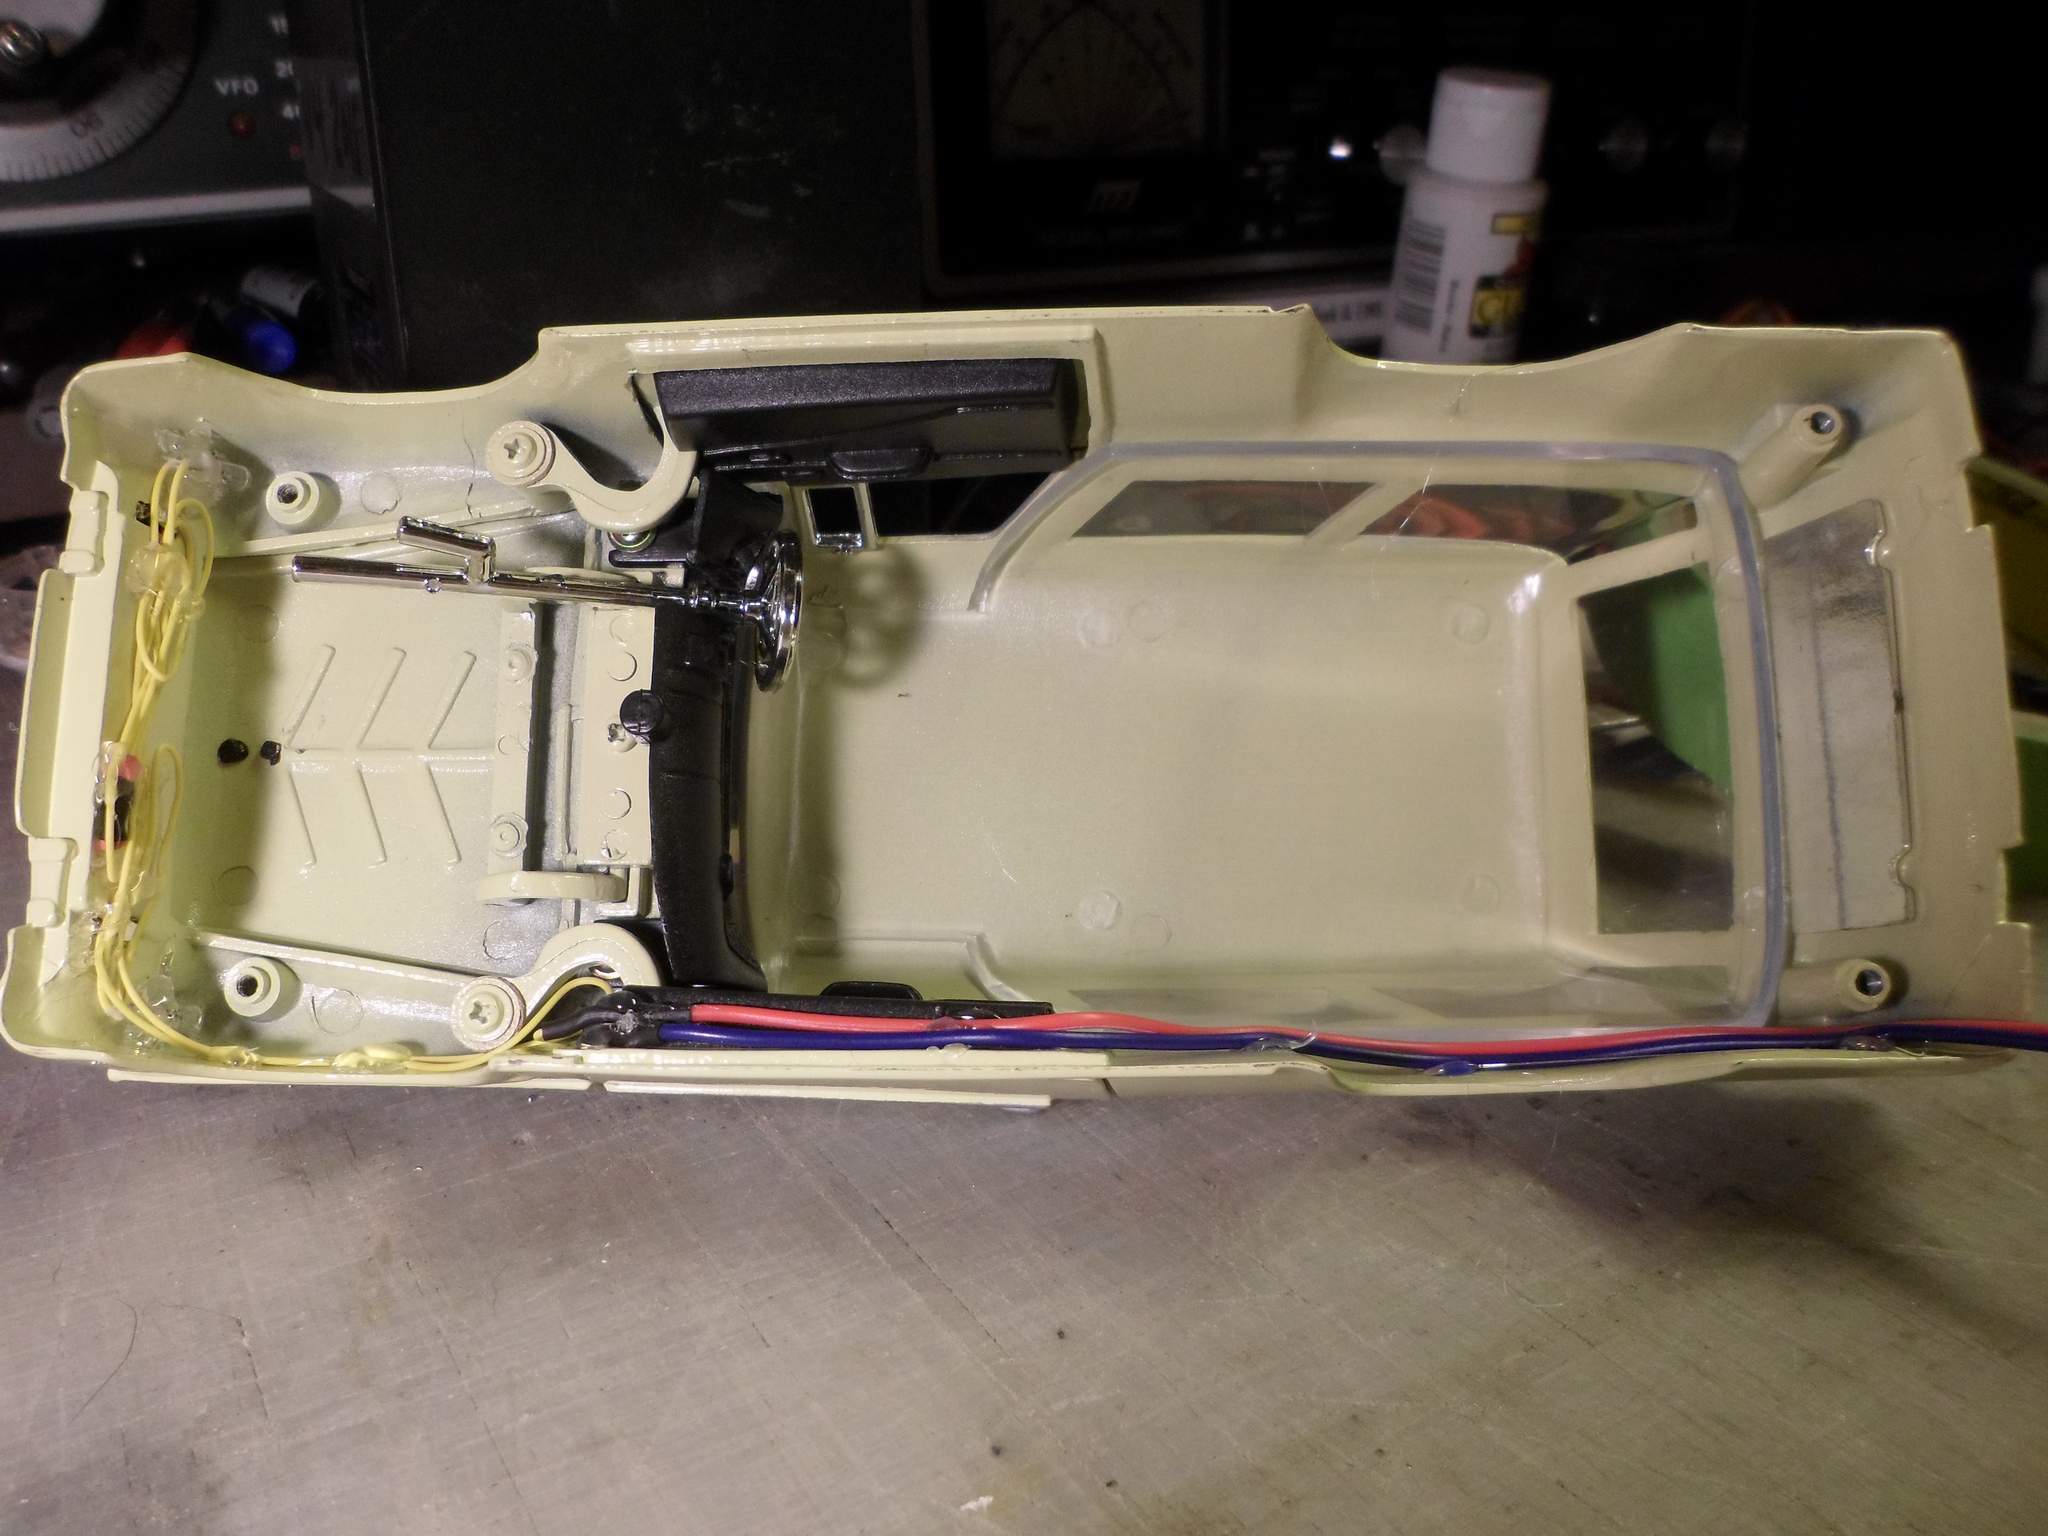
The wire exits in the rear…

This car suffered some rear bumper damage somewhere along the line, so the back end will face away from the viewer when set in the scene. I have a Shelby Cobra that also looks easy to light, so it’s up next. Then the two will join the new buildings.
Morning Jon,
Good Pics. I disagree with giving too much attention to the background. I think the dark color of the foundation causes it to just blend. Now siding like what Ken had on the back of his building did distract because of the horizontal lines, but basic dark color just blends away.
.
I’ve been drawn to those buildings over the years as fill ins and some stayed on for the life of the railroad. Work on the cars is great! Simple little scene looks good.
.
I also had a bunch of roofing shingles. You always have some left after a new roof and if they get put in the attic or someplace they tend to multiply. I ended up using a bunch under rock as plant ground cover. Sloped away from house foundation they drained the water away and as a weed barrier, nothing came through.
Looks good as a parking surface.