Large Scale Central

Spanning Keaton Creek on the DBH&W

I put some of these phots in my layout building progress but I think it would be better served if they had their own spot. So I’ll repost some pictures and then add some more.

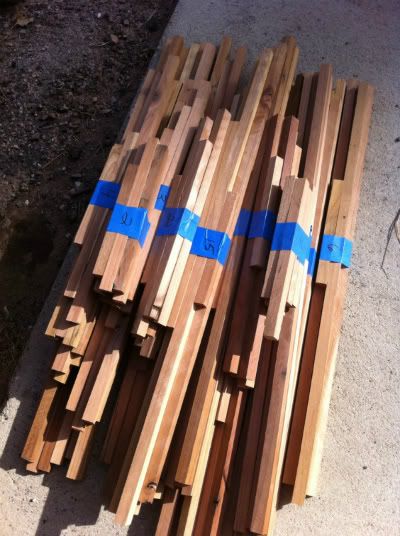
I started by cutting up some old redwood I got from my father who rebuilt his deck. Free old growth redwood is priceless in my book. I think I lucked out. This picture shows the trestle bents cut to proper dimensions and length.

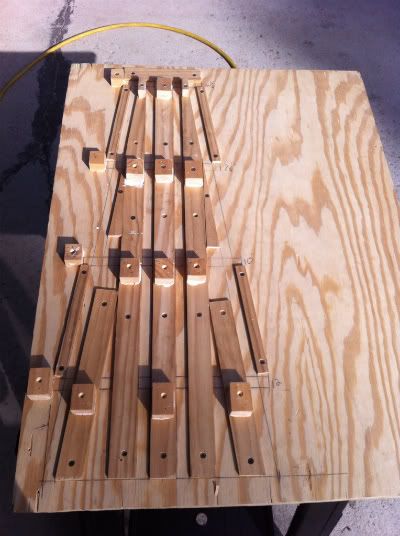
This is a jig I built to make my bents. I used a piece of 3/4" plywood and then placed blocks in the proper places. It made making the bents very easy. With my air brad nailer and glue I was able to build 25 bents in about 1 full days work (it took a couple of weekends because I spent 2-3 hours at a time).

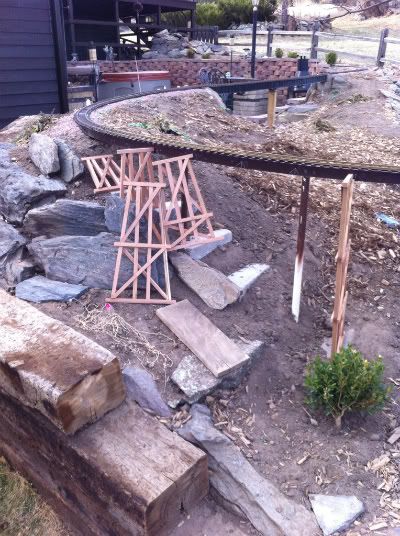
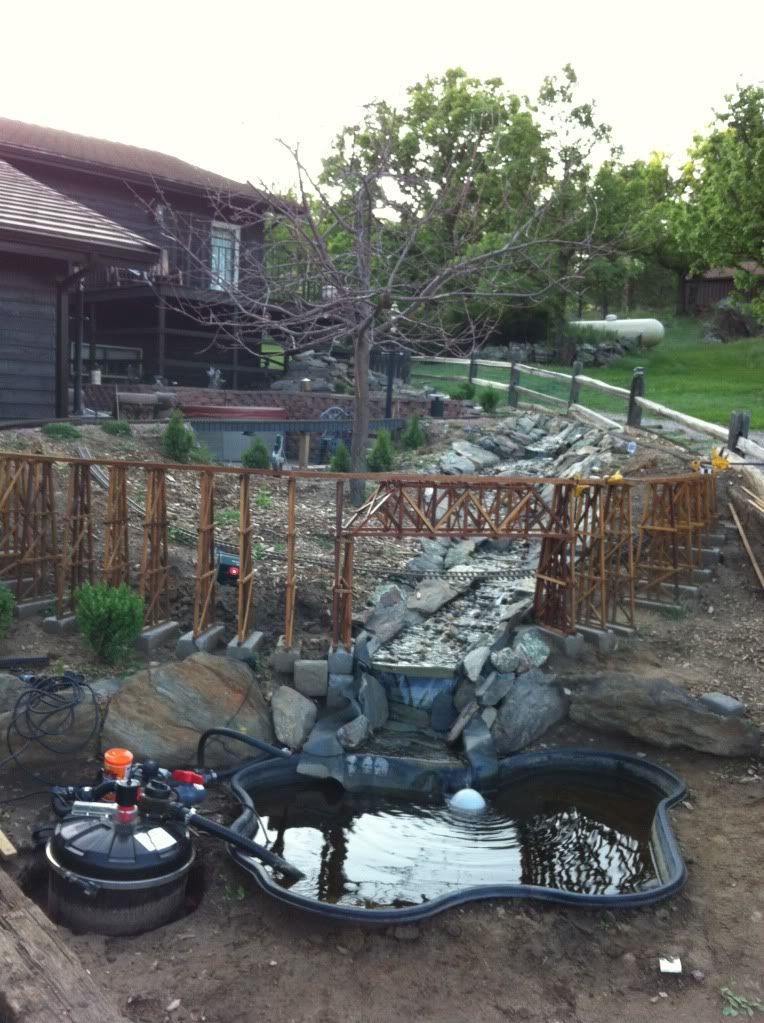
This shows some of my bents in the general area they will go. I have yet to remove the PVC ladder roadbed that I put in temporarily.

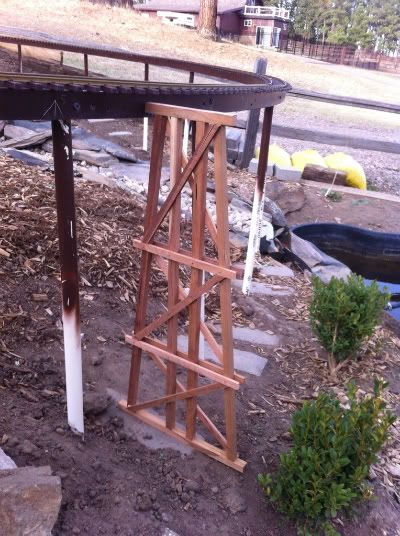
This is one my longer bents I built and the place it will go, once the ladder is removed. It stands 33" tall. If you notice in this picture and the previous ones, I used concrete as the base for the bents. These are just concrete pavers. If I remember correctly they are 12" x 3" x 2". They provide a solid base for the bents to sit on and keep the wood out of the dirt.

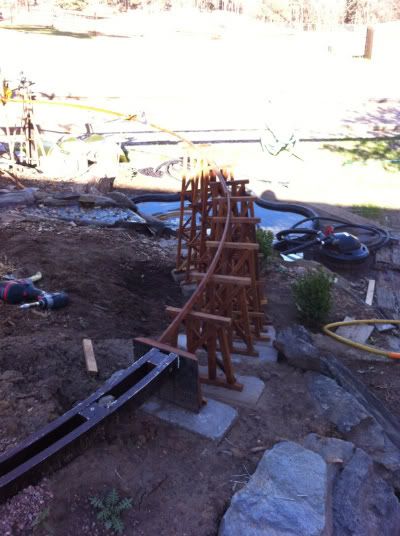
This is a picture of some of the bents and part of the sill in place. I had a hard time with keeping the sill bent and keeping the bents in place. I tried putting saw cuts in one side of the sill so it would bend easier, It worked some but left more surface area for the wood to rot. I then clamped the sill to a jig with the proper bend and wet it then let it dry clamped to the jig. That worked but it took too long. I finally just used concrete screws and screwed the bents to the concrete footings. This also made the bridge more stable.

Part 2

(http://i1128.photobucket.com/albums/m489/jake3404/0cf4d33f.jpg)

(http://i1128.photobucket.com/albums/m489/jake3404/8169decb.jpg)

These two pictures show some of the progress. If you notice the concrete footings are sticking out of the dirt a little farther than in previous pictures. Well, I changed my design in the middle of the building process. I originally had a slight grade on one end of the bridge, level out and then an opposite grade on the other end of the birdge. After thinking about this and coming to the conclusion that it is obvious I have never done this before and that my bridge should be level the entire span to make it easier on myself and my locomotives. I decided to raise the footings instead of rebuilding all my bents and make the trestle level the entire span. I will just raise the dirt around the concrete footings and no one will be the wiser.

(http://i1128.photobucket.com/albums/m489/jake3404/bcae54ec.jpg)

This picture shows how I established “level”. I just clamped together pieces of the sill in the proper radius and height and moved all the bents to the proper height. This pic also shows a dilema I faced, how to span Keaton Creek…

(http://i1128.photobucket.com/albums/m489/jake3404/55576d2a.jpg)

(http://i1128.photobucket.com/albums/m489/jake3404/fa99d5a8.jpg)

These pictures show the building in progress.

(http://i1128.photobucket.com/albums/m489/jake3404/4200b9c7.jpg)

(http://i1128.photobucket.com/albums/m489/jake3404/9a9c53ae.jpg)

I have a majority of my bents in place in these pictures. This gives an overall look to the bridge area. I like how the structure is taking shape. Not bad for a beginner. But, what to do about that gap???

I’ve always been partial to this bridge.

(http://ecx.images-amazon.com/images/I/51xhdCuF5IL.SL500_AA300.jpg)

It was on the East Branch and Lincoln logging RR in NH. Love the look of it.

Part 3 So now I have to figure out what I’m gonna do about spanning Keaton Creek. I looked at pictures of different bridges on the RGS and other railroads for inspiration. I started with this idea…

(http://i1128.photobucket.com/albums/m489/jake3404/butterfly-2.jpg)

This the Butterfly trestle on the Ophir Loop. Since this was a curved trestle and I have a curved trestle I thought it would work to have heavy timbers span the gap and then place bents on top of the timbers to support the track. But, the engineer in me says that my design wont bear the weight. The butter fly trestle has only one bent being supported by the timbers. I figured I would have around 5 bents to be supported by the timbers. Back to the drawing board…

(http://i1128.photobucket.com/albums/m489/jake3404/IMG_0814.jpg)

I found this image someone did on their model railroad (honestly I dont remember who or where). This looked about right for what I wanted to do. So I looked for some drawings of deck truss bridges for a basis for my design.

(http://i1128.photobucket.com/albums/m489/jake3404/5-22-12104.jpg)

This is the finished bridge. Sorry I did not take any in progress photos. I’d like to thank Randy for the help with the metal rods. I think they look real good and were very simple to put in place. I could use the threading on both ends to tighted a nut and then trim off a little bit of the rod on each end.

(http://i1128.photobucket.com/albums/m489/jake3404/5-22-12105.jpg)

Close up view of the bridge in place. Looks pretty good…

(http://i1128.photobucket.com/albums/m489/jake3404/5-22-12106.jpg)

This is an overall view of the bridge with the deck truss in place. I’m not completely done. I have one bent to make to place on the right where I forgot to make one. And I need to install the girts and finish installing the sill on the top. I’m not sure if I will take the time to make bridge ties and spike the rail yet. I’d like to move on to a few other projects. I may just replace my flextrack on the top and use that for now.

For the gap you will need some type of truss. It would be hung from the bents at either side. I don’t know prototype practice, but I would think there would be double or triple bents at each end of the truss.

Tell us about your creek bed. It looks like you have covered the lining with a layer of stone and some glossy material. It gives the look of being wet even when no water is running. Or is it just wet? In any case, it looks great, as does the trestle.

Yep just wet. I upgraded my pump this year to a 4000 GPH pump that puts a lot of water down the river. I lot more than my 2000 GPH pump I used last year. The liner is a EPDM liner. I have yet to cover all the edges to look more natural. Just another item on the “to do list”.

If you notice in my 2nd to last picture you can see why my apple tree is dead. I will sure miss those apples, they made excellent apple pie… :frowning:

Ah well, ya didn’t want the rotten apples falling into the creek anyway, so it’s just as well…:wink:

That’s one impressive looking structure…nice job!

Looks good Jake! Very nice job.

Very Nice Jake!
:slight_smile:

That is a beautiful trestle. Nice work!

Great looking trestle. Going to be a nice picture spot. I would love to do a fast moving creek with waterfalls on my layout just not up to the maint.

Great looking span Jake! That end will shine in the upcoming photos.

Well, by the urging of some. I guess I will go ahead and hand lay the track on this trestle. I agree that it will look a lot better, but since I have never hand layed track before it is a little bit daunting. Wish me luck.

Handlaying track is pretty easy if you take your time. It takes a bit of practice, but it is, by no means, rocket science.

Jake, get yourself a “Spiker” from SwitchCrafters. It’s the greatest tool you can own for spiking your own rail. A lot of us here have them and they work great. Just start by laying one rail them go back and lay the other rail using track gauges. It’s easy!!!

Chuck

PS don’t forget the guard rails or you’re get a visit from Sir Fred.

That’s Fr. Fred to you, Infidel. :slight_smile:

Bob McCown said:
I've always been partial to this bridge.
It's an oddball, Bob... in a good way.... your pic has reminded me that I've always admired the bridge on the River Kwai, another oddball, and just maybe you've got me thinking about building one in large scale for 'back there' .... mmm, nice prospect!
Jake Smith said:
Well, by the urging of some. I guess I will go ahead and hand lay the track on this trestle. I agree that it will look a lot better, but since I have never hand layed track before it is a little bit daunting. Wish me luck.
After building the trestle & bridge, I don't think you'll have any problem with the track ;) Ralph

Thanks for the encouragement. I’m gonna have to cut the ties first and while I’m at it I’ll cut some longer ones for the burn barrels. Of course they gotta be big enough to hold an adult beverage or two. :wink: