Chris,
I’m waiting for the curved roof pieces to be cut. Hopefully this means I can get the exterior done soon!
On my way to a union meeting, I stopped by my LHS and picked up some 1/2 and 1/4 round strips. My idea for the window gaskets is to place the 1/4 round on the edge of the slide glass and frame, and than top that with 1/2 round to make a 3/4 round gasket. The trick will be to bend the rod just enough without breaking it. Hot water might be the trick.
After following this project and learning so much about solving problems and learning new ways to make things
I see a great model coming to completion…well done…very well done, and thank you for sharing.
My only question at this point, is: where are you going to find SCALE snow to plough ?
So I suppose creating Scale Snow is the next project…!! A good challenge, for those that are into such things…don’t you think ?
Fred Mills…living where we get our fair share of 1:12, or 1:1 snow, that is not worth freezing our butts to plough…!!!
PLEASE NOTICE THE HUMOUR, that is meant…
Fred,
This is going to be a static model. No actual snow will be harmed in the process of building…
Thank you, Craig; that makes my heart feel better… I still think it is going to be a great model…nice work…
Fred Mills
Craig Townsend said:
Fred, This is going to be a static model. No actual snow will be harmed in the process of building…
"WHAT " Aren’t you a little bit curious to see if it works?
Sean McGillicuddy said:
Craig Townsend said:
Fred, This is going to be a static model. No actual snow will be harmed in the process of building…"WHAT " Aren’t you a little bit curious to see if it works?
No that’s what the full brass version is for… If/when I build that…
I tried some 0.040 half round tonight on one side. I can’t say that its perfect, but I think the overall look is there. I wanted to try and curve the pieces instead of joint corners at 45 degrees, but even boiling water didn’t want the styrene to bend as I wanted it.
On this one I trimmed the inside edge of the window to match the half round. Made the window look for squared.

On this one, I left it as I built it.

I’m not really thrilled with either one. Both options are going to need work with putty to smooth out. If I was handy with putty I might be able to create coved corners. I’m starting to think a pair of optovisors are needed. I feel like I’m back in HO scale. Which version looks better? Craig
So which museum is this going to be displayed in ? (http://largescalecentral.com/externals/tinymce/plugins/emoticons/img/smiley-wink.gif)
Sean McGillicuddy said:
So which museum is this going to be displayed in ? (http://largescalecentral.com/externals/tinymce/plugins/emoticons/img/smiley-wink.gif)
The Townsend 1/29 scale prototype railroad model museum. Museum is now taking donations for this and future exhibits. Donations are accepted, although we have not quite got IRS 501 C3 status yet…
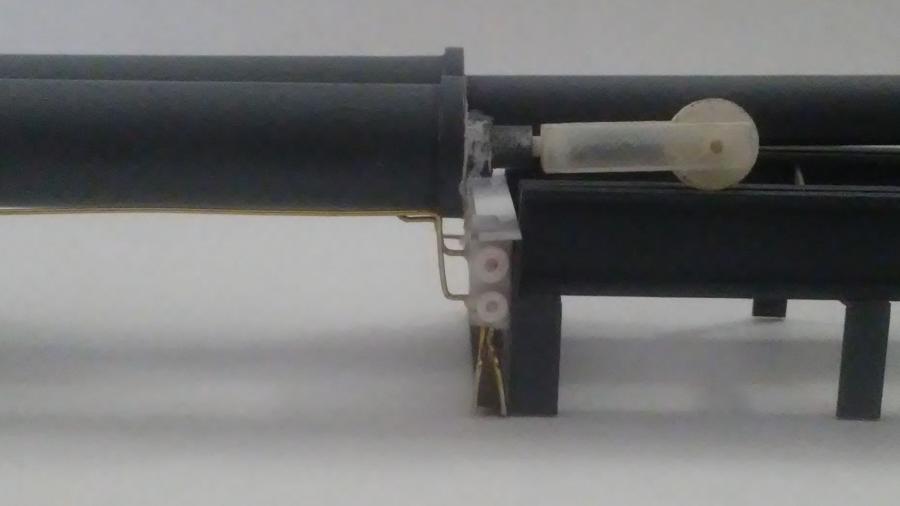
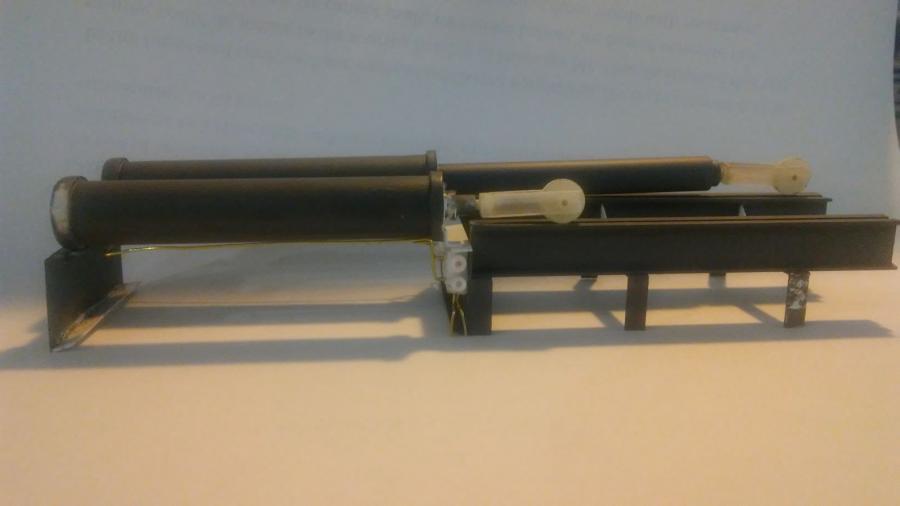
So I don’t really know what pneumatic spool valves look like, but here’s my approximation of what I imagine it to look like. These pneumatic cylinders control the front wings of the snow dozer. I am planning on modeling one wing in the stored position, and the other wing in the plow position. Thus, the pneumatic cylinders are extended and retracted.
By no means this is perfect, but rather a quick throw something together to make it look good.
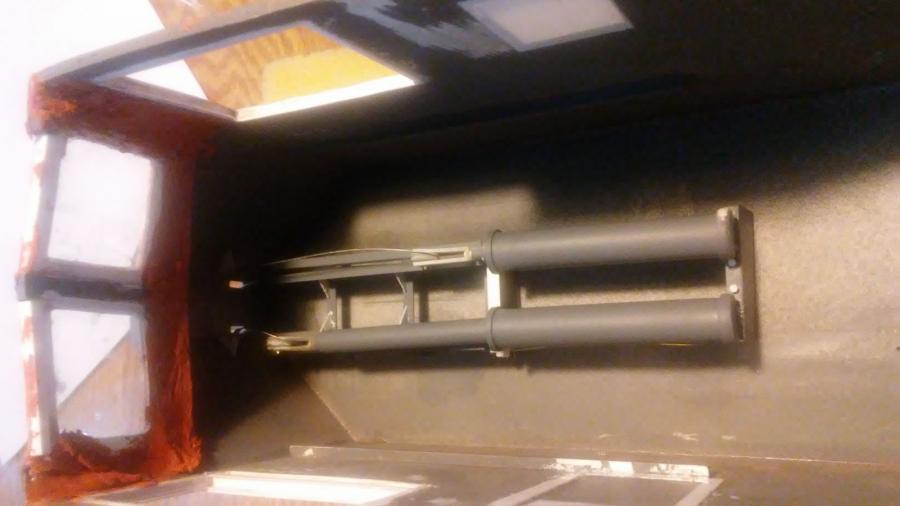
Ironically, this entire set of parts will be completed covered by another interior part (which I may make removable or not).
From the few interior pictures I have, I’m guessing that this will be painted BN green. The piping and spool valves black. I will also weather it a bit before gluing inside the dozer.
Craig
Wow Craig, this is a very technical build. Good job.
Shane
Thanks Shane. I think one of the reasons I can be so anal detailed is because I have a lot of technical drawings, and a lot of detailed pictures. Although last night one as studying pictures and found a mistake I made.
Craig Townsend said:
Thanks Shane. I think one of the reasons I can be so anal detailed is because I have a lot of technical drawings, and a lot of detailed pictures. Although last night one as studying pictures and found a mistake I made.
Craig, I was always told that “a man who doesn’t make a mistake is a man who is doing nothing” I like to think that is true(https://www.largescalecentral.com/externals/tinymce/plugins/emoticons/img/smiley-foot-in-mouth.gif)(https://www.largescalecentral.com/externals/tinymce/plugins/emoticons/img/smiley-laughing.gif)
Its not a mistake. Its a compromise made to make building the model a bit easier.
Opinions needed…
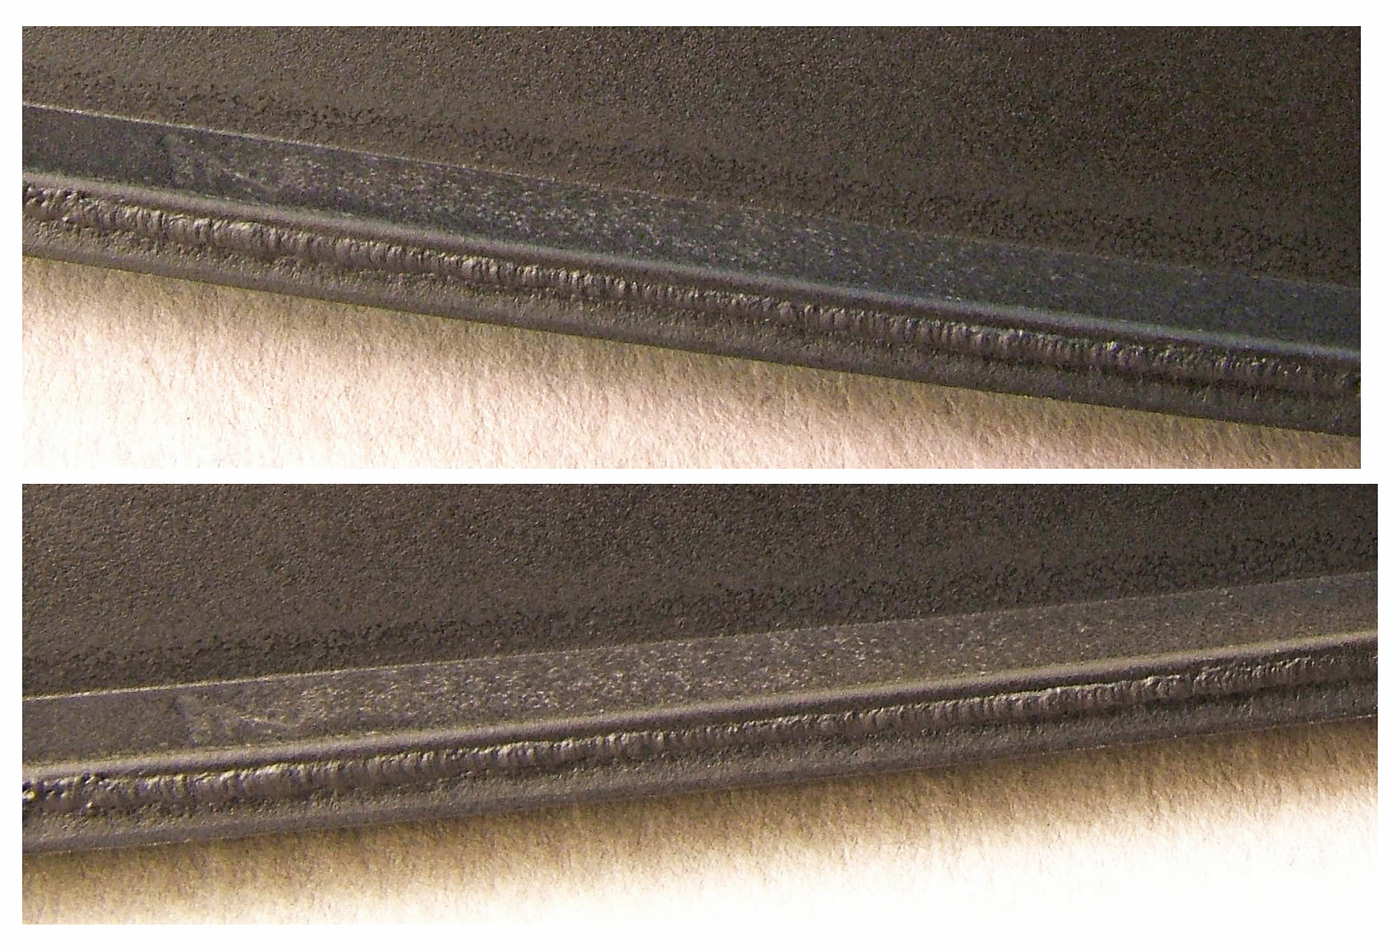
What better represents the weld bead on the drag wing? Archer weld decals or the brass rod?


Just my opinion but neither one.
Try JB Weld see here starting at about page 7 http://www.finescalerr.com/smf/index.php?topic=2543.90
Rick
Wow that’s some good weld lines!

Great job Craig, keep the pics coming .looking forward to the finished model on the tracks!
I’ve done sculpting with a dental pick, gel CA and Accelerator liquid/spray. I was adding wrinkles to clothing, but the method could transfer to welds. Sometimes I’d spray, but mostly I used the pick to transfer the accelerator to where I wanted it cured.
edit; a flame is an easy way to remove built up CA on your pick, it’s very flamable, use ventilation as CA makes my eyes water. end edit.
I got a wide selection of picks by asking my dentist, he got new ones at least once a year. Nicely balanced tools they are.(https://www.largescalecentral.com/externals/tinymce/plugins/emoticons/img/smiley-laughing.gif)


