Patrick McGrath said:
Looks great so far!
What are you using to cut up the plastic ?
That tender was cut so clean.
Patience. . . no actually cutting it with a band saw and a fine tooth blade and the a disc sander to make it “nearly” perfect.
Patrick McGrath said:
Looks great so far!
What are you using to cut up the plastic ?
That tender was cut so clean.
Patience. . . no actually cutting it with a band saw and a fine tooth blade and the a disc sander to make it “nearly” perfect.
Joe,
The same way the prototypes did it through the roof.


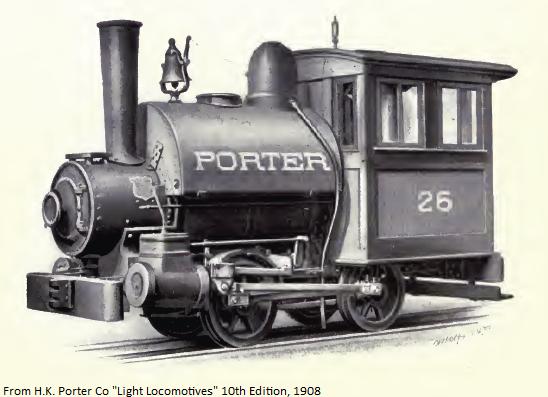
I will glue them to the cab roof where the corresponding pipe is coming off the steam dome. That way you can remove the cab. I actually did this on the 2-6-0 for the Eames exhaust. Porter did this with many of their little locomotives.
Devon,
Yes I see now. Thanks. (http://largescalecentral.com/externals/tinymce/plugins/emoticons/img/smiley-wink.gif)
OK a Little more progress on the winch. I built the side frames and the drive gear shaft (for the lack of a better term) and put it all together with the drum I had already made. The only thing the pictures do not show is that the way they appear here the whole rig sits to low. The con rods from the cylinders would hit the support for the cylinders/steam chest BTW what is that piece called. The part that supports the boiler and connects the steam chests and cylinders to the boiler/smoke box. Its a pretty dang important piece and I should know the name of it. Anyway so whats not in this picture is I added some “dimensional lumber” .100 styrene to raise it. Now it sits a proper height. I used styrene instead of real lumber so that I could make a secure glued connection between the loco frame and the winch frame so it doesn’t get broken off. I will score it and paint it a matching black to the rest of the wood.
.jpg)
.jpg)
.jpg)
Someone on here mentioned some scale cable does anyone know which thread that was or the supplier. I was going to use braided fishing line but its to thin even the 65# test I have. So I need cable.
OK so I decided the 65# braided fishing line would d the trick. Its not all that small and I have it. I wound it onto the drum. Then I took a piece of .100 X .187 strip and carved a hook. I drilled the clevis end and inserted a piece of 1.1 mm wire for the pin. I then took a small piece of thin brass sheet and cut a strip. I drilled two holes in to receive a piece of brass wire bent in a U to form a cable clamp. I made two clamps. I then threaded on the hook, assembled the cable clamps and CA’d them one at a time. Yes I glued my fingers together both times,
I will make a roller guide for the front of the winch to feed the cable through. I will also have two D rings on either side of the pilot. I will hook the hook on one of those.
.jpg)
.jpg)
.jpg)
Great progress!
Devon,
Good progress on the winch. The whole loco is really starting to come together. BTW, is this loco named after your daughter? (http://largescalecentral.com/externals/tinymce/plugins/emoticons/img/smiley-undecided.gif)
No Joe its named after the city in Wyoming. . . but as usual I misspelled it. . .kidding (http://largescalecentral.com/externals/tinymce/plugins/emoticons/img/smiley-wink.gif). Yes its named after my daughter. I also have other decal sets for the #2 “Logan” (son) and the #3 “Darcy” (wife). Its a family affair; the town site is Devon. . . BTW there is a Devon Montana. . . just like me its a simple place. . . a couple grain elevators on the side of the railroad tracks. It made me mad because on my Amtrak trip to St Paul, i went through it twice and both times the track side location markers were blocked by freight cars so I couldn’t get a picture.

This weekend, since I have some time, I am going to work on the cab. I have to get the cab done in order to finish chopping and rebuilding the chassis. I am ahead of myself with the details but I can work on them a few minutes at a time. . . and they need to be done anyway. But have to get the cab done. I think Jean-Gilles has warped me, because I have steered away totally from where I was going with this and that was to buy all the nice details. But I forgot how much fun I had making them and how there is a lot of pride in saying yeah I made that. So I have decided I am going to try and use no commercial details, well see.
I have also made a major change in the back story and therefore the design of this loco. This will be coal burners not wood burners. My 1:20.3 stuff is wood burning so wanted to go a different route.
Devon my signature on others fora; If you dream it, you can make it.
But I do not manage to put her on this forum
OK got side tracked on the plumbing issue. A lot of stuff has been swimming around in the vast emptiness in my head about how to scrath build decent plumbing fixtures. My first attempt was OK to maybe good, but by no means great. I had resolved to buying commercial fittings. But then my new detailing mentor Jean-Gilles inspired me to revisit it.
The problems, Making decent globe valves that looked right and were easy to install. The next problem is being able to bend and appropriate material into a very tight 90 for elbows and then having a way to attach them. I think I have solved my problems. So Dave T along time ago on his Silverton thread posted a picture of a turret and asked who would model that mess.

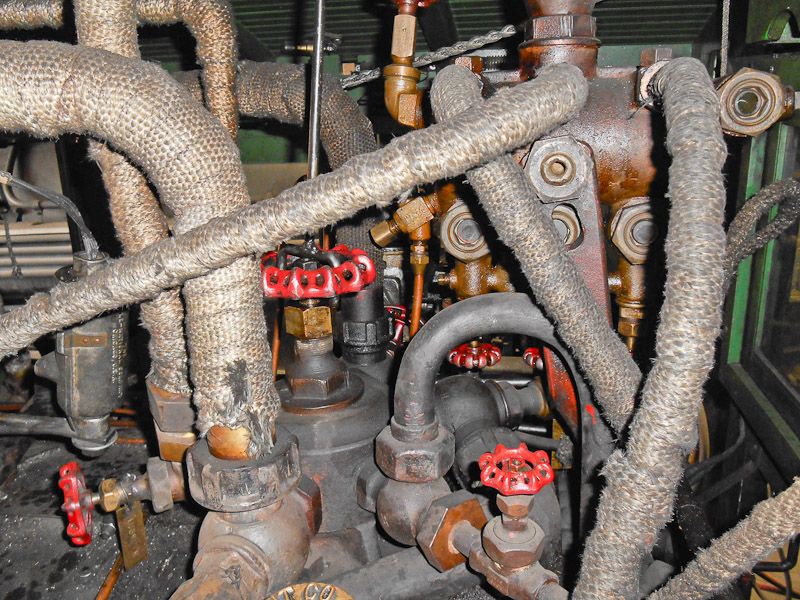
Well I volunteer. So a lot of things going on that are firsts for me. First was to talk generic plumbing like 90s and tees and what not and make them have a positive connection. The answer is to not make individual pieces but make entire plumbing runs all at once gluing the pieces in place as you go. Here is a sample 90. I am using music wire (.063) for the pipe. It is damn tough stuff and does not like to bend or do anything. But It is so hard it can be hammered in a tight 90 without smashing the wire. This is key.
.jpg)
Then to give the 90 body a bit more size than the pipe I slide on some shrink wrap that just fits and it can be slide around the corner. Then I used 1/8 styrene tube for the thicker ends. I will just try and string stuff along as I ago. Not sure how it will work but it makes for rigid plumbing.
Next was to tackle globe valves. So I used a fishing lure bead for the body. Then glued in a piece of 1/32 tubing that has a wire in the center through the hole in the bead, leave it long say an inch. A piece of .100 hex rod on either side is slid on. From this point strip off the styrene to leave only the wire. One end will be inserted in where ever the valve goes and the other I used a little dress snap half for a handle. The I filed a little flat spot on the bead and drilled a hole to recieve the music wire. I will leave them at this point and when the plumbing reaches the valve I will slide a .100 hex rod piece on and then glue the whole plumbing run into the valve. This should make for sturdy plumbing. This is for 90 degree globe valves. For 180 globe valves the handle and pipe fitting trade spots is all. The wire used for attaching the vale wont be pushed all the way through but only half way and the opposite side drilled to receive the music wire.
So that’s the valves. Now the turret. I am copying Dave’s picture. I used a half inch long piece of .250 styrene rod. Then punched some discs of .020 sheet to form rings. Three tings on top for the lip. two on the bottom for the mounting flange. I used a piece of the 1/8 tubing to make a small disc then a .100 hex rod piece and then a piece of the wire core tubing and a dress snap for the main valve. The attached a globe valve with a piece of piping that will go to the oiler. Then an interesting feature is the insulating wrap. I used a small strip of my son’s hockey tape (white) and wrapped the pipe. Good old dirty fingers rubbing on the tape weathered it nicely. I even run my fingers on my floor to get extra dirty (http://largescalecentral.com/externals/tinymce/plugins/emoticons/img/smiley-tongue-out.gif).
.jpg)
.jpg)
Now that I have that off my mind and am very happy with the results, I will get to work on that cab after some homework.
I I use of the electric cord, it is more supple and we can take back him if we made a mistake
Your electrical cord/wire is what gave me my idea. That is a great one. I might give it a shot as well. The coating is left on for the fittings and stripped off for the pipe. I saw what you were doing and I liked it. I have some I might give it a shot. For 1:24 it needs to be small I hope I have some smaller stuff I am worried in a solid wire I only have stuff that would be to think and look like giant pipe. I will play with it. Sure would be easier to bend.
Well here is!!
In France we are different three diameters following the amperage.
With the girdle or not it leaves us choice of the diameter.
Anyway, I am not a counter of rivets
Devon,
You can get bell wire that is solid core, thicker than telephone wire which is also solid core. I got a spool of it in red and white fer cheap, just under 20 ga. (0.032")
Nice insulated piping, try sealing it, those tapes are known for drying out.
I hope your girls aren’t suffering with all the dress snaps you’ve swiped!(http://www.largescalecentral.com/externals/tinymce/plugins/emoticons/img/smiley-wink.gif)
John
John Caughey said:
Nice insulated piping, try sealing it, those tapes are known for drying out.
I have it who are more than twenty years old and it did not move
Jean-Gilles Durand said:
John Caughey said:
Nice insulated piping, try sealing it, those tapes are known for drying out.
I have it who are more than twenty years old and it did not move
Well, there you go…
The beginnings of the cab. With this I can hack and whack and rebuild the back half of the chassis and deck. This is 5 mm underlayment plywood. Its 3/16 noy 1/8 but its not overly thick.
.jpg)
.jpg)
.jpg)
This is looking like it will be around 11 1/4 overall length when done. Room to spare.
Devon,
That is looking pretty sweet! (http://largescalecentral.com/externals/tinymce/plugins/emoticons/img/smiley-wink.gif)
Aren’t those pin nailers great?
Devon,
I hope you are going to do something with those huge cylinders. Not only are they too large, the steam chest is way too wide. You probably already have something in mind, but it just struck me looking at your head-on picture. (http://largescalecentral.com/externals/tinymce/plugins/emoticons/img/smiley-undecided.gif)