Large Scale Central

SD60f Build

Pete Lassen said:

Craig, that was unsportsmanship of them to do that. Almost all construction equipment from a manufactuer has 1 key to operate anything from a small backhoe to D10 bulldozers to 200ton mine trucks. So with about 10 keys you can open doors and run almost any piece of equipment out there. Is it the same for locomotives, with 1 key you can run any EMD loco??

The “key” to make a locomotive run is a reverser. The reverser is what makes the choo choo go back and forth. What I was talking about was the door lock. Generally, on the engineers side the door can be locked from the inside, and the firemans’s side has the exterior lock. The key looks really similar to a caboose key, but slightly different. And yes, one key opens GE products and one let opens EMD products. Reversers work on everything, and in a pinch the caboose key can be used as a reverser… Not that I would have ever done that before…

Exhibit A reverser.

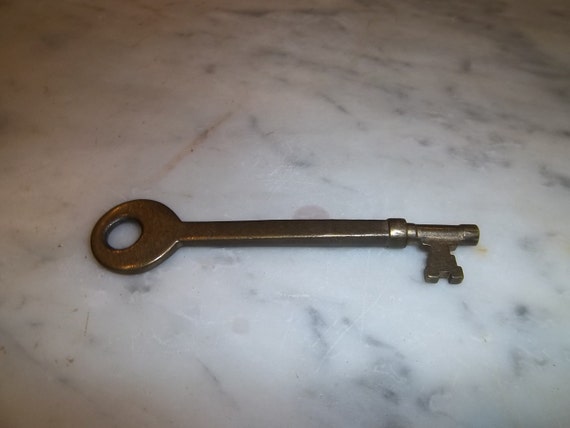
Exhibit B locomotive door key

Craig,

That’s funny that the coach key trick is common knowledge. I had to do it a few times when I was moving units at outposts and forgot my reverser on my lead unit. (http://www.largescalecentral.com/externals/tinymce/plugins/emoticons/img/smiley-surprised.gif)

Shane

Shane Stewart said:

Craig,

That’s funny that the coach key trick is common knowledge. I had to do it a few times when I was moving units at outposts and forgot my reverser on my lead unit. (http://www.largescalecentral.com/externals/tinymce/plugins/emoticons/img/smiley-surprised.gif)

Shane

The mean trick to play on a fellow hoghead is to use a caboose key and pop the caboose key out without being centered. The only way to get it back is to use another caboose key. The hoghead that trained me taught me that one… I think I was back inspecting units and he popped the reverser. When I got back to the lead unit, I was “What the…” When he and the conductor bursted out in laughter I knew something was up.

Outstanding Shane!

Now I know what this thing is.

A reverser. The one I have is a bit clunkier, must be an older version.

Shane I admire your attention to detail. Small details tend to be the most time consuming part of projects, and potentially the most frustrating, for me anyway.

Thanks Guys. I have to be honest, I’m glad this project is wrapping up. Building from the ground up is a lot of work.

David, you’re right, but it’s also fun to watch the little details bring the model to life. (This is a little embarrassing, but my eyes are not what they were a year ago.)

Earlier there was a bit of debate on sharing build threads. A few years ago, on an HO forum, a gentleman was sharing photos of some of his work. His models were pretty nice, and he was asked to share some of his resource information. He flat out said no. He then went into a tirade about the years of work he had spent building up contacts to acquire the information, and nobody should be asking him to share what he had worked so hard for. I swore right there I would never be that guy. As a railfan, I was blessed to have had the greatest job in the world, and it gave me access to things that others would never have the opportunity to see and acquire. I want to share it, whether it be my measurements from those long waits in sidings, or the GoPro footage I collected my last year before retirement.

Shane

Shane, there was such a gentleman person here on LSC for a very short time. He insisted that anything he would share he would have to be paid for. Me, I enjoy sharing, the feeling of helping someone out is a good feeling. But I agree that copyrighted information should not be openly shared. However, information that was collected from open sources, or compiled by the individual sharing, can be shared without any legal infringement.

Again, I am impressed by your build, and I agree, its the details that bring a project to life. As for eyesight, and about manual dexterity, mine is getting less acute each year.

As an anecdote, we now refer to ourselves as Napkin Builders because of his derision of said folks!(https://www.largescalecentral.com/externals/tinymce/plugins/emoticons/img/smiley-surprised.gif)

Shane,

I’ve really enjoyed watching you develop ways to achieve your build. Very nice.

John Caughey said:

As an anecdote

Anecdote for what?

" Rooster " said:

John Caughey said:

As an anecdote

Anecdote for what?

Bird brains?

Thanks Guys,

Here’s some files for the project.

Number Boards

Silhouette Files ZIP File

SD60f Rear Vents - Use this file to score the outline on .02" styrene.

Backboard Decal

Fire Extinguisher Decal

Tail Number 5536

Front Number 5536

Cab Side Number 5536

CN Logo

Chris Kieffer said:

What he said(https://www.largescalecentral.com/externals/tinymce/plugins/emoticons/img/smiley-cool.gif)

job well done!!!

Damn!

I mean, that there is real nice. Looks like a real professional job.

Stunning!

Beautiful work, thanks for letting us into your thinking as you shared your build.

Thanks Guys.

Here’s part 4 of the video build.

That someone can even do this kind of work just amazes me. You are the Ray Dunakin of diesel locomotive building. Just amazing. So when do you start taking orders for more of them?

Thanks Pete. I’m honoured to be compared to Ray, but I think I have a long way to go to get to his level. My diesel shops ordered four of these units, but I think they’re going to be lucky to get two. This project has been a lot of work.

We’re going to start with the nose detail today. I used a headlight from Miniatures by Eric.

You need to start by filing out a flat spot. Keep it 3/16" below the hood of the nose 1/8" below the curved edge. It will extend 1/4" to each side from the center joint. It needs to be 3/4" tall, and the bottom will need to be filed at 45 degrees.

I started by cutting the top and bottom line (green arrows) with a razor saw. Then I filed the section between the two cuts flat. Then I cut and filed the bottom (red arrow) at 45 degrees.

Mark the placement of your headlight, and then drill two 7/32" holes to match up with it. The light has a solid back, so you’ll have to drill it as well.

Using some epoxy, mount the light.

Now you can mark and drill for the nose ladder. Keep it 5/16" to the left of the center of the nose. Starting from the bottom, measure the lines 9/16" apart. The top line should end up being about 3/8" below the top of the nose.

The photo is a little deceptive. The holes on the hood of the nose are 9/16" from the edge. DO NOT measure from the top line on the nose.