Still worth the price
korm said:
" the Kingbutt Truss?"
What else could it be?
Korm Kormsen said:
i love northamerican building threads!
sometimes i learn new tricks, but nearly every time i see tools, i never saw before.
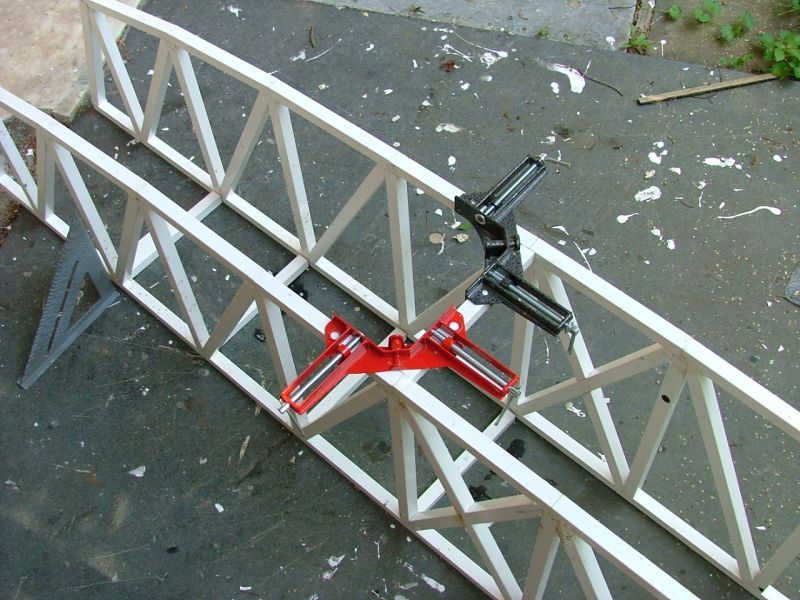
corner-clamps… - already found them on amazon.
the bridge, well , nice start.
only lazy people have genial ideas. like building the second half on top of the first.
and what kind of truss will it be? the Kingbutt Truss?
Oh yea, them corner clamps come in real handy for making corner joints.
I don’t get the comment “only lazy people have genial ideas. like building the second half on top of the first.” It wasn’t my idea, its standard assembly procedure for stick building RC aircraft. I just “borrowed” the idea, like so many other ideas and tricks that I use.
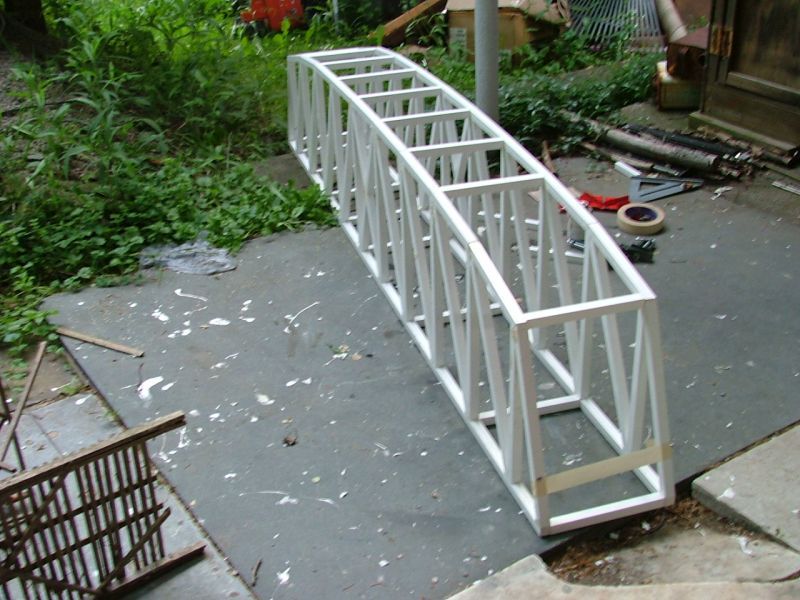
Its actually got a name. Its a Camel-back Truss.
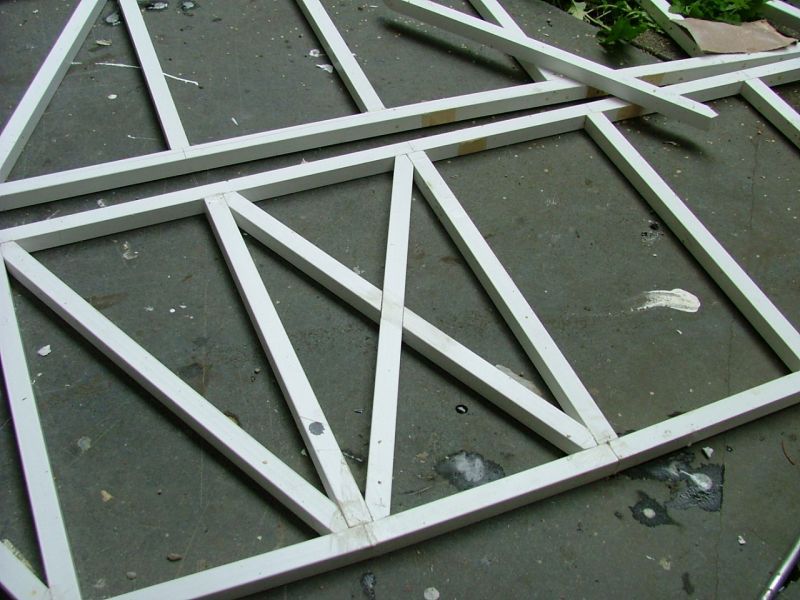
So next are the angled members in the side trusses.
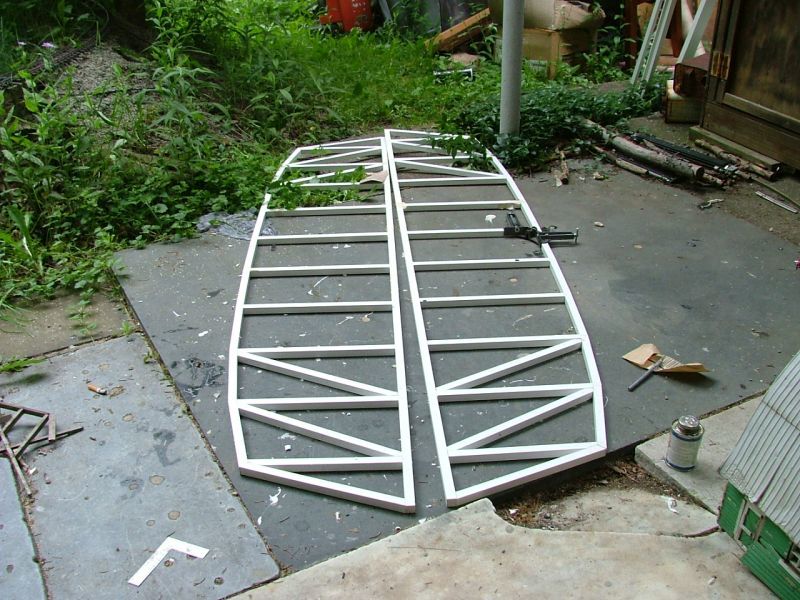
The center bay gets a x shaped angled truss support
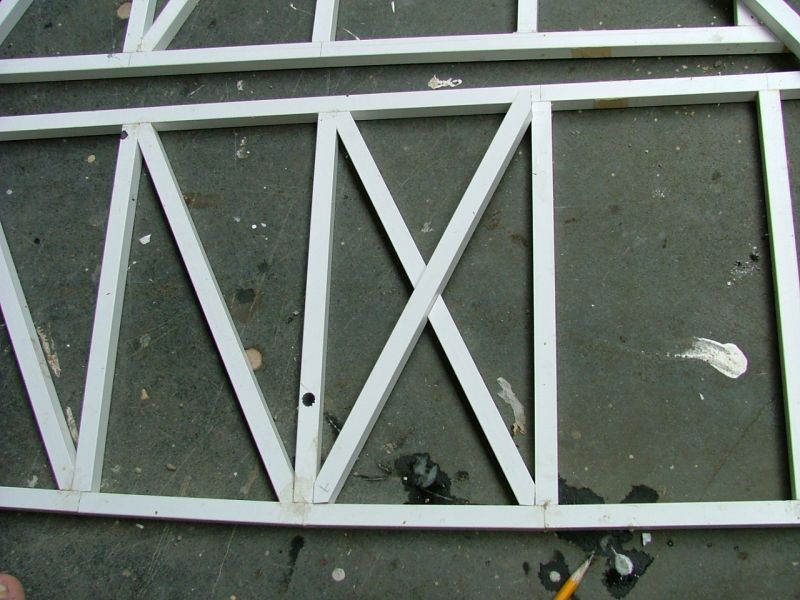
To make the X, I notched the members where they cross each other.

Uh oh! A new bandage!
John Caughey said:
Uh oh! A new bandage!
can’t be serious. the bridge is still white.
talking about still white…
will you paint it as a wood- or as a steelbridge?
John, yea, them Zona saws can really bite when one isn’t paying close attention to them
Korm, the final colour for the bridge is being discussed off and on during the build.
Tom Morrow, the shop foreman, is pushing for black, the “normal” colour for a railroad bridge.
Smokey likes silver, and he reminded us that dark colours get real hot on sunny summer days, and that the bridge is plastic after all.
Mary says we should just paint it oxide brown, and that way we can fake it. Its either brown wood for NG operations, or its rusted steel for SG operations.
I am leaning toward green. It is Shannon after all.
But the final say will be from the old man. When he decides, that’s what we will do. Right now he is taking his after nap nap, so he is rested enough to get a good night’s sleep. (https://largescalecentral.com/externals/tinymce/plugins/emoticons/img/smiley-wink.gif)
Beautiful work, David. I’m learning a lot from this!
I vote silver, but Santa Fe often had silver.
or dark read. (http://www.largescalecentral.com/externals/tinymce/plugins/emoticons/img/smiley-tongue-out.gif)
no paint needed - just sawing on! (http://www.largescalecentral.com/externals/tinymce/plugins/emoticons/img/smiley-yell.gif)
Cliff, you are learning from me? Your kidding. You with lasers and 3D printers, and me with a crappy Harbour Freight miniature chop saw that can’t cut proper angles, and a Zona saw that likes to taste human blood (mine).
Greg, I like the look of silver, or aluminum, and it would reflect the sunlight, and keep the bridge from getting as hot as a black painted bridge. But the decision hasn’t been made yet.
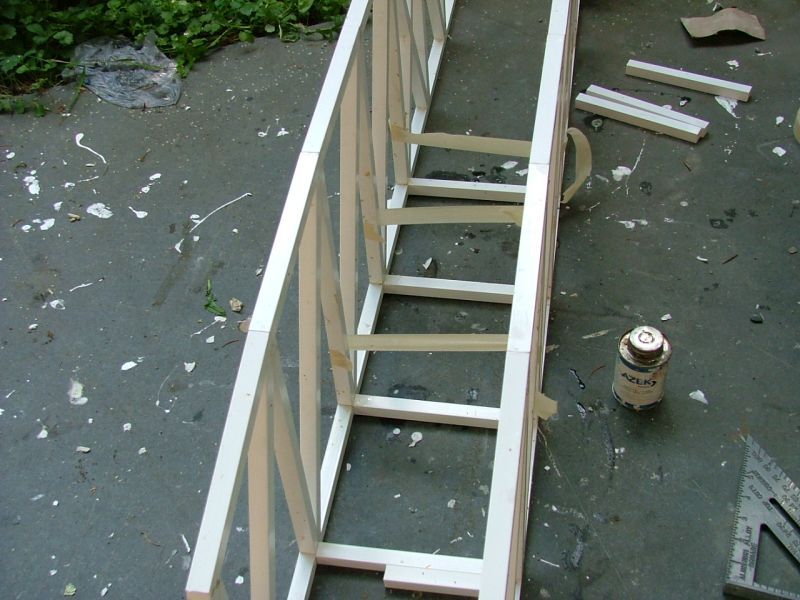
Once I completed the diagonal members on the side trusses, its now time to put the cross members in and join the 2 halves. So I cut a bunch of 7 inch long pieces and started attaching them to the front (north) truss.
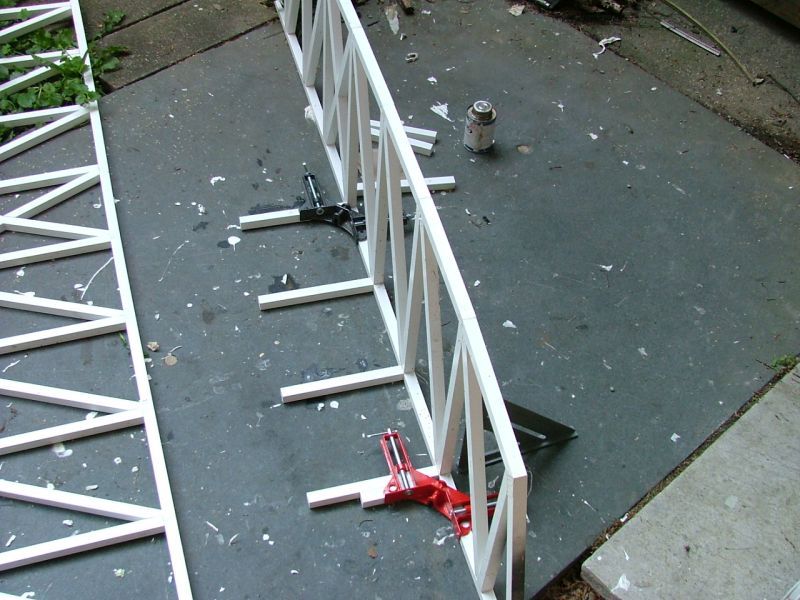
Once they set up I started joining the 2 halves together.
And to hold to 2 sides tight to the cross members I used strips of masking tape run from one truss to the other. Because I don’t have 8 inch long bar camps.
Dave the true masters use that green tape…
David Maynard said:
Cliff, you are learning from me? Your kidding. You with lasers and 3D printers, and me with a crappy Harbour Freight miniature chop saw that can’t cut proper angles, and a Zona saw that likes to taste human blood (mine).
Greg, I like the look of silver, or aluminum, and it would reflect the sunlight, and keep the bridge from getting as hot as a black painted bridge. But the decision hasn’t been made yet.
I like half silver half red with a painting crew hanging halfway, on the edge. Now and then you can paint more bridge and move them along…(https://www.largescalecentral.com/externals/tinymce/plugins/emoticons/img/smiley-wink.gif)
I’ve seen plastic grow so much in the sun, light colors are all I would try.
Remember that plastic track Train-Li sold? The rail would expand like crazy in the sun, and give you sun kinks.
Anyway, a nice easy way to make a bridge that looks great.
Greg
David Maynard said:
Cliff, you are learning from me? Your kidding. You with lasers and 3D printers, and me with a crappy Harbour Freight miniature chop saw that can’t cut proper angles, and a Zona saw that likes to taste human blood (mine).
C’mon David, of course I am! Proof: I just got my set of four corner clamps, very cool. Other thing I learned is that it finally registered that you can use PVC cement on PVC board, with good results. You’d think the “PVC” in both those products might have been a clue, but my brain needed the knock from your thread to make the connection.
And FWIW, half my tools (power and hand) are HF. (http://www.largescalecentral.com/externals/tinymce/plugins/emoticons/img/smiley-laughing.gif)
Keep up the great work!
Sean, if they don’t sell it at a discount at the Dollar General or Family Dollar, then its unlikely to be in my stash of supplies. (http://largescalecentral.com/externals/tinymce/plugins/emoticons/img/smiley-wink.gif)
John, oh yea. Just want I need, another half finished project. (http://largescalecentral.com/externals/tinymce/plugins/emoticons/img/smiley-wink.gif)Just kidding. That is a neat idea, but one I think I may pass on.
Greg, I didn’t know that about TrainLi’s plastic track. That is interesting. So I will stop considering it for a someday project I had in mind
Cliff, Don’t feel bad. I have those kind of “Doh!” moments. Looking back its like “why didn’t I make the connection before?” As for the other, that’s what we are here for. To share knowledge and learn from and inspire each other. I will never build a museum quality mine, but it’s inspiring and informative to watch you build one.
The first time I realized how dark plastic expands more than expected, was a friend’s ladder track support system, the ladder was made from dark brown plastic. He had put his track on the ladder, and secured it every so often.
Well the ladder expanded much more than the track (track expansion driven by the brass rail) that the track was ripped from the ladder in many spots.
Of course after the ladder was buried in earth the problem went away, but heck, it was surprising.
Nice job David, I think you should double think on putting a piece of aluminum angle under that bridge, yes its sturdy now but do not want it drooping in the middle with a heavy freight rolling across it! o Great job and something to build with that is cheap inexpensive and easy to work with.
Pete, I appreciate your suggestion, and I may regret not following it, but at this point, I would be unable to add it without it showing. I tested the plastic before I used it, and in short sections its as stiff, or stiffer, then the wood I used to build my previous bridges. Engineered properly, the members that are under bending loads are not that long, and are supported with bracing to the other members. If the deck werent supported and stiffened by the upper truss, then the darn thing would sag under load for sure.
Well, Its looking more and more like a bridge
Now that all of the 7 inch cross members are done, its time to add the diagonal pieces.

I am just doing the diagonal bracing on the deck, not on the upper part.