Large Scale Central

RV remodel

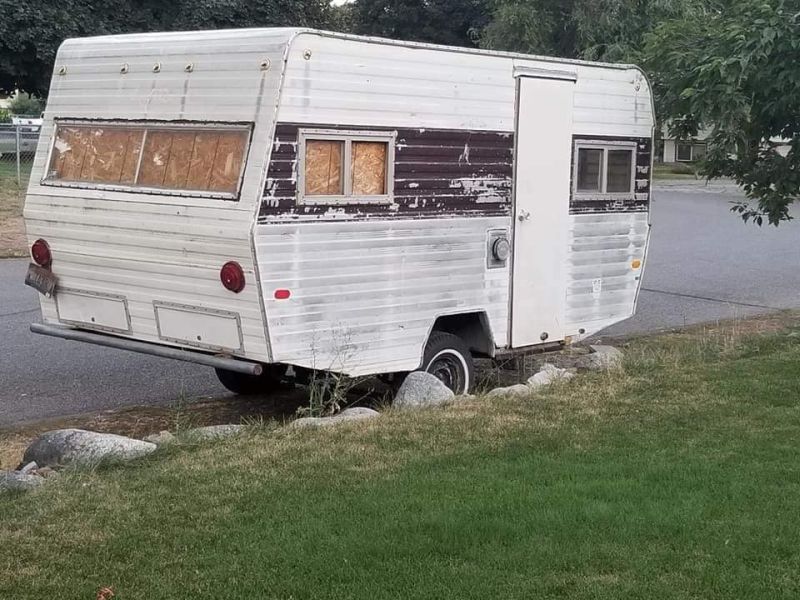
First off I am posting this just to prove I am still alive and kicking. The wife and I last year decided to remodel a little camp trailer. We are getting to old and spoiled for tent camping and we do a fair amount of camping. I wanted to build a small travel trailer from scratch. My wife was looking at brand new ones. We compromised and decided to join the travel trailer remodel/restoration craze. We found a 1968 16 foot Layton that had good exterior metal and a decent skeleton for $400. Yes it had some dry rot, but don’t they all. And I happen to know a bit about wood working so I knew there was nothing we couldn’t handle. So last summer and even more so this summer we have been working on the trailer. Basically completely gutted it on the inside. The previous owner had put up OSB on the walls and some tongue and groove pine on the ceiling and was living in it. He got a bigger trailer to live in. The wife decided she was keeping the OSB. Not my choice but I gave in. Weight isn’t an issue as its a small trailer so I was not worried about the heavy OSB. But I figured it was ugly. Well she sanded it all down smooth and painted it white and I have to admit it doesn’t look bad. After that came my part, building all the cabinets and what not. So after it was gutted we put in an all new sub floor, replacing the dry rot skeleton as we went and added 1" of foam boar insulation. This gave me the base for my work. Having a ton of blued pine I began milling. The majority of it is blued pine with a plain pine tongue and grove for the inner panels. Here is a little tour of where we are now. We are using it as we work on it. So we do things in pieces so that it can travel.

The first thing I made was the closet. Less doors and drawers (those are coming soon)

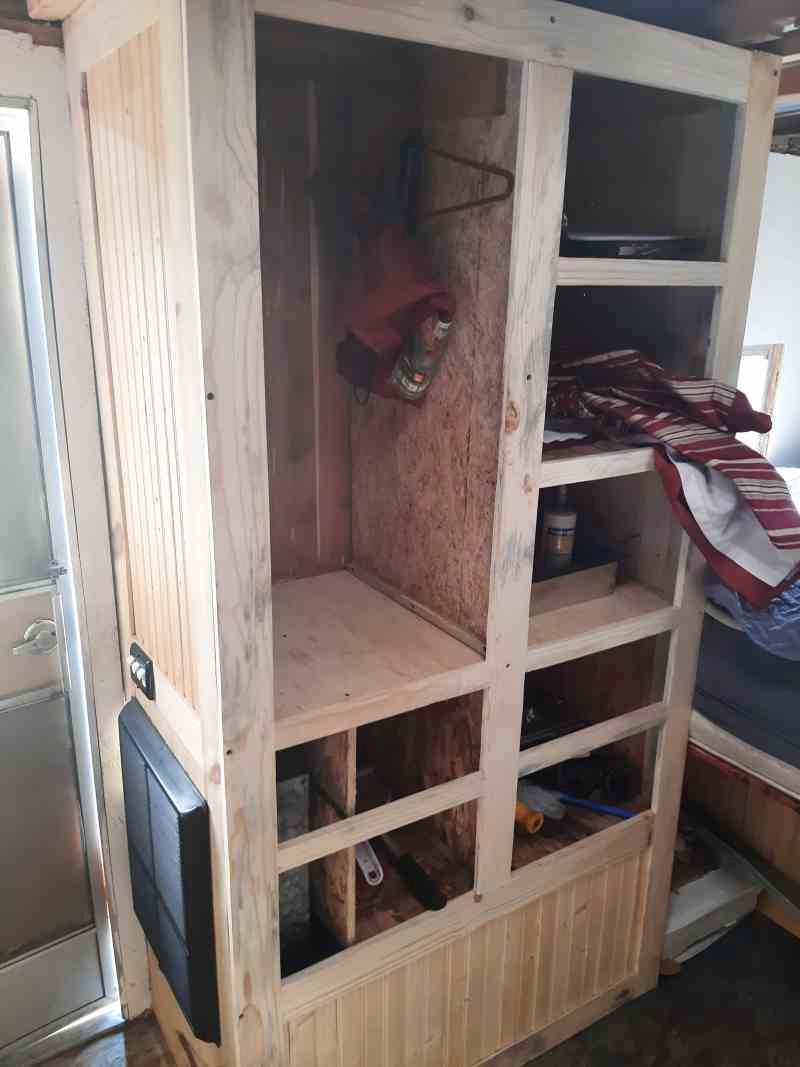
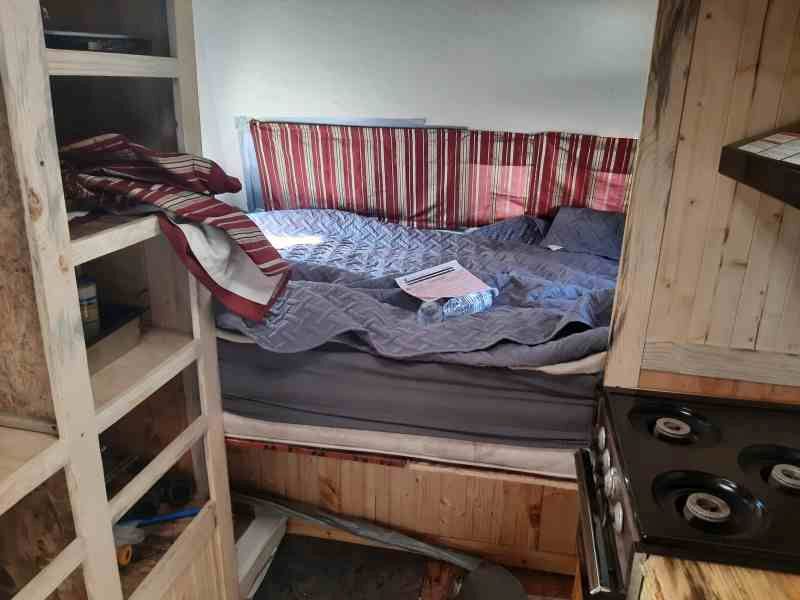
This incorporated the existing propane heater that worked like a charm. Painted the cover with a flat BBQ heat resistant paint. Next piece I made was a “skirt” for under the bed to block off the storage area under the bed.

After that came the dinning bench seat/cabinets. The one in the picture is set away from the wall so you can sit without hitting the kitchen counter. This left an area under for the power invertor, water pump and other electrical stuff. The upper back rest section has a hinged lid and is where we will store games and stuff. On the left is a 110v AC outlet and the switch for the water pump.

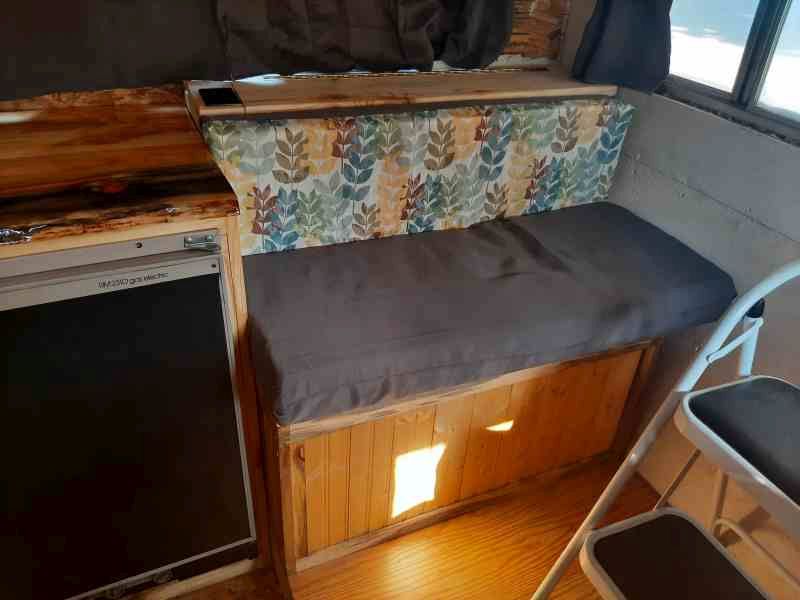
each of the bench seats opens into storage. The opposite side of this one is where the water tank is.

Next on the list was the stove/sink/fridge cabinet. I don’t have the sink cut into the top yet. But this is an awesome piece of blued pine with lots of color and character. It has a Stone Coat epoxy clear counter top epoxy on it.

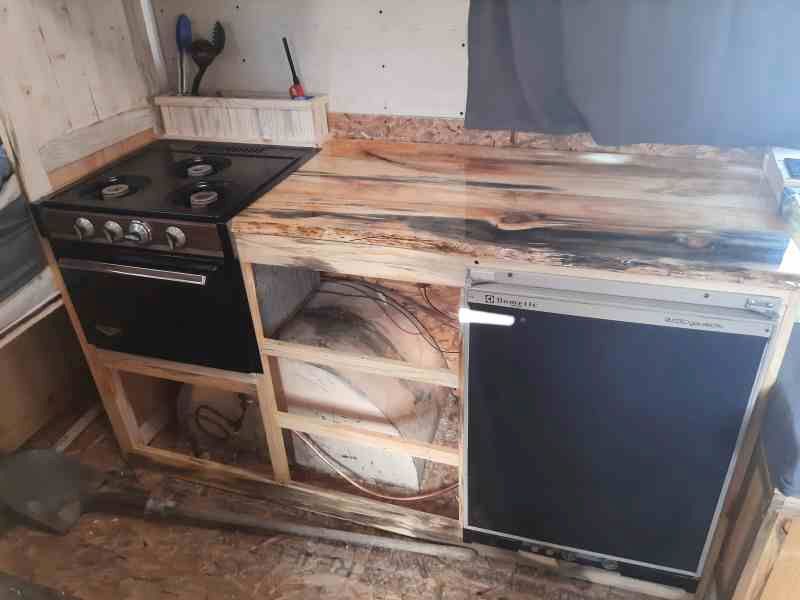
A little note here. The stove worked the fridge did not. Found a fridge to put in it. We painted the front of the fridge with chalkboard paint so our soon to join the world grandson Everett will have a place to draw when the time comes (yes this is my first grandchild due in September). We bought appliance paint and painted the stove, which was that ugly 60s/70s olive green, gloss black. Looks brand new.

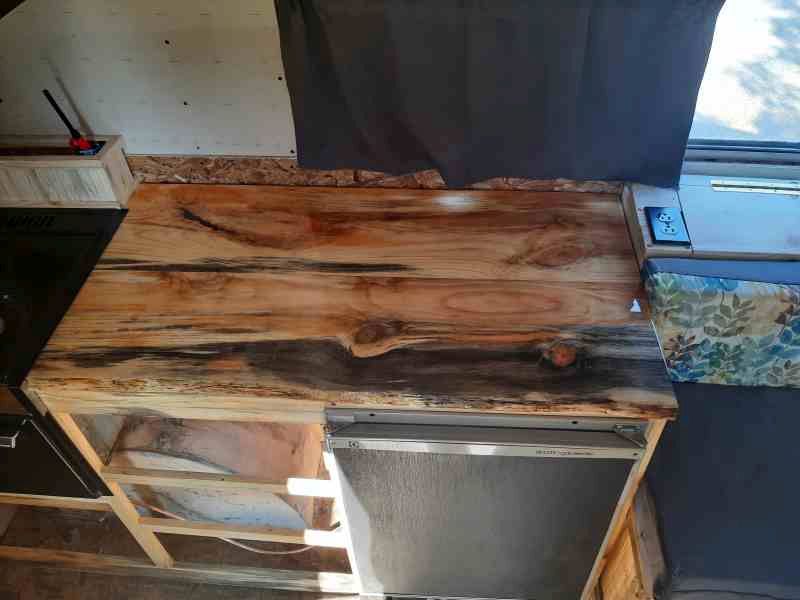
Isn’t that a gorgeous piece of wood. And Stone Coat epoxy is an amazing and very easy product to work with. I have used several resins in wood working and nothing is as easy as Stone Coat. And the combination makes for a neat counter.

and the most recent piece is this upper kitchen cabinet skeleton. We still have a long way to go. We had a bad mouse infestation over the winter. and that forced the ceiling to come out. The closet is lined in the back with aromatic cedar. So we decided to replace the ceiling with aromatic cedar as well. So that need to happen. I had enough left over vinyl laminate flooring from my hobby room and we will put it on the floor because it is durable and water resistant. Doors and drawers need to happen and I have some very nice blued pine in reserve for the drawer fronts. Still lots to do. But when its done I think we will have a cute little retro RV and for sure we will have one that we will be proud of because this is truly a her and I project. She is dang handy but most of the time it is me doing and her helping. But I can honestly say she has been my equal. She did most of the demo, she laid the sub floor by herself, cushions and curtains are her and all of the wood finishing, other than the epoxy counter, has been her. Been a lot of fun doing this with her and I know we will have a lot of fun using it. And said and done I bet we have less than 2000 buck in it.

1 Like

That is one snazzy rebuild Devon. Nice work

Badass chunk of wood!

Really nice work Devon.

I know a little about what you are doing getting my 8 year old lightweight back in camping condition after major mouse infestations, water intrusions and ignoring it for nearly two years when my tow vehicle was no longer capable. I did a section of the sub floor in the bathroom, and pieced in new vinyl floor. Had to pull out the microwave and range to clean up / seal up mouse damage. I had to completely re-buid the furnace as they got into the living space side of the heat exchanger and pissed all over it. First time I fired it before tearing it down I thought the smell was going to kill me. They were in the floor ducts too - I ended up abandoning them and creating some new vents through storage spaces. I almost forgot replacing the awning fabric too!

Never ending fun!

EDIT to add: Show us the exterior sometime (https://www.largescalecentral.com/externals/tinymce/plugins/emoticons/img/smiley-cool.gif)

Awesome project! Looks great so far. What is OSB?

Ray Dunakin said:

Awesome project! Looks great so far. What is OSB?

I think it used to be called chipboard…made up of lots of layers of lots of “wood” pieces.

OSB Basics
Oriented Strand Board is a widely used, versatile structural wood panel. Manufactured from waterproof heat-cured adhesives and rectangularly shaped wood strands that are arranged in cross-oriented layers, OSB is an engineered wood panel that shares many of the strength and performance characteristics of plywood. OSB’s combination of wood and adhesives creates a strong, dimensionally stable panel that resists deflection, delamination, and warping; likewise, panels resist racking and shape distortion when subjected to demanding wind and seismic conditions. Relative to their strength, OSB panels are light in weight and easy to handle and install.

OSB is produced in huge, continuous mats to form a solid panel product of consistent quality with no laps, gaps, or voids. Finished panels are available in large dimensions, minimizing the number of joints that can “leak” heat and admit airborne noise.

Really looks good. Nice work.

Great looking work …what does the sink look like…Is it going to ruin that great top?

Great to hear you still in the fight my friend…

Jon Radder said:

Really nice work Devon.

I know a little about what you are doing getting my 8 year old lightweight back in camping condition after major mouse infestations, water intrusions and ignoring it for nearly two years when my tow vehicle was no longer capable. I did a section of the sub floor in the bathroom, and pieced in new vinyl floor. Had to pull out the microwave and range to clean up / seal up mouse damage. I had to completely re-buid the furnace as they got into the living space side of the heat exchanger and pissed all over it. First time I fired it before tearing it down I thought the smell was going to kill me. They were in the floor ducts too - I ended up abandoning them and creating some new vents through storage spaces. I almost forgot replacing the awning fabric too!

Never ending fun!

EDIT to add: Show us the exterior sometime (https://www.largescalecentral.com/externals/tinymce/plugins/emoticons/img/smiley-cool.gif)

Yes mice are horrible. We stripped the entire ceiling and all of its insulation. Sprayed everything down with the pet odor remover stuff. And weather permitting we leave the door and windows open. It has eliminated 98% of the odor. We will put in new insulation and the choice of aromatic cedar on the ceiling is to further control any remaining odor. Aromatic cedar is nice because it is odor absorbing and also has a strong but pleasant smell which should solve the smell issue entirely. The very first thing I did after ripping out the ceiling was to go around and seal ever conceivable hole they might be able to get into. I was planning on doing this anyway but that moved it up on my time table.

Here is a shot of the outside right after we bought it.

It still pretty much looks like this. The OSB in the windows has been cut out. A new real RV door with screen door has been put in. And it has new recessed taillights. But thats about all we have done on the outside. My brother-in-law is a paint and body man and he will clean up the outside and then we will paint it. Thinking tan and black to match the interior colors.

Ray Dunakin said:

Awesome project! Looks great so far. What is OSB?

What Bruce said.

And thanks to the pandemic what used to cost 15 bucks a sheet is no upwards of 50.

Sean McGillicuddy said:

Great looking work …what does the sink look like…Is it going to ruin that great top?

Unfortunately yes it will ruin the great top. The sink is just a generic stainless steel single basin sink. You can’t really see it in the pictures, but there is a real neat long bark inclusion in the upper right area. This top is one board cut in two pieces and glued into a wide panel. It was done very specifically to put that bark inclusion in a place where we can keep it with the sink in. SO it will ruin it to a point but you have to do what you have to do.

Awesome! I know someone who is remodeling an old Airstream that was laying out in a field for 20 years.

Don’t forget the most important part: axles, bearings and brakes.

Nice job Devon. I like those old campers then again who doesn’t? They have all the charm. My wife and I have been looking for an older air stream to do up and boy are the prices all over the place on those depending on condition and age. We passed on a gutted one that needed everything for $6500 and just missed out on one that needed little for 3 times that price. Newer ones can top $100,000 !!

I like your project. Do you go onto Facebook? There are several groups on there that are all about little campers. I belong to the “Tin Can Tourist” one. You might get some ideas and tips.

I really would love to have a 14 or 16 foot 50’ or 60’s vintage airstream. But the prices are just stupid expensive. A tin can with nothing in it is minimum $3000 and that would be a cheap one. Its insane. So unless Melinda Gates decides to make me her boy toy I doubt I will own one.

Devon, I have seen a bowl used as a sink in a van camper. Mount it above the counter and you would only need holes for the water feed and drain preserving more of that beautiful piece of wood. You would also increase the under counter storage area and I’m envisioning the underside of a polished metal bowl reflecting that gorgeous grain.

Just a thought, Tom

Tom Bowdler said:

Devon, I have seen a bowl used as a sink in a van camper. Mount it above the counter and you would only need holes for the water feed and drain preserving more of that beautiful piece of wood. You would also increase the under counter storage area and I’m envisioning the underside of a polished metal bowl reflecting that gorgeous grain.

Just a thought, Tom

Thats not a half bad idea. That’s how one of our bathroom sinks is. Never considered it but that really is a neat idea.

Well that idea was short lived. For the record I loved the idea. The wife not so much. I tried to talk her into it, but she wouldn’t budge. And this is “her” trailer and she has agreed to let me stay in it. So what she wants she gets.

If I protest to much I may end up back in a tent while she enjoys our trailer.

For the record I loved the idea. The wife not so much.

Devon,

Maybe you talked about a regular bowl. Tom should have said that a “Vessel” sink is all the rage, and a single handle faucet the bees knees. We had one in our vanity.

The top ic is a rustic one, the second is the fancy modern version.

Tom is not up on rages or insect joints. The one I saw was a stainless bowl from a restaurant supply. A hole was cut in the bottom to drain into a gray water container below while a second container held potable water raised to sink level by a hand pump. If hot water is desired it is heated on the stove and poured into the bowl. Devon has not given details as to how complex his electrical or plumbing systems will be. At the time his trailer was built simple amenities were common. As a fellow woodworker I wanted to contribute an idea to save more of that beautiful counter top. I also have a wife who contributes to my decision making. After 46 years with travel trailers I would like to try a small motorhome but I don’t think it’s going to happen.

Be sure you continue to show us your progress Devon, Tom

Tom,

The plumbing is very simple. 7 gallon freshwater tank to a 12v pump manually switched on and off to the sink with a tee to be able to hook up to an exterior hose and faucet. The faucet at the sink is one of those purified drinking water faucets sold for home kitchen use that hook to like a reverse osmosis unit. Hot water is as you say, a pan on the stove. Grey water is just a hole in the side of the trailer that is connected to a hose that either can drain into a container or onto the ground. No bathroom, no black or grey water holding tanks.

As for the vessel sink, I have not given up yet. The idea of having an extra drawer may sell her. I forgot to mention this part last night. But at the end of the day momma gets, what momma wants. A happy wife means more trains. Or at least I hope this is how it works.