Very Nice
Thanks Devon! Trouble is, I get side tracked.(http://www.largescalecentral.com/externals/tinymce/plugins/emoticons/img/smiley-undecided.gif) (railroad pun intended)
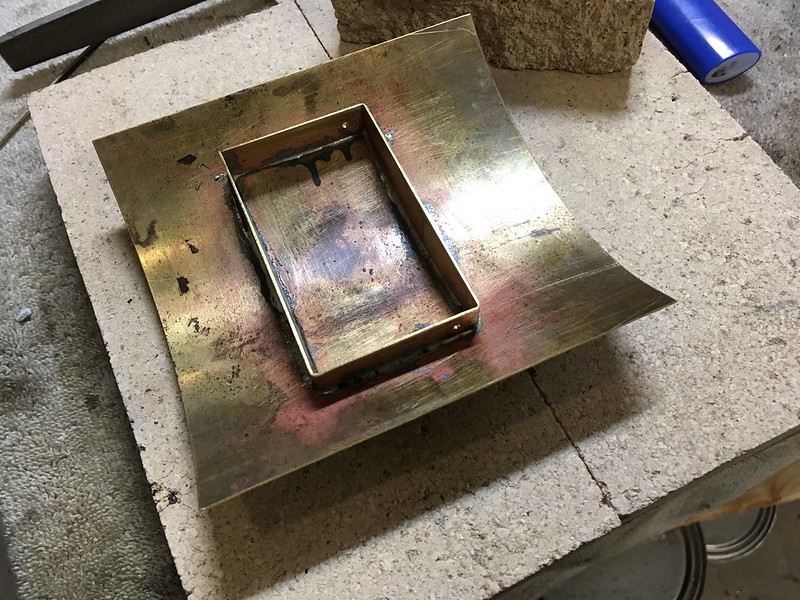
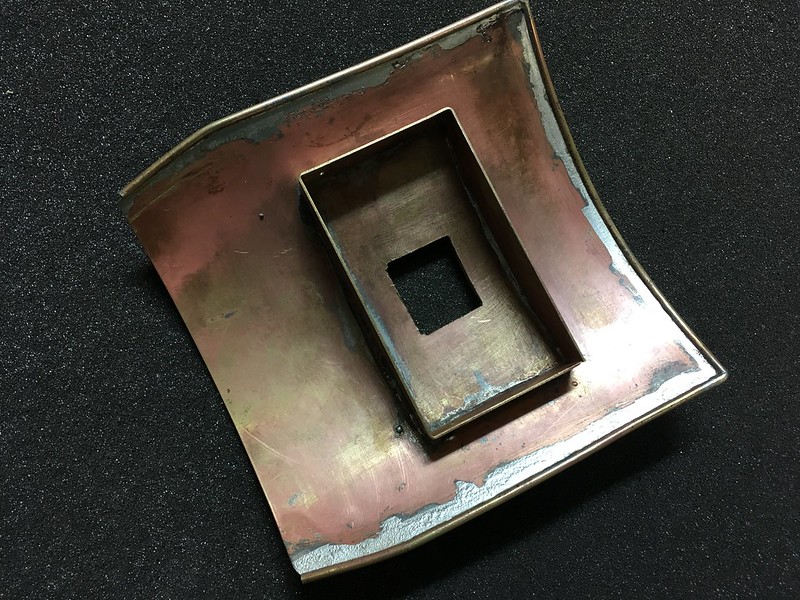
Well, on to the sides took a while, but when it happened it went pretty quick. I had a few days this week with time to kill. I think the up coming NNGC 2016 was getting me excited too, so I started working on the Ruby. I started by soldering two appropriately sized rectangles together. Next I laid things out, did the old drill and slice and unsoldered my two new sides. Next it was time to give the sides the works on the “rivet press”.
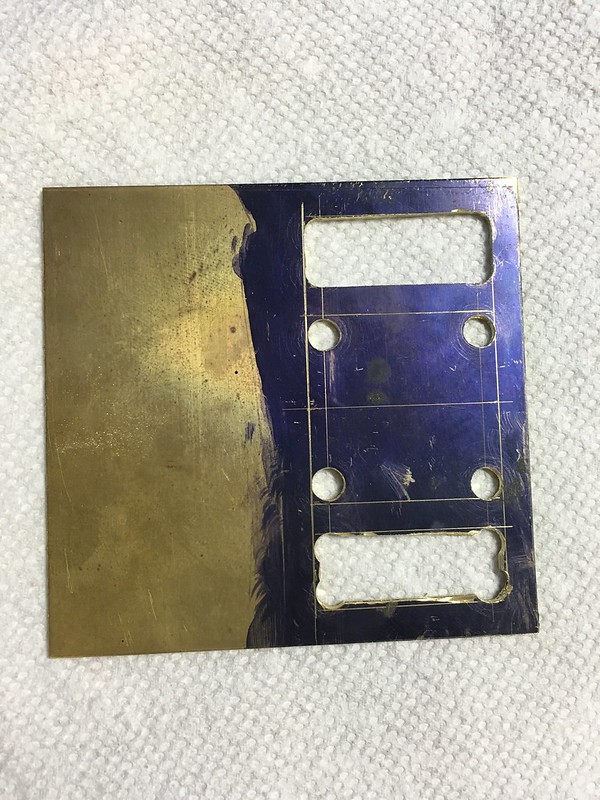
After riveting came the tedious process of cutting fitting and soldering all the brass angle around the edges. I also new that I wanted to mount the throttle servo beneath the engineer acting as his seat. I cut out a par of brass mounting horns taped, drilled and these were actually silver soldered first. I also cut out and folded up a fireman’s seat but this was applied with only plumbers solder.
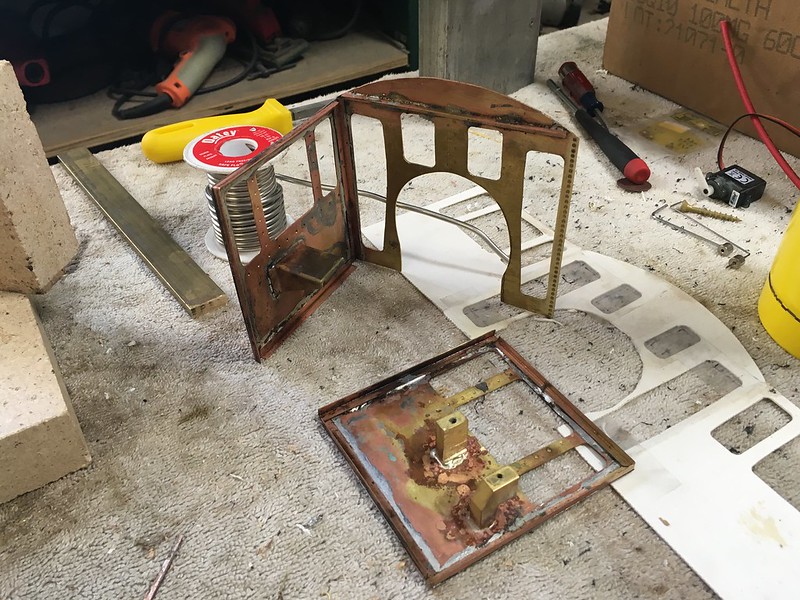
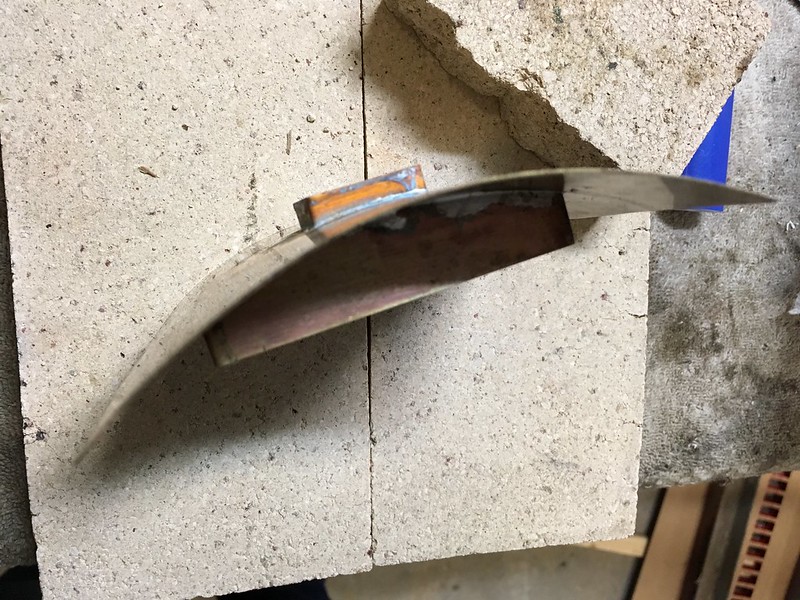
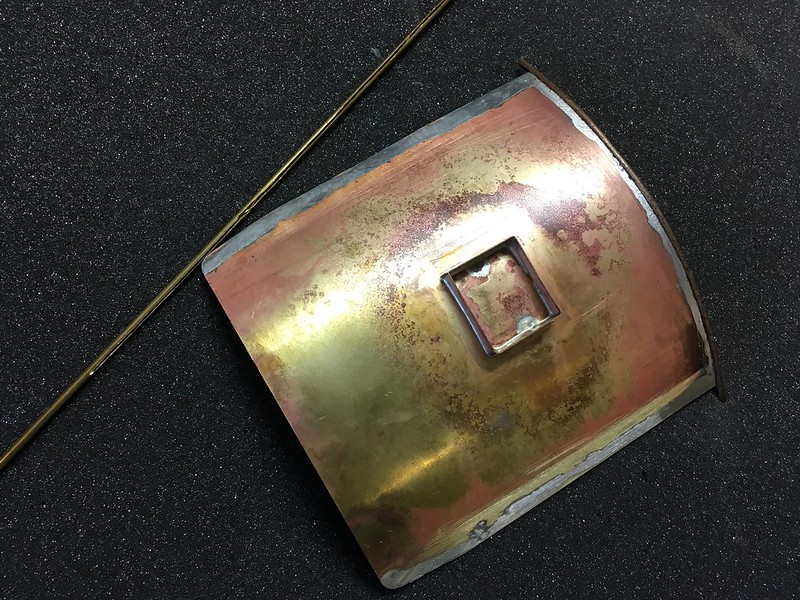
I have to admit I was very re-leaved to solder on the last side to the front and now have a finished cab, minus the roof of course. It seams to fit really well. Also looks like there is plenty of clearance for everything going on in the cab.
I’m also pretty happy with how it looks with regard to its proportions. That’s one of those decisions that I kind of agonize over. Is that wiggly chip board mock up really reflective of how that non-wiggly brass will be? I hope to keep slow steady progress on this until it’s done now. No more big breaks. We’ll see…(http://www.largescalecentral.com/externals/tinymce/plugins/emoticons/img/smiley-embarassed.gif)
Wow Randy, this is coming along well…it is going to be really cool! ruby’s are fun to mess with!
Outstanding craftsmanship; I had a Ruby years ago always had the idea to do something with it. Your article is the best to follow along.
Thanks Guys. Yeah, as my first such project it’s been really fun. Lots of learning and some fairly solid results. I cant wait to do the next.
I got a bit more done. The roof just needs its swing wire inserted and then I need to solder a round around the edges. You can see the holes that are drilled in the ring fore the wire in the first picture. In the second picture you can see the little ring I silver soldered on to the top first. The big ring on the bottom was soft soldered.
Nice work Randy. Cant wait to see it done.
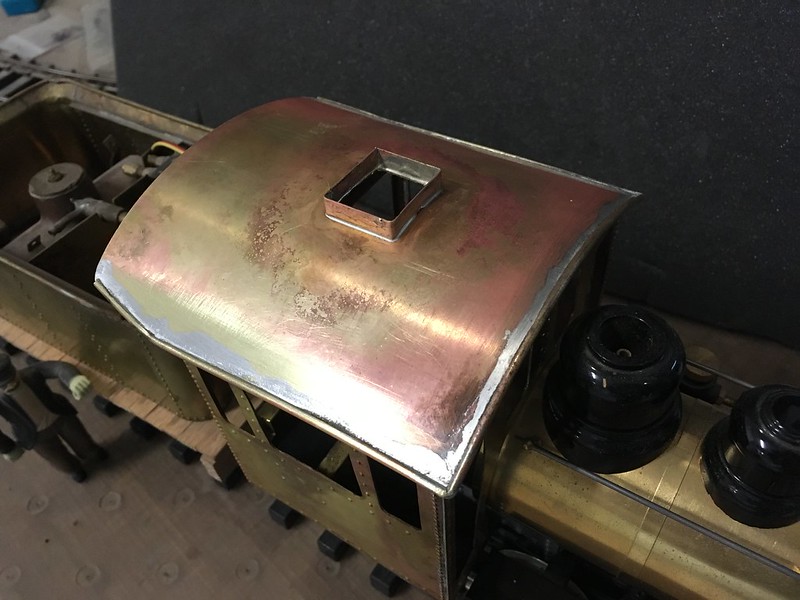
Ive been slowly doing a bit here and a bit there which has paid of in the form of a finished cab roof. In this first picture you can see the brass tube that I sliced down one side with my Dremel tool. Also you can see where I have tinned all the edges of the roof where I’ll attach the round. Before fitting the tube up to the roof I heated it cherry red to soften it and let it take the bends easy. After it cooled I did my best to pack the slot with flux, put it in place and heat things up to set the solder.
The last order of business was to cut out the vent hole, and file/clean up the front two corners. This all went pretty well and I’m pleased with how it turned out.
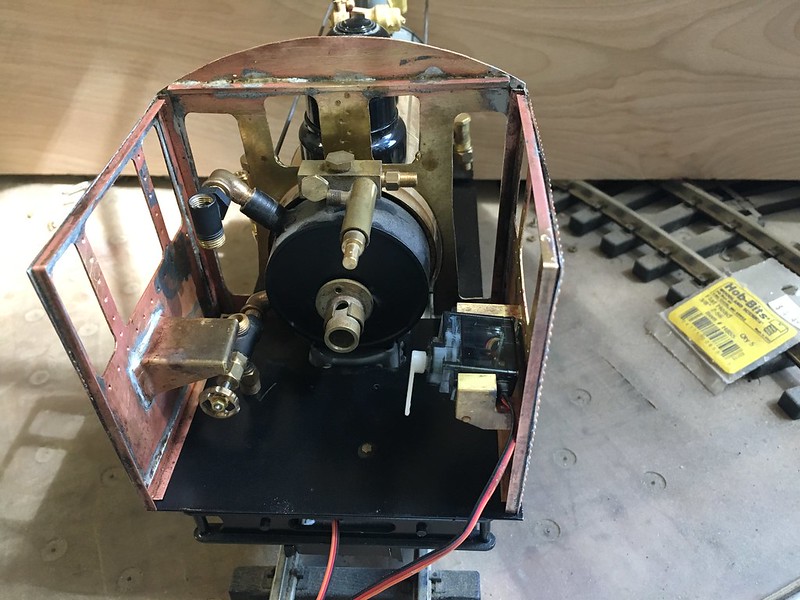
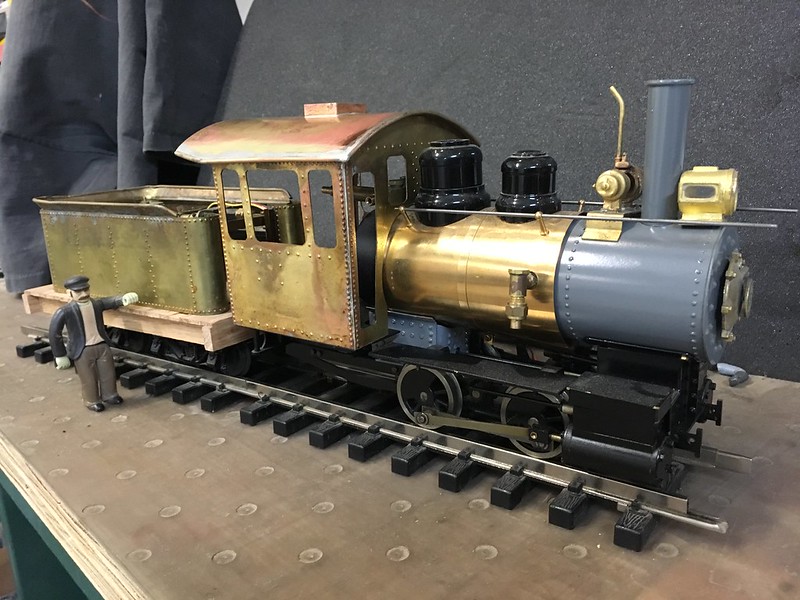
Here the 3/4 view and it’s really starting to look like something. I need to solder bit’s of tube in to the cab to form pockets for the roof wire. Once that’s done, it might be time to paint up all of the Engine parts and do final assembly.
Looks great Randy. I like how you did the roof.
this post has been edited by Rooster: for post count and hoping to be thanked
Beautiful work so far Randy!
I need some help with the headlamp. I’d like to use a LED, but am afraid that heat may be an issue. If you look at this photo I posted above, you can see where the headlamp will “sit”. I’m going to have it mounted via 2 screws to a base like the one the generator is sitting on. That will shield some heat from the lamp but I bet it will still get hot. What temps do LED’s take?
Thanks!
Randy,
I don’t have a response about your LED question, but instead I want to ask you one.
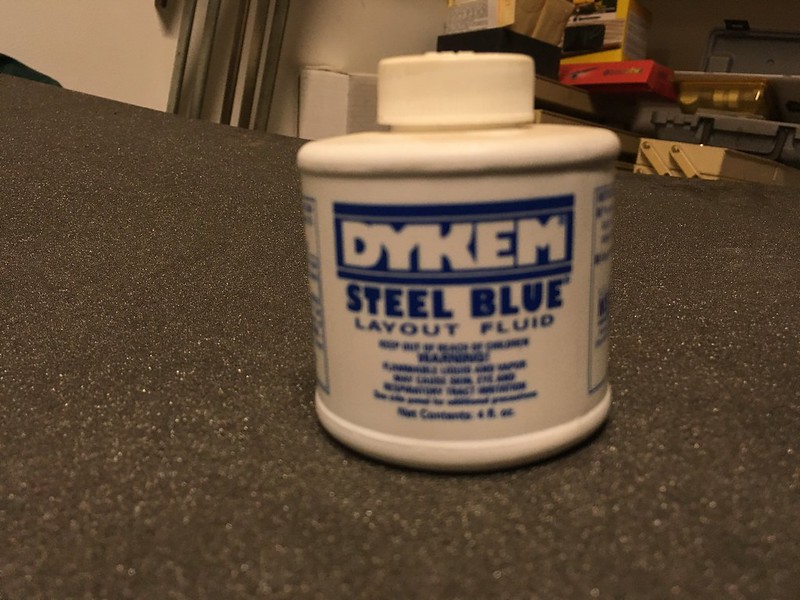
What are you using as blueing ink for marking up the brass? I tried some stuff from the auto part store that they called “bluing ink” or something like that but it never dried. When I asked at the local hardware store (not a big box store) they had no idea what I was talking about even after i told them I was trying to look for something to mark metal prior to cutting.
Heat should not be a problem with an LED.
Be careful about routing the wiring for it. That may suffer from heat.
I would avoid using the bodywork as a return wire for the LED. Use two wires.
If the handrails could be hollow brass tube they would make a good way of routing the wiring. One lead in each tube.
Tony Walsham said:
Heat should not be a problem with an LED.
Be careful about routing the wiring for it. That may suffer from heat.
I would avoid using the bodywork as a return wire for the LED. Use two wires.
If the handrails could be hollow brass tube they would make a good way of routing the wiring. One lead in each tube.
I was thinking the same. The other question I had was where the battery was gonna go?
Hey Craig, I guess turnabout is fair play. I use Dykem. I got it at Grainger and I’m sure McMaster Carr would have it to.
Thanks Tony! I’ll have to source a LED now and work out the mechanics of lighting it.
I’ve been getting a few other things done too. The roof now has it’s hinge wire inserted and works well.
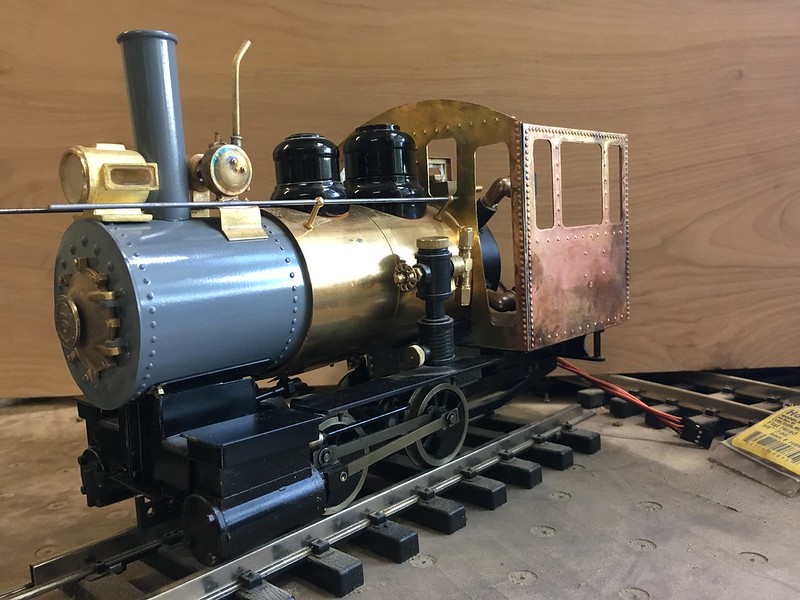
I’m also working on the pilot beam and front coupler. I did not have the room for the long 1:32 draft gear box. I liked Acuucraft’s 1:20 pockets but needed them with 1:32 couplers, so I decided to homogenize the two. First I cut off the back of the 1:32 coupler shank leaving as much as I could. I drilled a 2mm hole as close as I could to the back. I cut off the big barrel from the bottom of the 1:20 scale pocket. Now, the 1:20 coupler has a lug on each side to retain it’s spring, so a way had to be devised to add these to the 1:32 shank. I was afraid of gluing or drilling and screwing so I elected to form a slide over piece. This piece can be seen mid picture. I was a chunk of plastic I cut out of the pin the put in new doors in place of the door nob latch. I cut a little rectangle, cut a small rectangle through the middle the shaped the sides. I cut the piece a bit thick so the I could then hold it by the bottom half and file, saw, carve out the little nubs that hold the springs.
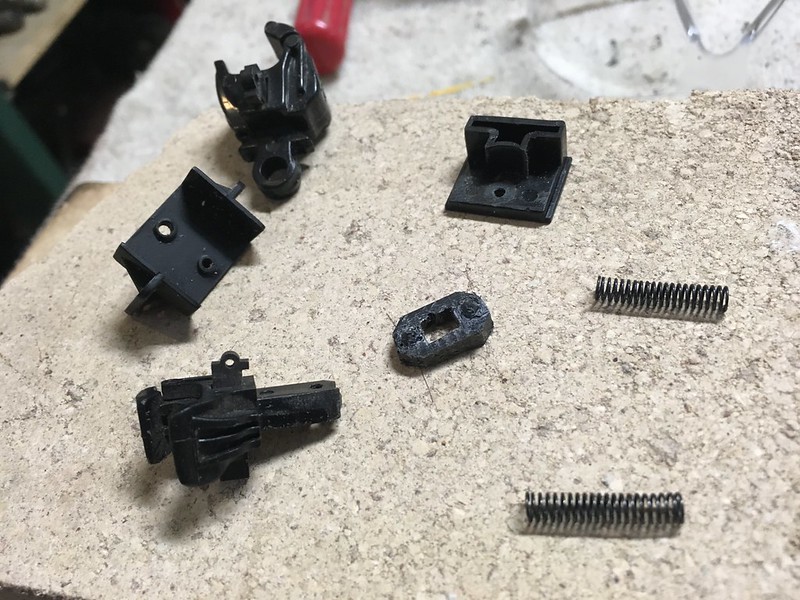
It assembled well, and works just like it’s larger counter part. I’m really excited I was able to get this to work out so well this will work perfect in the new pilot beam.

" Rooster " said:
I was thinking the same. The other question I had was where the battery was gonna go?
I’m going to power it with the 7.2 volt pack that will run the RC System. That will all reside in the tender.
OK …Very …NICE!
Loving the work!
Possibly a 5mm LED with a 480ohm resistor then. Suppose you could just ground the whole loco and only run a positive feed to the light?
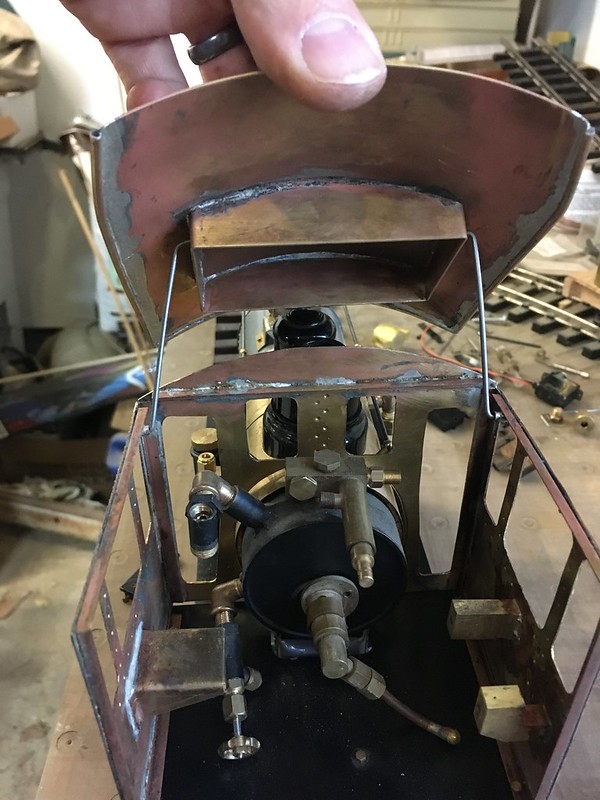
Really nice work Randy. I like the coupler mod to get what you needed. And the lift away roof leaves plenty of access. (http://largescalecentral.com/externals/tinymce/plugins/emoticons/img/smiley-cool.gif)
Wow Randy that is looking good. Makes me want a Ruby to kitbash now.
Randy, my Ruby never looked so nice! Great project with work to match…