like the color
Steam domes can come from the most unlikely sources. I chose to use the objects in the photo below to make a still, but they could just as easily have been cobbled into steam domes. #1 daughter gave them to me because she thought they might be useful for a model train project. They are the cork covers to sparkling wine bottles. They also came in that color. They are plastic, so they are easy to work with. Just another everyday example.
Best wishes, David Meashey
Oh I know you can make them put of just about anything. I see them or parts to make them everywhere
Devon, so you learned to cut down a working chassis instead of building your own (out of square) chassis. Good job.
I like the build so far.
David Maynard said:
Devon, so you learned to cut down a working chassis instead of building your own (out of square) chassis. Good job.
I like the build so far.
I would say yes to that. But I do still believe I can build my own just not by glueing bits and pieces together. That is the single largest take away. That and building components not one sold mass of stuff that can’t be taken apart.
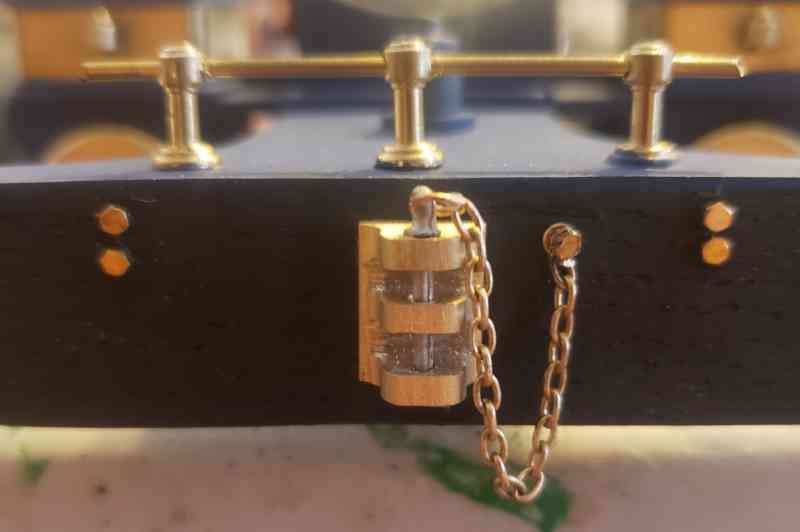
I have some fairly hefty brass channel. I cut a piece of it and hen cut down the sides of it by about half. I took one of the cut off pieces and soldered it into the center between the sides. I then used files to give it a profile. drilled a hole in the back and threaded in a 0-80 brass bolt and then cut the head off. Drilled a hole in the pilot and threaded it onto the pilot with some CA to hold it in place. Added a chain bolted to the pilot and secured on the end of the pin.
A couple bolts to simulate the pilot being bolted to the frame.
Devon Sinsley said:
David Maynard said:
Devon, so you learned to cut down a working chassis instead of building your own (out of square) chassis. Good job.
I like the build so far.
I would say yes to that. But I do still believe I can build my own just not by glueing bits and pieces together. That is the single largest take away. That and building components not one sold mass of stuff that can’t be taken apart.
The old fashioned way is to clamp 2 steel side frames together and drill them on a press so all the holes line up square, wasn’t that where you erred?(https://www.largescalecentral.com/externals/tinymce/plugins/emoticons/img/smiley-wink.gif)
No John the problem was that I used the stock chassis for the back two drivers but on the front drivers I just cobbled the frame together fro pieces of styrene. And its alignment was off but worse than that the slot for the axle was sloppy and allowed it to move around to much.
My method would eliminate the cobbling and the sloppiness can be avoided.
edited for spirit
John,
When I do decide to build one from the frame up I am going to either do what you are suggesting or have the frames cut with a CNC. For now and what I am trying to accomplish this is working well. But your method is the “proper” way to do it if one is going to truly scratch build fro the frame up.
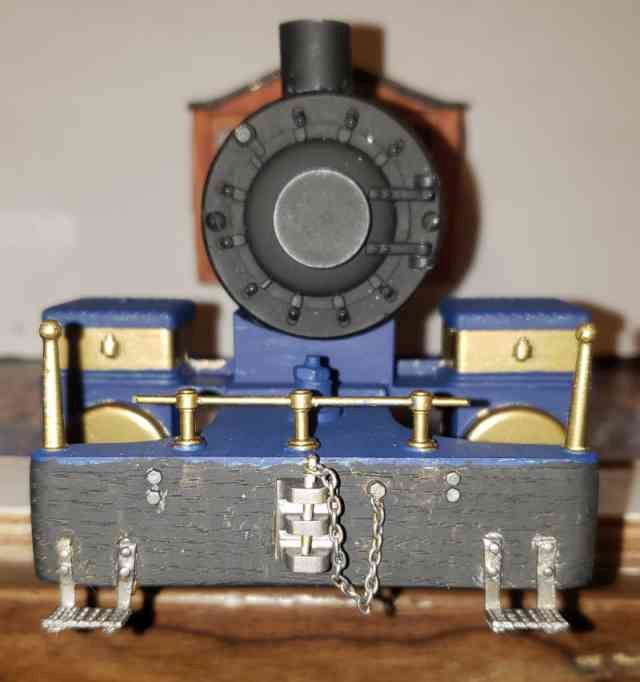
Okay back t the project at hand. I have made some nice progress. Here is a mock up of most of the parts.
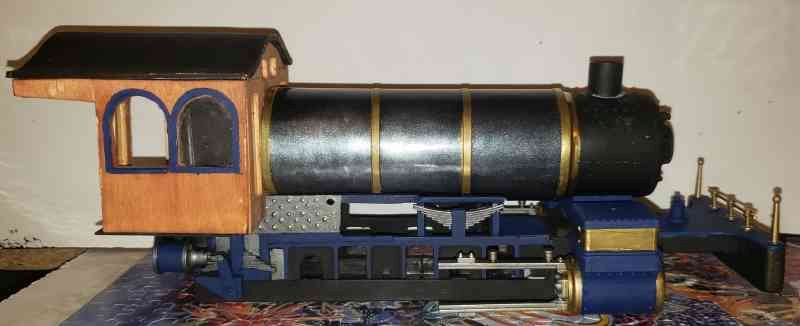
One thing I am interested in is coming up with a proper representation of a planished iron jacket (Russia iron). My understanding of planished iron is more or less a treatment process for treating the iron boiler jacket. This is akin to bluing a gun. It takes the heat and is durable to prevent rusting. It can be polished to a very high sheen. One of the reasons many model manufactures pain the boilers blue is to simulate planished iron. But from what I understand its not blue. Its more of a gun metal grey but because of its high polish i reflects the blue sky giving it that blue look. So I wanted more of a gun metal color that was still very polished an shiny. So my experiment was to spray the boiler in my favorite chalkboard paint. It gives a lot of tooth. I then dry brushed on Jacquard Pearl Ex powder in silver. The tooth of the paint allowed the powder to stick nicely and then after it was done I sprayed on I think five coats of gloss clear. I am pretty happy with it and it does reflect a slight blue hue which is nice.
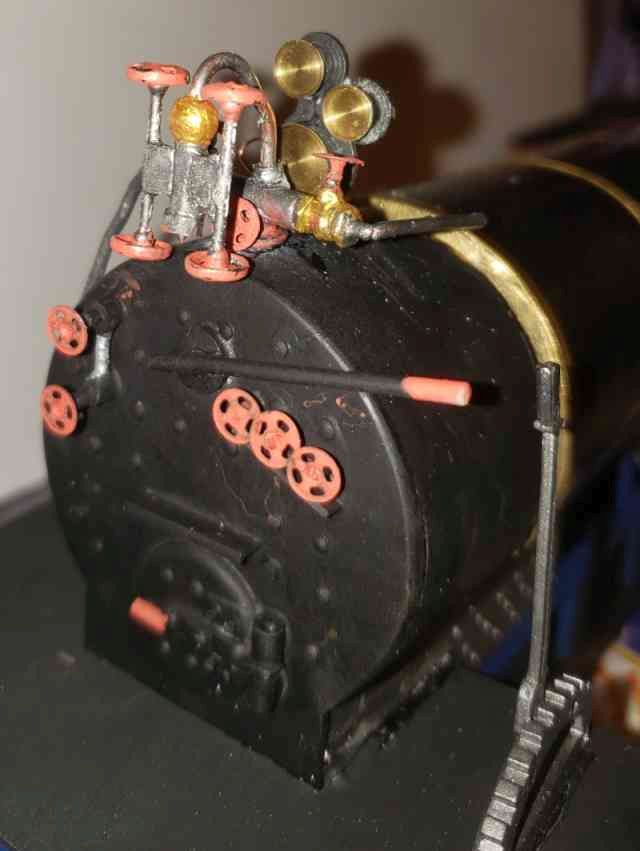
Also been working on the backhead plumbing
and I added some steps to the pilot beam
I think this is going to work out to be a nice locomotive. I think I have learned well from my previous attempt and this one is going together better. One thing about it is the ability to take it apart.
That blue reflection thing even happens on gloss black painted boiler jacketing, for example,
https://www.railpictures.net/photo/605693/
and
Planished iron is iron polished to a high sheen, almost to a mirror type finish.
Russian iron is iron impregnated with graphite. In the process of heating and hammering the iron, the graphite glazes, giving it a gloss finish. The highest quality of Russian iron has a bluish colour to it. Russian iron can also have a greenish tint, or a brownish tint depending on the impurities in the graphite.
I like the look of your Russian iron Devon.
A few years back, before Yahoo ended their groups, the Early Rail group had a several weeks long discussion of Russia Iron and its color.
Group is now on Groups.io
This book also has some discussion of Russia Iron and other metals used for boiler jacketing, as well as discussing locomotive finish in general.
Most metal things were their natural metal hues.

David Maynard said:
I like the look of your Russian iron Devon.
Thanks. There are several products I have wanted to try to achieve the “right” look at least what I think the “right” look is. I am interested in buffable lacquer paints such as those that Testors used to put out. But they are harder to come by now days and the clean up is always a pain in the butt if it goes through an airbrush. I saw a Youtube video where the guy used this type powder and alcohol and sprayed it on that way. then sealed it. I figured with the tooth of the paint I could dry brush it on. It worked very well. Not necessarily the most even finish but with practice I think I can achieve good results. I want to try the brass powder and see how it looks, over a gold paint the gold powder could really pop.
Devon, I think you are going to end up with a mighty fine engine. No one can accuse you of Devoning on this one, for sure. I blink and you’re almost done. I really like the wooden cab, gives the engine a lot of character.
Well its a long ways from done, still plenty of time to “stare it into ruin”.
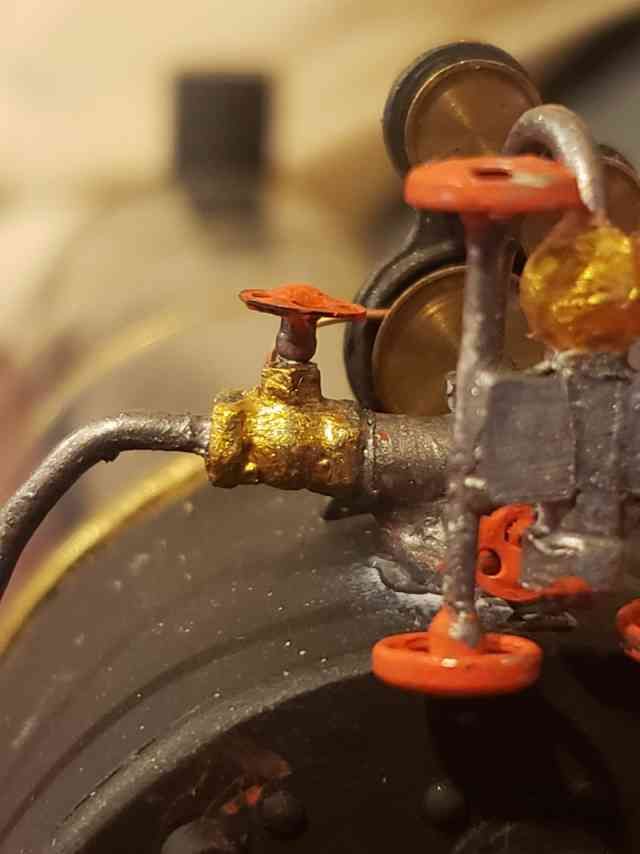
So as I think we all can relate, at least those of us that like to make stuff as opposed to buying it, that the goal with each new project is to be better than the last one. While I strive for perfection as long a I am doing better with each go, then I am happy. So plumbing is one of those things I find fun and challenging to make the scale right and make it look good using bits and pieces. So the main pipe work is 14ga solid strand insulated wire. I strip it for the pipes and use the insulation for fittings like elbows. Anyway I am very happy with these current valves. Even at extreme close ups they don’t look bad and at even a foot away look darn good. If I can toot my own horn. So first a finished valve
It consists of a plastic fishing bead, two stainless 0-80 nuts a brass 0-80 nut (notice the extreme size difference even though they are both threaded to 0-80), a piece of piano wire, a dress snap, and the 14 gauge wire. This one will be for the connection at the back of the tender that runs up to the cross head water pump.
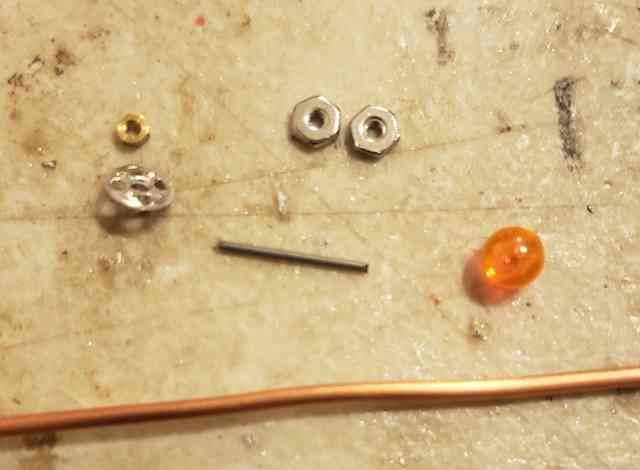
I drilled out the bead and stainless nuts to accept the 14 ga wire so the parts can be slid on.
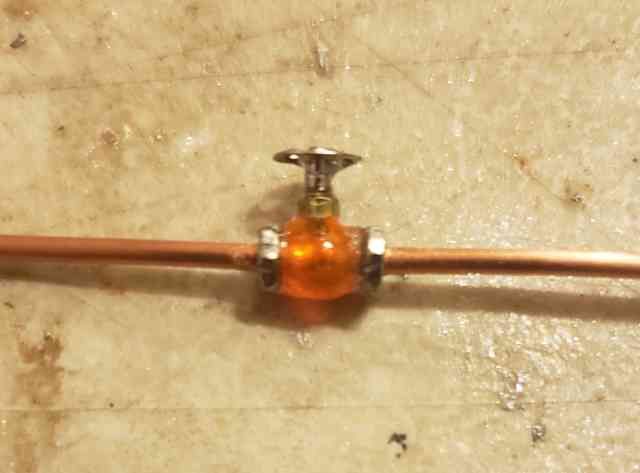
First a nut then the bead then another nut all CA glued in place. I little extra glue helps blend the bead into the nuts. Then I drill out the dress snap to accept the piano wire and then drill a hole 90 degrees to the wire to take the piano wire I glue in the wire and then the brass nut (simulates the packing nut) and finally the dress snap.
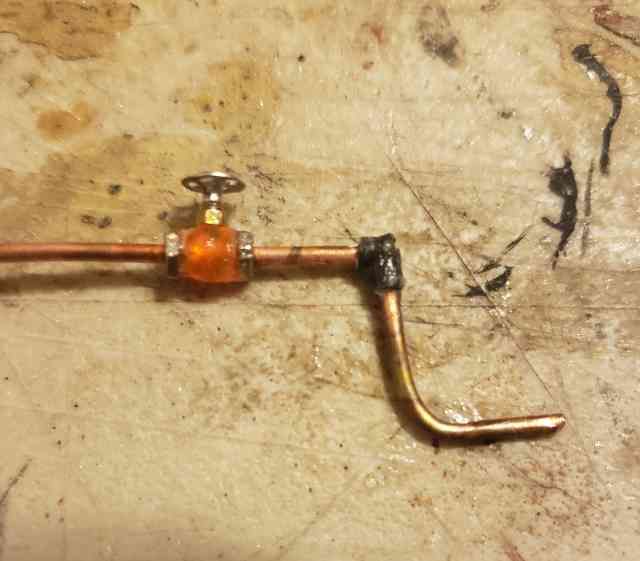
To make the 90 I cut the wire filed the ends to roughly 45 then soldered them back together. I used two small chunks of insulation cut at 45, one part forced over the 90 and then the wo glued together to make the fitting.
All in all I very pleased with how they look
Valve construction with bead is a nice bit of inspiration.
Email today from a railroad book seller has a new title with cover image of what I guess might be termed a late model 2-4-0, (and tender is as long as the loco!) https://www.ronsbooks.com/ROCK-A-BYE-BABY-%E2%80%93-HISTORY-OF-THE-ROCKAWAY-VALLEY-RAILROAD_p_28870.html
.jpg)