Large Scale Central

Photography Ignorance

OK so after reading the hot debate on cameras in the 3D printing thread it got me thinking about a question I have had. How do you take the type of picture that puts the for ground in sharp focus and then sort of fades out in the back. I don’t mean blurs the back ground but just gives serious feeling of depth. Sorry for the layman’s terminology. I know at one point I read an article about guys taking photos of HO that used pin hole cameras to get the effect. I have also seen car modelers do some very real looking photos of their models with that extreme depth perception.

I have an older SLR camera and only two lens. Forgive me for not knowing off the top of my head what they are (I am not around my camera) Both are variable for zoom one for normal pictures and one that does stuff farther away for like my kids hockey. I am not opposed to buying another lens to get the desired effect if need be.

Sorry for the ignorance. I am a point and shoot guy but i am learning. I have gotten some great help in taking action shots of hockey. So I am teachable. I want to be able to photograph static displays as if taking a photo of a real scene.

Devon

Here is a great example of what i mean. This is a photo from in the diorama not a photo of the diorama

Maybe I need to talk to John. He lives in my backyard and some of his photos are exactly what I am talking about

http://largescalecentral.com/forums/topic/22820/the-official-winter-run-photo-th

Devon,

The “aperture” setting, or “f-stop” is what gives you control over your depth of field. A small hole behind the lens (aperture) is a large f-stop number (they go from low numbers = large hole to high numbers = small hole,) and gives you more depth of field.

A pinhole camera has a very small hole and gets a good depth of field - the back is in focus just like to front. Be aware that the smaller the hole, the less light gets through, so you have a related issue with the time of exposure. Most automatic cameras pick one (aperture or exposure) and adjust the other to make the photo work.

In practice, with an SLR or other controllable camera, the first thing you do is take it out of automatic mode. Then turn the aperture (f-stop) to the smallest opening (probably f-22.) Adjust the exposure time from 1/10 second to 1/1000 and take a few photos of the same scene at different exposure times. This is called ‘bracketing’, and one of the photos should be close to what you want. If not, you’ll have some feedback on what you did and can experiment some more. (Take notes so you can reproduce what you tried last! And a tripod helps.)

Of course, bracketing used to be expensive when you used real film! Nowadays it is a free option.

OK Pete I do know enough to understand everything you said. It raises two more questions. Lens and lighting. Do I need a special lens like a macro or just play with what I have. And where should light come from to get the best effect. Direct or indirect, front light back light etc. I am looking more at dioramas and static displays verses layout shots. (makes sense because I don’t have a layout yet).

Devon

In case anyone else is reading this to learn I came across this site

http://s145079212.onlinehome.us/rr/howto/photography/index.html

Devon,

It works with most lenses, but light is a different matter. Many of the diorama builders/photographers prefer natural light (outdoors), that way one of the cardinal rules — just one light source — is a given. Shooting dioramas with shadows going in three different directions is not so hot, unless they were shot on the planet with three suns.

BTW I still get a kick out of pictures which show model engines with the focus starting to fade 2" from the front; yes, they are still quite common on the Internet.

No special lens, but you will want one that focuses fairly close–maybe 6 - 12" or so. I like macro lenses for really close-up work, but you’re not going to shoot dioramas and the like in macro, so it’s not necessary. My lens is an 18 - 200mm zoom which I use for probably 95% of what I shoot. I’ve got a telephoto (70 - 300) as well, but its minimum focal length is about 5’, so not really useful at all for miniature photography.

If you’re shooting a diorama indoors, I like to use primarily soft, indirect lighting. If I want shadows, I’ll add a key light for that, but not so harsh as to make the shadows all that noticeable to the eye. They’ll show up in the photo much stronger than they do when you look at the scene. Outdoors, I just use natural light, preferring to shoot on overcast or mostly-cloudy days where the light is even. Shooting in direct sunlight and getting photos worth anything takes some work. I usually have a reflector with me to bounce some light into the shadows if I have to shoot in full sun.

In terms of exposures, Pete’s advice is spot on. You want a very small aperture. You don’t necessarily need to go down to the smallest, just small enough to where what you want to be in focus is in focus. Also note that some lenses get “soft” when closed all the way down, and you won’t get crisp images. My lens can go down to f32, but I shoot at f22 because that seems to be its “sweet spot.” I get really good depth of field at all focal lengths, and the image is still very crisp.

Know that at such tiny apertures, your shutter speeds are going to be l-o-n-g. If I’m shooting indoors, typically I’m looking at 1.5 - 4 second exposures. Outdoors in natural light (overcast), typically my exposures are between 0.5 and 3 seconds. Use a tripod and the timer setting on the shutter, so your finger pressing the shutter doesn’t jiggle the camera.

If you’re shooting with a digital SLR, shoot in RAW. That will give you the highest level of control over the image. You can compensate a lot for under- and over-exposure, color, sharpness, etc.–things you can’t really “fix” if you’re just exporting jpegs from the camera into iPhoto or something.

Later,

K

Talk to me, Devon???

I use a Nikon digital point and shoot. I let the camera figure everything out. :slight_smile:

Thanks guys. I am already learning a lot. fortunately I know about enough to be dangerous. So far you guys have kept it simple enough for this photography Neanderthal to understand. Now I want to take pictures and experiment.

John Bouck said:

Talk to me, Devon???

I use a Nikon digital point and shoot. I let the camera figure everything out. :slight_smile:

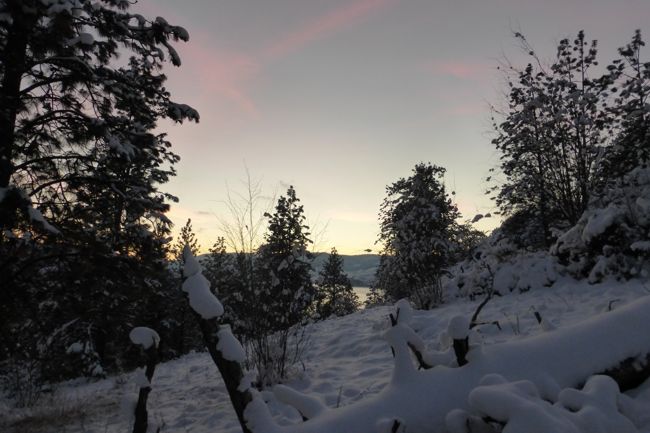
LOL well maybe you got lucky then. I like this photo in particular

Needs a guy shoveling snow but seems like a good photo to me.

OK made the wife go look at my camera.

It is a Canon EOS Rebel XTI 400d and the lens I would likely use is the one that came with it and is EF- S 18-55mm f/3.5-5,6 II.

I can run shutter speeds as slow as 30 seconds. says minimum aperture is f/22-38. and a focal distance of 9.8". So sounds like I can get it done with what I have. So i am assuming I will want to run the apeture down as close to minimum as I can and mess with shutter speed, correct? With a 9.8" focus distance I think that will get me plenty close enough. Don’t know if it makes a difference but that is scale 16 feet away.

So beyond what has been presented any other tips.

What about ISO settings

Devon Sinsley said:

What about ISO settings

The ISO sets the sensitivity. The higher the ISO, the more sensitive the camera becomes. But after a point the picture gets “grainy,” especially with cheaper cameras. ISO up to 800 is pretty safe.

As one example, if a certain F stop gives you the depth of field you desire, but you can’t run a long enough shutter speed (because of shake, or the camera just doesn’t have the setting), you can increase the ISO making the system more sensitive letting you use a shorter shutter speed, (or smaller F stop for more depth of field).

You can use the “stop down” feature on the camera to see what the picture will look like (light level) before you snap it.

Devon,

Stay with the lowest ISO setting the light conditions/shutter speed allows — remember ISO 100 used to be called “fast” when ISO32 and 64 slide film was the cat’s meow. You may also want to distinguish between “snap shots” and “keepers”.

Some years back in the “DSLR Boot Camp” the instructor (a semi-retired photo journalist) called the “Auto” setting dumber than a dog. Hmmm … yeah but. Plenty good enough for quick snap shots and even then depending on the composition it can easily result in “not bad at all” stuff.

Devon, I have a Fugi Film, Fine Picks S5000 with a built in lens. I mean, I cannot change the lens. For long depth of field pictures, I take those pictures at dusk, or on overcast days. The picture here, was on an overcast day. I set the camera down on a flat rock, and kept increasing the F stop until the F stop setting was displayed in red. The camera was telling me that I had gone one step too far. I then set the timer and walked away. I don’t exactly remember what the exposure time was, but it wasn’t the full 3 seconds my camera can do. I seam to remember it was 1.5 seconds but I could be wrong.

That is a Aristocraft C16, a Bachmann boxcar and 3 Bachmann passenger cars. So the train is probably well over 9 feet long. If I had chosen to wait until disk, I could have increased the F stop setting and exposure time and probably had the last car in sharper focus.

David Maynard said:

Devon, I have a Fugi Film, Fine Picks S5000 with a built in lens. I mean, I cannot change the lens. For long depth of field pictures, I take those pictures at dusk, or on overcast days. The picture here, was on an overcast day. I set the camera down on a flat rock, and kept increasing the F stop until the F stop setting was displayed in red. The camera was telling me that I had gone one step too far. I then set the timer and walked away. I don’t exactly remember what the exposure time was, but it wasn’t the full 3 seconds my camera can do. I seam to remember it was 1.5 seconds but I could be wrong.

That is a Aristocraft C16, a Bachmann boxcar and 3 Bachmann passenger cars. So the train is probably well over 9 feet long. If I had chosen to wait until disk, I could have increased the F stop setting and exposure time and probably had the last car in sharper focus.

Dave that is an impressive depth of field. From suggestions here and stuff I am finding on the net I can’t wait to give it a try. Though I really at this point have nothing to photograph. I do like the 100 foot high chain link fence :wink:

I guess I should have photo shopped out the fence. But even though the fence had to be a good 25 feet from the lens, its in focus enough that you can see its a chain link fence. And the cylinders on the C16 were 2 or maybe 3 inches from the lens. And that is with a standard lens, nothing fancy and nothing up my sleeves.

My Cannon Rebel Xti has a A-DEP mode which is Auto depth-of-field. I use it quite regularly when photographing my railroad. It will force the smallest aperture setting that can be accommodated with the metered light conditions and ISO setting If there is enough light it’s possible to take hand-held photos that have good depth of field. This is an example; notice the track and the watch tower in the foreground have crisp focus as do the trains in the background. Well, at least they do in they uncompressed original :]

(http://lsc.cvsry.com/post4/FallRun2014-04.JPG)

Not saying you shouldn’t try the manual route, just suggesting an easy option for when you just want to snap a few pics with good depth-of-field.

And use a Tripod and cable release, and turn off the stabilizer on the lens when using a triopd.

Jerry