Had a little more t shop time yesterday, so I finished the scribing brick on the chimney, and cut a piece of coroplast to fill the front opening back a ways from the edge. also after reading Todd’s build I used another piece of the plastic wood for ground contact in the front below the coroplast. also discovered that when the can was cut apart I evidently bent it , as it now has a different profile on the left side compared to the right, this was discovered when the coroplast would not fit back in its spot until I flipped it around. Its not going to hamper any thing , just a small issue. Today if I get a chance it will ne cutting some strips of wood to make the front and rear face of the project. But before things get too far further along I will have to do the 'bull shite" work of painting everything , as I don’t believe a tin can will do well outside on its own. Pictures to follow, if I get them today
following up on my earlier post here are a couple of pictures on the weekends progress, showing the coroplast wall and the trim board base to the wall

I need to start cutting some planks to make the wood wall, and decide on windows if any, and a door

forgot to show the fireplace on this picture, but it will be on one side, not sure which right now, plus it needs painting to a realistic brick look, if I can figure out what color works best. seems like Andy’s thread on his indoor layout had a picture of a good brick paint color, need to go look for it.
Thats looking great pete.
Hey Pete,
Cover that sucker with dirt and it will look just like the munitions bunkers me and my Sentry Dog use to guard in Korea.
Wow Rick I could have saved a bunch of time by just doing that!, could have made 2 of them … future project! Well I seem to be at a “how much do I detail this building” quandary. Still mulling over IF I want to cut and add windows or dormers as Bob C. suggested. Also on the quandary list is to paint the coroplast front area and call it done or skinn it all in boards. the back tin wall will just be painted since it will probably be positioned away from view. A little more progress yesterday, going out there in a while to see what comes up and if any final thoughts or ideas. Pictures to follow later
Well went and did the unthinkable, everyone will be disappointed,
but the Hut is now one solid color
Here is one last look, let
the complaints roll in!

Before ^^^
After

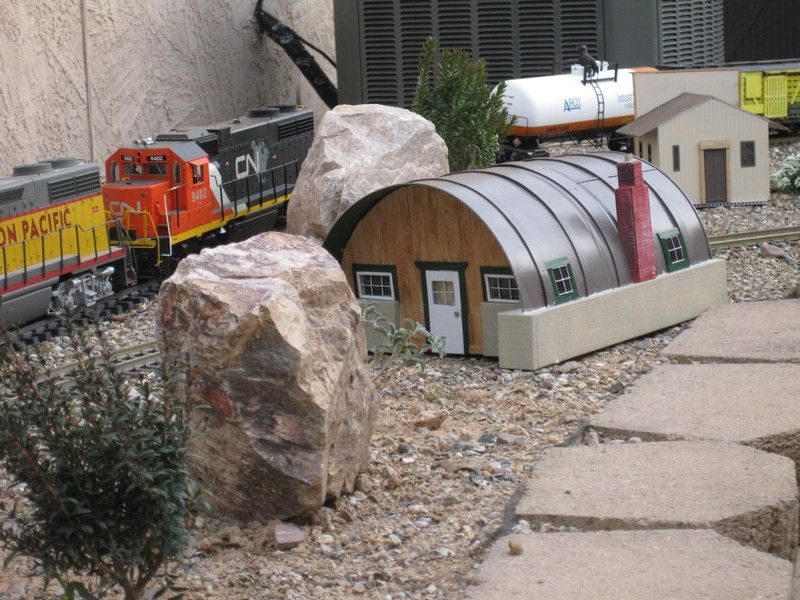
I picked this color mainly because its not one I have 2 or 3 buildings painted with this already, I wanted something a little darker than tan, and this fits the bill. That said I am second guessing my pick. I also painted the inside a dark green just to give it some rust protection. Cut and fit the coroplast wall for the front, hemmed and hawed on what to do or a finish on it and finally wood won that argument. I have windows and surrounds all painted up, a door also is waiting on what to do about the inside, should I cut the openings or just put something dark and keep this building whole. I made a attempt at doing some fake windows for the sides, I am not sure if they will make the final cut .
Pete;
Way back when my wife and I were in a square dance club, we held our weekly dances in a building that looked very much like your model. It was owned by Roanoke City Parks & Recreation. I suppose that a few Quonset buildings got repurposed that way. The building was not air conditioned at that time, but large fans kept the air flow sufficient to keep the dancers cool.
Looking good, David Meashey
Well, Pete, although I do think the original colors made for a very unique looking building, the painted version does look better and more realistic. Well done!
Whoa, man, you, like totally gave in to the Man!
Seriously, though, it looks great!
Eric
Okay,
I’ll admit the hippie hut looks good one color
I liked the “Austin Powers Groove Shack” but painting it as you did makes it more Rail Roady ready.
Will you be adding details like old tools, ladders, pallets, barrels etc… to the front or sides?
Todd Haskins said:
I liked the “Austin Powers Groove Shack” but painting it as you did makes it more Rail Roady ready.
Will you be adding details like old tools, ladders, pallets, barrels etc… to the front or sides?
Thanks Todd, I would if I had some, I did buy a big set of resin cast “stuff” from a guy off Facebook, but it will not be here and would kill 3 years of Mik build budgets. I’m working on the exterior details , about all I can do, with my non existent junk/spare parts box. I am following your idea of installing windows on the outside only. I was going to use my Harbor Freight “dremel” to cut them out, but… as I picked it up, my arm hit the chair back and the tool hit the floor and the cooling fan on the motor exploded and my cheap tool is ruined! Some expletives and down right cuss words were used. So I finished for the day .
I like it. Colors, materials, shapes…it’s coming together. It makes sense to pick a color that goes with the rest of your railroad; after all, it’s good of course to come out of the Challenge with something that will fit on the layout, and yours looks like it will make it for sure.
I hear your debate. Windows and doors are a pain for me. I think I’ll be modelling for decades and still be whining about an effective way of making windows especially.
Rooster stated in the voting section that no one posted pictures on a washer/dryer, so I wanted to point out here that I took at least one picture on the washer, and posted it on the official pictures . Roosters must have bad eyesight. Plus I thought I would add a couple of finished shots of it on this page

Clear view of the washing machine here on this picture, and note under it on the Voting page Mik approved washer picture
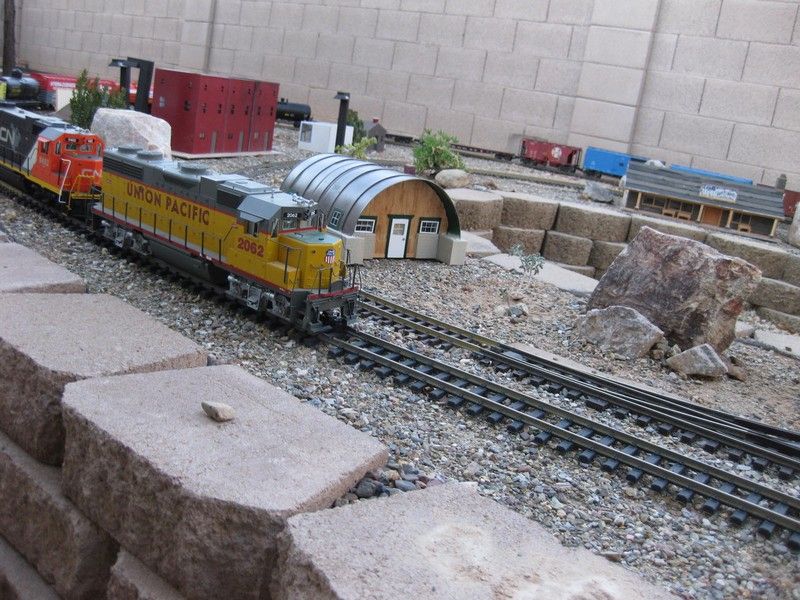
a view of the 2021 Mik build with the 2017 Quarry stone Mik contest building the CAMB BBQ in the background