Large Scale Central

Pete's 2021 Challenge Build Log

Well build Challenge time, but first, the namesake of my Railroad, the late great Babs, who left us in 2006 at the age of 12, same dog as in my bridge build, she just got her yearly buzz job for summer here.

Ok At first I was really iffy about trying this build, but after thinking and looking at different things, and reading what others have posted and not wanting to just copy someone else I came up with the idea after CICNCHOUSE/Peoria said I could use some unwanted cans she had

,

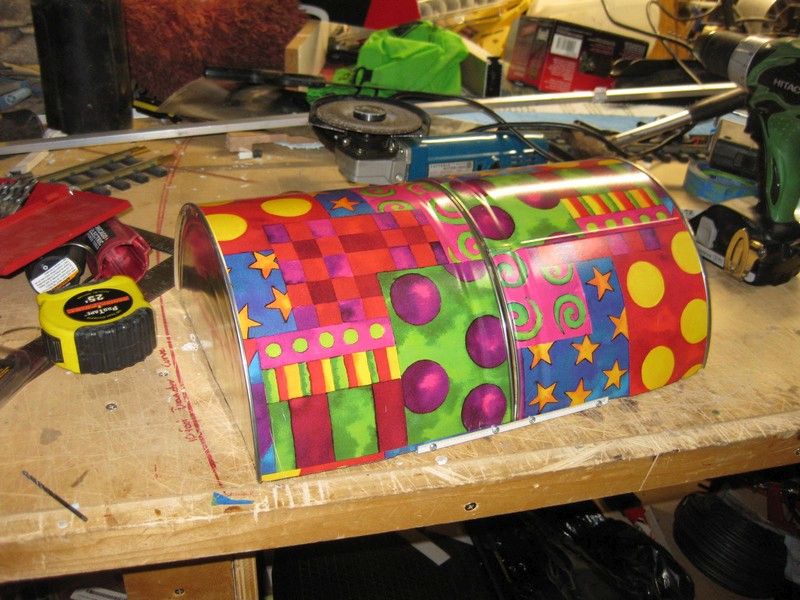
So I have 2 very colorful starting points, now what to do, too small for a tank farm, a Facebook friend used some 2.5 gallon drums to make a tank farm, but I would need a way to bend aluminum tubes I have and I still have not got that one figured out without crushing the pipe. So I present to the group, my build.

CICNCHOUSE was horrified by my picture with all the stuff on the desk, them she laughed and said all y’all are probably the same with desks like mine. Send letters of disapproval/ irritation and pictures to Debbie Lassen at …better not finish that one.

S&N stands for Smokey ( Debbie’s dad, former Marine), and Norman, my dad (former Navy). that’s the idea for now, it may change.

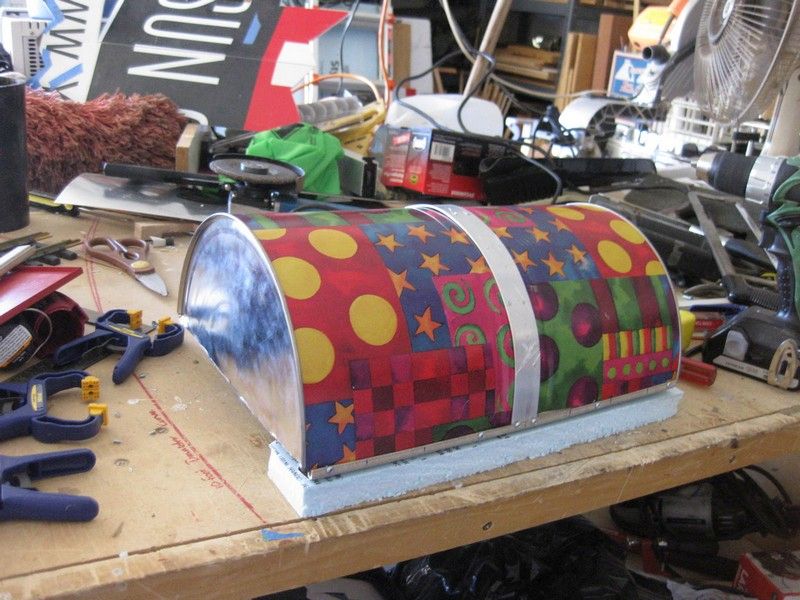
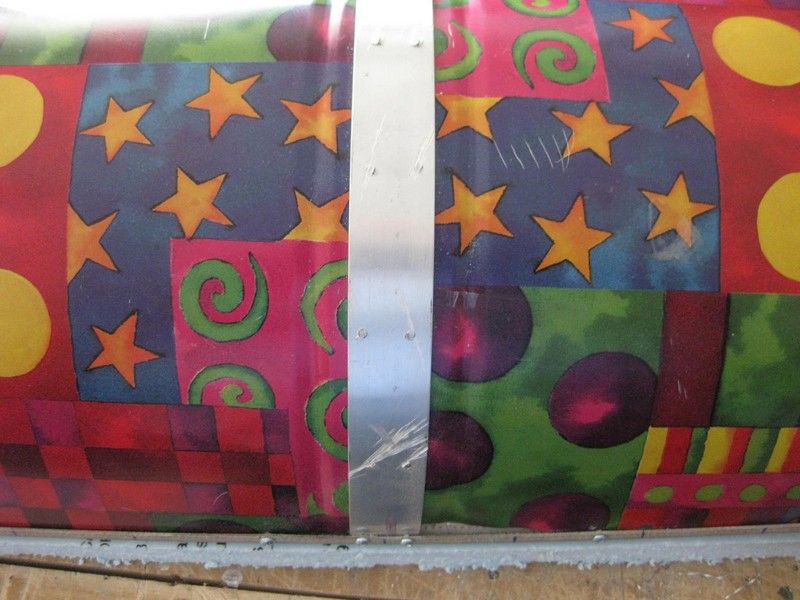
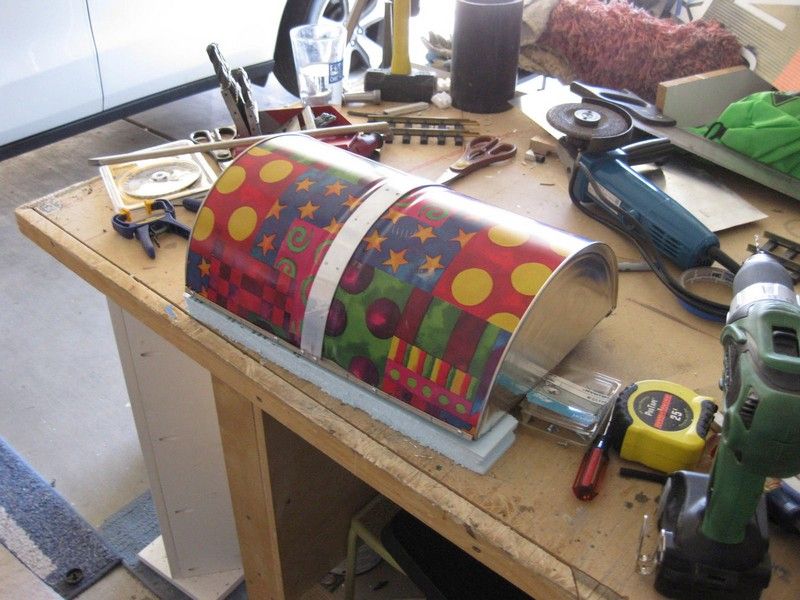
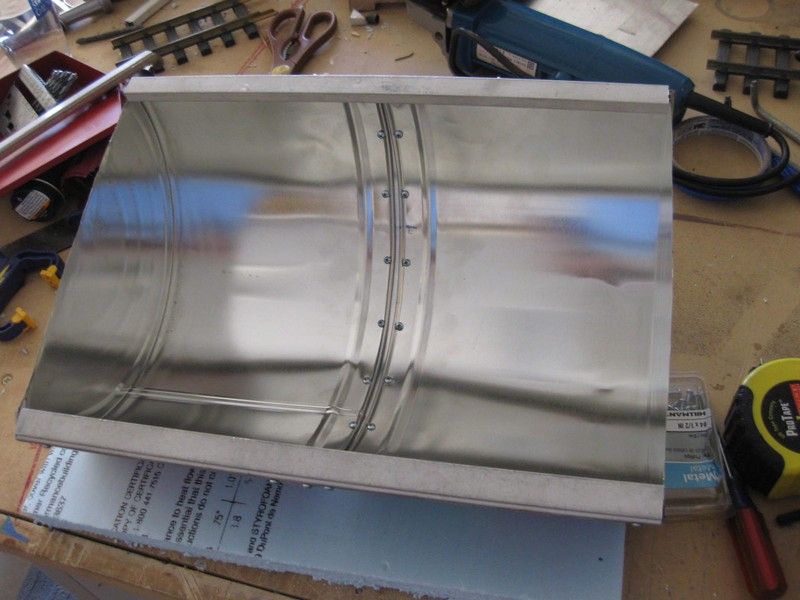
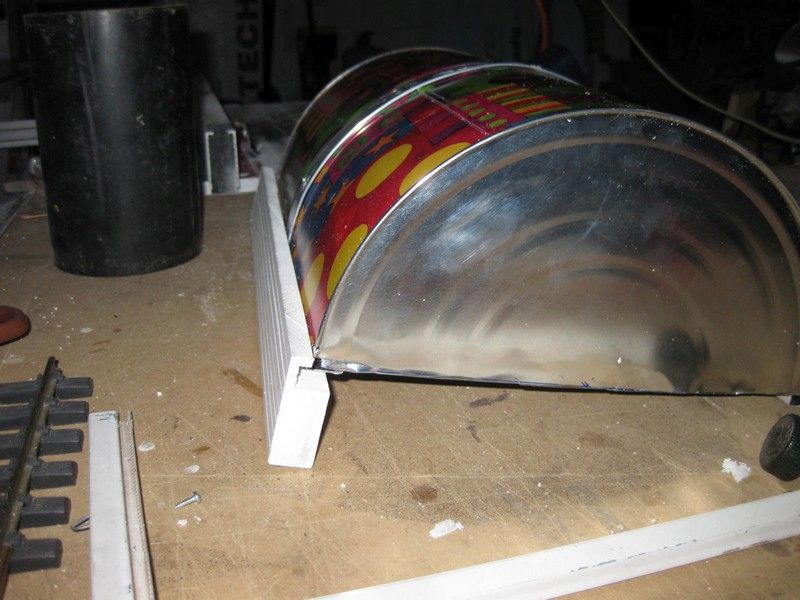
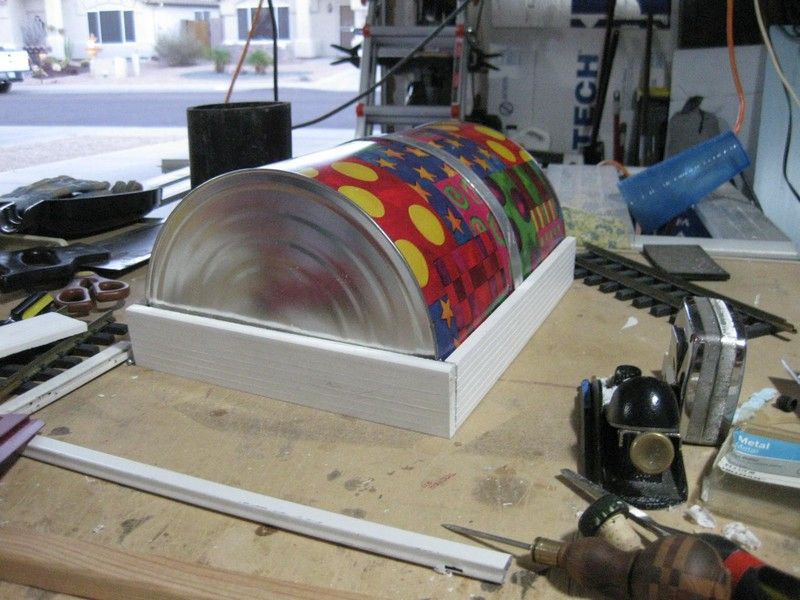
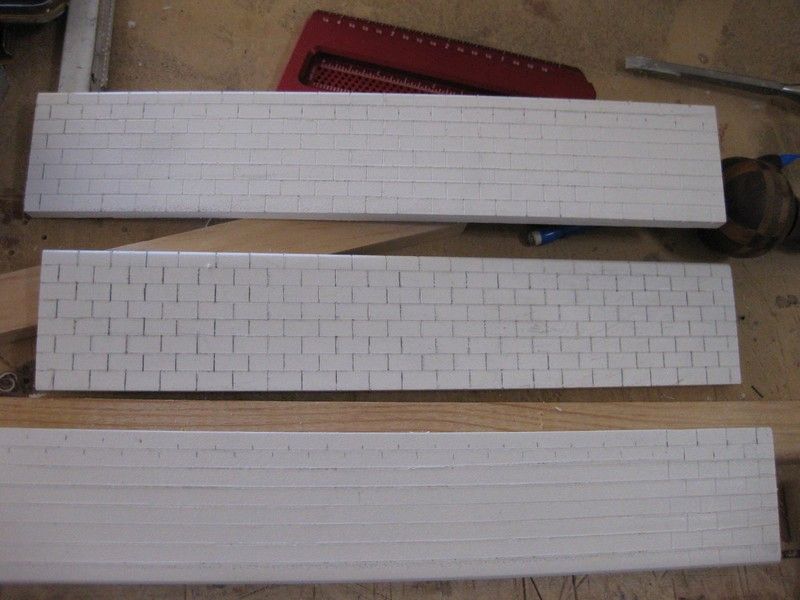
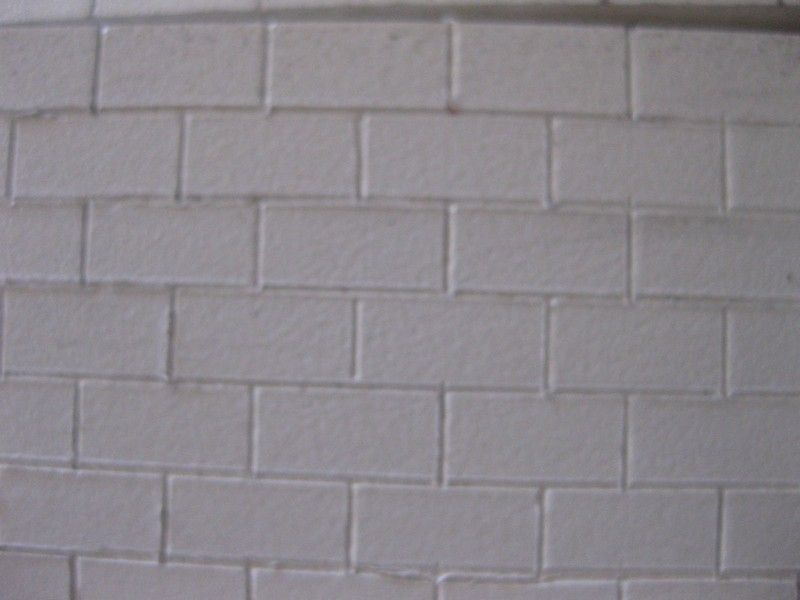
Idea is to cut the can in half top to bottom, connect the 2 pieces to make one long Hut, then add some Aztek plastic “wood” made to look like brick to the bottom to give it a little more height, then use wood for the front and leave the back side alone. Most Quonset huts are corrugated, but I may be able to find something to give it the look, if not , then these are rare smooth sided huts from a supplier that went out of business.

Cool build.

Pete, that will be the most colorful Quonset hut we have seen. I think this will be a fun build to watch.

btw: Thanks for introducing us to Babs. I know some folks don’t get the bond we have with our four legged friends but I can certainly appreciate it. Although they are with us a short period of time, the joy and memories they provide are with us forever.

I’m so glad somebody decided to do a quonset hut…when I was a kid and my dad took us skiing up in Breckenridge, there was a quonset hut that was actually a movie house, double feature picture shows and all, for after skiing.

Day #1, NO BLOOD!, considering I am working with a lot of sharp edges and sheet metal, I consider today a complete win! First off clean a spot to work. With minimal skills and tools and algebra knowledge, I figured out how to get my cuts approximately 90* from each other and cut the can almost perfectly in to 2 pieces.

I cut it using tin snips and other tools I had on hand, but 99% was the snips. I used a piece of window screen framing to attach the 2 sides together, and I liked how well it worked I cut 2 full length pieces to give the project some much needed rigidity. Now how to hide the resulting center where everything meets.

Off to the True Value store for some strip aluminum, a 1"x1/16" and a 1/2"x1/16" strip seemed to work good to cover and still look reasonably close to what it might have looked like. I drilled holes and used sheet metal screws I had for my bridge build to connect things . I ran the screws from the back side then using a hacksaw trimmed the tips off flush with the strips.

I think I have figured out how I will hide the bottom screw heads in the next steps of the build. One of these days I will learn to make these holes in an even orderly manner so as to not offend my "these are off from the others " OCD, which I notice after I get something done, never before I do it!

I must point out this great tape measure I received for Christmas a few years ago on the bottom right, its a center finding tape measure, with one side half scale to the normal side, I really like this and it has helped me a LOT, because i am lousy at fractions. I was joking one day with someone as I was helping and gave them a measurement of 13 and 3 lines past a half inch, and they will never let that go if I have a tape measure in my hand

And just for fun a picture of the inside of the can and probably the last view of it. Next is to decide if I am going to cut off one factory end and inset it like most Quonset Huts are, or just face it in wood and move on from there. Also need to decide if the windows are actually built or just implied.

One day down , who knows how many actual work days I will have before this is over. I am liking this build so far! I spent $13.00 on the 2 6’ pieces of aluminum, but may only use some of it. The 1" strip will be all off that strip , so I will do the math and get a total tomorrow. I think I need a piece of trim board for the brick work to make the Hut the height I want out of it, its only 5" tall and I would like 6 1/2" at least. That is why its sitting on the foam board piece to se how much I need to raise it to look right

Very Quonset-ty! Glad you still have all your parts.

No blood … well done. I believe this will be a conversation piece once out on the layout.

I am liking the “urban camouflage” look, so I may not paint it.

Pete Lassen said:

I am liking the “urban camouflage” look, so I may not paint it.

Nooooooo, don’t paint it. Lots of character just the way it is.

BTW: My Qhut I own has corrugated siding on the front and back… But it runs horizontal. Easy to finish the ends that way… It too sets up on a concrete base about 24-30" tall… That allows you to get closer to the sloped sides before hitting your head on the roof…

I’m all for leaving the paint, Pete! Maybe you could “hippy up” the whole project, with a VW bus outside doing a stores run for the local commune!

Its not worth doing if you dont bleed on it

I agree dont paint it. I like the idea of making it a hippie hide out

Looking good my friend.

Now we’re getting somewhere. Nice cuts, the geometry looks good (I fought with the diameters and quandrants and angles etc also!), and the seam in the middle you placed in the middle looks great. I never thought of rivets…if I had maybe I wouldn’t have already burned my finger with the soldering iron…but only once!

My vote is to paint it, something Navy like, a Navy theme, but that’s just me. (I’m partial to the Navy; my mom and my oldest son served in the Navy.)

Pete Lassen said:

I am liking the “urban camouflage” look, so I may not paint it.

It does have a folksy, the Beatles in their Yellow Submarine vibe to it. (https://www.largescalecentral.com/externals/tinymce/plugins/emoticons/img/smiley-laughing.gif)I say keep it. Neat build.

Well got home at a reasonable hour, the Boss is at grandsons baseball game across town, so I got to do a little work on the so called “Hippy Hut”. Stopped at my big “Blue” Box Home center, got a piece of plastic trim board, $23.00 for a 8 foot piece, used 3 feet =$8.75 towards my $30.00. I cut the trim board down and put a rabbet in it to hide the screws on the bottom sides, and the trim board will give the Hut about 2" more height, to almost 14 scale feet tall at the top.

This is one side fitted to the hut. rabbet hides the bottom screws and has been scribed.

Using my marking tool from Woodpeckers and an AWESOME awl a good friend surprised me with, I scribed lines on the trim board. I made the horizontal lines , but now am at a quandary, should I make the trim board represent cinder blocks or a wood looking base for the Hut

here is a look at 3 sides of the Hut, i have a club meeting tomorrow, so this may be all the work this weekend I get to do

After standing back and studying it for a bit, while enjoying a cold barley pop, I think I will scribe the vertical lines to represent block wall to hold everything in place. More to come, the entrance on the other side needs a lot of work.

That’s looking good, Pete. I like the block better than the wood idea. Your friend did a fine job on the awl. Nice gift.

Dan he is a great guy, and has too many hobbies , but really surprised me with this work of art, I like the bullet casing used as the ferrule.

The casing is what caught my eye. I knew then that someone knew what they were doing and took pride in their work. Nice to have folks like that for friends.

Well, didn’t have a lot of free time today, so didn’t get things as far along as I had hoped for, but still some progress is good progress.

About halfway to getting all the block walls scribed, Devon’s awl is doing a good job in making the mortar lines, and the marking gauge is making the lines nice and square. first time I did brick work like this I used a woodworking chisel, and this is so much easier. But wow having to press down to get good lines is murder on my fingers

All in all it’s starting to look like my napkin, maybe in the morning if nothing else is going on I can get the rest of the walls done and start working on cladding the ends with wood, or whatever I can come up with to make them look decent. Must say this is moving along at a decent pace for once… I just jinxed myself , as my wife just yelled as she is looking over my shoulder. too late now!

Fine job on the block, Pete. I can even see left over mortar in a few of the joints (https://www.largescalecentral.com/externals/tinymce/plugins/emoticons/img/smiley-wink.gif)