Large Scale Central

MIK 2019 Craig Townsend Build

Devon Sinsley said:

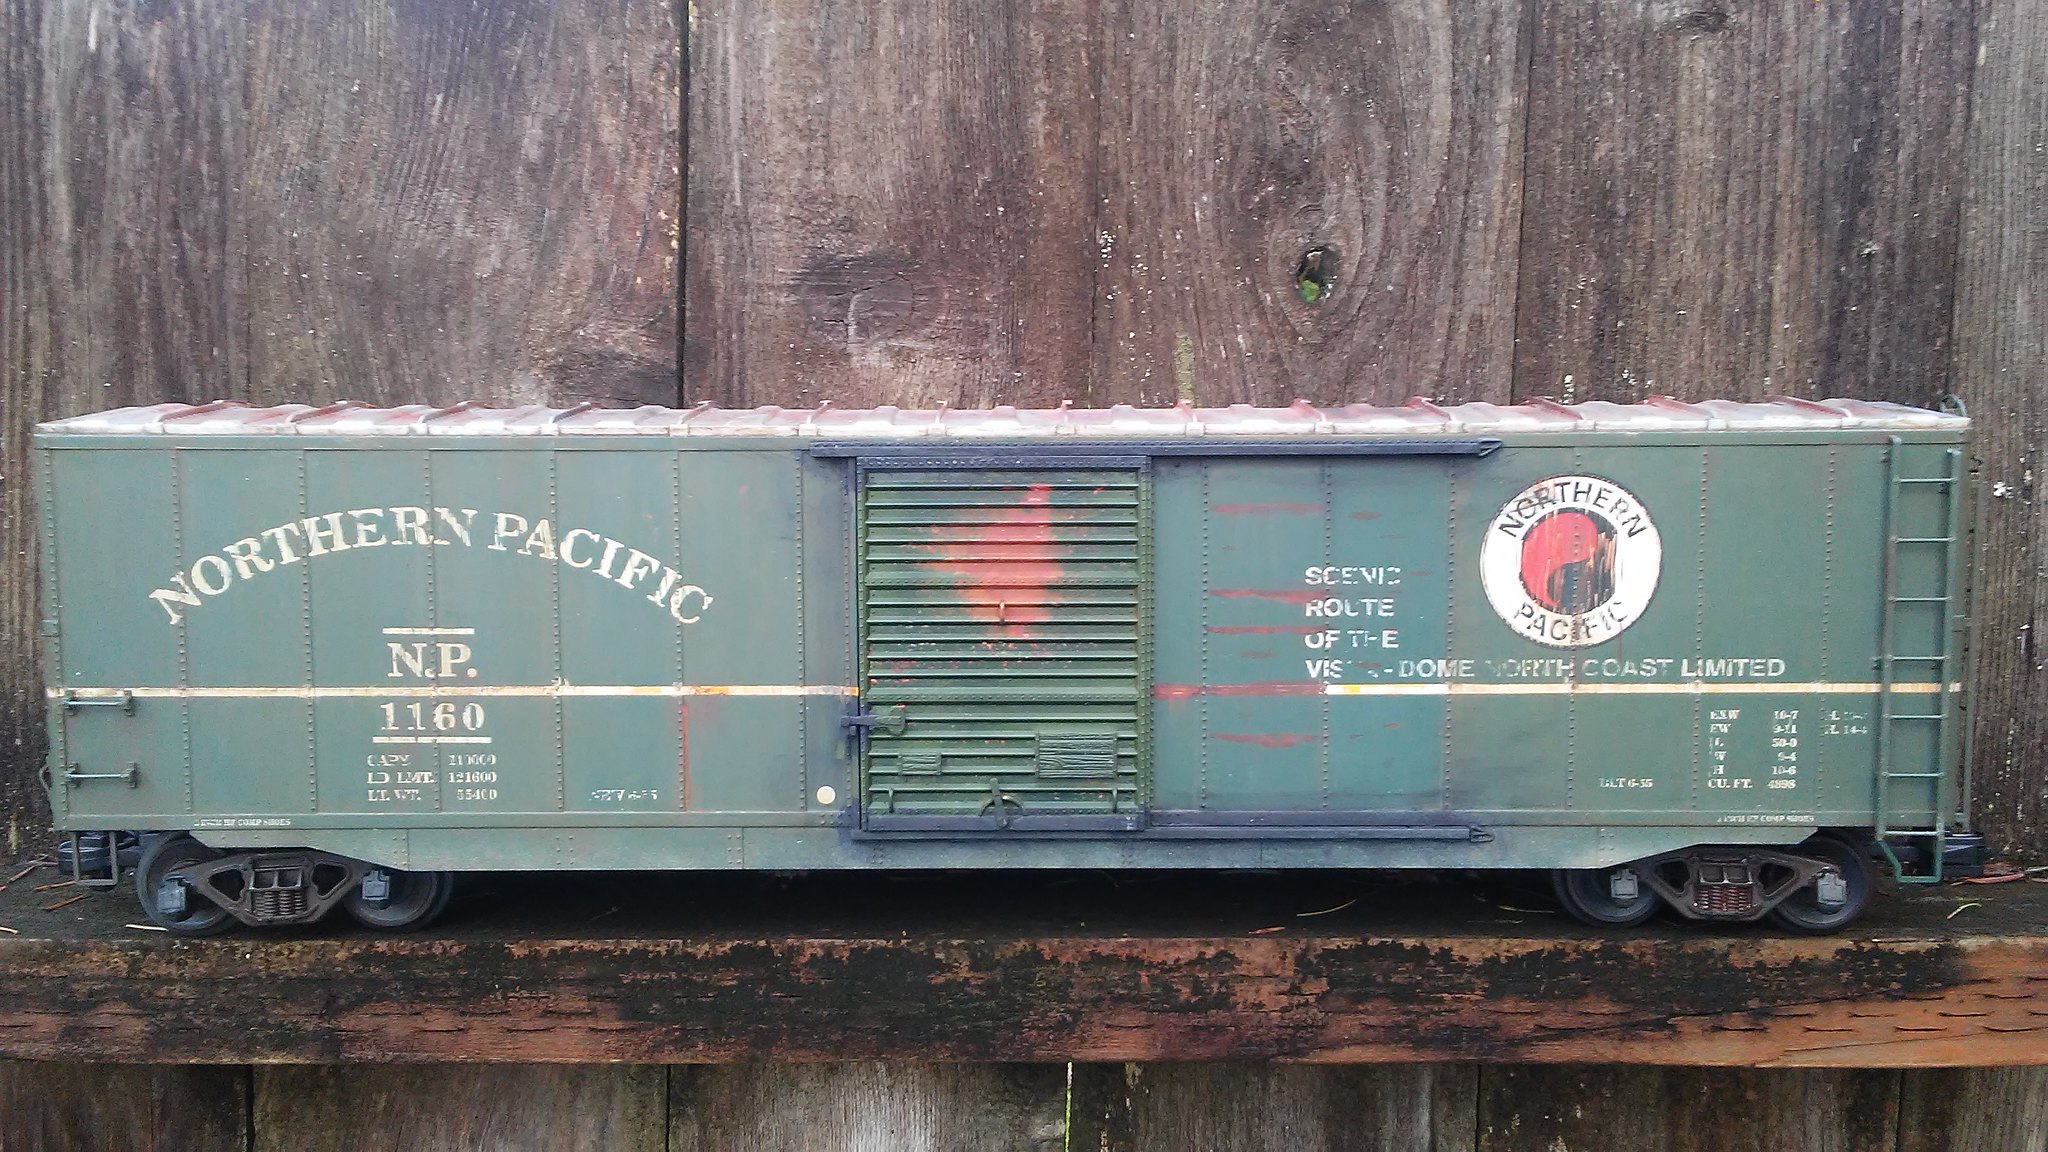
Boy that came out really good. The first photo looked like someone puked confetti on it and I was wondering where you were headed.

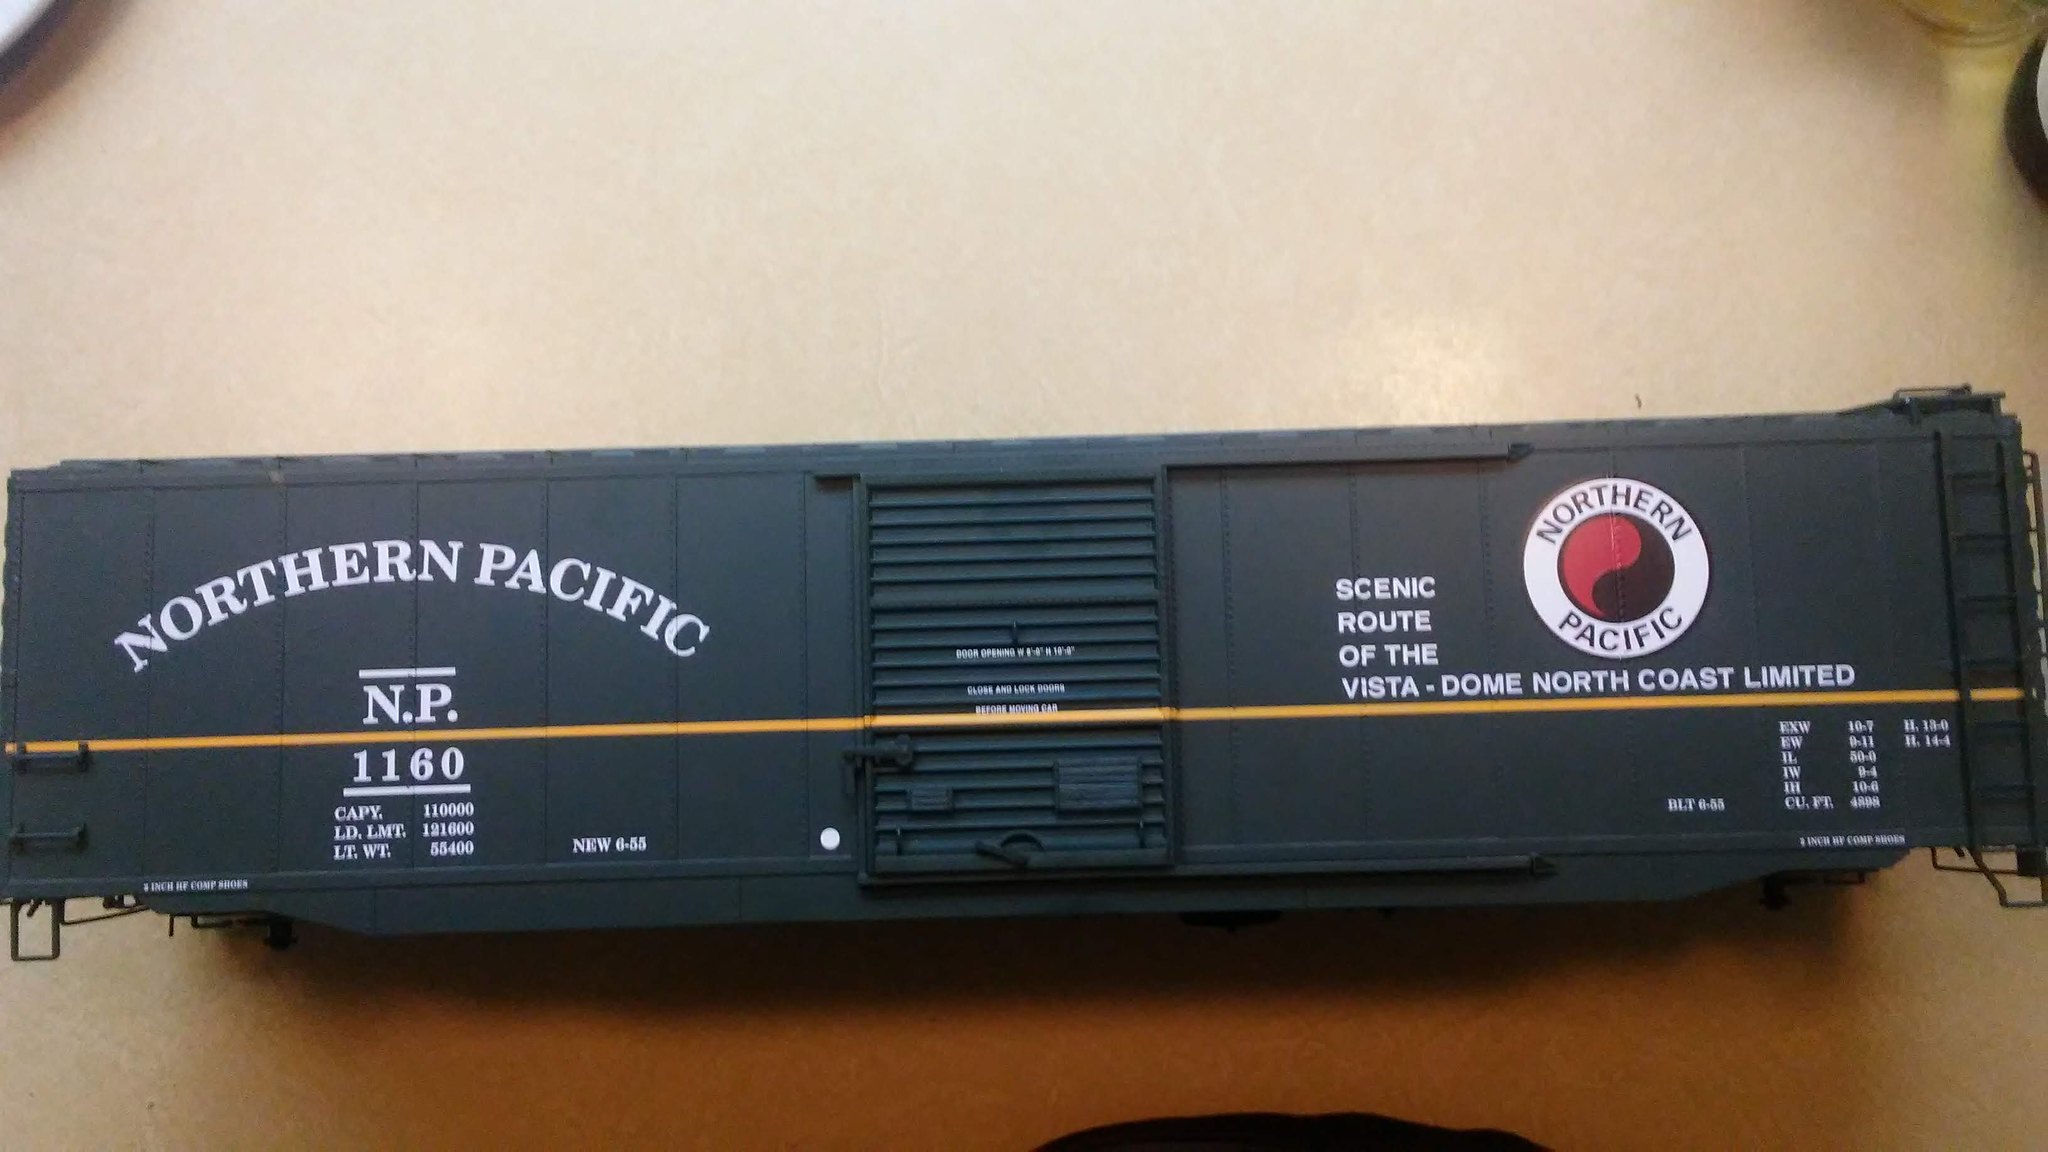
I probably used way to much oil paints, but the general idea is there. It’s hard enough doing this on a 1/29 scale boxcar, I can’t imagine trying to do this on a 1/32 scale tank. If you want to see good people using this method, search on Youtube for oil dot filter weathering. Amazing methods, I’m just making happy little mistakes.

You really want to be wowed … go here : http://theweatheringshop.com/home.html

Sean McGillicuddy said:

You really want to be wowed … go here : http://theweatheringshop.com/home.html

Yep. That’s where I’ve been stealing my ideas.

I also got some idea’s there … I think some of my question are there still …Hmmm I should revisit .

Photo dump/weathering update. Progress will be slowed by a trip to Spokane over MLK weekend.

Underframe got a coat of Rustoleum Camo Brown. Same stuff I use for rail.

While I had the underframe out, I grabbed some acrylics and painted the wood interior. Looks a lot better than flat black. How often the doors will be actually open, who knows, but if they are opened, the floor at least has some texture. I may end up doing something similar in the interior of the boxcar.

Next up trucks. These also got the Camo Brown treatment, followed by some oily black around the journals, and some weathering powders. I don’t think the powders are worth the effort as they disappear with the clear coat.

Here’s the status of the box as of now. Door was removed, paint stripped, rust added, salt, new layer of paint added. I added a oily wash/black powders to the door guides top/bottom.

Otherside

Just for reference here is the unweathered model

As of now

Craig our club is meeting Sat. It’s in Hayden, but Steve F is going, if interested.

Craig, great job. I’m following along and taking notes. Weathering is most definitely my weakness.

Devon Sinsley said:

Craig our club is meeting Sat. It’s in Hayden, but Steve F is going, if interested.

It would be nice, but my sister might kill me if I go wander off to play trains. The wife too… But someday when we come over, I will have to plan a trip to come check out the layouts on this side of the state.

Dan Hilyer said:

Craig, great job. I’m following along and taking notes. Weathering is most definitely my weakness.

I look like a amateur compared to the rust bucket guys. But I’m learning. The biggest thing is to follow a prototype photo. I’m way over board in weathering this car.

Craig Townsend said:

Dan Hilyer said:

Craig, great job. I’m following along and taking notes. Weathering is most definitely my weakness.

I look like a amateur compared to the rust bucket guys. But I’m learning. The biggest thing is to follow a prototype photo. I’m way over board in weathering this car.

Craig, that is my biggest problem, I go way overboard when I’m weathering. I just keep adding and adding until I step back and it just looks like finger painting. But I’ll keep worling at it and learning from folks like your self. Again, thanks for sharing your techniques with us.

Time for another photo dump.

More weathering progress. Added some rust streaking, oily black around the boxcar door guides, mud/earth splatter on the ends from the wheels. A little bit of mud splatter on the lower sill as well. It needs a wash to start blending it all together. I have found one thing, I like the look and method of the chipping for the rust. It looks way better than a light coat of rust over the top of paint. This scale you can see the 3D effect of layering paint on top of rust as the real thing would rust. Doing it the other way around looks like crap (or maybe that’s just me and my lack of rusting skills). The methods of weathering in HO scale don’t always translate good to large scale. But overall it’s a lot better than the shiny factory paint.

Craig that is looking really good.

Not perfect by any means, but it’s a start with weathering. Knocking the shine off factory models with a flat coat even helps. I should set a goal of lightly weathering 1 piece of equipment a month… Or not.

Outside test shot. Not bad, but some reworking might be needed.

Compare the two photos. Inside lighting vs. outdoor light.

It needs a bullet hole

Devon Sinsley said:

It needs a bullet hole

Ha ha. Actually that door might get stripped and redone. I don’t like the way it looks. The rust is one dimension. Needs to be 3D.

I think that is a good move. Your other rust is more mute, more subtle; then all of a sudden there is a big orange spot on the door. If I may its not the size its the color. It more pronounced. Maybe because its bigger; but whatever the reason its more in your face than the rest of your rust. Maybe the salt/hairspray crackle? I don’t know. But what i do know is you will get it where you like it, I know that about you. It will bug you until you do.

The funny thing is the rust color that I used on the roof and the door is the exact same color, but it looks weird. The rust needs to be more circular in shape (comes when a circular logo fell off the door).

Kind of hard to see in this photo, but you can see how it is shaped.

I really should try and punch out a nice circle out of styrene and do something along the lines of this. But I’m not sure where/how I could do the D/F logo.

The only thing that I can think of that would make it look different is because I only did one layer of rust. One the roof, I sprayed a couple of different colors (I think a dark rust and a light rust), then salted the top color.

You’ll get it and it will be perfect