Large Scale Central

Leeds Hill RR Equipment

Ha! The left-most looks identical, just much taller! I took my dimensions from one of the posts that still stands along the old ROW here in town. (There are at least 5 whistle posts from the old Central Mass RR along the rail trail in Hadley. Someone even repainted them semi-recently.)

I really like the look of the yard limit sign, too.

1 Like

Nice job.

Maybe some robotic people pedaling?

Many moons ago, there were “stompers” - little electric trucks that just happened to be the right size for gauge-1 track.

This is my speeder on a stomper with similar wheels to yours. It has 1 AA battery, and it ran twice around Roger’s huge RGS layout, including the 3% hills.

Casey Jones

For your little beast, you need a lunch pail or similar to hide a miniature motor/gearbox. You can buy these on eBay or Aliexpress. The gear ratio is the problem - mine was 40:1 so it was very slow. You then need another box (safety gear?) to hide the battery. You can get small 3.7V Lithium 16340 batteries, which are 1/2 the size of an 18650: 16mm x 34mm. 34mm will easily fit between the wheels.

Sometimes an object one would normally throw away will work for the model railroad. I cannot find the photo at the moment, but I once converted the box that held mechanical pencil leads into a credible model of a concrete milepost.

Regards, David Meashey

1 Like

The left one is yours, I just stretched it vertically and scaled it up about 15 percent.

I’m not quite happy with the yard limit sign yet, but getting there…

if you want some more scale looking wheels we should talk i made this pushcart model a few years ago and even sold a few.

these can be customized to meet you needs an be printed i a tough resin.

Al P.

*A Special News Report *
This press release was distributed yesterday directly from the Leeds Hill Railroad.

Yesterday, the Leeds Hill Railroad purchased two diesel rail cars from the Rockwall Canyon Railroad (@RockwallCanyon ) of New Hampshire. Both of the cars are lettered for the Boston & Maine. Their origin was not disclosed, but the owner of the RC confirmed that the cars are 23 years old and were produced by Aristo-Craft. The engines are in amazing condition after being used for so long. The lettering and paint looks pristine. The cars are modified from their factory release. Both have had their trucks lowered to make accessibility easier for passengers, especially where platforms are not at door height.

Unfortunately, the Leeds Hill Railroad does not currently have trackage to support the running of these engines. The purchase was a great opportunity for the railroad, but it means that we have a lot of work ahead of us. Our plan is to expand passenger service on our Northampton Street Railway with these cars. It is possible that the addition of them will allow us to double our daily capacity, and give poor Toby a break from time to time. The first step is to get the lead car, number 6112, operational. That is the powered car. The other, number 6133, is a dummy and the pair will always be coupled together. 6112 will need new internal controls before tests can begin. Then, we will consider what needs to be done to the track of the Northampton Street Railway to make the tracks operable for these new cars.

This project may take quite a while, since we also have the PW switcher currently undergoing a rebuild. After that, we have decided that our Sandy River forney will also need new internal controls. So, these cars may be in storage for a bit before you see them out on the rails.

This photo was distributed along with the press release.

4 Likes

Okay, @manimal , the time has finally arrived. I have begun painting…

An Addition to the LHRR

I picked up an Ozark Miniatures model kit at a hobby shop in Salem recently. It took me a while, but it is now complete! The sun was a bit bright on this loop of track, so some of the details are washed out. It looks pretty good, for my first time building a kit and doing any weathering at all. The chain is sprayed (repeatedly) with different colors to age it and it’s glued to the frame.

I did make one modification to the kit. It came with brass axles, which I replaced with styrene so it won’t short out any powered track.

6 Likes

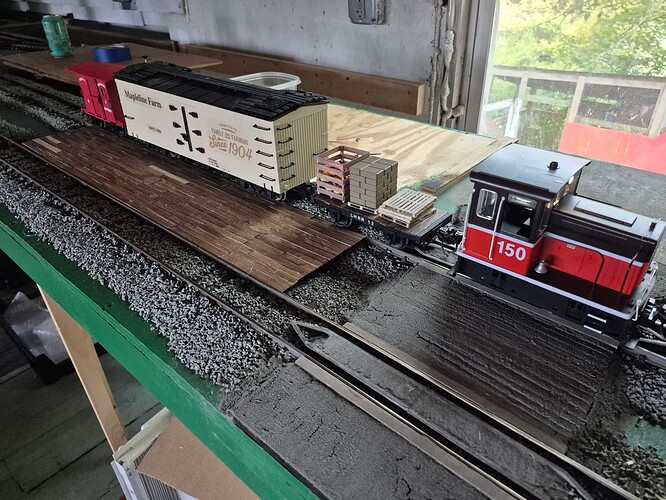
Today I managed to finally finish my 25-ton switcher! Thanks to, @RGSNH Al, I got the last couple of railings I was missing (read: that I broke) and I finally got them painted & installed. It is a model of Providence & Worcester’s #150, which the Seashore Trolley Museum now owns.

This car is completely scratch-built. It is a model of Mosum River Railroad’s #8 car, which is also a part of the Seashore Museum’s collection. I designed & 3D printed the chassis, the windows, and grab rails. The rest is plywood, popsicle sticks, and styrene. I am in the process of getting decals from Del (G Scale Graphics) for this car.
The process for this car is documented on my website.

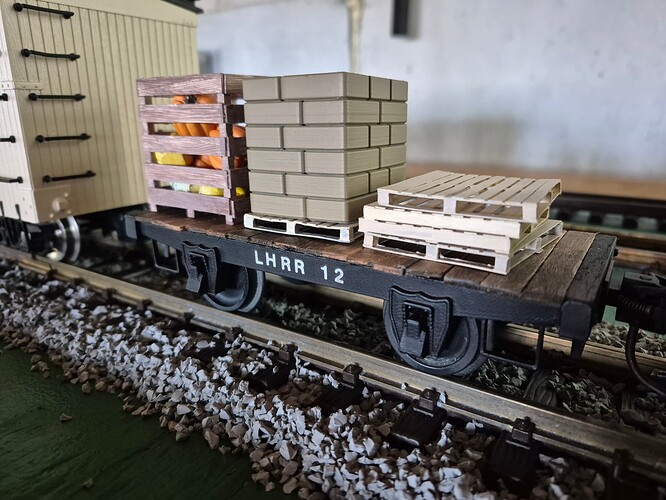
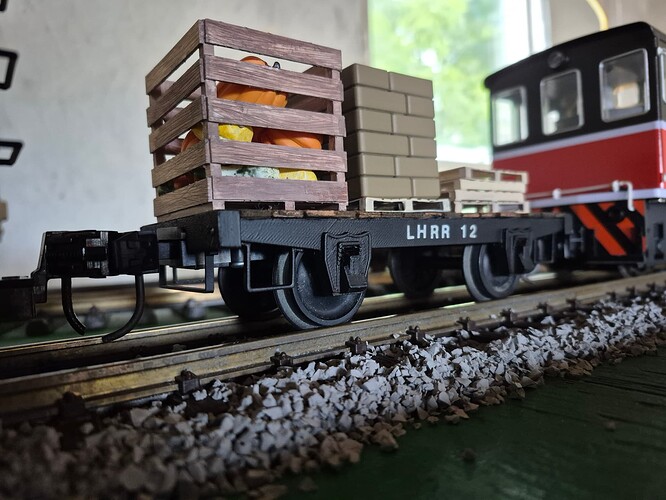
I also made this flatbed. It was actually a prototype for the MRRRCo #8. A stained pop-stick deck will play host to all of my fun little details I’ve been 3D printing over the last several months. Notes from this car are on the same page of my site.

More pics to come!

4 Likes

Great work, John! I’m looking forward to seeing your flat car load(s).

Looking good! That flat looks very similar to some 4 wheel flats the EBTF purchased from an industrial user. They will go into work train service allowing the historic flats to get a rest.

Here you go, Cliff! I finally took a couple shots the other day.


Oh, that’s awesome! I love when things work out like that. I just designed it based on the frame of my MRRRCo model sans body.

EDIT: P.S. This is the first time I’ve posted a photo publically of the progress of my modules since finishijg the level crossing! I am quite happy with it. The platform, too.

Excellent loads, John! All printed, right?

How did you do the wood grain on the pumpkin crate, wire brush, or…?

The crossing and platform look great.

1 Like

Thanks so much, Cliff!
The pallets and crate are styrene. I used my xacto knife for the grain on the crate boards and a coarse sand paper on the pallets. The pumpkins are store-bought, but the flour load is printed.

They all look great and very realistic, except I question the stones/bricks in the middle. The wight would topple over a fork lift, surely?

Those are bags of flour, so I’d think the pallet wouldnt weigh as much as brick. I’ve gotta decal them still…

Oops - sorry. :roll_eyes: :roll_eyes:

John, you got me thinking about whether there’s a way to model flour or other bagged product using actual bags. The only thought that comes to mind is getting cheap off-brand lantern mantles and filling them with plaster. But, I don’t see any that are all white, and still cheap. You can get empty fabric tea bags but they’re all too big.

I’m interested because of wanting to model (someday) sacks of coal and ore, because that was often how it got shipped in the Comstock area.

[edit] Hmm, tubular finger bandages might work. OK, I’ll stop!

Cliff and All;

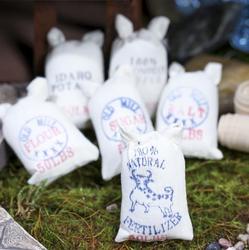
Fabric/Craft shops used to feature small Feed/Flour/Fertilizer sacks for dollhouse and miniature diorama enthusiasts. Oddly, those were about right for our scales. I still have many of them, but no photos - yet. The next time SWMBO drags you into that kind of shop, take a look around - You just may find some. OBTW, the 1/2-inch dollhouse items work well for many of our scales.

Regards, David Meashey