Large Scale Central

Landscape with River

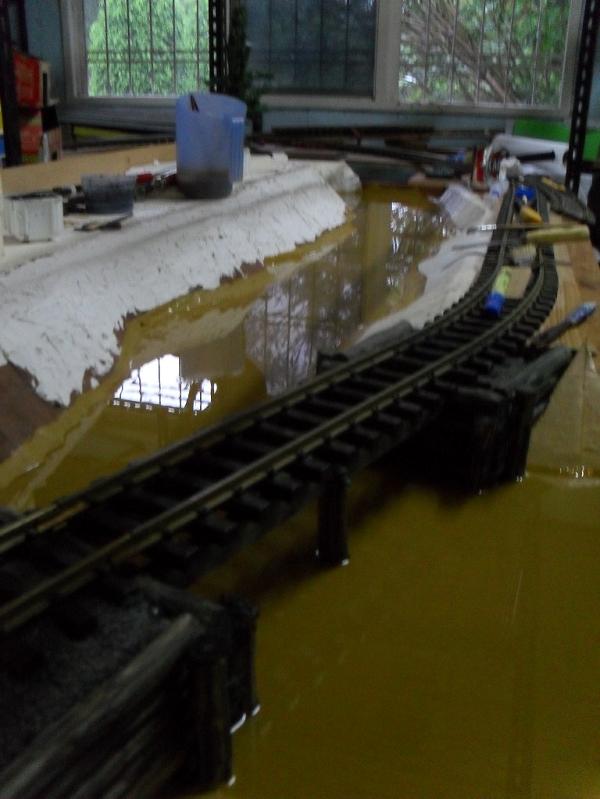
in my thread about a small bridge ( http://www.largescalecentral.com/forums/topic/18843/small-rustic-bridge/view/page/1](http://www.largescalecentral.com/forums/topic/18843/small-rustic-bridge/view/page/1 ) , i mentioned, that it will be part of a landscape, that shows track, a river and a forest.

here we go.

even knowing, that most modellers do first everything else, before pouring water - i choose, to do it the other way around. (i always tend to attack the strongest challenge first)

avayability and prohibitive prices keep me away from the known waterproducts for modellers.

(i will not mention everywhere the long waiting times between the different steps. rest assurerd, that my patience was/is challenged very hard. that stuff really begs to stick a finger into it, to see if it is dry already! by waiting i am talking days, not hours…)

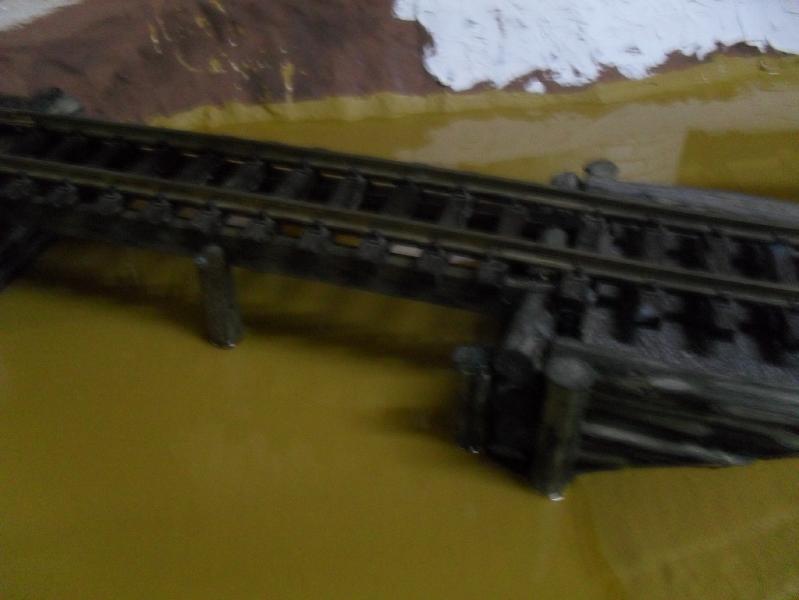
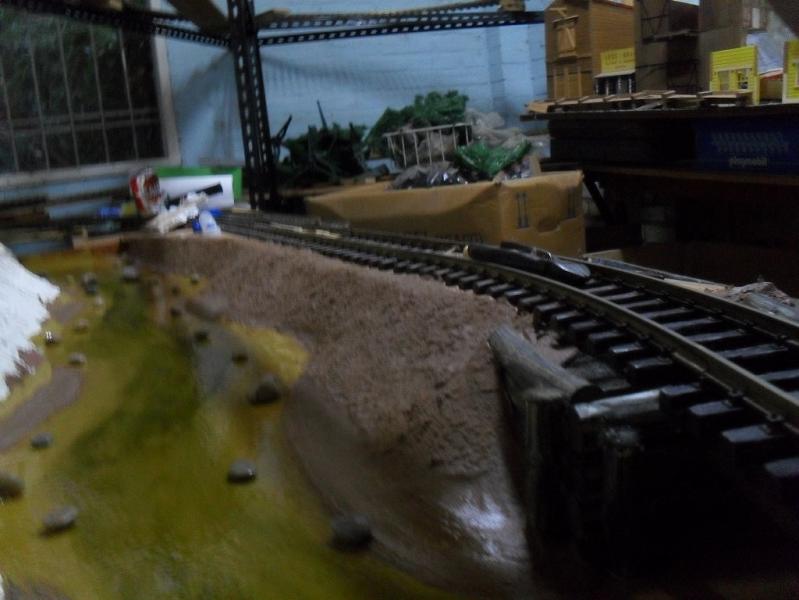
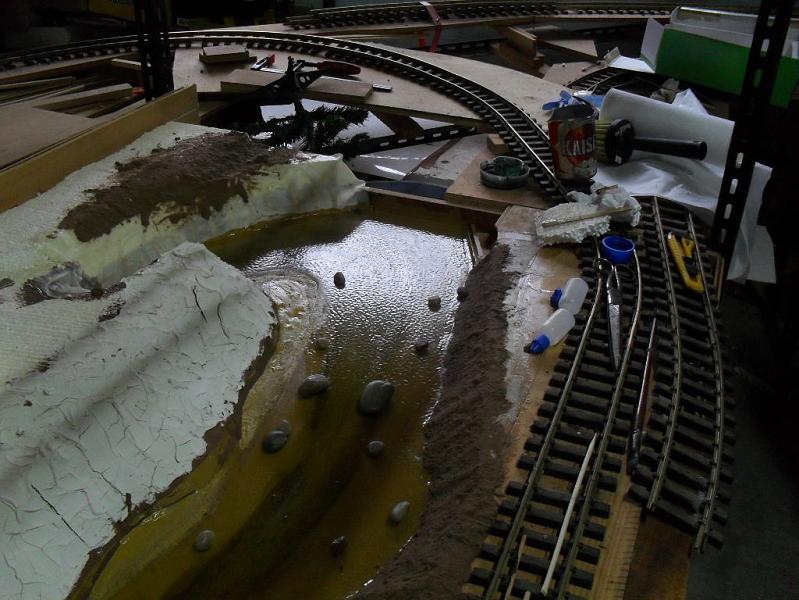
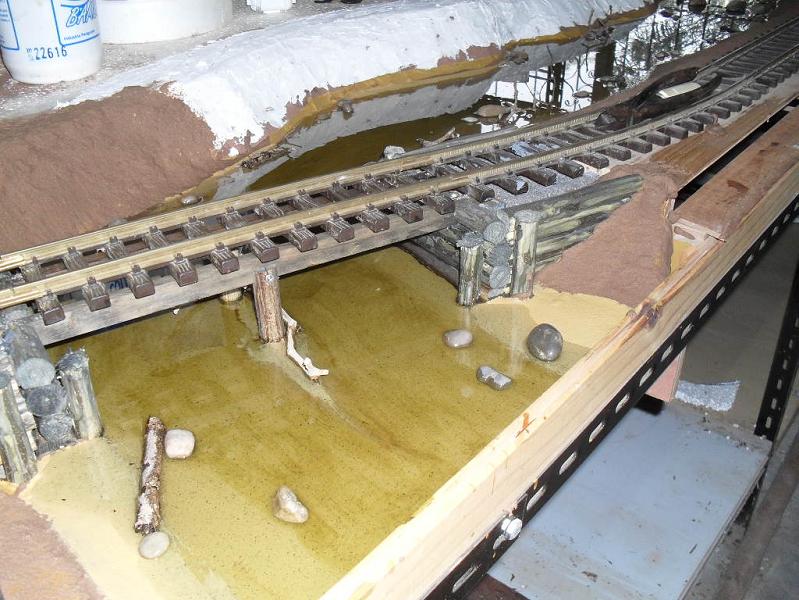
the base is nothing more, than thin plywood (1/4" - 6mm), nailed and glued to the structure (1’ 8" - 500mm apart)

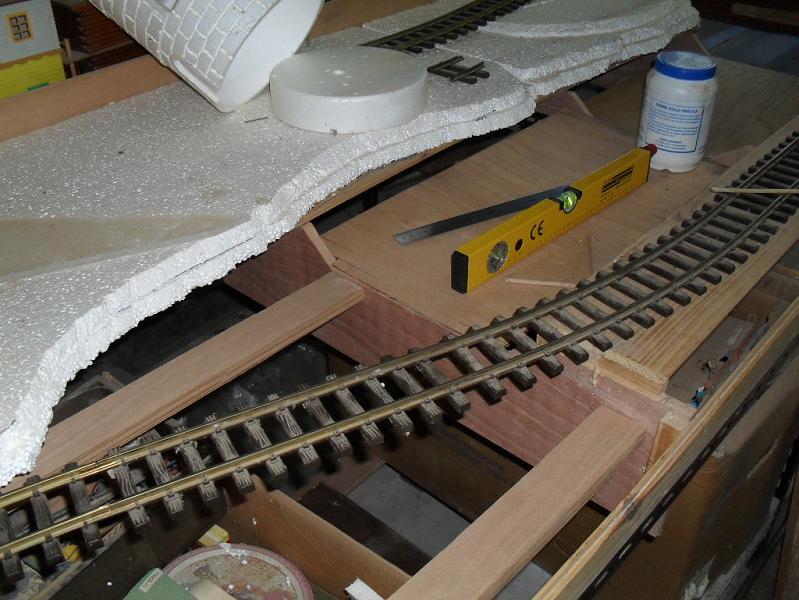
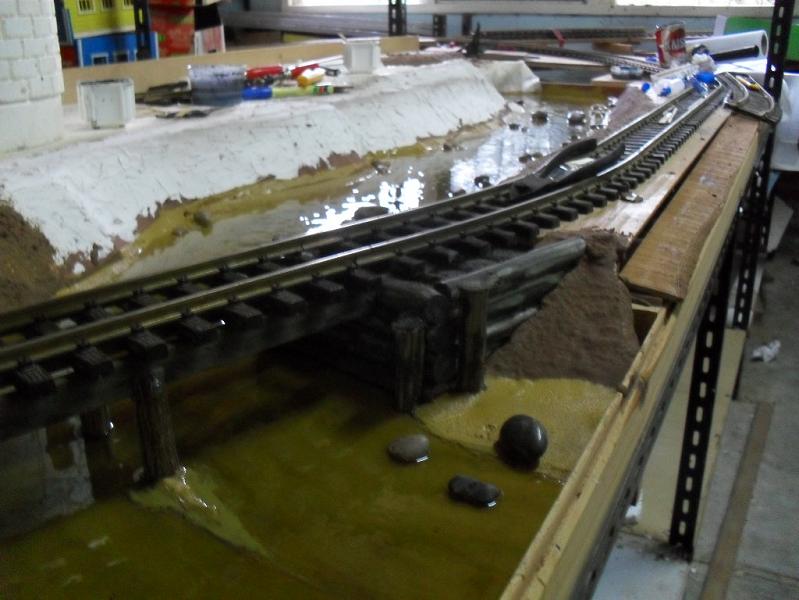
the structure for the riverbanks is made from glued down coffeestirrers.

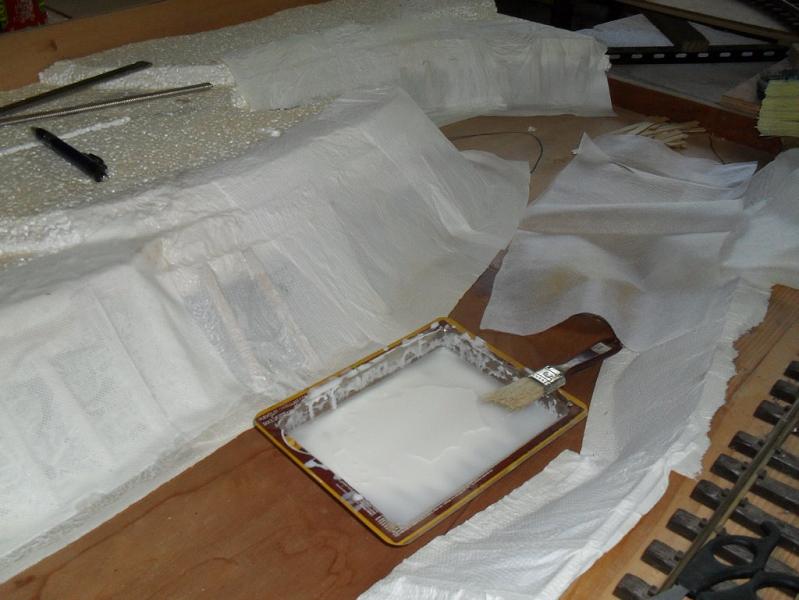
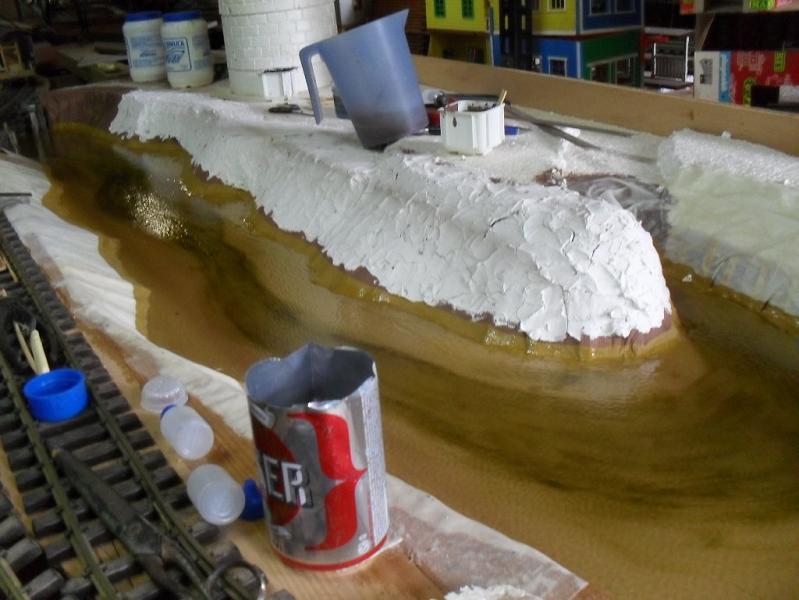
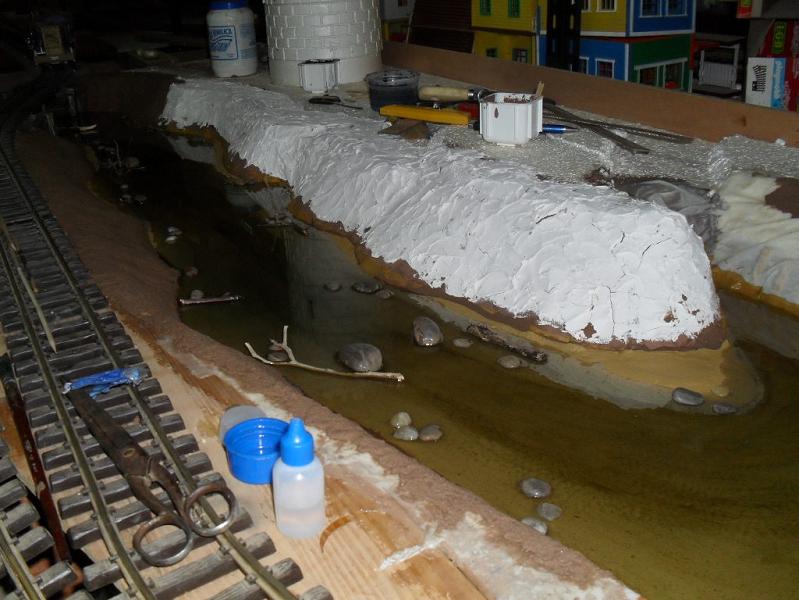
at the covering i experimented. part is from kichen papertowels, part from cheap, sintetic, throwaway party-tablecloth. both well saturated with white glue, and painted over several times with more glue.

(i noticed no difference in the usability of the two materials. kitchen towels are easier to work, because i don’t need scissors)

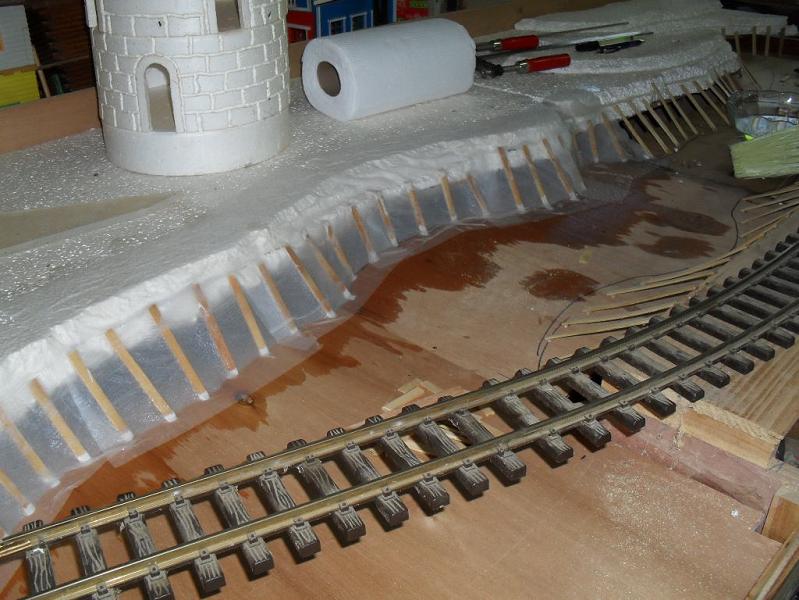
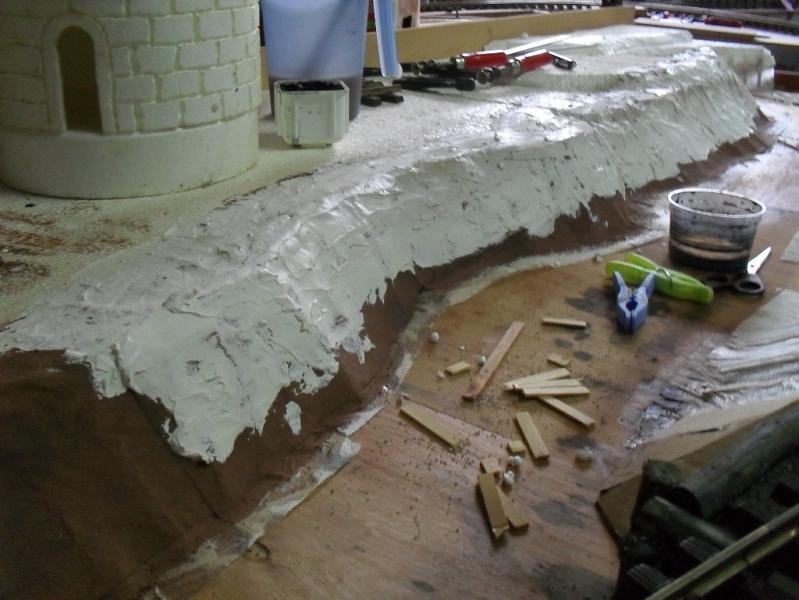
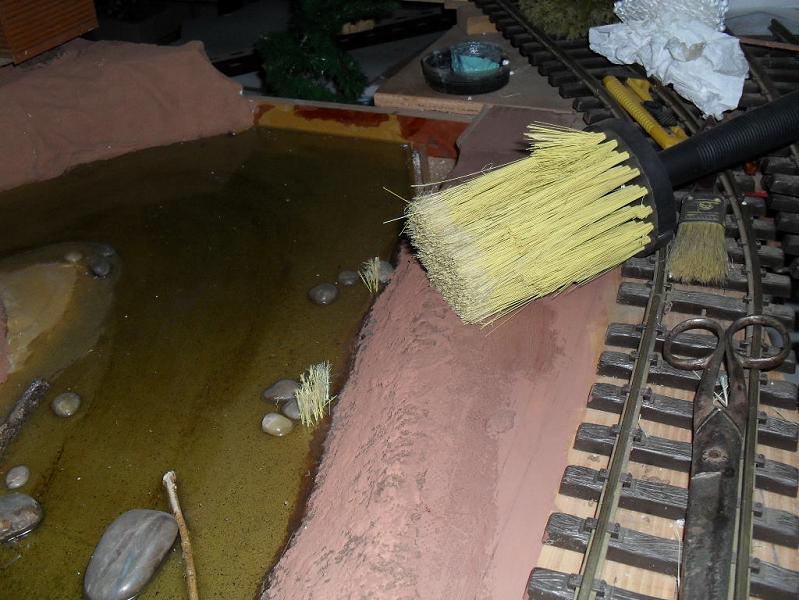
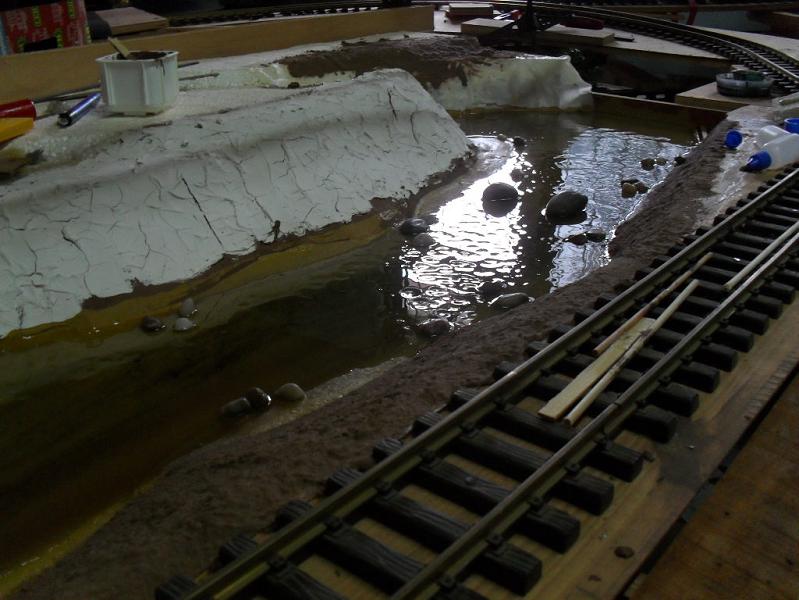
after closing the gaps between the plywood pieces, i painted the whole riverbed in a light brown/beige.

finally i started to try out the clear resin.

i had used that stuff about 20 years ago for repairs of our pool and some watertanks, that got dissolved by momentary application of lead.

in my memory that stuff got hard so quick, that between mixing and drying there was not even time to light a cigarette.

so i first lit my cigarette and then mixed half a beercan of this stuff.

i poured it in a less visible part of the riverbed.

and - after half an hour it was still wet and creeping.

made another half can, more hardener, and poured it.

after another hour and a lot of expressions, that i can’t repeat here, without getting Bob very busy, i mixed the rest of the hardener with the rest of the quart of resin and poured it.

it crept… and crept… finally the whole riverbed was covered with the stuff.

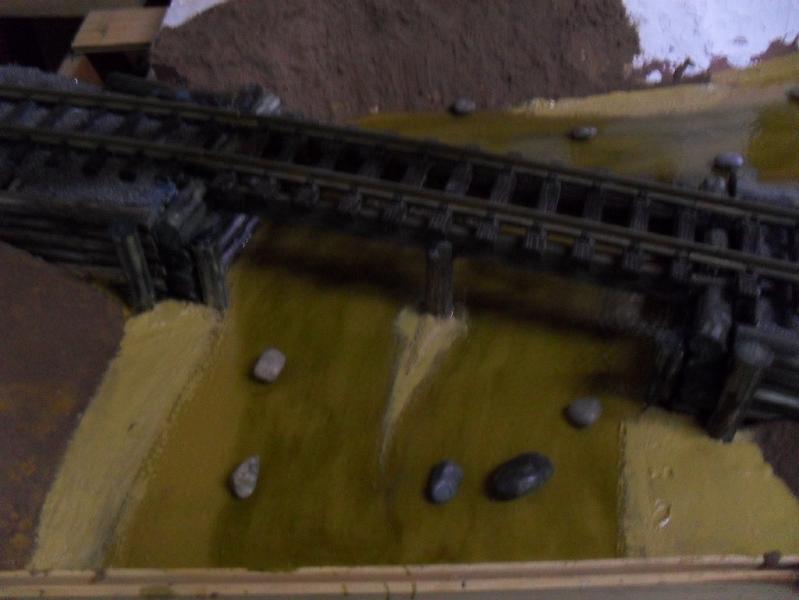
thickness about 1/16" or 1.5mm

(i lost about a shotglass’ worth of resin at a leakage, before it clogged)

then i did the wisest thing, i could think of. i went to watch a dozen or so episodes of stargate atlantis, played some computergames and… in short, i did not go back to the disaster zone for two days.

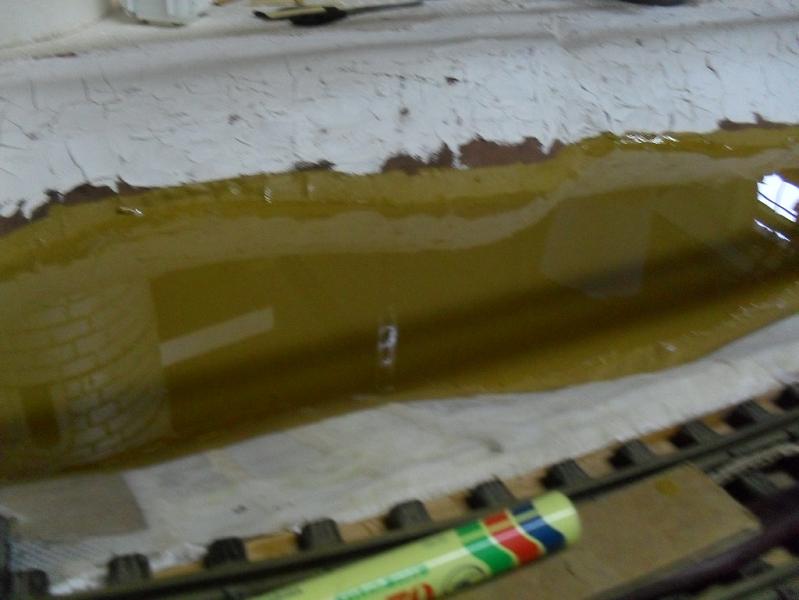
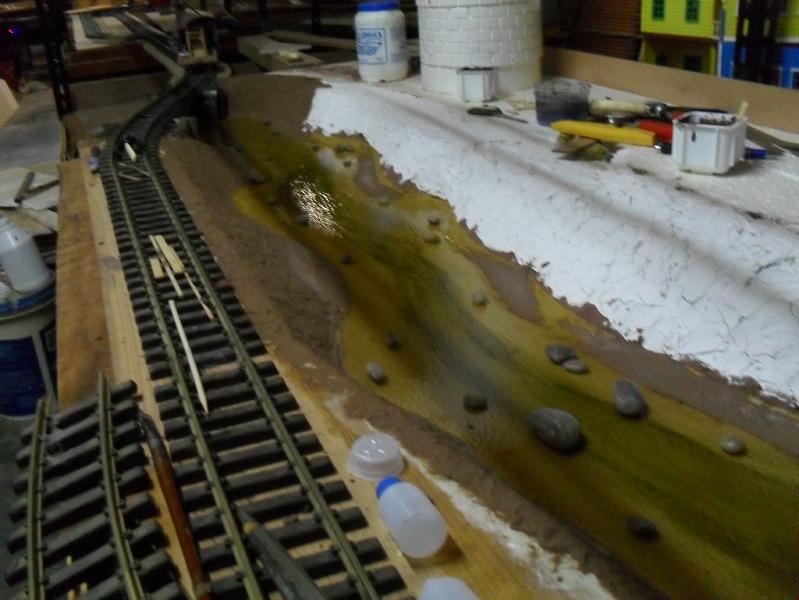
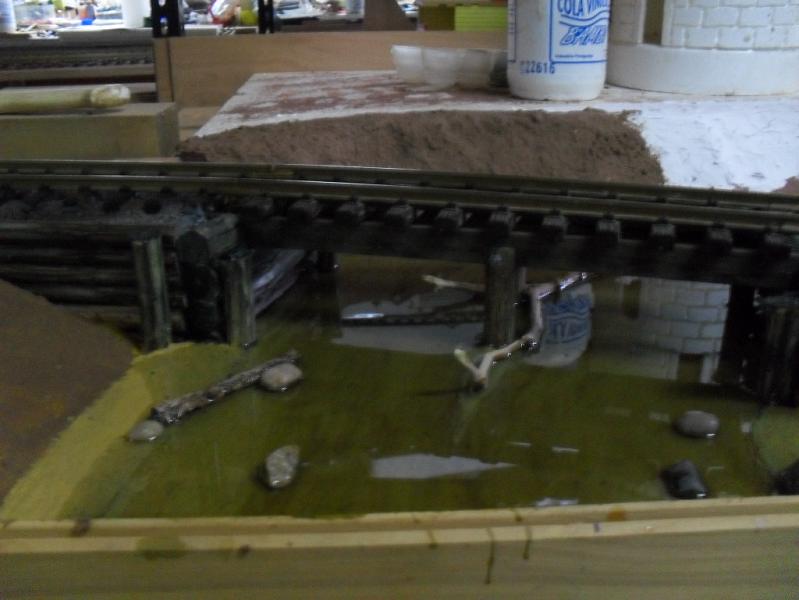
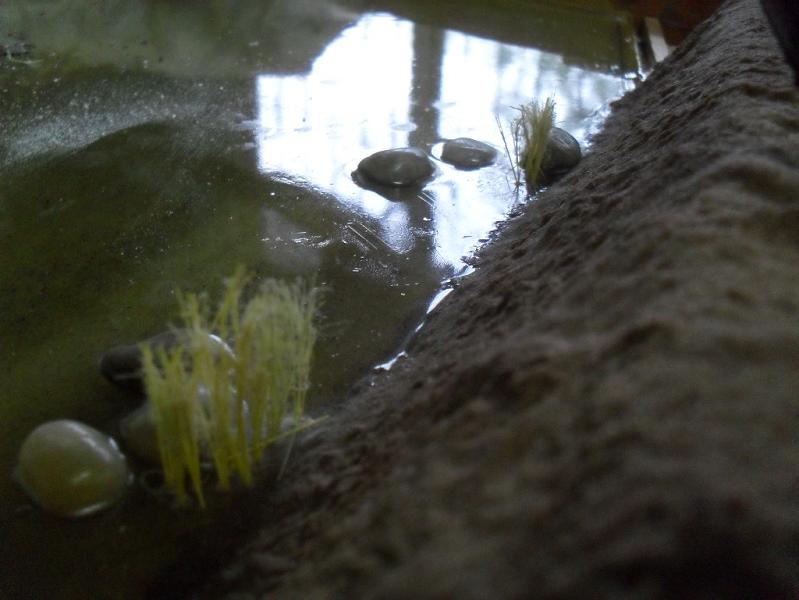
this is, how it looked after the two days:

and… it was hardened!

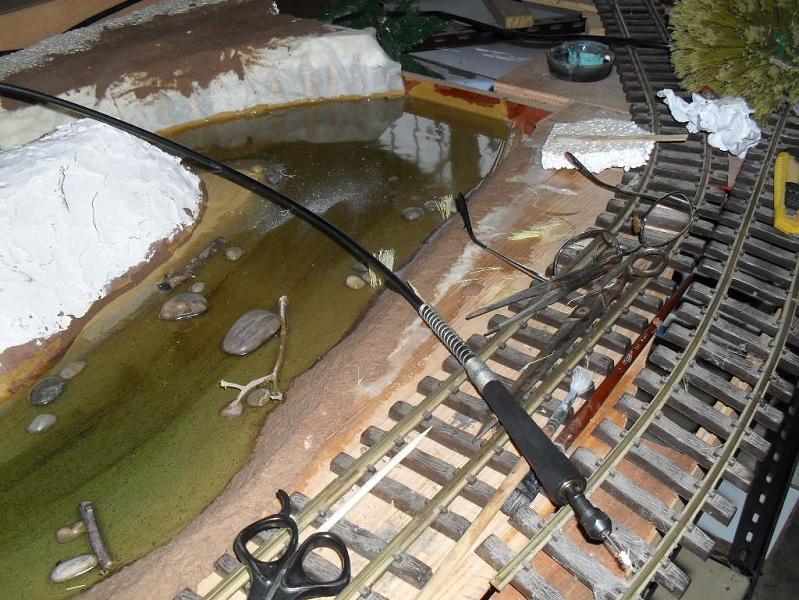
i poured another quart

and after only a day and a half that was dry too.

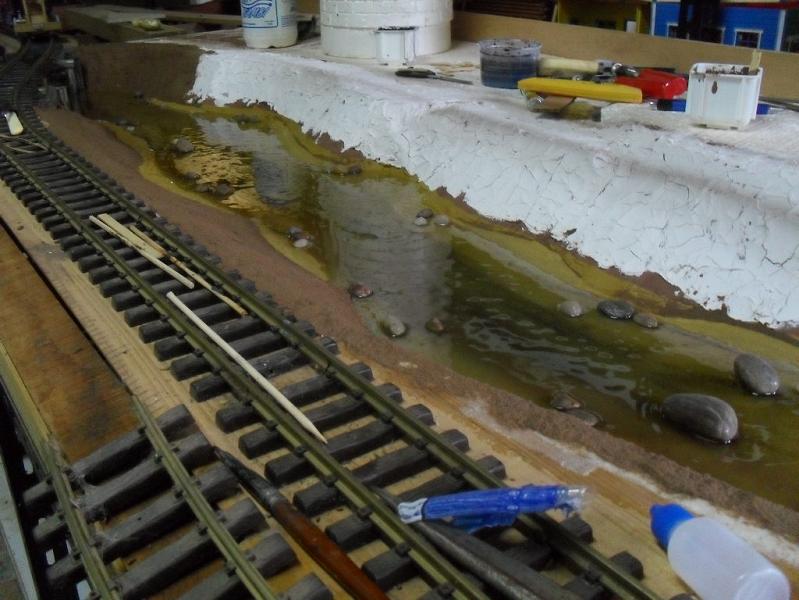
this time the surface had a slightly ondulatad surface (see the pic below). not bad for the surface of moving water.

for depth i got some olive green, transparent glas-colour from my wife.

i mixed that with thinner and pinseled it on the resin, where the river is deepest.

when that is dry, i will pour another layer of resin, with another layer of glasscolour on top of it (broader, than the first one.)

then i will top everything with one or two more layers of resin.

to be continued to the bitterend…

LOOK GOOD. NICE WORK.

(http://freightsheds.largescalecentral.com/users/noelw/smilies/2eatingpopcorn.gif)

So I lit my first cigarette…

That stuff ain’t flammable? :slight_smile:

thanks Noel.

(btw i got unfinished milkmaid Nr5 sitting before me, as i write. with my promise to make one for you, that is waterproof, i learn a lot about figures and materials.)

John,

luckily here they sell the stuff in plain bottles. no frightening labels, that one could kill a polar bear and ones grandmother by using it.

and the stuff gives the whole room a real nasty stink.

so it would be using a mask, or smoking to stand that. who gives a …? i can’t die young anymore.

today i made some half submerged beaches.

i used a mix out of ordinary sand from the road, white glue and some water.

as usual i made about five times as much, as i needed. so part of the high riverbanks got a coating as well.

while i am waiting for the stuff to dry up, before i can pour the next layer of resin, i am toying around with the single most dangerous feature this scene will get:

the half submerged stones. if i place them wrong, after the next pour there will be no changing anymore.

Looks good.

thanks.

painted the submerged sandbeaches a little lighter.

(still unsure and uncontent about the stones)

here one more, to show the wavy structure of the surface.

i know, there are many modellers out there, who like their water as smooth as a mirror. but i hope, the next layers will conserve the waves.

i am counting on the changing light reflexes as the obvserver moves, to make the water “move”.

Korm,

I think you are doing a great job on that river. It’s looking very realistic. I like the stones the way they are. Keep up the good work.

thanks.

i just poured the third quart of resin. (after rearranging the stones a dozen times or so…)

for this pour i mixed some green marker refill ink into the resin, to give it some kind of shadowness, so that things under water are less clear to the eye.

Very nice. I’ve been following your indoor landscaping for ideas on my own indoor layout.

Looks good Korm

Korm.

I forgot to menschen, on my Ho layout when I did the resin on my streams, I use a hair dryer while resin was wet to made small wave in the resin. Anywhere you need to turn up the water for small white caps, I used a screwdriver and wipe the area to make small white cap or look like running water off of rocks. The screwdriver wiping put small bubbles in and turn the resin white color while wet.

Just added inform, but your waves dose look good.

Hey… ok on the cow lady… No hurry…

We are still trying to get a new walk bridge and telegraph pole in yet where the overhead wires need to be raised over the new bridge. Will make a new post on it. Layout not running yet.

Looks good Korm. If your modeling a river its pretty rare to have a glass smooth surface. I think the waves are much more realistic.

Jake, don’t you ever write that in a german modeller’s forum. you will start a war!

Noel, i will try to remember that hairdryer trick, until i come to build my 3 x 3’ harbor.

so, another pour done. the trunks and branches are partly submerged now.

now comes a slooow step. (when it’s dry)

next i will drill “plantholes” for the reed, that grows along the river banks.

ever bought a pinsel lately? the cheaper ones are plastic “hairs” with roughed up ends.

got some in green and some in yellow. they will make fine reed. (already used them on my exhibition-layout)

Lookin’ VERY good Korm!

Sure Looking good. Hey where the fish??? I don’t see any with that water so clear, should be some fish somewhere??..

Keep up the photos.

(http://freightsheds.largescalecentral.com/users/noelw/smilies/2eatingpopcorn.gif)

Really shaping up there Korm.

That’s really effective! The ripple is just right.

I used real water

(http://outsidetrains.com/mls/100_1388.jpg)

that is my problem - i don’t get stones hereabouts.

i would have liked really stony banks like on that pic.

but i hope, that enough reed and other vegetation will give the scene a beleivable look.

Looks good Korm.

I’ve got a few million stones around here.

But shipping to Paraguay would be cost prohibitive :wink:

Ralph

thanks Ralph.

we all joke now and then about rivet-counters.

i must confess, that i turned into something even worse: now i am a reed-counter!

the holes i drill into the water can hold three to four reeds each:

(that will take me weeks!)