
Is it done yet?(https://www.largescalecentral.com/externals/tinymce/plugins/emoticons/img/smiley-wink.gif)
Jim,
I am glad you went this route. Having suggested it, I have never actually done it. So will be very interested in the results. And if I like it, i might steal it back for my build.
Devon: It is hereby yours to use (of course!), assuming it works at all…
It has been more than 12 hours so time to see what our signs look like! Call Geraldo Rivera!
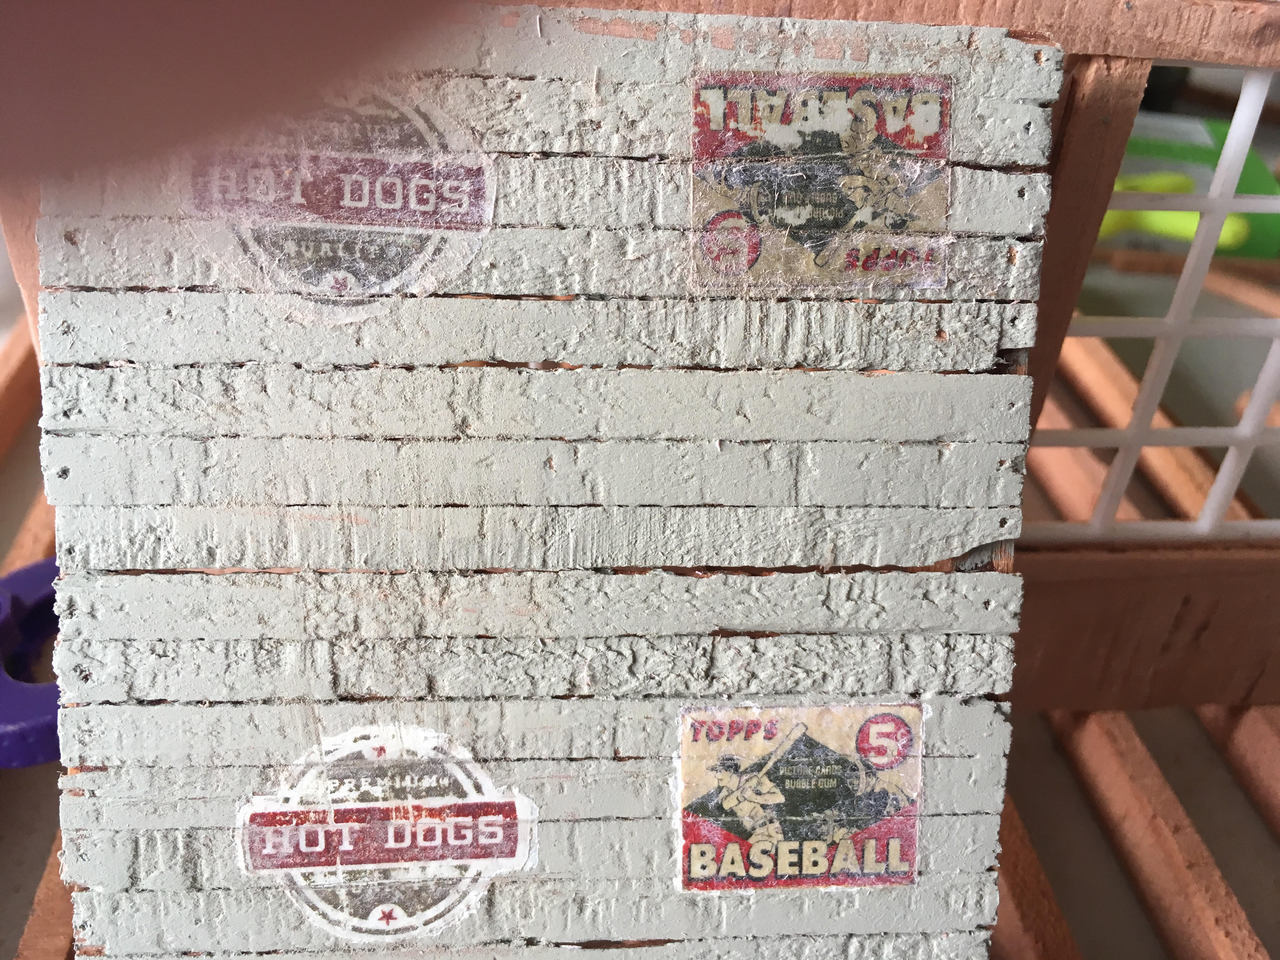
To reveal the signs, the first step is to get a rag wet and use that to moisten the paper that is hiding the sign. Then I used that same rag to gently rub away the wet paper backing:
After removing all the paper:

The impression I get is that this is creating a decal (kind of). I was probably too heavy with my gel application and the gel is a bit thick. Seems to hold the toner though!
I tried 3 different backgrounds: bare wood, painted wood, flat white on top of the painted wood. Clearly the flat white is the best option for reproducing the colors of the original image.
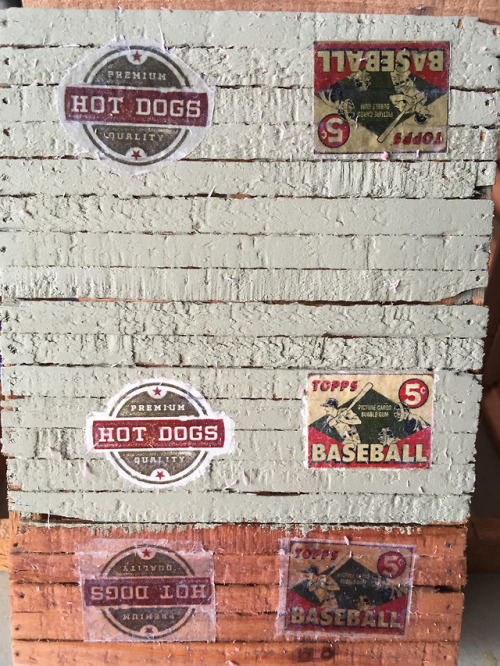
I then used my xacto knife to slice through the gel at board boundaries. It tends to close right back up so I might need to work it a bit harder to show those seams better.
Finally (so far) I used a sanding stick to remove some of the toner. Sorry about the finger in this picture. Doh!
I just covered it with matte clear, and I’ll be doing a bit of dry brushing to weather it a bit more just to see what I end up with.
Comments?
Learnings so far (I think): don’t be so heavy handed with the gel, minimize the gel that sticks beyond the toner (i.e. trim really close to the image).
Wow, those look great, Jim.  Thanks to Devon for pointing this technique out and many thanks to you for showing us how its done. I can see some of these in my future. You done good
I’m wondering about the weather fastness of those products. 20 years back, I laid ballast with matte medium and later, water would turn it milky white…
I’m pretty sure this is an indoor technique, as clear UV coats may tend to impart a wet look on the wood.
Otherwise it’s a great look.
For this contest it doesn’t matter.(https://www.largescalecentral.com/externals/tinymce/plugins/emoticons/img/smiley-wink.gif)
Whadda’bout using a plastic knife to force the edges down into the crease?
Ya done good.
Your build is really coming along Jim and looking great.
I have seen where guys have used the light diffusers for windows but they are thick. It was a good idea to cut them down on your bandsaw. I use 1/2x1/2 hardware clothe and paint it then put it in front of a piece of plexi to represent windows. Here is an example of it on my engine house.

I think for your application what you did is a better choice.
Keep up the good work.
Thanks guys.
Dan: hope it is useful to you for future projects.
Todd: yeah, they are a bit thickish. I still need to attack a couple of mine with a sander to get them uniformly to a reasonable depth.
John: good idea about the plastic knife. The xacto is too sharp I suspect. As to indoor/outdoor I am worried that you are right. This is a “gel” and not straight matt medium, so maybe it is more likely to survive. So far spraying a matte clear on it has not turned it milky. I’m hoping that the matte clear will protect it outside. We’ll see! California is a more forgiving climate than most but it still gets wet and sunny.
Jim that came out awesome. Just about like I had envisioned it might. I hope it is sealed enough so that it can withstand weather as John suggests it could. But it gives a very impressive painted wood sign that can then be weathered. I see it being applied to other surfaces as well. Seems the key is to have a porous surface to hold the gel is all.
Boards on the last wall. This will be the most visible, along with the store front. Still a bit of sanding, trimming to get done, and I need to make the door to the upstairs storage area.
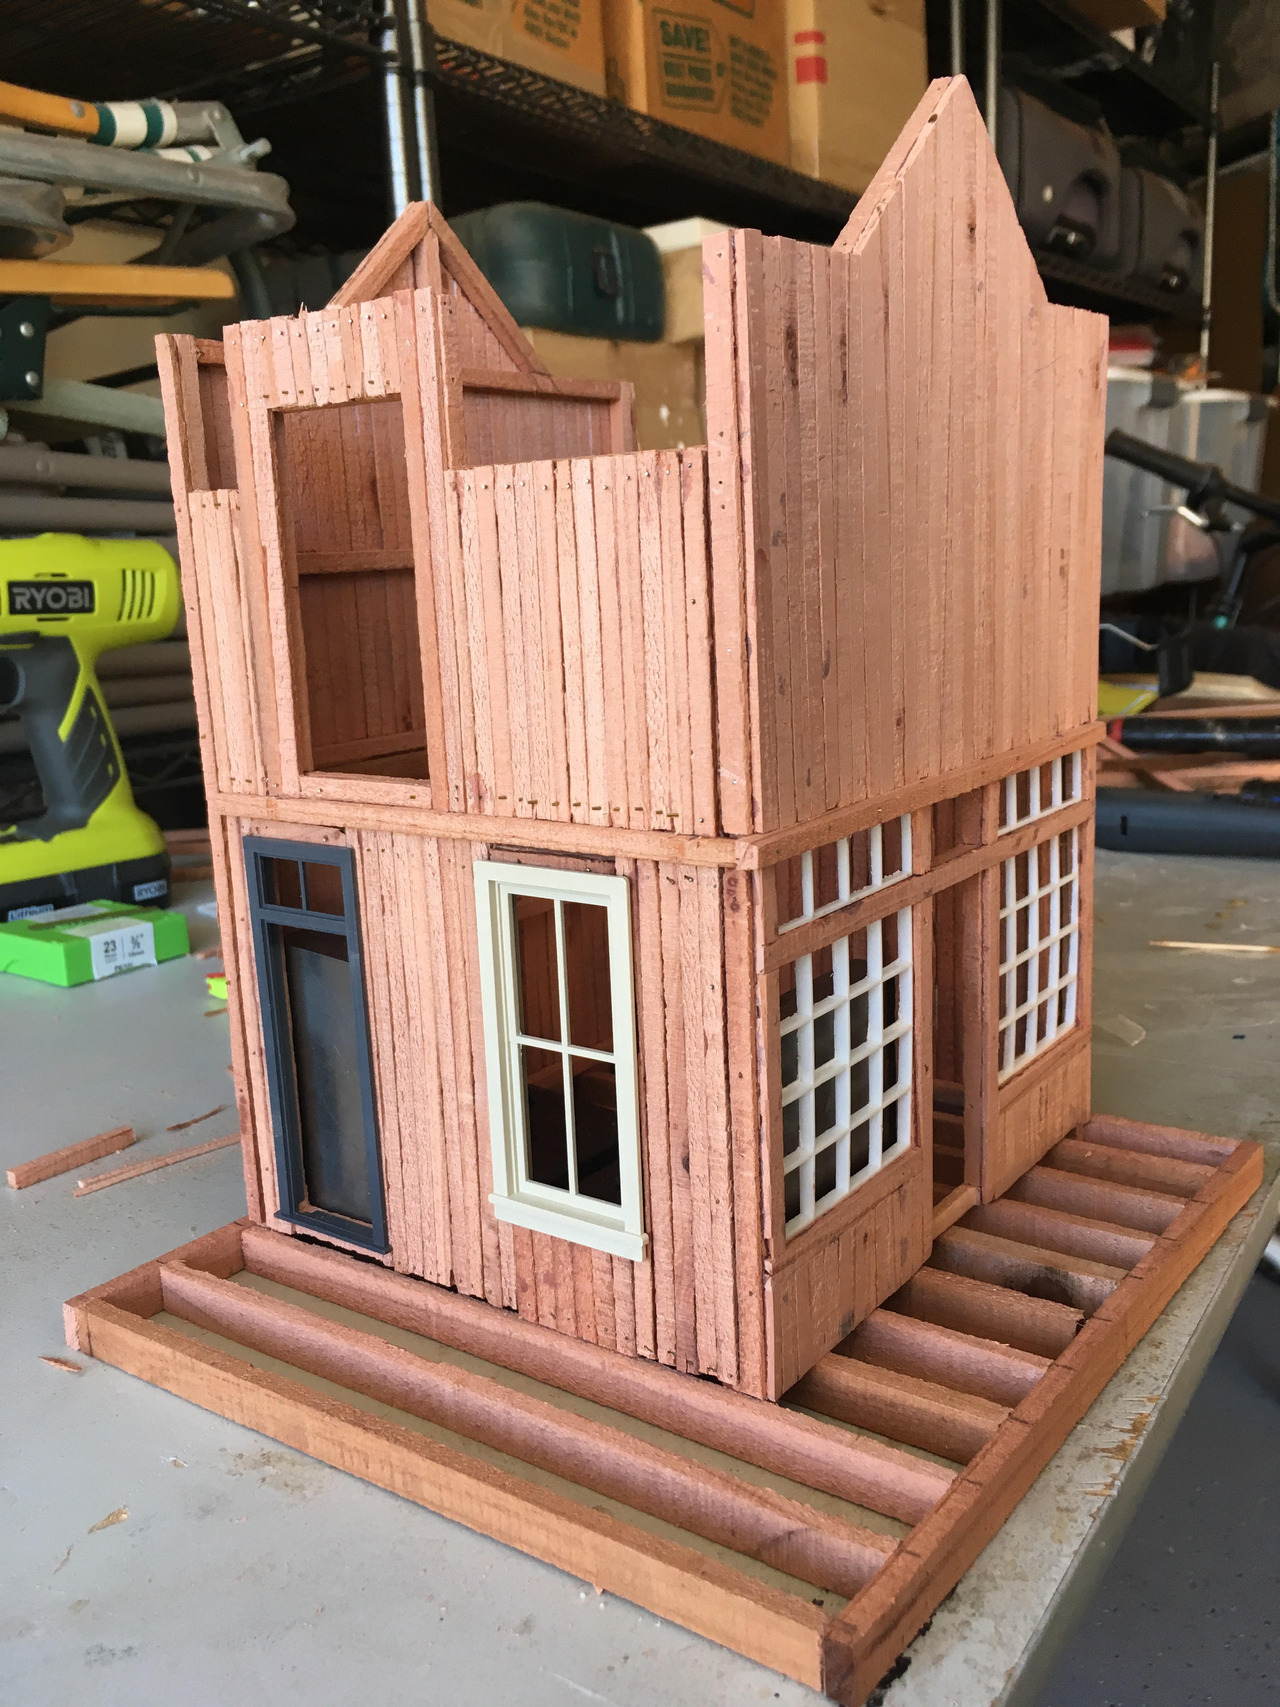
I’m thinking of following (loosely) something that Rooster told me about his building: modularity. I’m hoping I can build this so it can come apart so I can get access for future internal details. Each wall, the floors, the roof will all be separate modules that can be clipped together (still working that out… Rooster seems to use screws but I’m not that professional).
Hopefully Jim , you’re not like Rooster , he does have some screws that could be tightened… Looks awesome … (https://www.largescalecentral.com/externals/tinymce/plugins/emoticons/img/smiley-surprised.gif)
Nice building, Jim. You do good work and I like the rough texture of the wood left by the band saw. The light diffuser windows look darn good…
Looking great, Jim! Further motivation for me want to master the straight saw cut as a goal for 2019!
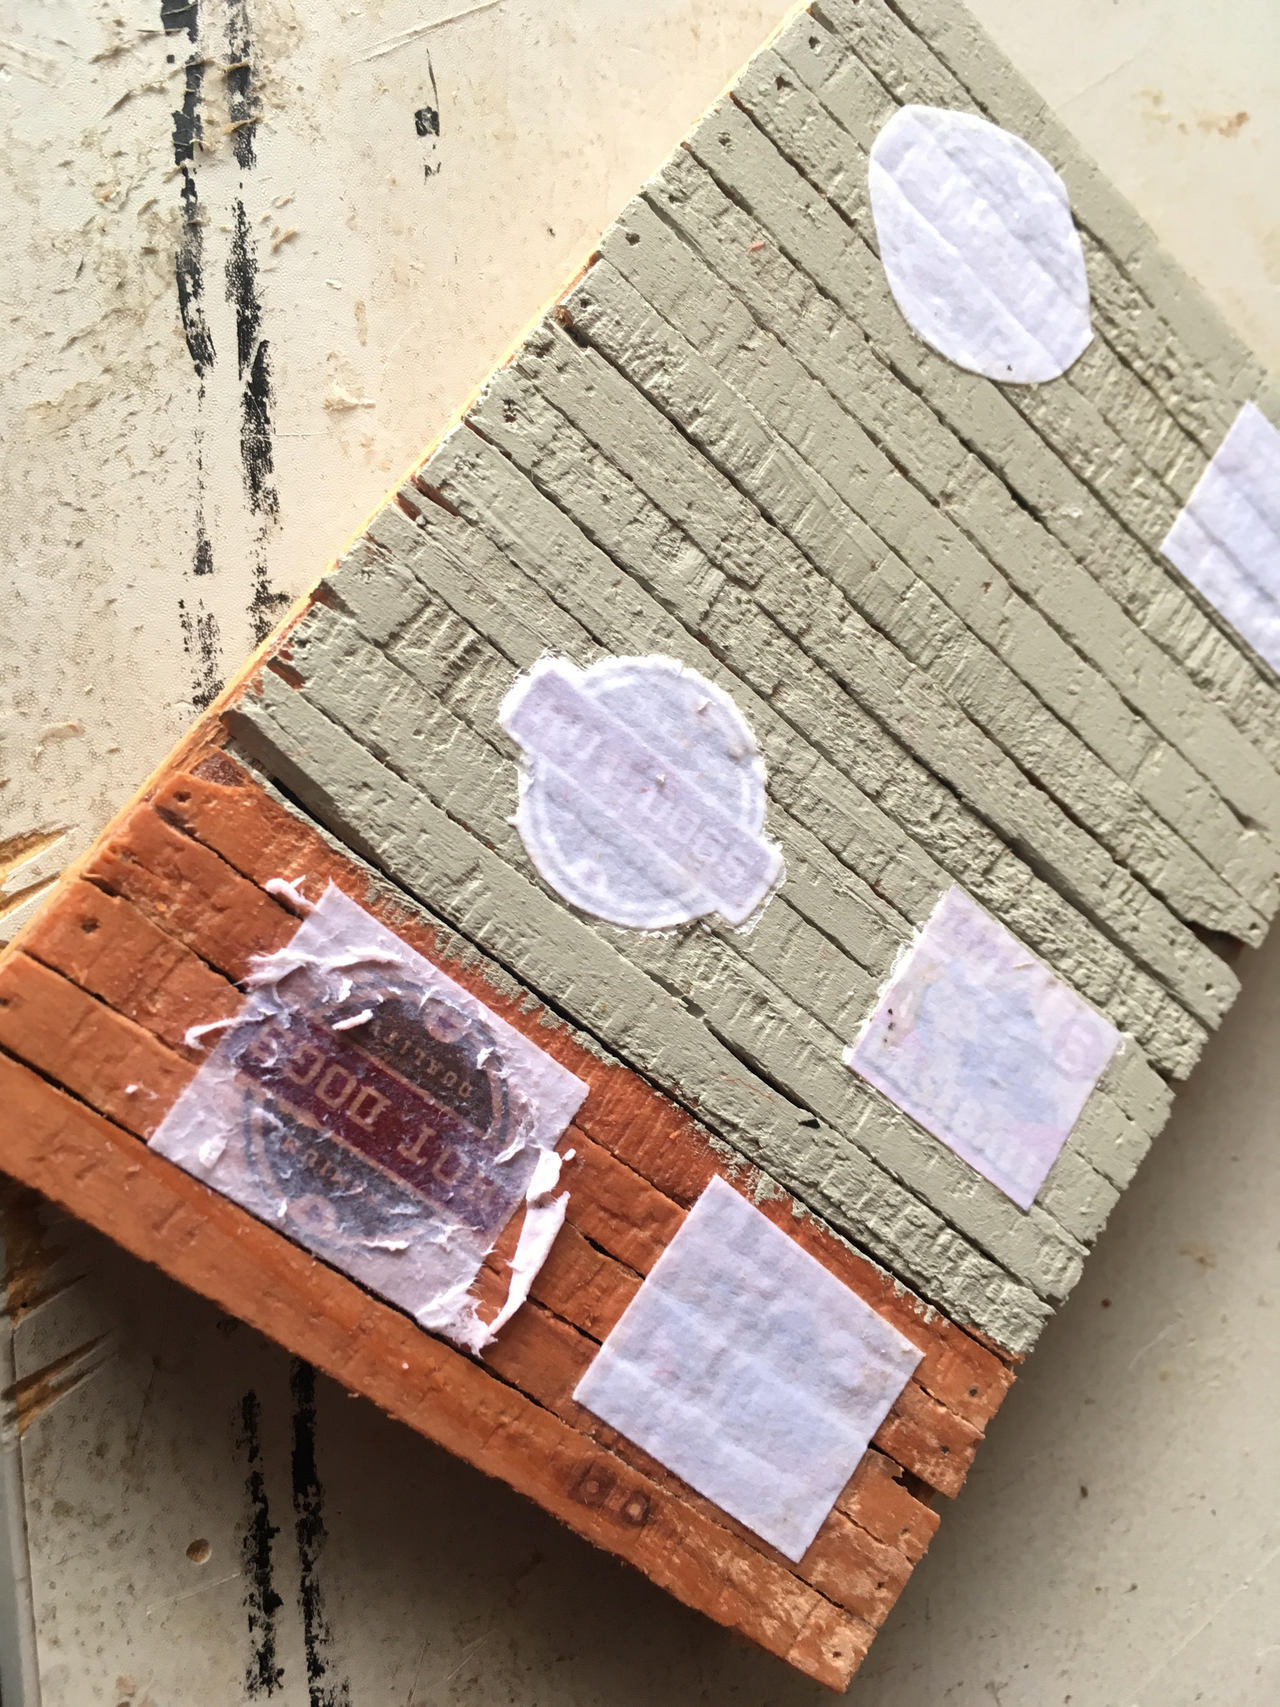
Devon was asking me by PM about the image transfer process and I thought it might be generally useful to talk about one aspect: you can’t transfer white toner (as white == absence of toner). So if you go back and look at my previous post about this, I tried transferring the same images with raw wood background, the pale green wall color as a background, and a flat white painted on top of the pale green as a background.
Basically you can’t get “white” to be any lighter than the background color, as the toner will just make it darker. So if you want white, you have to paint white and block off where you don’t want white with a dark color. Also, the printer is applying toner expecting the paper to be white so colors will be skewed if you don’t have white behind it. You can see this in the photo of the images after the paper has been removed:
The bottom images are applied directly over wood. Where the text is white is just showing wood through. Similarly with the top images. Where white should be is showing pale green. The middle images have white behind them so they look like the original images on my computer (and on the printed paper).
Also, it is probably worth emphasizing that you need to use a LASER PRINTER. Not at all clear that inkjet will work. I suspect the gel will just smear it, but haven’t tried.
Anyway, some more detail in case one of you wants to try this.
I’m following up on the “rooster modularity” thinking and here’s what I am trying to do:
- I want my walls to be removable (and the roof but I’m not there yet), preferably one at a time
- the walls need to be kept from collapsing inward and falling outward
- to prevent collapsing inward I’m building separate floor sections that are the right size, i.e. the walls butt up against the 4 sides of the floors, one for ground level and one for the upper storage area
- to prevent falling outward I’m planning to use brass u-shapes and bits of redwood to hold the walls together at each corner
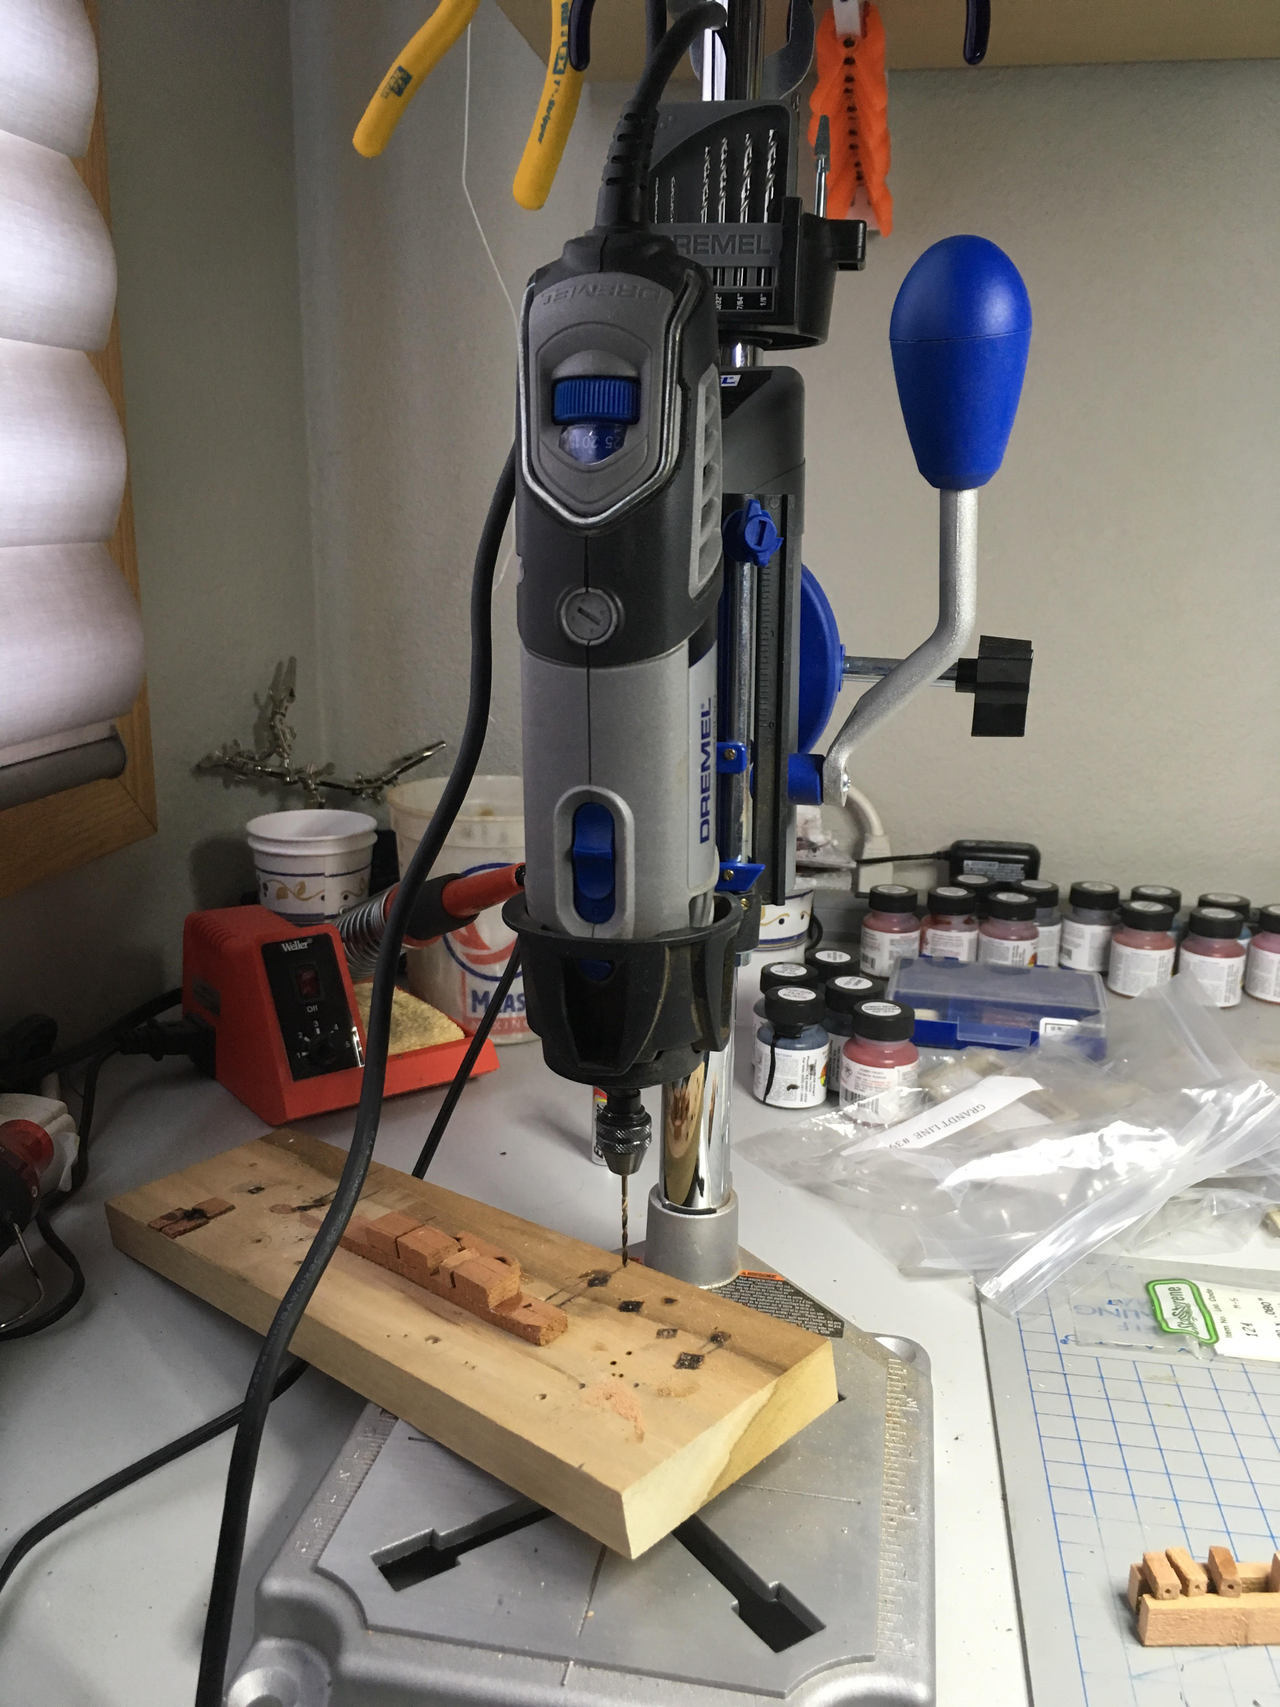
So, I’ve got a Dremel drill press and needed to use that to drill the long way through some 1/4" by 1/4" redwood. I don’t have any appropriate clamps so I built my own jig.
The drill press:
And the jig with the resultant drilled 1/4" square redwood:
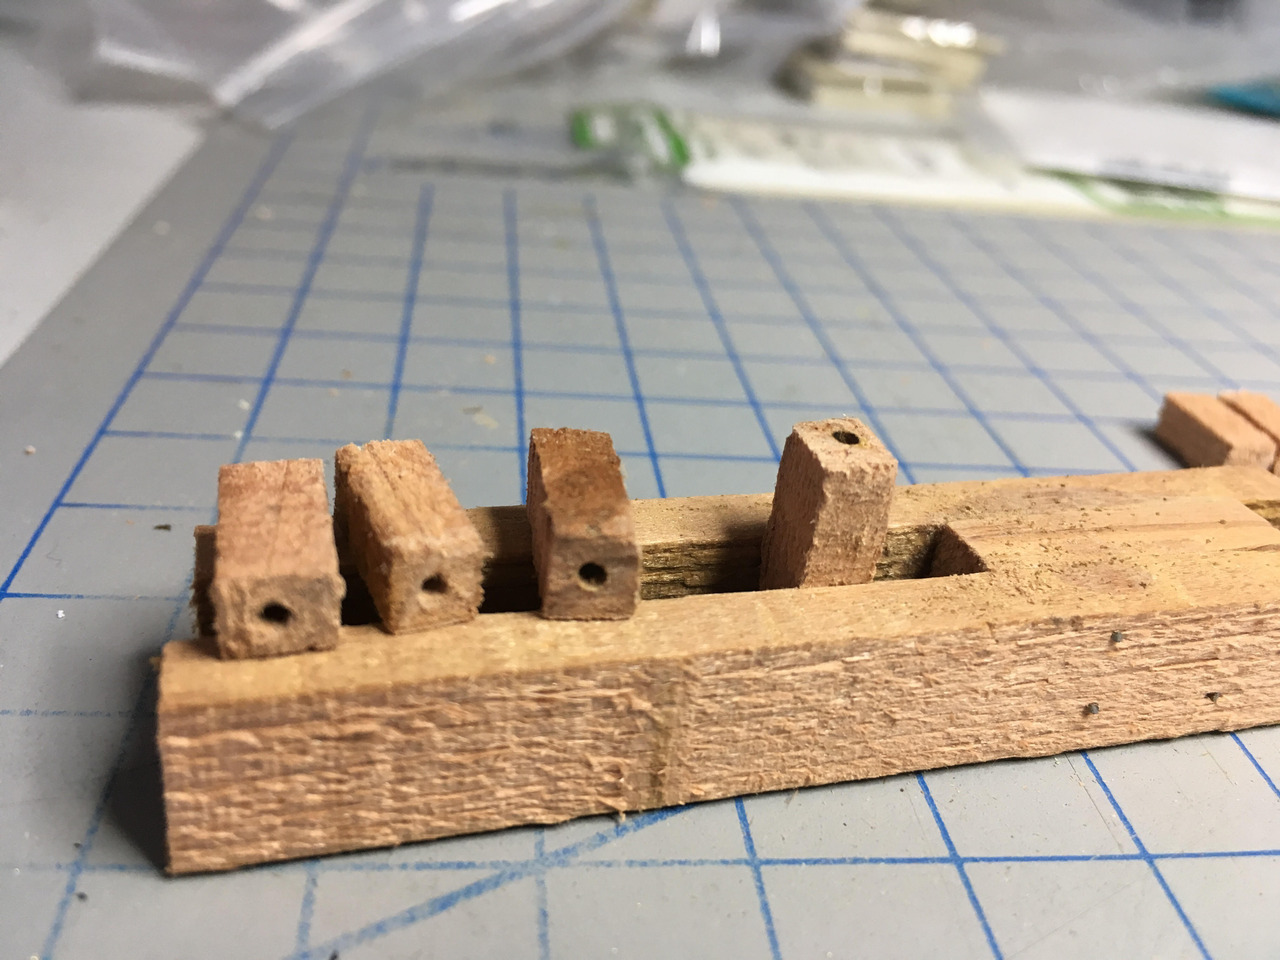
That seemed to work well. Huzzah!
Then I bent a bit of 1/16" brass and added another bit of redwood to build the connection. It is glued and nailed in place. I’ll remove the brass and trim it to length, and proceed to the other corners, shortly.
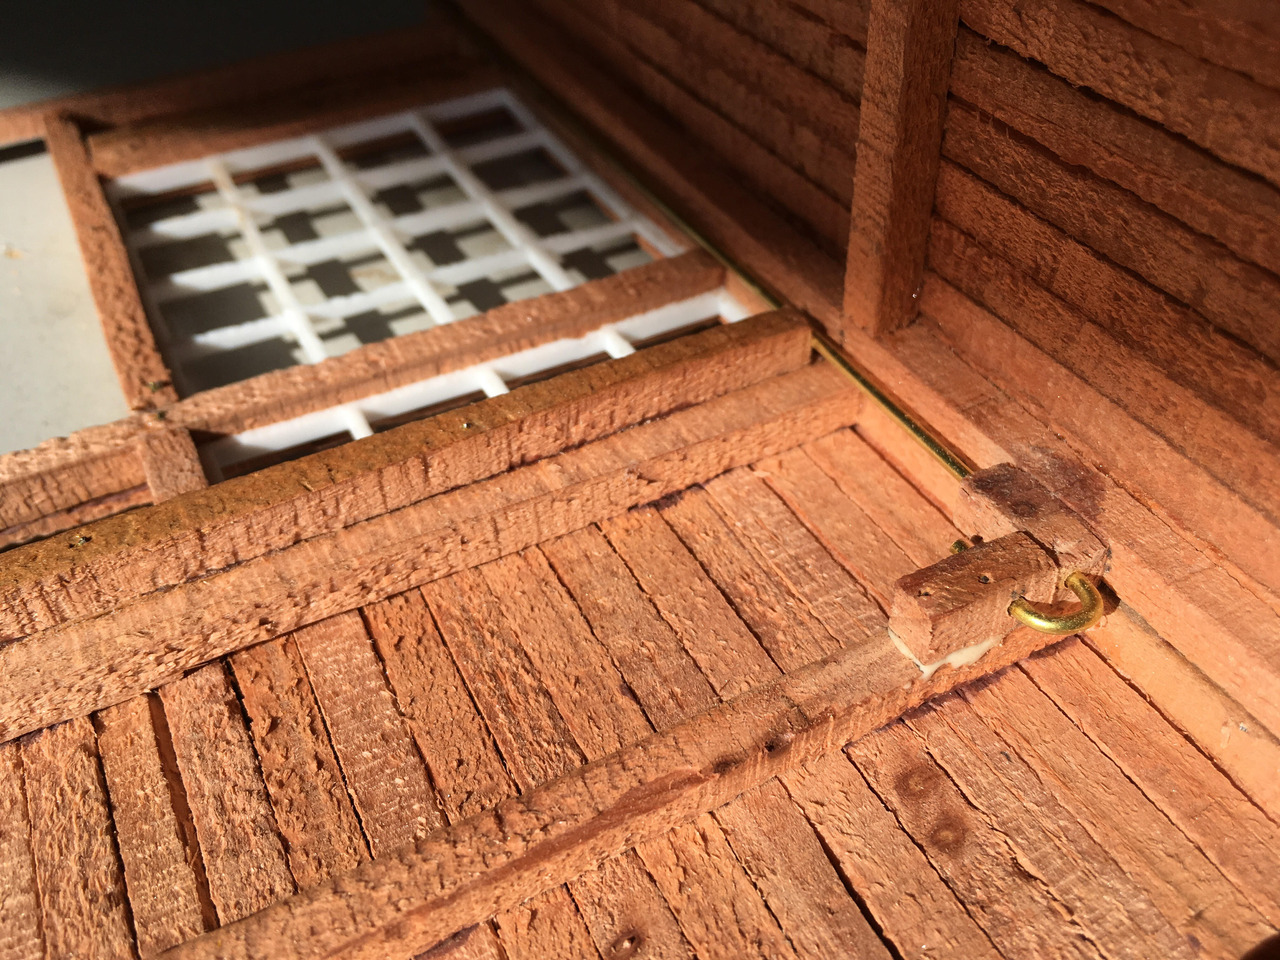
So far this is working, though a bit ugly on the inside of the building (but in corners where nobody can see it).
Happy Miking!
[edited to fix typo]
Why does the thing need to be dis-assemble-able?
I am assuming storage for winter? If so this is a very good possibility.
David Maynard said:
Why does the thing need to be dis-assemble-able?
Jim said; “I’m following up on the “rooster modularity” thinking and here’s what I am trying to do:”
That 'splains it Lucy.
Yeah, winter is not a big deal here (no snow, lowest is 32 degrees), so storage isn’t that big of a deal to me.
I’m wanting to be able to remove at least a wall and probably one of the floors so I can (future) add details in the shop, without having to feel like I’m building a ship in a bottle. Since I’m removing one wall, I figured why not remove others to make this easier to work on right up to the final assembly.
These walls are a lot easier to fiddle with when they are laying flat on the workshop (or in my case, a table).
Others may not find value in this. Perfectly reasonable. Heck, I might not find value with it after I’m done. But it seemed like it was worth a tiny bit of effort now to save me hassle/time later. We’ll see…