I too am a firm supporter of battery power but I like my floating track. I really thinks it comes down to what type of soil you have to deal with surrounding your ballast. Out here on the California desert we have sand and very little loam so it tends to be very stable for floating track.
130 bucks for a level? Holy Underwear, Batman! I’ll take the 2 for $5 ones, thanks!
Im pondering trying out your track method, too, and save the full PT treatment for yards and sidings… Hmm…
Doug Arnold said:
I too am a firm supporter of battery power but I like my floating track. I really thinks it comes down to what type of soil you have to deal with surrounding your ballast. Out here on the California desert we have sand and very little loam so it tends to be very stable for floating track.
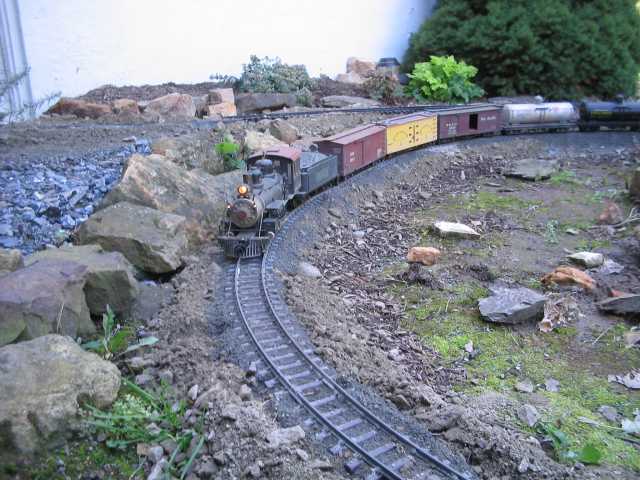
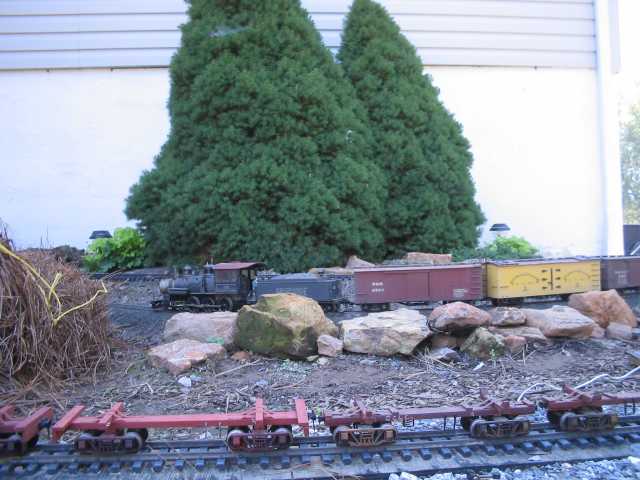
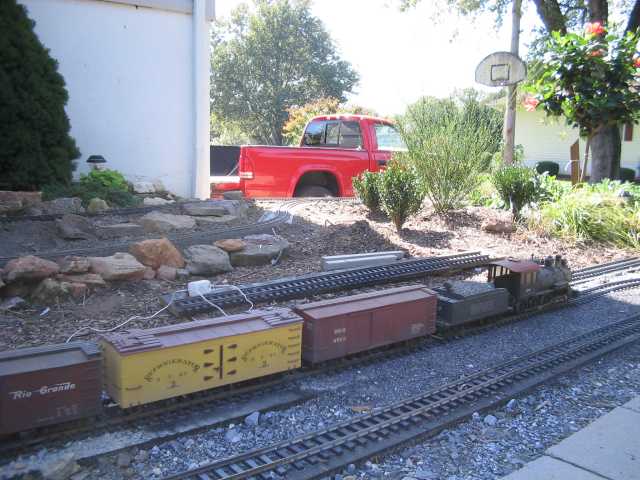
I used the floating track method for years. With the freeze/thaw cycle around here it got to be too much maintenance. Every spring was spent leveling all the trackwork . With this method it looks like it may eliminate much of that. We’ll see… This what I have installed and ballasted so far.


The yard area is supported with 3/4 PT plywood. I used 2A modified under it for support and drainage.

Ken, that looks great! I have a lot of landscaping to do before I even get to the ballast.
Bob - $130 for that level? Wow…it’s gone up a LOT!
I will probably do PT for the yard area…need to get my buddy with the pickup…
Ran a train today. A few adjustments needed; but easily made.
Still having problem with one car on a specific switch. Haven’t figured out the issue yet.
More testing needed. Takes time. I want to make sure I can run a train in reverse the whole layout, as well as forward - that should clear up all potential problems.
One thing I REALLY like is the ability to change directions…
This area is just one small part of the larger scheme. Guess you could say I test out theories and ideas here, see if they work and plan the next phase. It’s basically just an oval with a few sidings and a spur. Just something to run trains on while I think about how to go about the next part. While I do have somewhat of a plan in mind, (http://www.geocities.com/RodeoDrive/4497/layout.html) there’s always something to tweak or change to suit the area or the scheme.
Here’s my current plan:

I will build a platform of treated 2x8. The platform will be 12 feet long and is indicated by the brown rectangle. A turntable will be built and attached to one end. I’m limiting the size to allow for walking around the peninsula to get to the plants. This is a closeup of the yard.

Any suggestions? Ideas for improvements?
Any room on any of those leads for water, coaling or sand towers? just a thought…
Ken,
In your refit using Bruce’s ladder method, do you go into an area where you’ve had lots of trouble or have you just started at one end?
Ric Golding said:
Ken,In your refit using Bruce’s ladder method, do you go into an area where you’ve had lots of trouble or have you just started at one end?
Well mainly Ric, the old roadbed was free floating and caused a lot of trouble over the winter, so I was looking for something that would be a bit more stable throughout the whole layout. Bruce’s method seems to be it, though it hasn’t passed the test of time yet. It does take a bit of time to lay out the stringers, but since they’re pretty rigid length-wise, I don’t for see the problems I had before.
While Fred’s 2x6 method serves his purposes very well, It wasn’t what I was looking for. I’m more into having it “look” more realistic thus the hidden supports under the trackwork and roadbed. I don’t plan on having it raised either, at least not at the level Fred’s is ( though when or if I get to be his age I may regret that decision.;)). Since I like the “gardening” end of the whole deal, I hope to integrate the scenery end of it as close to reality as I can.
If you answered my question, I missed it. I’ll try again. Did you tear all your track out and start over? Or did you have a bad spot and tried Bruce’s method on that area? How are you guys attaching the track to the track splines? (Or whatever you are calling the ladder work. Is that what you call it - ladder work?)
Ric,
Those that have used the ladder in these parts have screwed the track to the blocks that are between the two side runners.
Warren
Ric Golding said:
If you answered my question, I missed it. I’ll try again. Did you tear all your track out and start over? Or did you have a bad spot and tried Bruce’s method on that area? How are you guys attaching the track to the track splines? (Or whatever you are calling the ladder work. Is that what you call it - ladder work?)
Yea, I guess I did miss it, Ric. It wasn’t the actual trackwork that had me tear it all out but the supporting retaining wall. It was all 3x5 PT ties. There were a few rotten spots and replacing them would have been a bigger PITA than it was worth. original retaining wall, built in 1988:

The old wall was 8’ long X 10’ wide. I lengthened the new wall to 14’ and the width to 13’ It’s also a foot higher to eliminate the 5-6% grade up to the garage window. new retaining wall (2005-2006):

I’ve been using deck screws to attach the rail to the blocks seperating the side rails. Sometimes a hole in the ties lines up, sometimes not. (And once again, Ric and I have hijacked a thread… )
)
Thanks Ken,
So bringing this back around and on track to Bruce’s original subject, both of you have ended up tearing out all or most of your trackage and essentially started over. However, you have used your experience of the prior trackage going through the same areas and refined this down to easier grades and wider turns. Thank you for sharing.
You know if you look at the history of the bigger railroads that also deal with the elements, outside, they have also first got trains running to start creating revenue and then refined and improved the trackage.
Just a note to tell of our experience on the IPP&W.
We find that nailing the track down using 1 inch or 3/4 inch common nails works well. They rust and then are very hard to see.
We also find that nailing at the ends of the ties works better than in the centre.
Nailing in the centre; may cause the tie to collapse, if the nail is driven too hard, causing a narrowing of the gauge.
In any case; no-mater where you put the nails…predrill the ties, and don’t drive the nails down too deep…leave about a 64th of an inch between the head of the nail and the tie…it makes it easier to remove if you ever need to.
BTW… my main concern with the ladder approach to roadbed, is the experience we have had with small pieces of wood; pressure treated or not…they tend to rot quickly …seems the smaller the piece, the faster it rots.
This of course usually happens when laying the wood in the ground…raised roadbed will not have as much problem, as it is air dried.
Watch when driving stakes into the ground…in frost prone areas; the frost tends to push the stakes out on a regular basis. It seems to have something to do with the shape of the foot of the stake.
Fr.Fred
Fred Mills said:
Just a note to tell of our experience on the IPP&W.We find that nailing the track down using 1 inch or 3/4 inch common nails works well. They rust and then are very hard to see.
We also find that nailing at the ends of the ties works better than in the centre.
Nailing in the centre; may cause the tie to collapse, if the nail is driven too hard, causing a narrowing of the gauge.In any case; no-mater where you put the nails…predrill the ties, and don’t drive the nails down too deep…leave about a 64th of an inch between the head of the nail and the tie…it makes it easier to remove if you ever need to.
BTW… my main concern with the ladder approach to roadbed, is the experience we have had with small pieces of wood; pressure treated or not…they tend to rot quickly …seems the smaller the piece, the faster it rots.
This of course usually happens when laying the wood in the ground…raised roadbed will not have as much problem, as it is air dried.Watch when driving stakes into the ground…in frost prone areas; the frost tends to push the stakes out on a regular basis. It seems to have something to do with the shape of the foot of the stake.
Fr.Fred
Well, Fred if you hadn’t jumped in with both feet in the middle of the discussion, you’d have realized the ladder construction we are both using is a composite plastic material. Bruce is using some stuff called TufBoard and the stuff I found is called NeveRot. …

For right now, the stakes hold it in place till the larger ballast can be applied. Eventually just the stone will be holding the under roadbed in place.
BTW, the stakes I’m using are plastic too…
Ken…I was talking about the small blocks of wood that are commonly used as the “Rung” part of the ladder…when I was talking about the rotting wood…I do know that you guys are using “Plastic” “Sides” for the ladder…
I’m glad the “Ladder system” is working well for you guys…all I was doing was adding my very small bit of caution, gleaned from my experience.
I have been following the thread......good stuff.....Ric Golding said:
Thanks Ken,So bringing this back around and on track to Bruce’s original subject, both of you have ended up tearing out all or most of your trackage and essentially started over. However, you have used your experience of the prior trackage going through the same areas and refined this down to easier grades and wider turns. Thank you for sharing.
You know if you look at the history of the bigger railroads that also deal with the elements, outside, they have also first got trains running to start creating revenue and then refined and improved the trackage.
A little history:
Back when I started this layout in 1988, there wasn’t a whole lot of info out there on how to construct an outdoor layout. Most of what I could find seemed to favor the floating track method so that’s the route I took. The ballast rock was reasonably cheap and it was easy to work with. As with anything when you first start out most of it was all trial and error till you found what worked and what didn’t. Back then I didn’t know anyone who had an outdoor layout so there was no “flow of ideas” so to speak as we have now.
What finally made up my mind to re-do the entire layout was what I mentioned before about the supporting wall having some rotten spots. That and also the fact that my oldest son has some connections in the landscaping business and I could get the stone wall sections at cost.
With all the knowledge and experiance from guys like you, Fred, and Bruce and all the others on here, the decision to rebuild was a decidedly easy one. Run the idea past you guys to see if it flies or not…I’ve certainly been following Bruce’s methods closely here. After all, part of the fun in this hobby using what you learn and applying it where you can…
Now, back to our regularly scheduled broadcast…
Ken Brunt said:There's really no such thing as a thread hijack. ;) I started this thread as a way to document what I was doing, as well as to solicit comments. When people post with what they've been doing, it gives me more ideas; and sometimes changes my plans. For the new guy coming on board, I think it's valuable to have this discussion to give them a chance to really think about how they might do their own layout.
(And once again, Ric and I have hijacked a thread....... )
Going back to Ric’s comment - I tore up my original layout for several reasons. First of all, I had permission to expand, as we had fenced in our backyard - giving me more room for the layout. I had been somewhat unhappy with my simple loop as it didn’t lend itself very well towards operations. I did not like the sectional track look all that much, and the free floating wasn’t working for me. When I first saw the AMS flex track, I was hooked! I liked the look, and really liked the way that it could be easily bent. (I had bought a video early on, and it showed how to use a rail bender - it was almost enough to convince me that I had made the wrong scale choice!)
The fact that the track was code 250 was a plus - but this meant that I’d have to firmly anchor it to something. Heck, that had been a problem with the first track. Between the hose, me, and the dog, something was always disturbing the track. I’d adjust it all and it would work well until I had guests show up. Now, I could have gone with PT lumber like Fred, but I would have to have it delivered and I wanted to build a little at a time. You can plan all you want, but once you get outside and start putting track down you find: that the grades are a bit different than you thought, a plant is in the wrong place, there’s a huge rock that is buried too deep to remove, or something that looked good on paper dosn’t look so hot outside. So, the ladder method was more to my liking. A bit more expensive, but it also allowed me to easily form nice curves with automatic easements. If it’s not raining, I can put the pieces in my convertible to bring home - and I can pick up just a few pieces for what I need.
Of course having said that, I just had my buddy with a pickup truck help me get some nice 12’ long PT that I will use to construct the yard.
And…I still have some free floating track…or sort of… my trestles and bridges are not fastened down…
Bruce,
I remember our first conversation on this going out and coming back from McCurdy’s up in Ottawa. I think we all become infected with energy, when we see Fred’s and the other Canadians, like David’s, work. I guessing that was 15 months, or so, ago. Your work and your documentation of it has been very helpful. Have you included any expansion joint areas? Our visit to Marty Cozad’s has started a whole nuther series of questions and explanations.
I’ve seen a little snaking in long straight sections, but now I’m contemplating the expansion situation in a whole new frame of thought.
Bruce Chandler said:
Steve, I'm not sure ;)These are plastic trim pieces that I found at Home Depot. Nominally 1"x2", but actually measure about 5/8" x 1 3/8". As I recall, they come in 12 foot lengths, so you can get a nice curve out of them. They’ve got a whole set of shapes, but the rectangular ones seem just right for this.
It is called “Never Rot” and its not cheap, but it is easy to work with. Used the same base for my track. Nick