Large Scale Central

Ideas on a lift-out section of track

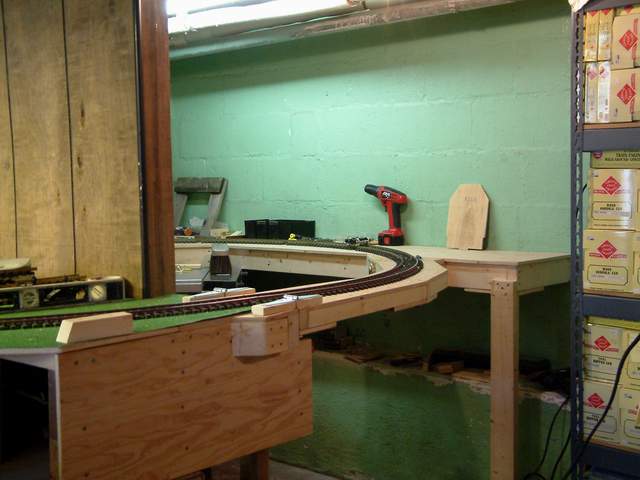
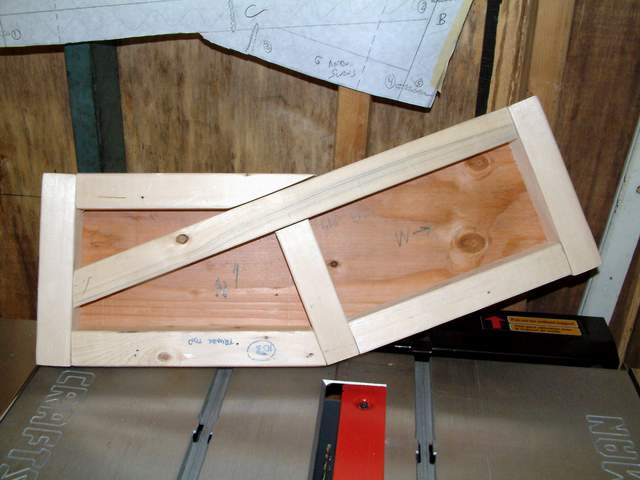
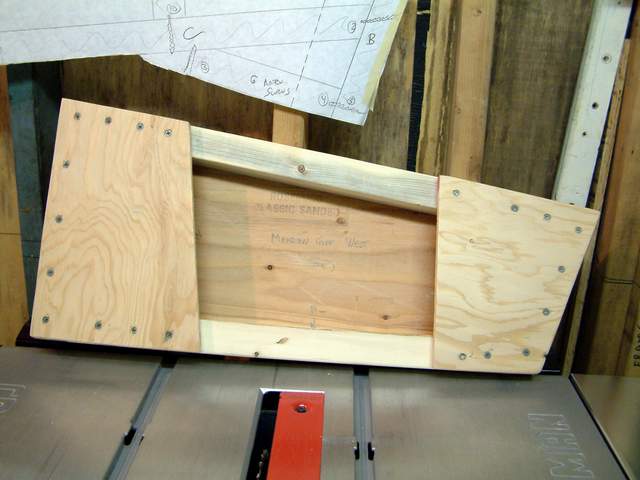
I need some ideas on a lift-out section of elevated track work. I am about to tie the grade level, (squeaking knees level) layout with the Table Top using a very utilitarian 50’ – 60’ single line of ladder track on risers set in concrete. The problem is about where the line is about 24” of grade it crosses a path to the garden, think wheelbarrow, and trips for salad, etc. What are some of the more successful ways of dropping that Lift-out in place using keys, guides, whatever?

Bill

you might try something of this kind:

(http://kormsen.info/bridges/klappbruecke.JPG)

(http://kormsen.info/steering/safetycircuit.JPG)

Could build a vertical left section with counter weights…I will be building one in a few weeks for a BIG layout in SC.

I made this a few years ago from a 2"x2" aluminum tube, some styrene and PVC. It is a lift-out section to allow access to a storage room. I use Hillman bridge clamps to tie the rails together at each end. There is also a simple interlocking design at each end to help hold alignment.

(http://lsc.cvsry.com/Post2/E-Escap-e_38.JPG)

There is a build thread on here somewhere.

I’ve also done a couple of folding hinged sections on my indoor section…

(http://lsc.cvsry.com/Bridge-640-007.JPG)

(http://lsc.cvsry.com/Bridge-640-008.JPG)

I have a 52" wide walk the the track crosses from a trestle to a berm about 10" above grade. The bridge lifts up on a hinge to use the walk. The bridge is open anytime the RR is not in use. I use DCC track power and to prevent running the the Loco off the bridge I lay a short piece of track across the main track to create a short. A lesson learned by crashing off the bridge approach…@#%@#!!

Here are some photos.

(http://freightsheds.largescalecentral.com/users/ddevoto/Bridge1.jpg)

(http://freightsheds.largescalecentral.com/users/ddevoto/Bridge3.jpg)

(http://freightsheds.largescalecentral.com/users/ddevoto/Bridge5.jpg)

(http://freightsheds.largescalecentral.com/users/ddevoto/Brdge4a.JPG)

Jon,

That bi-fold on a curve is pretty dog-gon clever.

Have you had any sag issues with it?

Rick

Opps one more photo…the bridge landing. The bridge keys into the composite wood on top of the abutment. You can see the short piece of track to create an automatic circuit breaker.

(http://freightsheds.largescalecentral.com/users/ddevoto/_forumfiles/Bridge61.JPG)

Dan,

That circuit breaker works great, until the first battery or steam powered locomotive approaches. Ask me how I know. :slight_smile:

Rick Marty said:

Jon,

That bi-fold on a curve is pretty dog-gon clever.

Have you had any sag issues with it?

Rick

Thanks Rick. No sag issues. Like everything I do it’s a bit over-engineered :]

(http://lsc.cvsry.com/Bridge-640-001.JPG)

(http://lsc.cvsry.com/Bridge-640-002.JPG)

I’ve also had the problem of driving a loco off into the abyss. My solution does not rely on electronics, but rather brute force. The center of a tie at the end of the approach is drilled to accept an Aristo blue track driver. I run yard speed indoors and it will stop a loco, usually with no damage.

http://www.youtube.com/watch?v=h0NzDQ2_G7g&feature=youtu.be

This video shows the lift up bridge I did for our clubs modules.

Nico

Steve Featherkile said:

Dan,

That circuit breaker works great, until the first battery or steam powered locomotive approaches. Ask me how I know. :slight_smile:

Steve,

Hopefully my circuit breaker would derail the Batt. or steam loco before it went over. My crash wasn’t too bad how about yours.

Jon Radder said:

I’ve also done a couple of folding hinged sections on my indoor section…

(http://lsc.cvsry.com/Bridge-640-007.JPG)

(http://lsc.cvsry.com/Bridge-640-008.JPG)

Clever design!

Dan, in the meantime (before going battery) you could secure your trains better.

make a separate section, that includes the bridge and two or three foot on both sides.

connect your plus on one side of the bridge, and minus on the other.

the closed bridge connects the rails, the open bridge secures, that one side has only plus, the other only minus.

(see the second pic in my post above)

the advantage over your “short” piece of track would be, that even somebody opening the bridge, who is not aware of the problem, has interrupted the electricity.

Am I the only one who can not see Korm’s pics? All I see is a red X in square box.

One of the simplest methods I’ve seen used utilizes cupboard catches, the little U spring type receptacles that receive the male prong to hold old fashioned cupboard doors shut.

A shelf or bridge is built to fill the gap and the catches are installed and aligned before the track is laid. After everything is screwed in place and solid the track is laid across to line up all the way across and fastened down securely. The rails are then cut on both ends of the bridge leaving everything in perfect alignment.

To remove simply pull up on the bridge to free the male plugs on the bridge corners from the catches on the buttresses below. For track power simply wire the bridge rails to the plugs and the track below to the catches and you have mechanical and electrical connection all in one.

What was the lift mechanism from that you used Nico?

David,

They are from a desk system, so you can sit and stand while you work.

Nico

That is one slick bridge Dan.

I have a lift bridge on my RR. It is supposed to look like a gider bridge and is it about 32" long.

On the approach tracks I used solid piece rail clamps not the split jaws and ground down one side of the clamp so it would accept the code 332 track when it is placed onto it. The brass gives good contact for my track powered trains. Split jaw does make a special clammp for lift out bridges but I thought it cheaper to make my own.

Here is a photo of the bridge but I don’t have a close up of the rail clamp.

(http://freightsheds.largescalecentral.com/users/capecodtodd/_forumfiles/SHAYexcursions.jpg)

Mine was hinged, not lift out, but worked well. The end you don’t see was cut on a slight diagonal to make it easier to mate up when closing.

(http://bp3.blogger.com/_3Hdj0jDlqqs/SIAUTvaDktI/AAAAAAAAACU/xijsqqcVLkc/s320/frontbridge.jpg)

This was the main entrance to my apartment, so it saw a lot of use.

Matthew (OV)