Large Scale Central

🫣 How to Look at Stereoscopic Train Photos Without Having a Special Viewer

This Wiki will teach you how to look at (and create) stereoscopic images or die trying. The intention of this wiki is to also provide a repository of stereoscopic images that may be of interest to LargeScale Centalians.

This Wiki is Best Viewed Where the Center of the Photos can be Adjusted to the Distance Between your Pupils.

  • on a phone
  • on a tablet

Occasionally a stereoscopic image will pop up that deserves a proper look. Unfortunately these photos are not in that GAF VIEWMASTER format you may remember as a kid.

Another method for printed images or those seen on a computer screen is to use a viewer such as this:

amazon.com

Amazon.com : 3D Pixi Loreo Viewer - Hands-Free Parallel Viewer for Computer…

3D Pixi Viewer Hands-Free Parallel Viewer for computer monitor. The Pixi 3D Viewer is a side-by-side, parallel viewing 3D image viewer. It is primarily a Computer Monitor Viewer for medium sized images. Inexpensive…

Viewing a stereoscopic (3D) image without glasses is usually done using either the parallel-view method or the cross-eye method. Which one works depends on how the image was created.

Method 1: Parallel Viewing (looking “through” the image)

Used for most side-by-side stereo pairs where the left-eye image is on the left and the right-eye image is on the right.

  1. Sit about 30–60 cm from the image.
  2. Relax your eyes as if you are looking at something far away beyond the screen or page.
  3. Allow the two images to blur and drift together.
  4. You should begin to see three images. The middle image is the one to focus on.
  5. When the middle image becomes sharp, the scene should appear three-dimensional.

Tip: Hold a finger halfway between your eyes and the image. Focus on the finger briefly, then look “through” the image while keeping your eyes relaxed.

Method 2: Cross-Eye Viewing

Used when the stereo pair has the right-eye image on the left and the left-eye image on the right.

  1. Place your finger midway between your eyes and the image.
  2. Focus on your finger.
  3. While keeping your eyes crossed slightly, notice the two pictures behind the finger.
  4. Adjust the amount of crossing until the two pictures merge into a single center image.
  5. Shift your attention from the finger to the merged image while maintaining the eye position.

Again, you’ll usually see three images, with the center one appearing in 3D.

IMG_2982

A Simple Exercise

When practicing:

  • Start with larger images.
  • Good lighting helps if viewing a printed image.
  • Don’t strain your eyes; take breaks if uncomfortable.
  • Some people find parallel viewing easier, while others find cross-eye viewing easier.
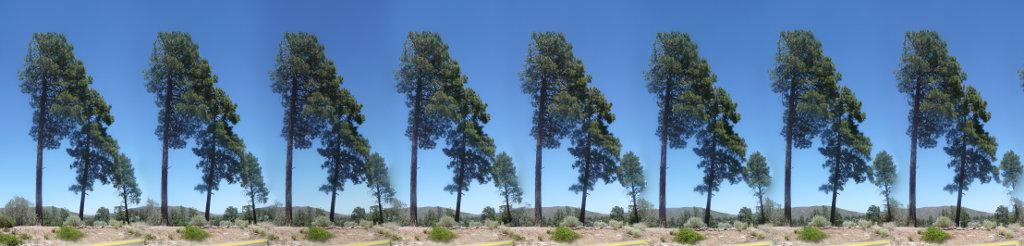
  • Try to adjust the centres of the 2 images on your to the approximate distance between your two pupils, placing less strain on your eyes.

Once you learn the technique, many people can lock onto a stereoscopic image in just a second or two. It is very similar to the way viewers used classic stereoscope cards in the late 19th and early 20th centuries, except you’re using your eye muscles rather than a viewing device.

IMG_2988

IMG_2994

For Those With 3D Printers

A Video Guide

A Guide to Using Your Own iPhone/Adroid to Create Stereoscopic Photos, by my favourite Astrophysicist, Brian May

Still Having Trouble?

Try This at Home

2 Likes

Bill, are you able to do this with your eyes? I had a Viewmaster many years ago.

Bill,

FWIW, here’s a cheap viewer for images on the monitor:

Your topic reminds me of a (to my knowledge) unique book, comprised entirely of stereoviews about the construction of the Central Pacific Railroad. It relies on a pair of glasses having red and blue lenses. The images really pop!

Ignore the price… the slightly used ones go for around $25.

1 Like

Thanks Cliff.

Great information. I forgot to click the Make This a Wiki button. I think everyone can now add to the page.

I just added a link that allows your iPhone to make stereoscopic pictures. It should be fun.

Hi Wayne… yes. I think it’s easier for nearsighted people, but suspect some strong reading glasses may work. If you can find a centred object to focus blur your eyes on, then adjust that to your pupil to pupil distance, that too helps.

Once you figure it out the first time it’s so much easier after that. I’ve also updated the Wiki with 2 interesting YouTubes.

The second video has links to The London Stereoscopic Company and Stereoworld Magazine.

[edit: I wrote this just after my viewer & book post, maybe 24 hours ago].

Hmm… I just posted about a 3d viewer and a book, but the system thinks I did something naughty I guess, cuz my post requires approval. A new one for me! I wonder if I get a cookie?

I promise I didn’t post any butt-shaved rooster images or other nasties!!

A Wiki article by default didnt allow unmoderated conversations. I have just enabled it. But remember, a wiki is a shared editable article.

Hi Bill, I see my post finally got approved. Don’t know what word or phrase flagged it. I asked about the view because I have an issue with my right eye. My right eye doesn’t look to the left very well. One of my many old age problems. Eye glasses correct it for the most part.

@Cliff_Jennings my post #2 took hours to get approved.

Absolutely.

Theoretically a wiki page should be one-stop shopping where you can find EVERYTHING on one topic in one article and not have to scroll through conversations. A good wiki is a collaborative project. It evolves.

For example if you’ve read this far you might have found the book Cliff recommends Waiting for the Cars sells for a whopping $230 USD. However if Waiting for the Cars was part of the Wiki page I suspect it might likely to be seen by more people. Then of course being on the Wiki page someone else might update Cliff’s suggestion that a brand new edition can be obtained in America for $29.95 at the California Railroad Museum, rather than stumbling across that info here.

I initially forgot to click the wrench icon to make this page a wiki. (Can make this a wiki page be made the default setting too?)

I’ve trained myself to do it with only my eyes. Way back when I had the program to generate 3D pictures using patterns that are otherwise unrecognizable.
This is a kangaroo:

I also have no problem viewing these. In fact, you can look at any repeating pattern and differences in spacing will make it 3D. I do it all the time with pictures in the newspaper that will have a repeating pattern!

Now here’s a trick I taught myself involving finding differences in images in two “indentical” side-by-side pictures. Look at it as a stereogram making it 3D. Those things that are not common to both images will appear a bit blury as opposed to a nice sharp image (e.g., band on the wing, square on the table cloth, line in the tree).

The biggest trick to viewing these is to get them to a size on your monitor where you can cross your eyes and have a COMPLETE image form in the center. If you can’t get a complete image, reduce the size, or move back some so that you can.

1 Like

That’s really cool Todd. I immediately saw the wing but had to go back for the square on the fabric!