Looks great - it fits right in! Nice work.
That looks mighty fine, Ted. It’s obvious you put in a lot of time on this project.
Thanks guys. When I get home from my Christmas vacation in Florida I’m going to start on the bridge section. Already have some of the necessary wood cut but need to cut up a lot more.


Finally getting back to the outdoor layout. Started laying out the Timbers around the perimeter. I notched the ends then used PT 2x6 pieces to join them. Drove lag bolts in to hold the joints together.

This is my area where the layout will be. Started putting grade stakes in going to try and start with as level of an area as I can. I’ll be putting in drainage pipes and electrical piping then back file with 1 1/2” screened reclaimed asphalt. It should make a great base and not allow too much unwanted growth.

This is the current progress. It’s actually gone a little farther than this picture shows with the train coming from the basement, traversing the outer track, switching to the next inner track, coming around through the wye, and under the track from the Howe bridge. Then the train proceeds on the outer track back around the perimeter, over the truss bridge in the back of the photo, and along the stones on the left back onto the Howe, then into the basement. This route will be the majority of the mainline. It splits into a passenger line and two freight/livestock lines. Pipes visible are for electrical (3/4”) and drainage (3 1/2”) if needed. There will be a pond on the left middle of the picture with a small creek that will spill over at the jog in the right side 6x6 retainers. The jog is visible by locating the small pump house in my lower yard. The creek spills over into a basin and will be pumped back up into the main pond. Lots of work to do!
3 Likes
Ted, not having a basement, how did you tunnel through, or is that small rectangle a repurposed window? Will the basement be used for storage or will it be set up for operations in bad weather?
My basement is a walkout and the back wall is a stick built wall. I made an opening through it and the trains continue along the wall to an L shaped layout which currently has three sidings where my trains are stored. The trains automatically switch out from each siding as one returns, another leaves continuing around the L shaped layout and back out through the cellar to the outdoor layout. There is an automatic door that opens and closes for each train at the opening in the wall.
1 Like
Now Now
Pics are required 
Agreeing with Sean, especially regarding the automatic train door!!

I’m away from home on Christmas vacation in FL. When I get back home I’ll post some pictures. Problem is my iPad is pretty full so it gives me a hard time about loading more photos.


Here’s the “L” shaped layout inside the basement and the hole in the wall where the trains go out to the trestle. I didn’t have my automatic door set up when these pictures were taken. Will take some pictures when I get back home.
3 Likes
Hmmm
Your into the older car rebuilding like the model T ?
It’s taken you a while to get your layout up, great to see you back 
Yes Sean,
I restore and repair old cars mainly but currently have a’79 triumph spitfire I’m doing for a customer. Between running my own packaging equipment repair business, restoration business, then just general life, projects get put on hold. The outdoor layout has been planned since I built the house making the raised area at the same time as the foundation was dug. That’s about 25 years ago! I have many hobbies too like the old cars (showing my own), building and flying scale RC aircraft, hunting (bow, primitive arm), building muzzle loading firearms, managing a band, and still being a husband! I often put things down when something else becomes a priority or when I just need a change to refresh the mind. Restoring cars to show cars and doing correct is something that often requires you to step back and take a mental break. I’m a one man shop (other than the painting) so short breaks are needed to keep your interest at full level. I’ll often take a break by going in the basement and building an rc balsa kit or building some car or cars for my RR. I usually turn on my layout and let it run the whole time I’m in my basement. Now that I’ve enough track down with a double loop outside, it’s pretty pleasing when a train heads out along the wall, the auto door opening then it’s gone for a while. I’ll then hear the automatic door open and hear the train coming back in, going into the yard nd switching out the next train before it comes to its final stop. His process just keeps repeating itself and is something that just enjoyable and soothing to my mind. My wife doesn’t understand it but some of my and even her friends do. One girlfriend of hers said she understands as her dad had a HO layout and as a young girl she would be with him while he ran his trains. She will come downstairs and sit and watch mine run when she visits.
Please share the formula…
Looking back at the build thread for my bridge. it was Steve Featherkile who suggested the mix…
This, and several other color experiments are from the build thread for my Indian Hill Bridge, found here: New Deck Girder Bridge for Indian Hill - #72 by JRad
Excerpt from that thread:
25% Ebony Stain 75% Boiled Linseed Oil…

Reading further down the thread, I changed the mix a bit to 33% Stain / 67% Oil…
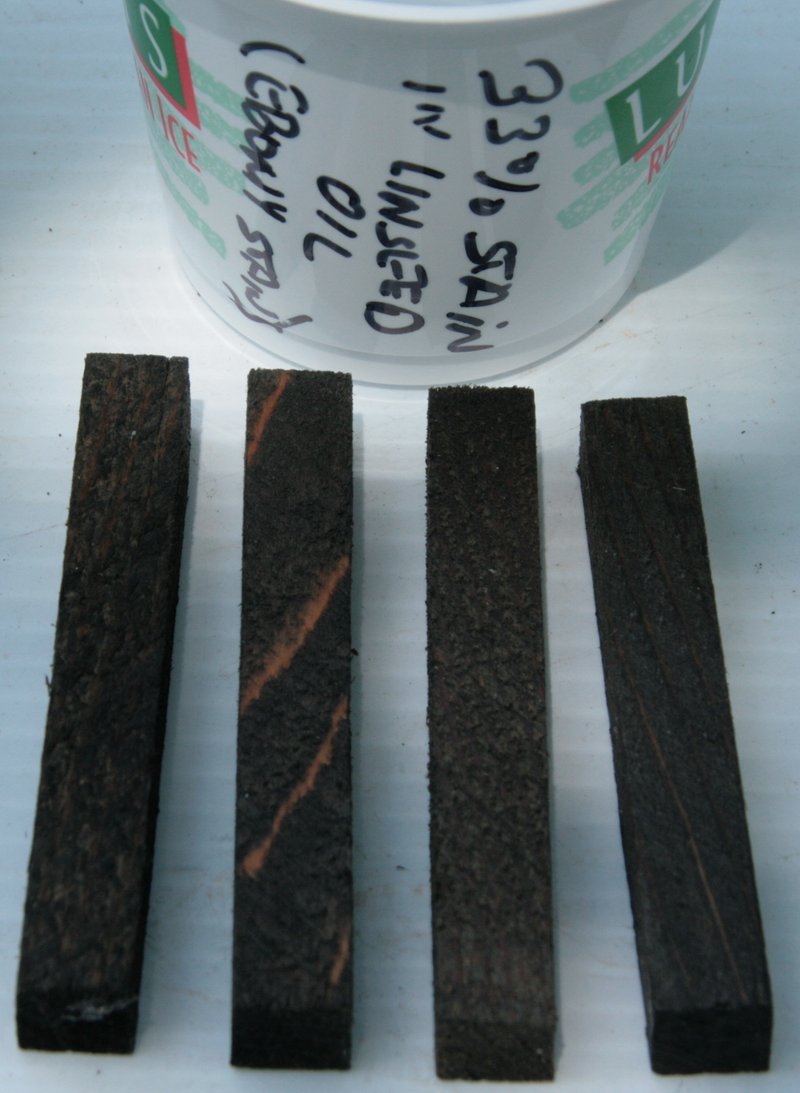
Which is what I settled on in the end.
Jon, how has it held out? And how would you say it compares with deck stain alone?
I cant compare it to “deck” stain as I have not used it for anything. The Cabot Redwood stain I used on my engine house refurbish faded rather quickly, but the black seems to be holding up well. It’s rarely in direct sunlight, even in winter.
This was after 4 years outside, in 2019…
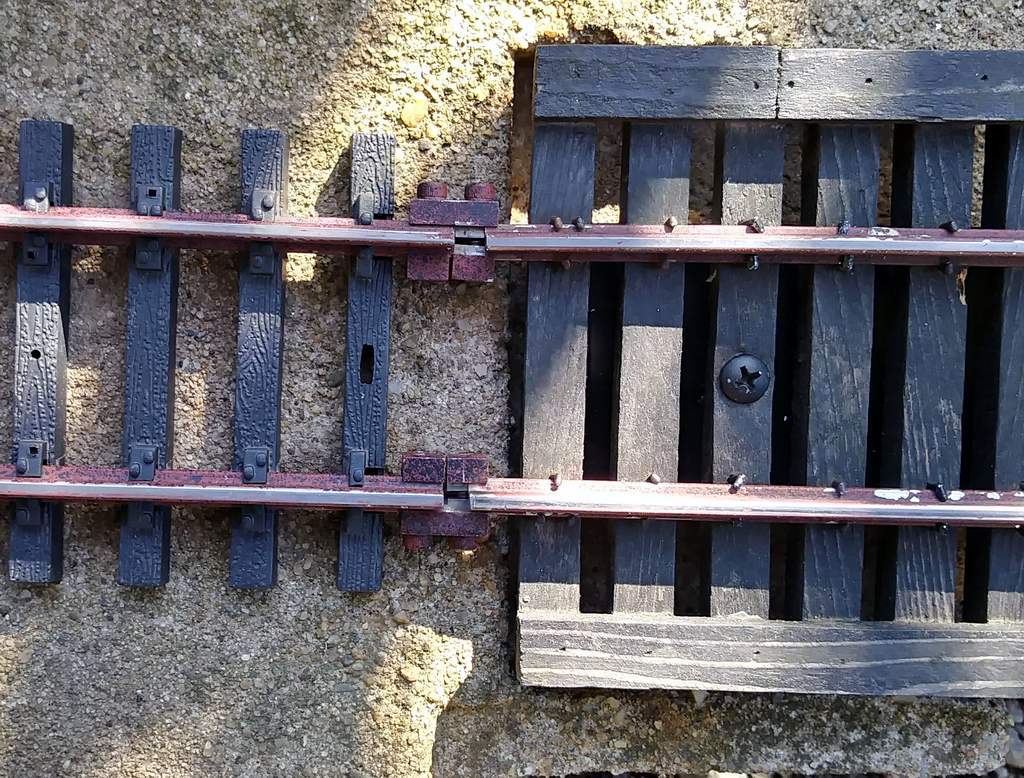
Overall, it’s held up quite well. This was one year ago, indoors for repair. Almost 10 years out in the weather…

That’s great to know, thanks Jon.