Dave,
Those shots of you in the gallery … I almost didn’t recognize ya! Damn you clean up well.
A heartfelt thanks for all the great, and mostly otherwise unobtainable, photos and information you are providing on the narrow gauge.
Bob C.
Dave,
Those shots of you in the gallery … I almost didn’t recognize ya! Damn you clean up well.
A heartfelt thanks for all the great, and mostly otherwise unobtainable, photos and information you are providing on the narrow gauge.
Bob C.
REPLACING TUBES IN A STEAM BOILER… Well we got the junk out of the smokebox, and that was the goal for the days work, only it wasn’t yet noon, so Stathi said well, were here and we have the time, lets go ahead and start on the tubes.
Replacing tubes was all new to me… I have seen videos, I have read a lot, and generally got the idea, But there are a lot of little things that I never knew, as I had never been actively involved in the work. So when it was decided that we needed to replace a few tubes, It was decided that the boiler guys at the C&T would do it, as none of the active crew members had ever had hands on experience on 315’s tubes. Ten years ago when we un-stuffed her from the park, the shop guys at the D&S were tasked with the re-tubing. I put the word out that when the C&T crew was going to tackle the tubes to let me know, and I would drive over and assist any way I could, so I would have some first hand knowledge of what all was to be done, and I’m writing as best I can a maintenance and repair manual for 315. We had the time, he wanted to do it, and I was eager to learn, so away we go.
The five offending tubes were Identified by Stathi from the firebox end, and I marked them in the smoke box end. Easy to find… Shine a light thru them.
NOTES about the drawings I made… Not to scale, and not technically accurate, as I over emphasized some things for scale and to get the point across…
The tubes run thru the boiler from the firebox to the smokebox. Each end of the tube is handled differently in how its sealed to the tube sheet.
Drawing #1 cross section of the tube sheet at the smoke box side. Note the small space sticking past the tube sheet.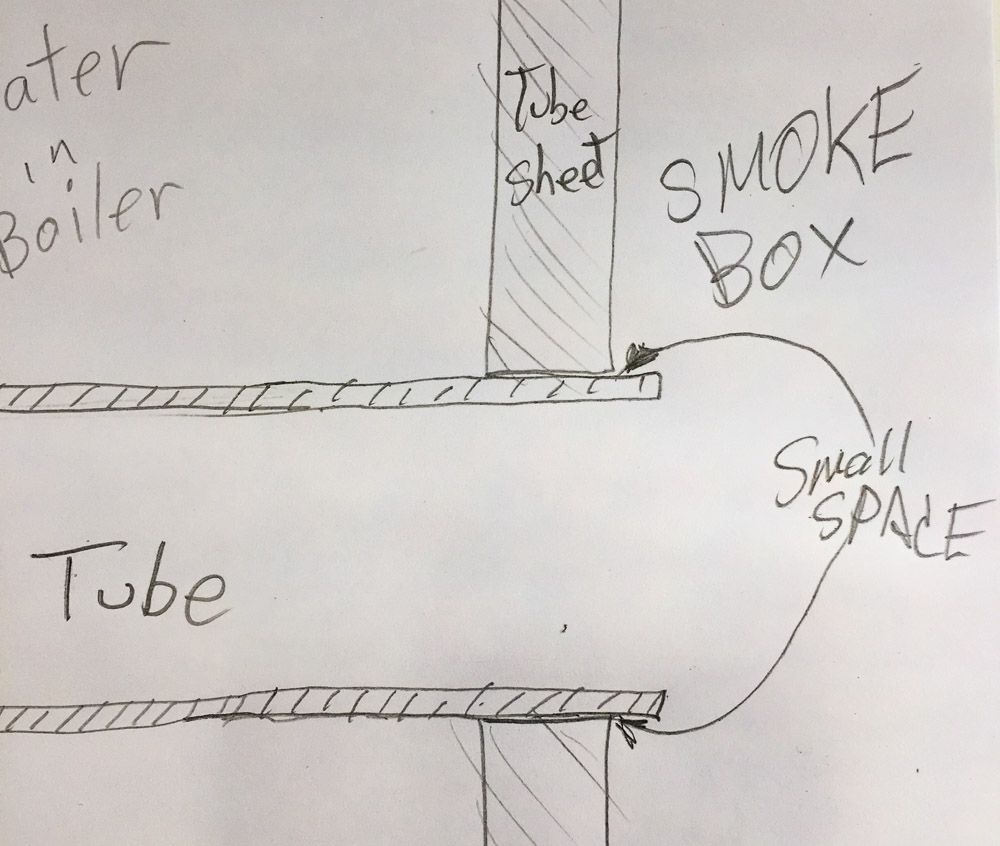
Note that the tube only goes thru the tube sheet, it is rolled ( more on that latter) with no welding or other treatment. Simple to do.
Tube ends in the smokebox.
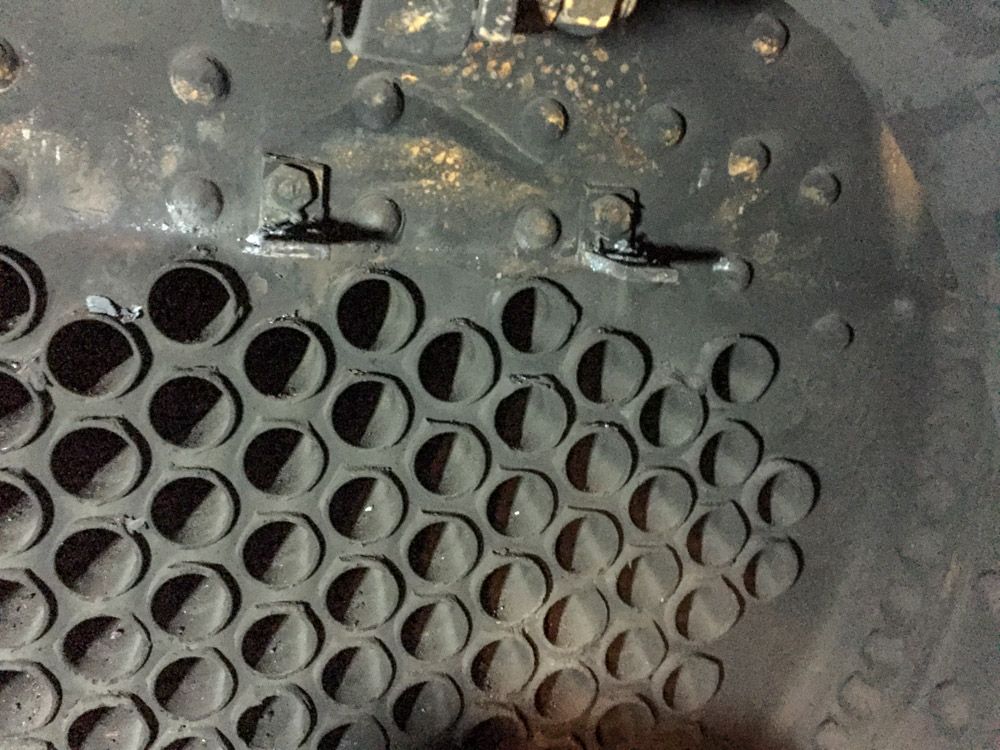
Note that they are just sticking out.
Drawing #2 cross section of the front tube sheet and tube on the firebox side.
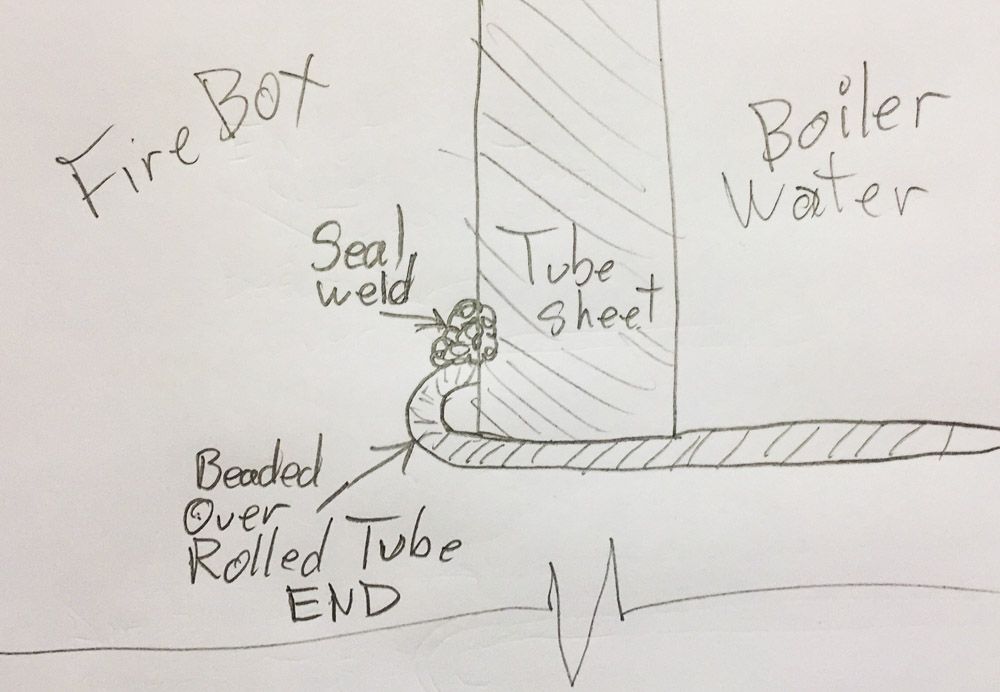
Note that the tube on this end has been rolled (more on that latter ) with the protruding end has been rolled over and “Beaded” over onto the tube sheet, and then “Seal Welded” against the tube sheet.
I showed these two drawings so you can have better clarity of the pieces as I explained what we did. I’ll start in the smoke box side, as that is where I spent most of the day.
To “Free” the rolled tube from the tube sheet, all that is done is a cutting torch is precisely used to cut thru the tube lengthwise where it passes thru the front tube sheet in three places. Note that there is no “Beading” or welding on the front end. Its “Cooler” and there is less stress on this end of the boiler, then at the firebox end, less thermal expansion also.
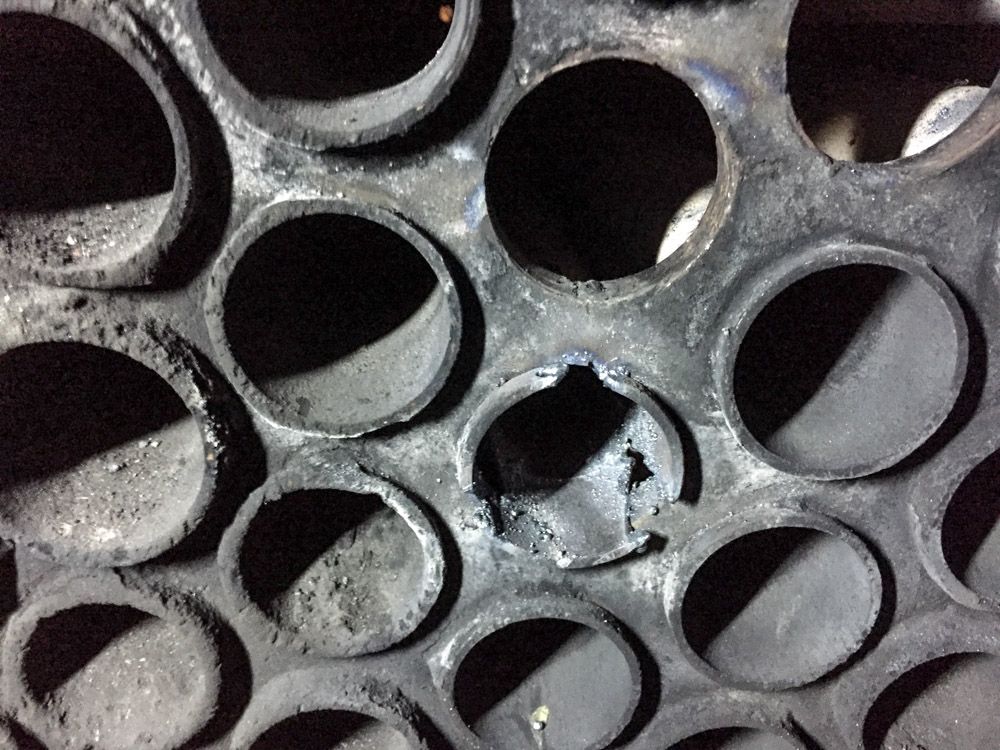
Great care is taken to be sure not to cut into the tube sheet.
After cutting, I used a cold chisel, and bent the cut ends inward to free the tube from the sheet.
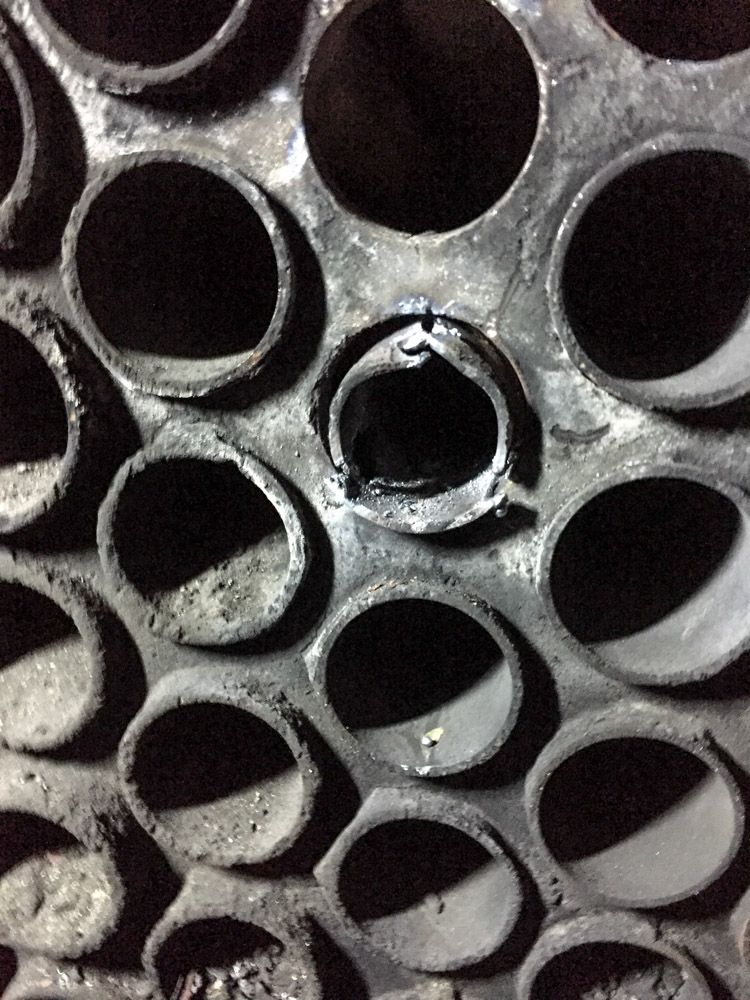
Thats all there is to prepping the smokebox end for tube removal. Now actually getting the tube out is yet another challenge. On to the firebox side.
I did not get to take any photos inside the firebox side, Two guys inside there is really tight, and I was working the front as Stathi worked the firebox. Back to the drawings, Referencing back to drawing #1 as a side view, and now a front view.
Drawing #3 straight on view of the front tube sheet and tubes on the firebox side.
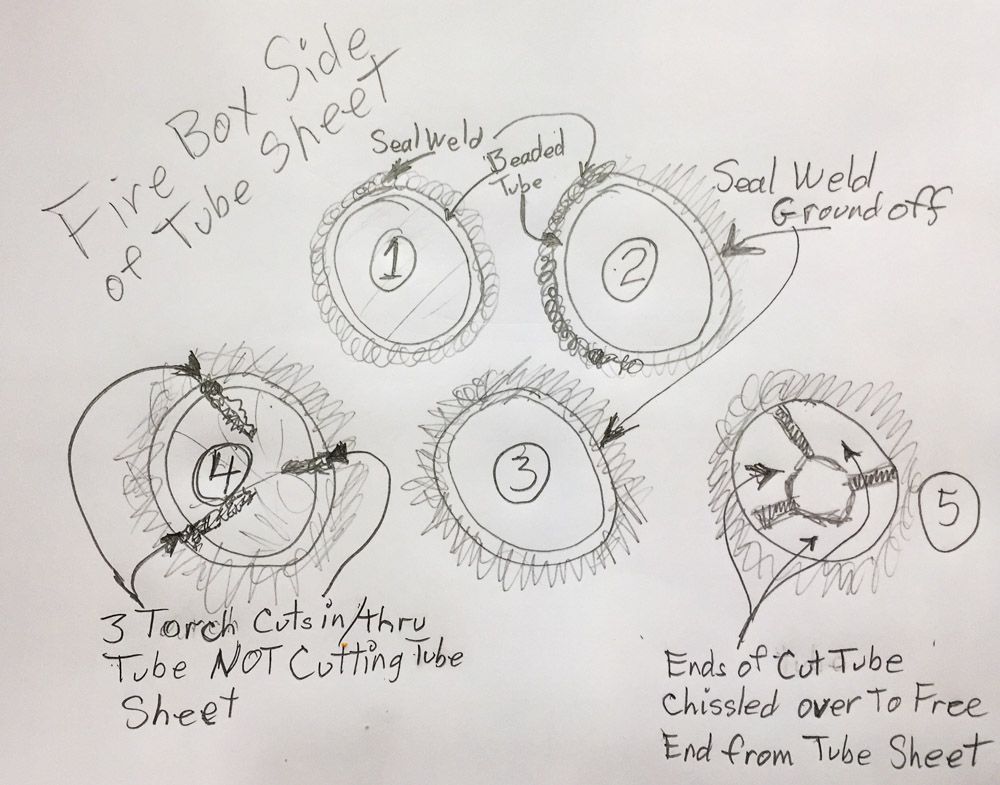
#1 - end view showing the beaded over tube with the seal weld all around the tube.
#2 - #3 showed that we had to grind off the seal weld around the tube, leaving the beading in place.
#4 - Shows the three torch cuts radial on the tube end, and carefully avoiding the tube sheet.
#5 - Shows the end of the tube after chiseled into itself, freeing it from the tube sheet.
Drawing #4 shows what the objective is, after cutting, and bending the tube to free it.
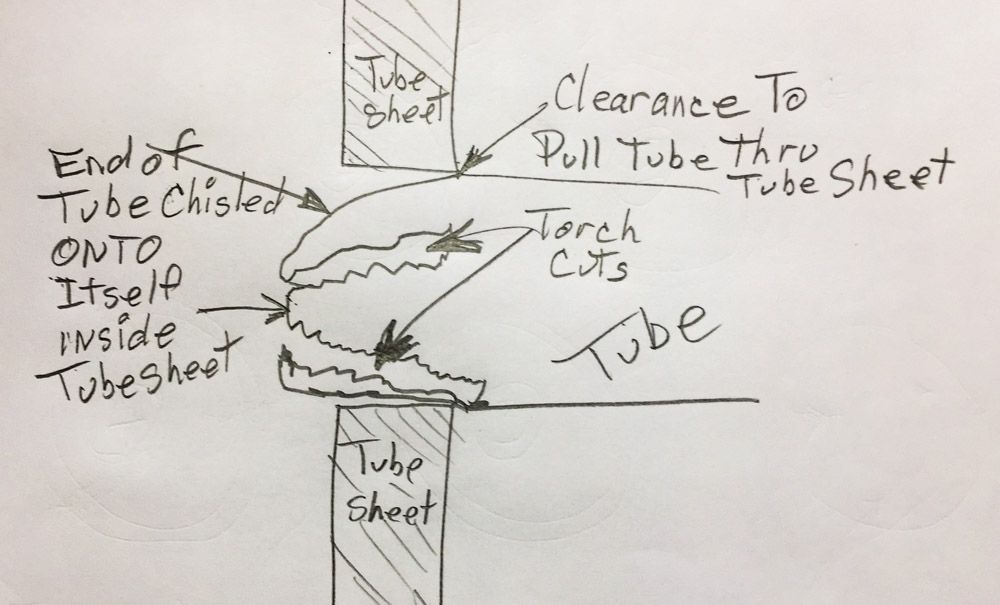
The tube is free of the tube sheets. In this case, we only had to do 5 tubes. when you have to do a FRA mandated 1472 inspection, and re-tube the boiler, you have to do ALL THE TUBES. Very time consuming. 315 has only 152 tubes, not that many, and they are all the same size, really big locos can have hundreds more then we have. Also no superheater and oversize tubes.
For this job, we were able to push/pull the tubes out thru the firebox.
To get them out, we used a 10 foot rod, and I held it on the end of the bent over tube in the fire box, and Scott Gibbs wackked the other end of the rod with a sledge hammer, and we drove all twelve feet out, one wack at a time. Several of the tubes just slid out, one we wackked and wackked for about three feet, then we rigged a come-a-long on the firebox end and pulled it on out. A lot of work!
Tubes out!!
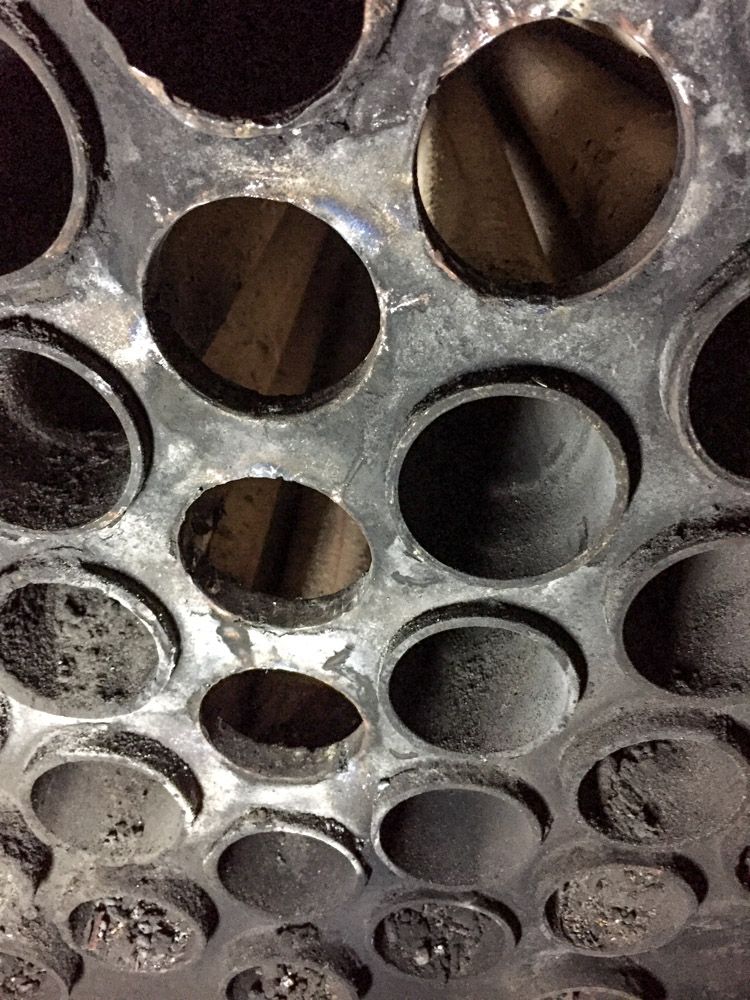
Before we can put the new tube in we have to clean up the holes in the tube sheet.
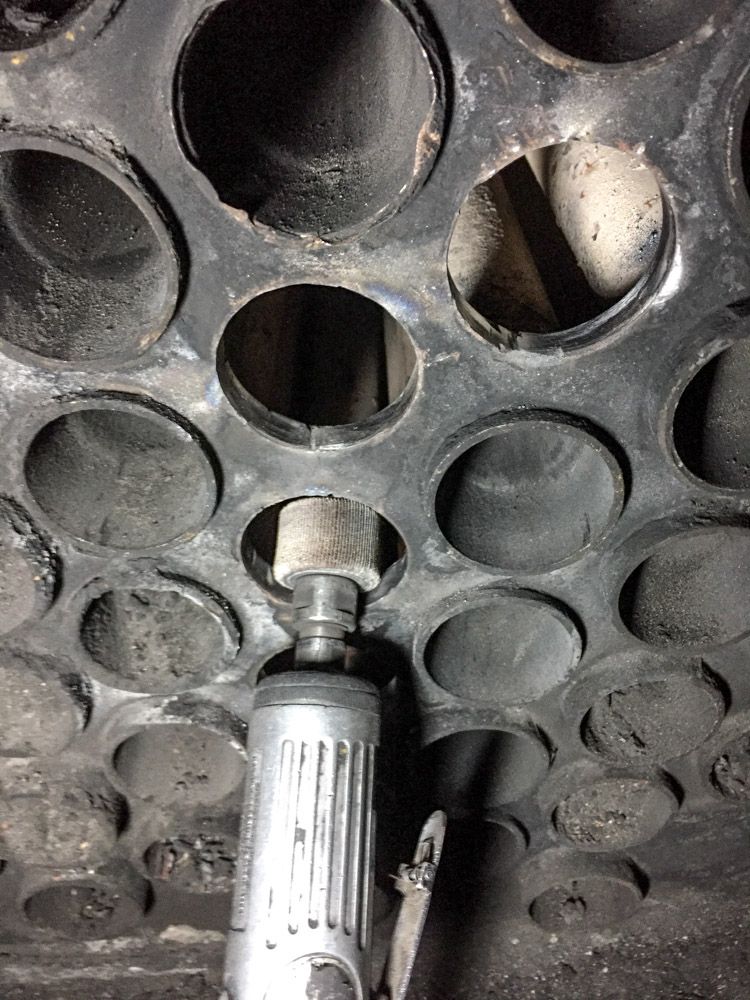
An air die grinder with a sanding flap disc, does the job. You need to clean the hole in the sheet, and de-burr the inside and the outside edges, Care must be taken not to over do the grinding and make the hole any larger then absolutely necessary.
All set for new tubes,
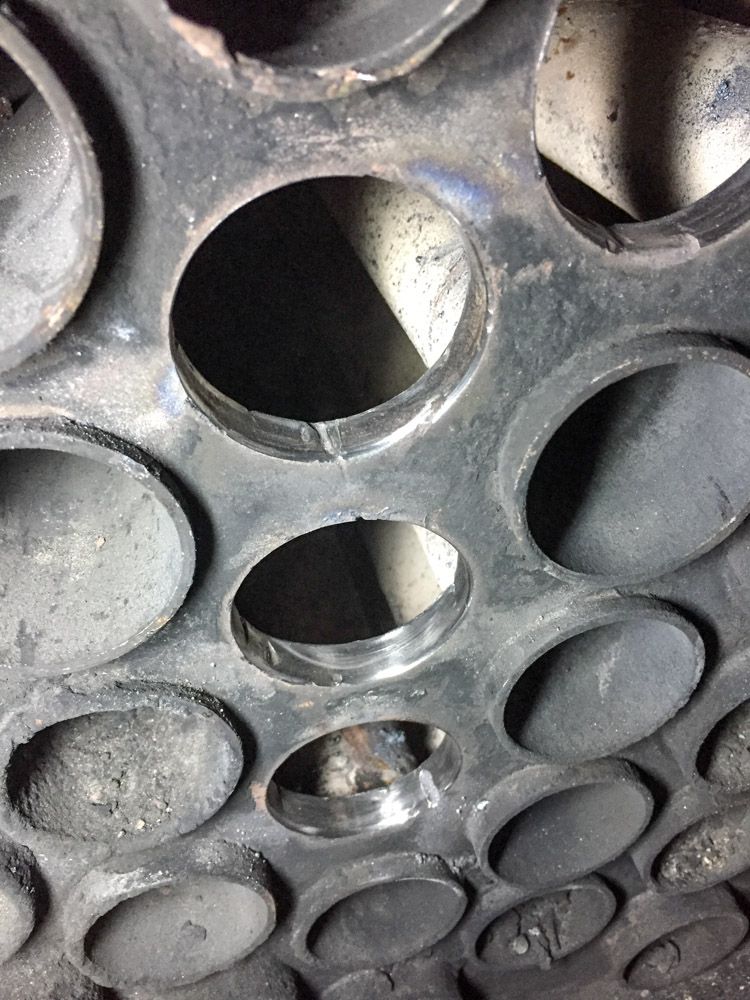
This was done on both ends of the boiler.
UP NEXT: Installing the new tubes…
I’m off to Antonito this morn to Finnish up some work on 315, I finished up the rest of the drawings for the tube replacement, and I’ll post ASAP.
JUST A REMINDER: We will be having a week long work session in Antonito CO having our FRA Annual inspection, starting on May 1st thru 5th, for anyone thats in that neck of the woods, your very invited to stop by and say howdy, I’ll give you the nickel tour, Hell we just might let you get dirty with the rest of us.
Interesting…so far I have not been involved in tube replacement…yesterday I was involved with forming a new rear tube sheet for a new boiler for ww&f number 10. I’ll try to post some photos.
Dave Taylor said:
Finally made it to a full work day on 315 in Antonito. It’s now after midnight. SO I will try to fill you in on the fun tomorrow.
I got really dirty today, so dirty that my wife made me show ID before she would let me in. Wouldn’t you if this came knocking at your door at 10:45 at night.
She now says that it’s official, I’m a dirty old man…
Bucket list stuff today…
DAMN it looks like SO much FUN ! I wish I could be there having such FUN. No way this year . . . the ankle that My gal broke when the bad hip gave out is healing crooked and looks to have to be broken and re-set ( Ouch ! ) . . . just now way I can get to Narrow Gauge Country with all this going on . . . . and then in late June I have to “vamoose” to Stockton for 4 months.
Nice . . . thanks for posting . . . . . . . (http://www.largescalecentral.com/externals/tinymce/plugins/emoticons/img/smiley-smile.gif)
Nice vid!
Well it’s only been 8 months since I last updated this log… Where to pick up? Wellll we got the tubes in and ran a lot this summer…
I’ll see what might be interesting and try to get caught up…
Good to see you back. I’ve been missing your interesting and entertaining posts. A visit to the remaining D&RGW railroads is one of the things on my “bucket” list.
Been another Nine months since I last posted on this blog… Time to try and get caught up.
I have been appointed or anointed, I’m not sure which it is… As “Chief of Maintenance” on D&RGW engine 315. That has put a heavy added load on my back. I’m a bit honored, and a bit scared. It’s official now, if something goes wrong or breaks on a 123 year old locomotive, it’s officially my fault, well maybe not, but everyone looks and points the fingers at me. Depending on how bad the problem is, which finger is used… Oh No…
For an upcoming charter for a fundraising event for the Cumbres and Toltec RR (C&T) the 315 is in the process of being back dated to when the D&RG bought her from the F&CC ( Florence & Cripple Creek), and was re-numbered to 425, before she was assigned 315.
The 315 crew is in the process of changing out all the stuff to get her aged, and one of the main looks to get her back to 1918 is the wooden pilot.
Sounds simple enough, right… wellllllll maybe not. As Chief of Maintenance for 315, I took it on to get the wooden “Cow Catcher” on the front end. Where to start.
This BLOG will be more of a “Build Log” then a technical class.
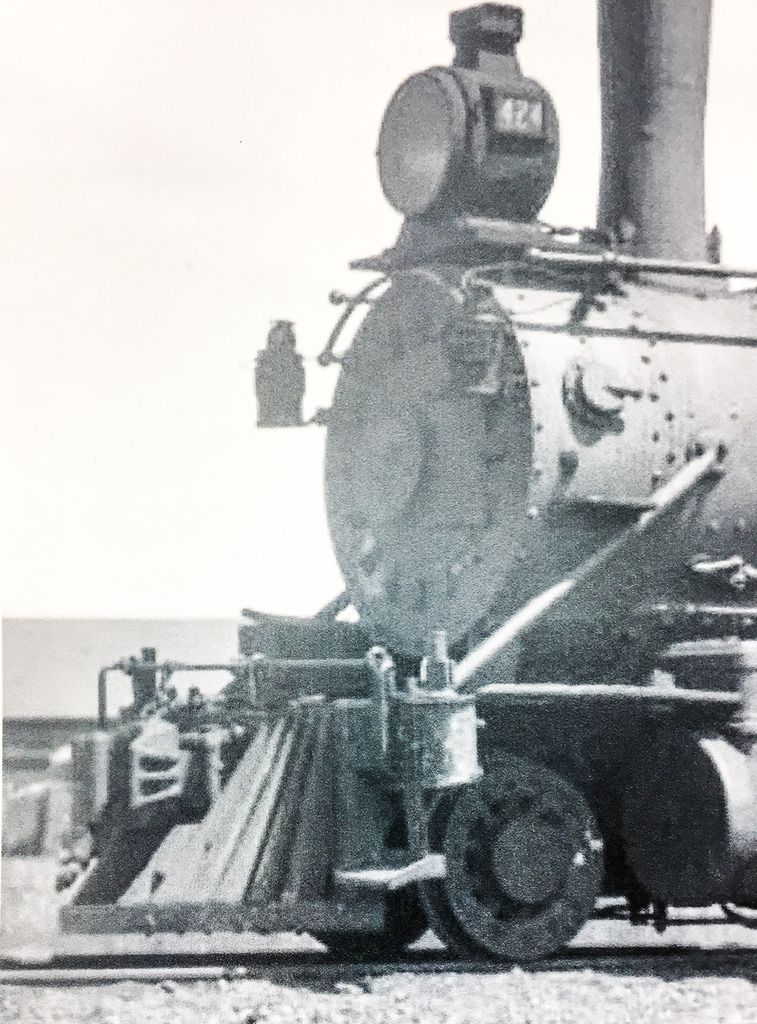
First off I started looking for photos of the early years of the C-18’s 425 is not pictured but I did come up with a pic of 424 her sister.
Here’s the front of 424. Notice how far it (cowcatcher) sticks out, and that it is two colors, a light color in the middle and darker on the sides.
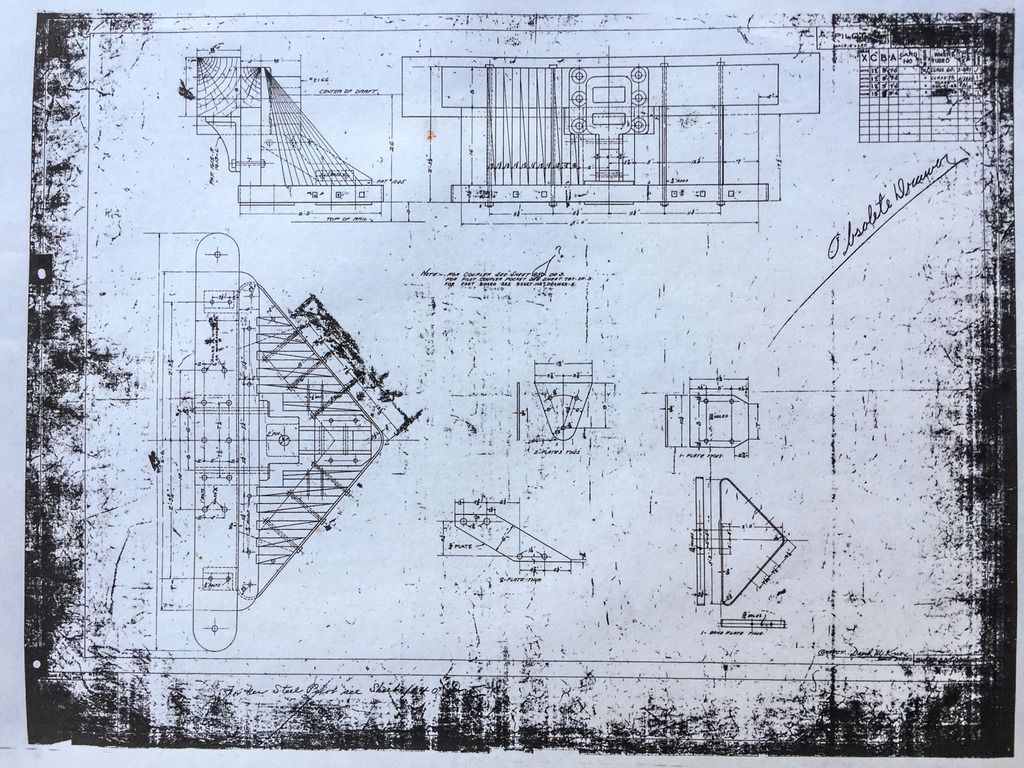
And the copy of the original blue print from the D&RG archives of the planes for wooden cow catchers. Give a good idea of construction, but wrong size and wouldn’t fit. And it has a lot of steel built into it and used to attache it to the pilot beam.
The decision was made, since this cow catcher was a temporary prop, that we would make it as simple as possible to add and remove, but be as true to the prototype as we can. And as a fundraiser project, keep the cost down to a very small amount.
We spent several hours on the front of 315 taking measurements and designing a mounting system. And some times just making a “Swag” for how to get it to fit. Un-beknownst to most people, is that there is a lot of steel in the original . We are trying to get it done in wood, Saves costs, and construction complexity.
I finalized a plan, and drew up a full size Drawing. 1:1
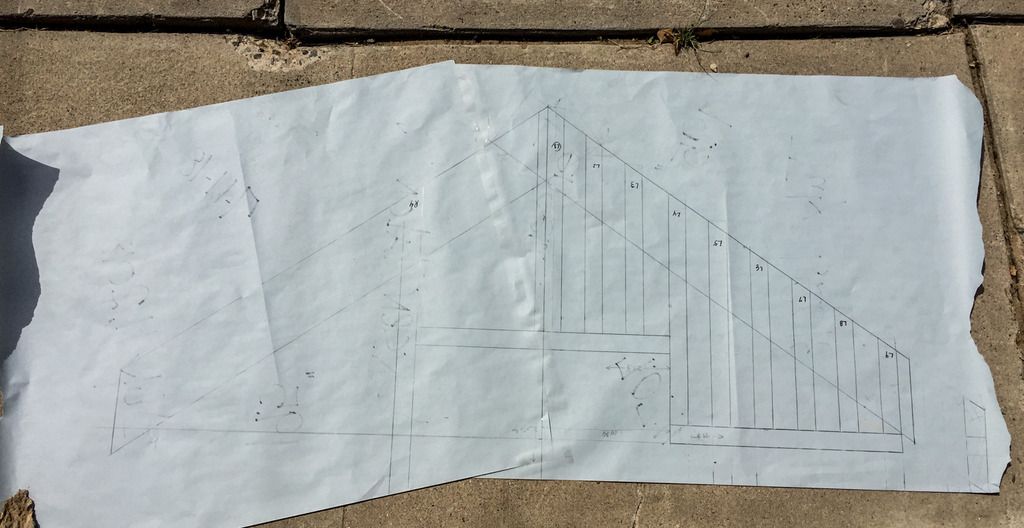
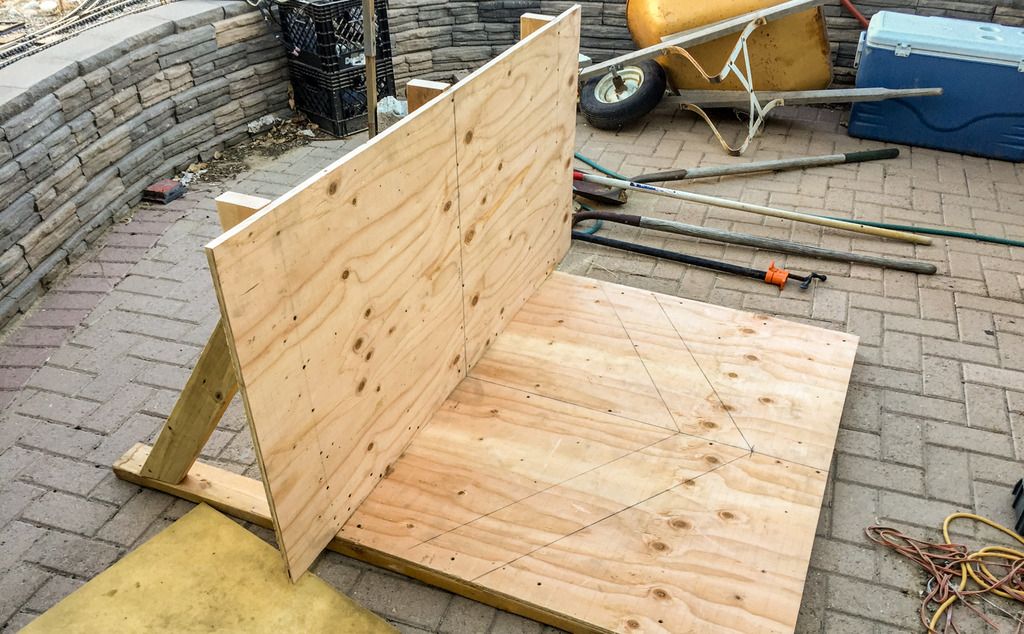
The hole in the center is for the front knuckle to pass thru. The other realization is how would we be able to get the right angles on the vertical boards, and how to keep everything aligned while we did construct the unit. I decided that I needed to construct a Jig to align everything, and to actually build upon. The Jig needed to be square and straight and have a 90 deg. angle to it, and be as wide as the front of the engine.
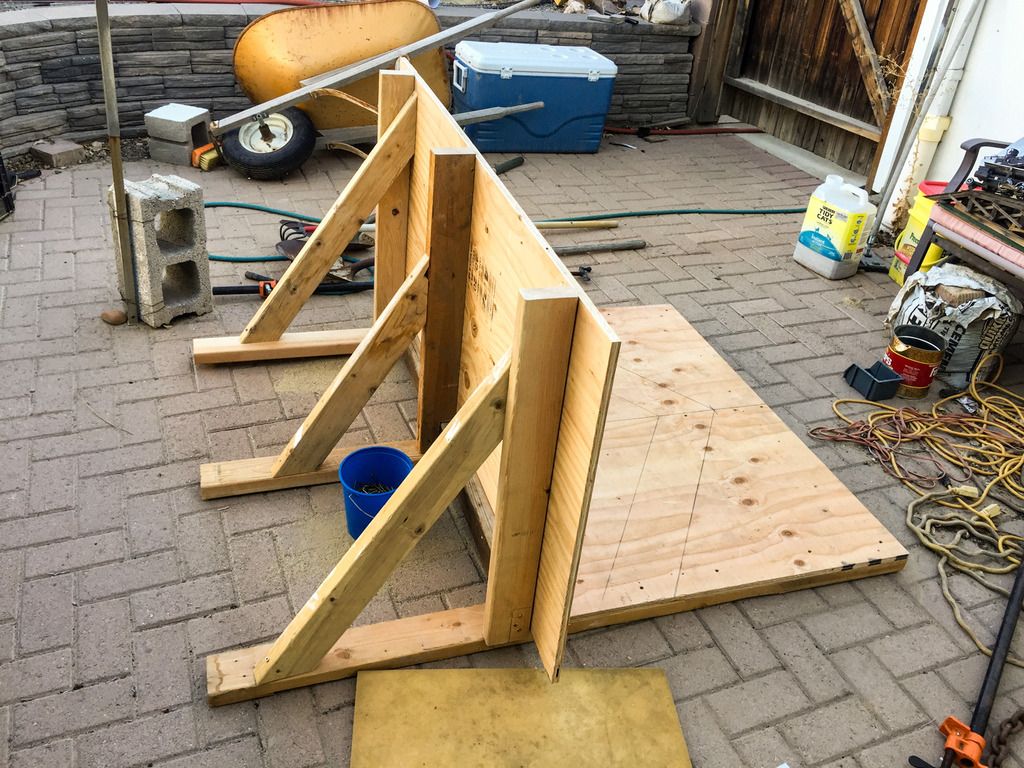
This is what I came up with after several hours in the Hot NM sun.
And the reinforcing on the back side.
I got the important centerline drawn and layed out the alignment and placement for the front bottom beam, and the top beams. Finally I get to start building the real thing
Stay tuned…
Thanks for checking in. You’ve been missed.
Congrats Chief!
The 315 report is fun too.
Its just my opinion, but the difference in colours on the pilot in the photo appear to be sunlight and shadow cast on the thing.
Yah… I think so… Sun and shade… It’s going to be all engine black.
Congrats on being named “Chief Scapegoat” on the 315. Will be neat to see her with a wooden pilot.
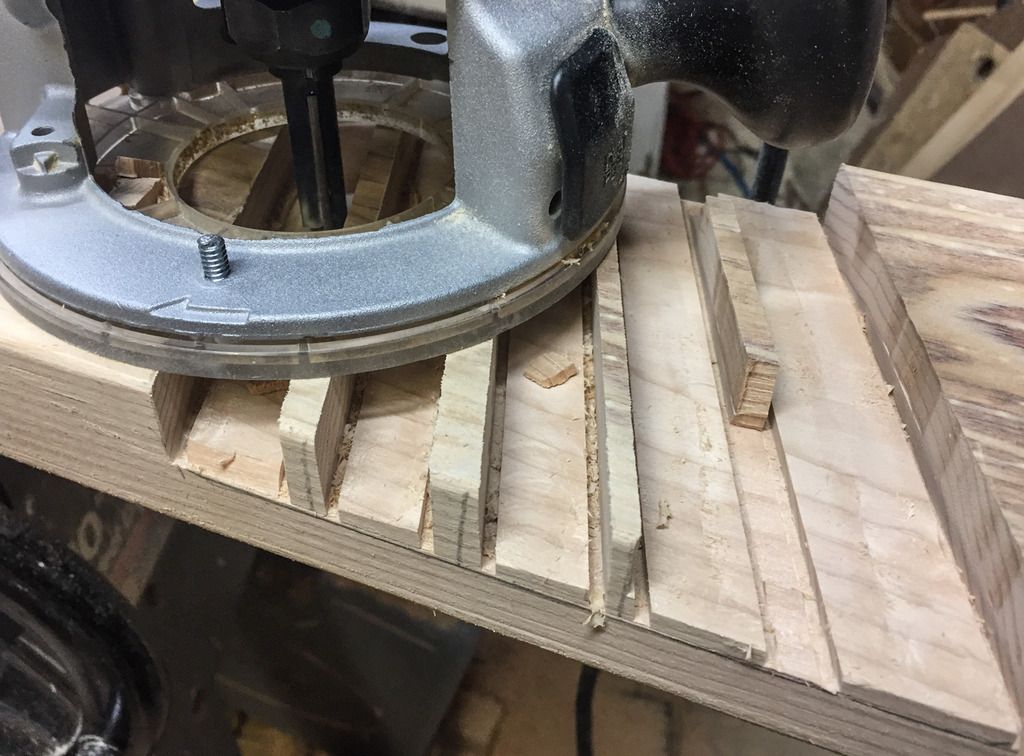
Got busy on wood cutting and building. The bottom board that supports the uprights is angled at 110 deg. at the point. This supports all the uprights. On the original ones there was a 1/2" steel plate that both held the two side pieces together, and had another two steel brackets that went up to the coupler pocket for support. No steel on this one, so I decided to use a half lap joint at the points, and then Glue ( Titebond III waterproof ) and Screw for strength. All lumber to be used is common 2x6 boards ( actual 1 1/2 x 5 1/2 inches).
Set the table saw miter to the 55 deg. mark ( 1/2 of the 110deg total ) and cut the cheeks to 3/4 inch deep, and a couple of risers for the router to set on.
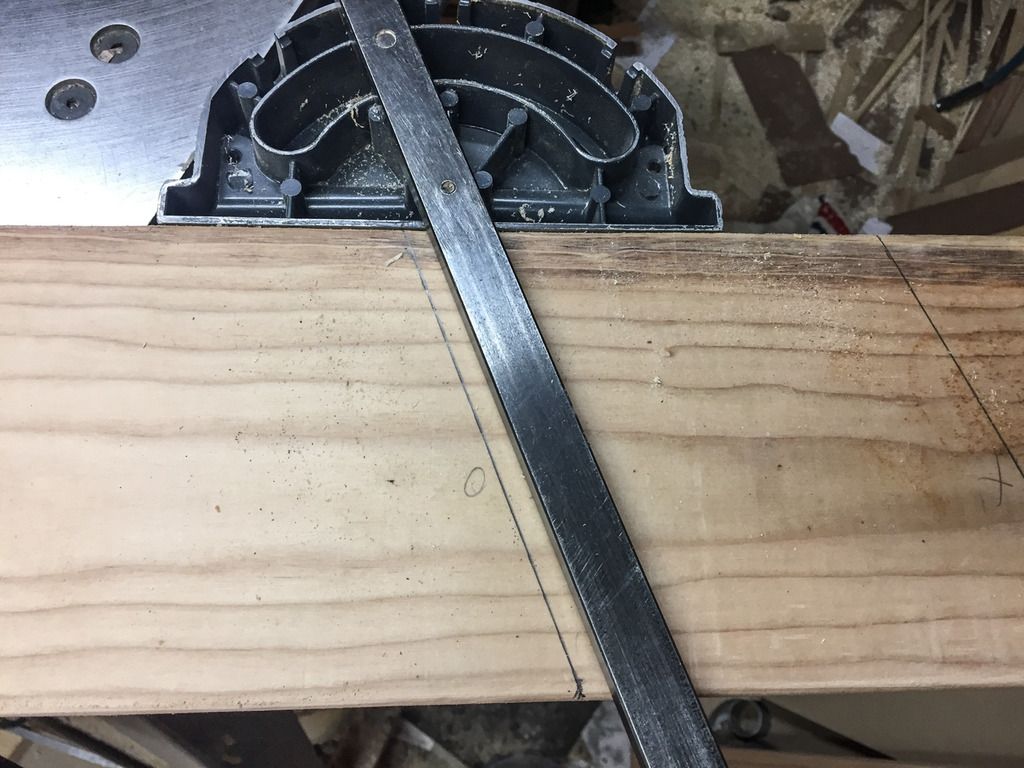
Set the router with a flat bottom bit to cut 3/4" deep, and removed the bulk of the cut out.
Used the chisel to clean up the cut and sanded smooth.
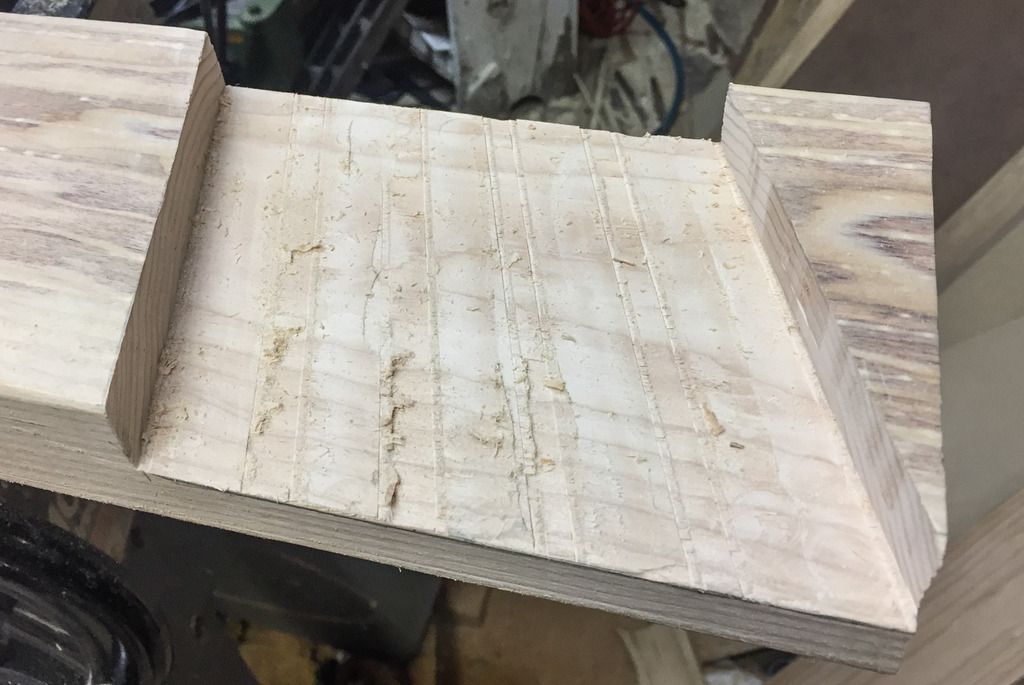
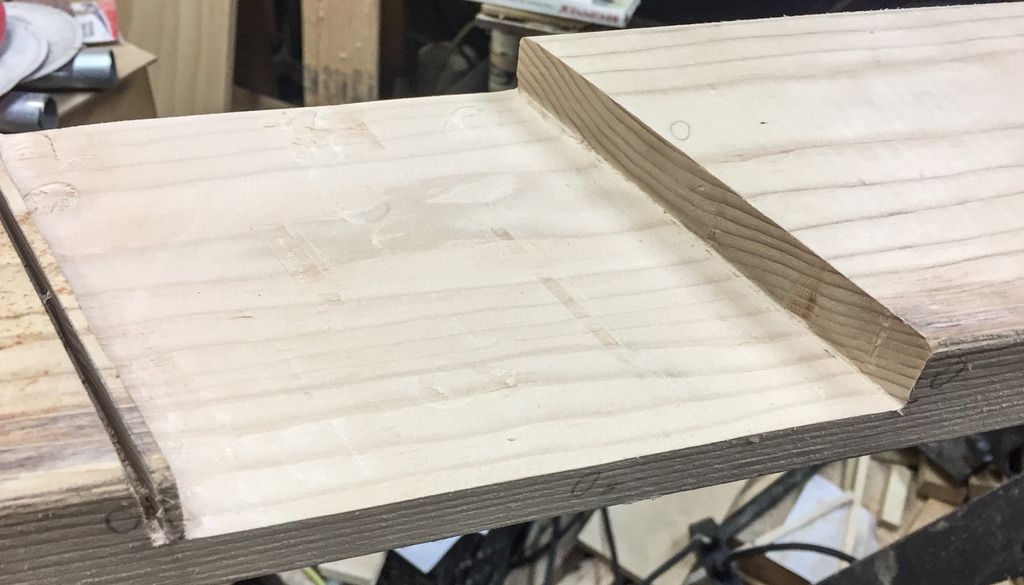
Did both bottom boards.
Glued and screwed the joint. Paid close attention the the screw locations so that they wouldn’t interfere with the screwing and dowelling of the vertical pieces that will be attached on the top side.
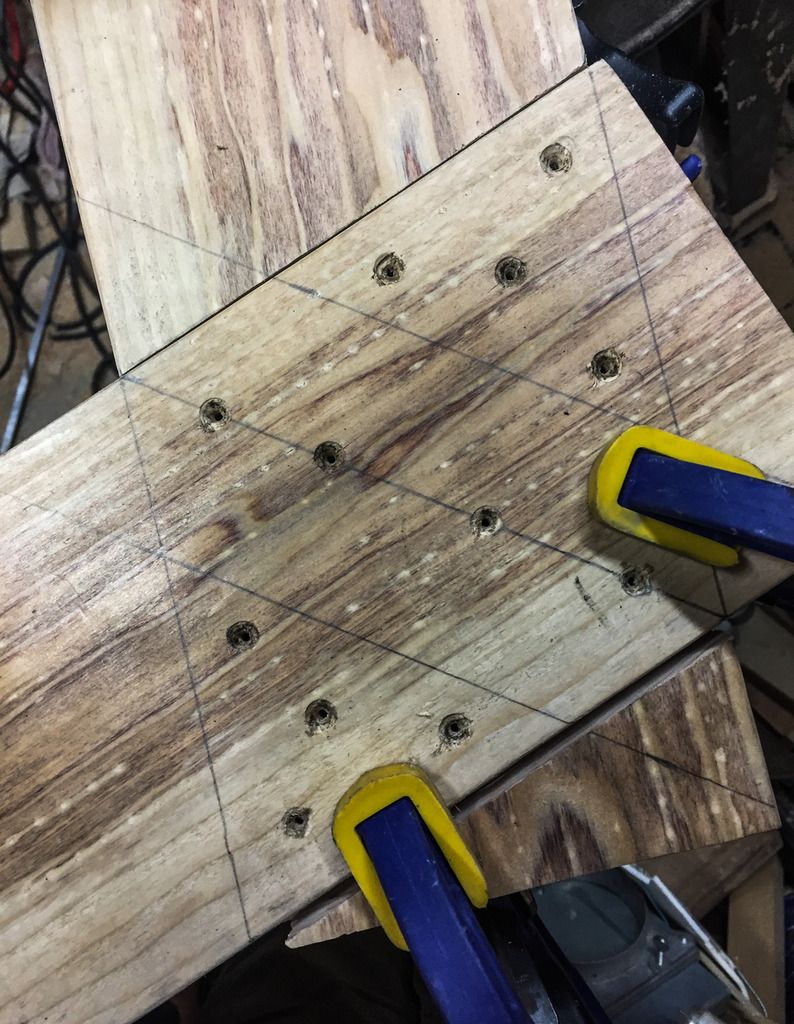
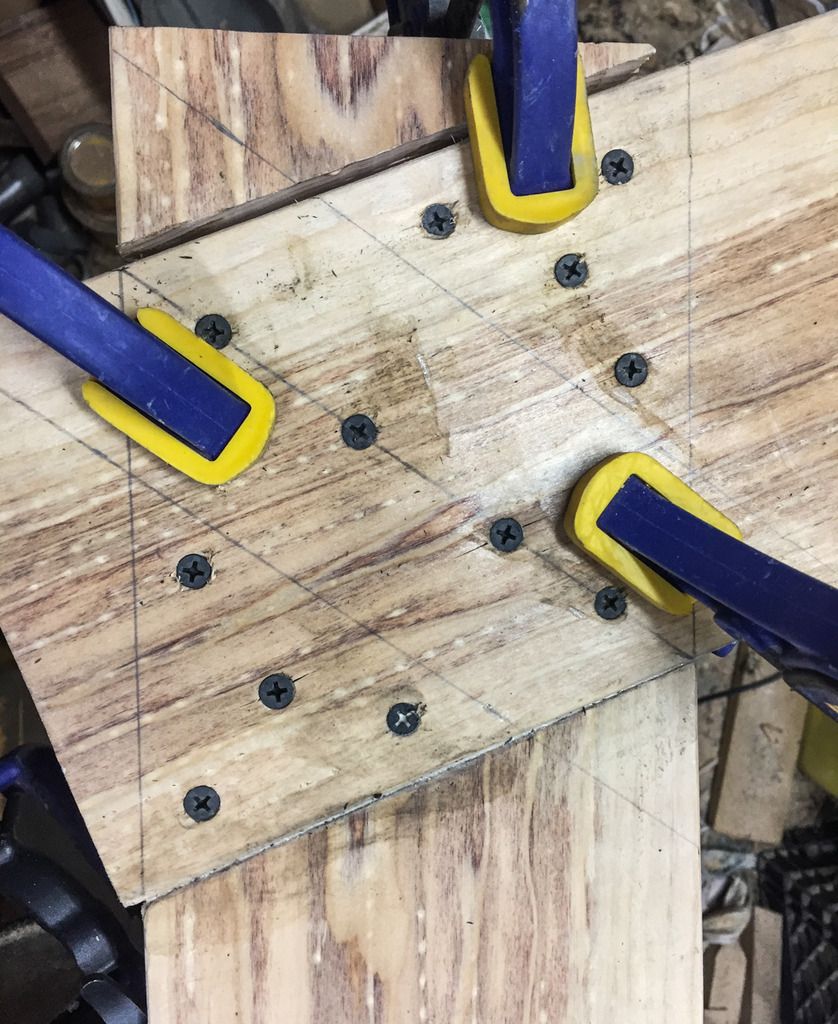
Trimmed the ends, and laid out all the mounting locations for the vertical boards. Everything will be located in reference to the center line on the jig.
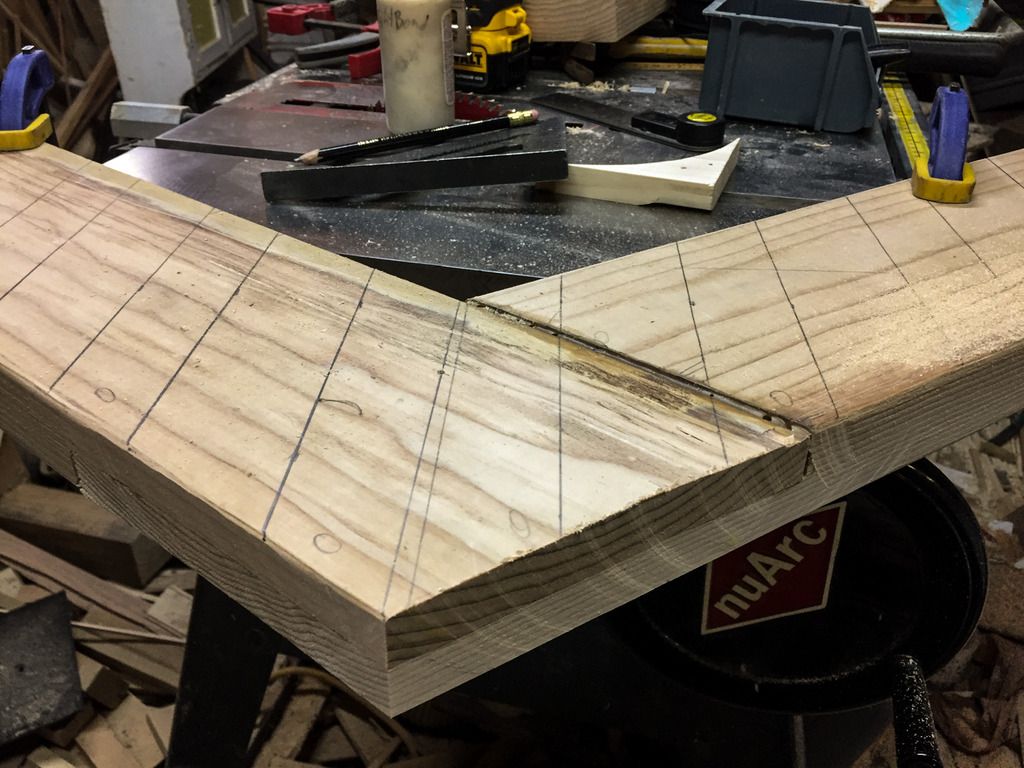
One of the big steps to this thing went well.
Stay tuned for more.
Great work Dave !
Scratch-building in 1:1 scale. Cool.
So are you going to offer these in kit form? (https://largescalecentral.com/externals/tinymce/plugins/emoticons/img/smiley-wink.gif)(https://largescalecentral.com/externals/tinymce/plugins/emoticons/img/smiley-wink.gif)
As an amateur woodworker I always learn something from your techniques. Thanks for sharing them. Great work so far. It will be neat to see 315 back-dated. I prefer her later look, but I might be swayed by your transformation.