Large Scale Central

D&RG 315, My week in Silverton

Last week before the snows hit the Durango area, we had a work session on D&RGW 04432 Water service Bunk Car. My task for the day was to remove the windows so that they could be copied and new ones made over the winter.

The side windows were added when the original box car was converted to a bunk car. They are single 4 pane wooden windows.
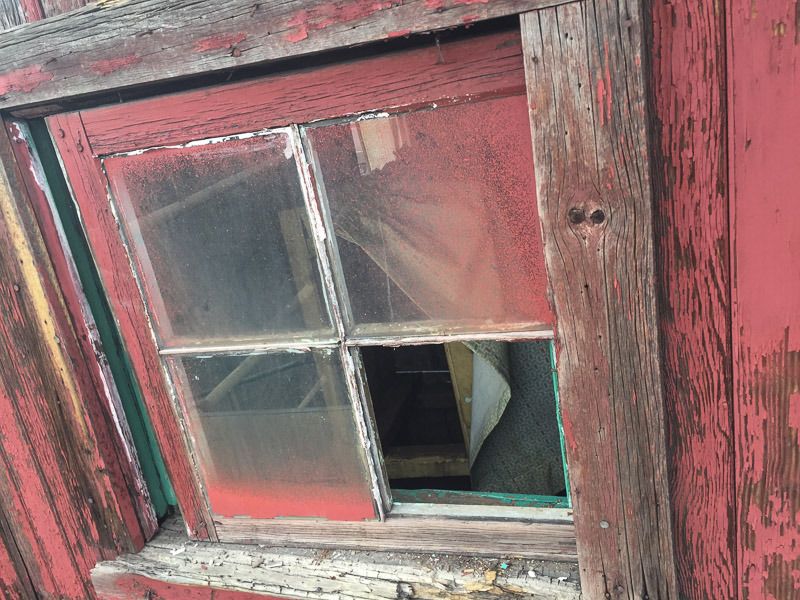
What makes them different is that they slide into the wall cavity, I guess that you would call then “Pocket Windows”.
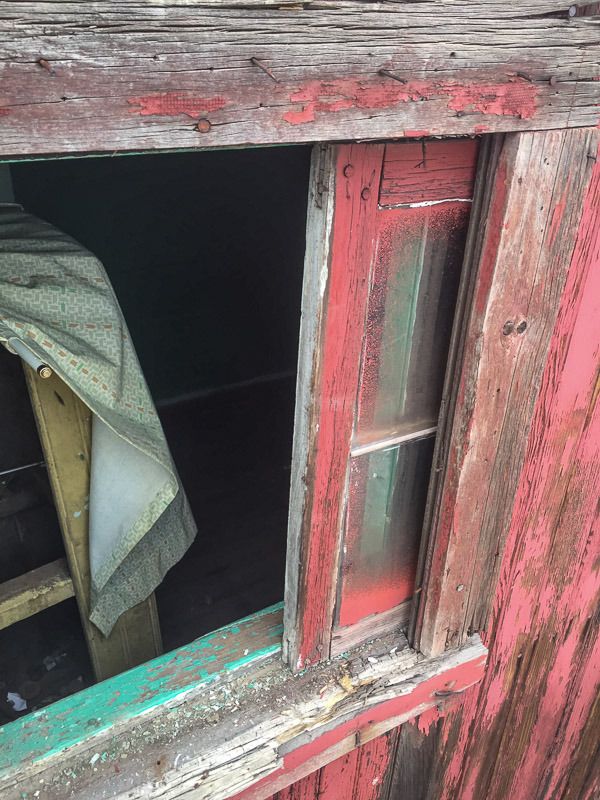
They were held in place just by the 1x3 trim molding. Here is looking into the “Sliding Pocket”.
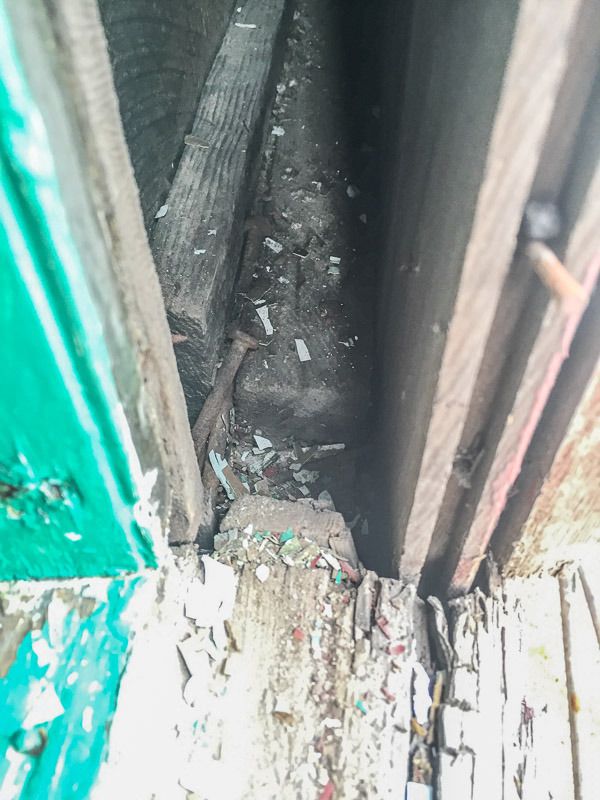
NOTE: To make the space for the window to slide in, one of the vertical wall support beams had to be cut. You can see the top of it just inside the opening. There was no added support on the car to take up the load. But there was the added boards on the inside walls, they must have thought that that would make up for the three cut posts.

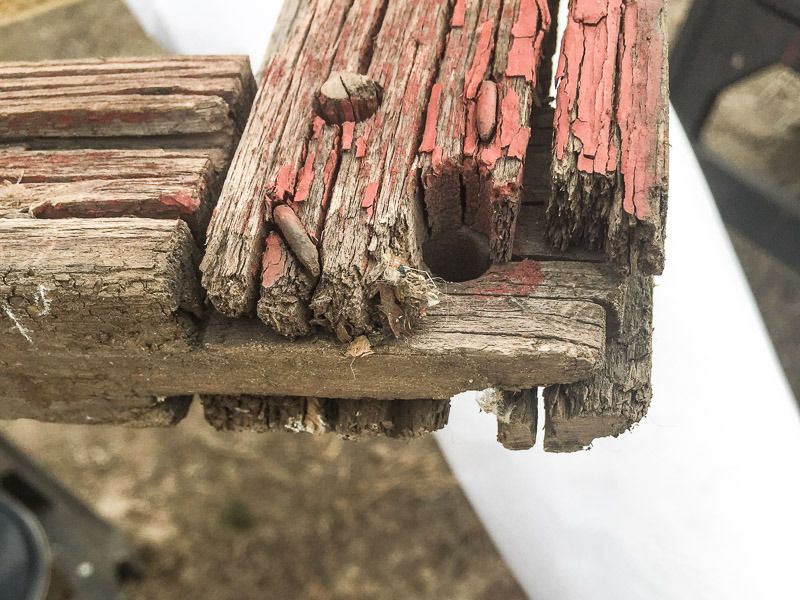
Now, these windows, As simple as they seem, Were hand crafted by a master carpenter. After pulling them out I got to looking them over, and the craftsmanship that was applied to a simple window, has really upped my apparition for the guy that made these shortly after the turn of the century. Here is the top corner, its in pretty good shape for 100yr old. Note how it was made. I’m sure that the nails were added many years later.
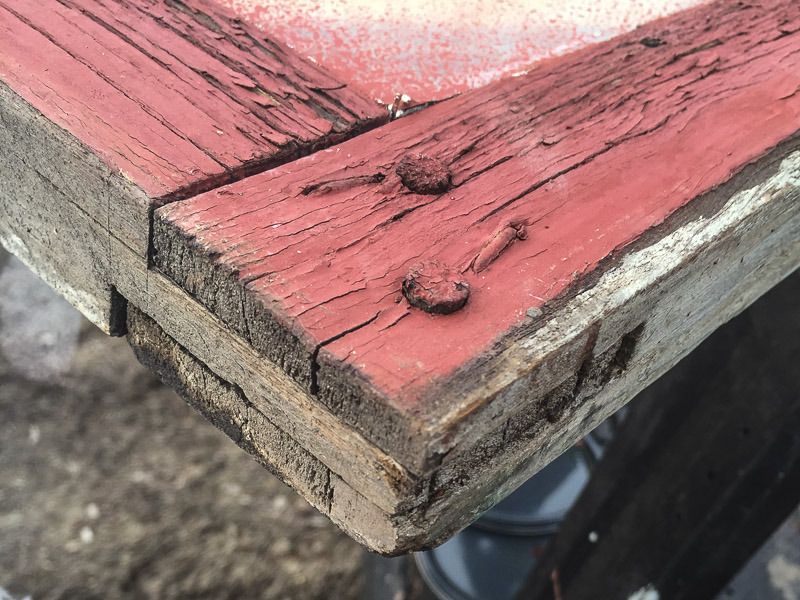
Note the tenons, and the wood pegs. also note that the cuts for the glass to sit in meant that the tenons had to be offset cut. If you look close you can still see the scribe marks for the cuts. Fine carpentry here. There are a half a dozen simpler ways to make a window, but this guy took pride in doing it right.

The other corners didn’t fare so well over the years.
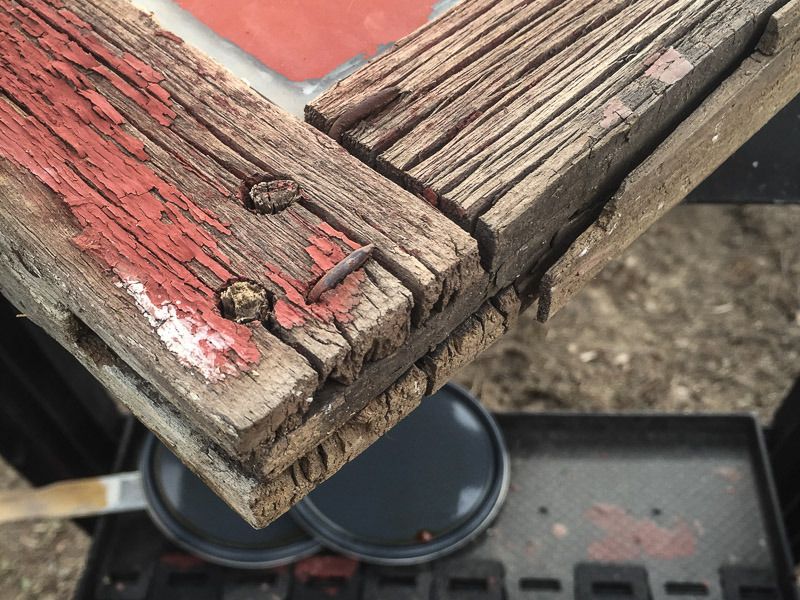
Might not have held up so well, but you can see the craftsmanship that went into the corners.
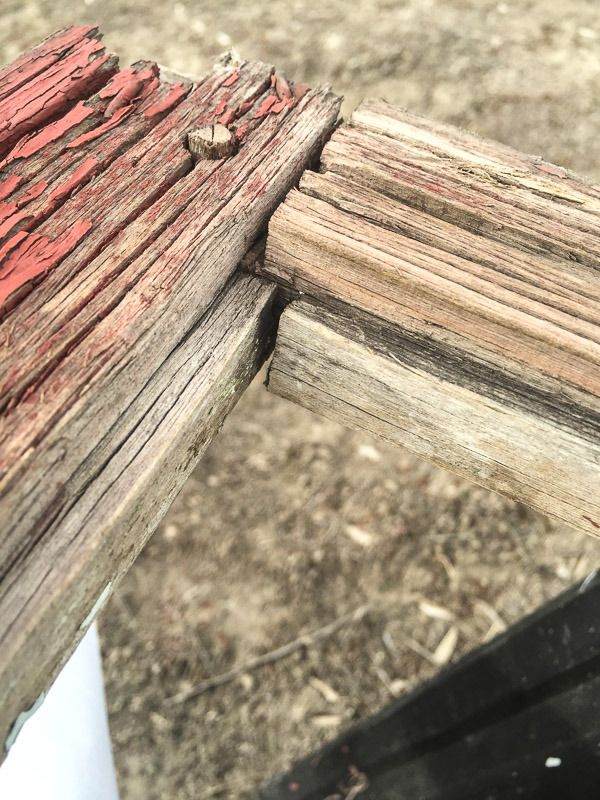
And the same kind of workmanship for the center pieces, no shortcuts taken.
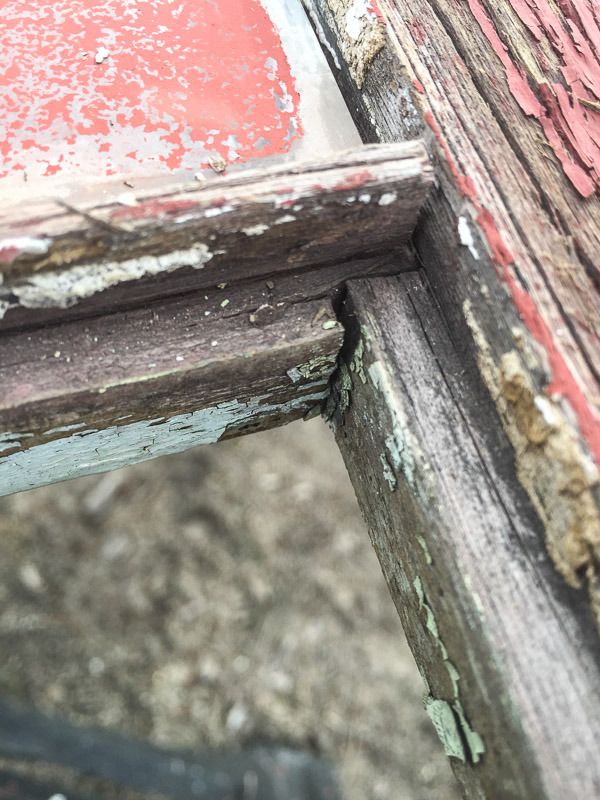
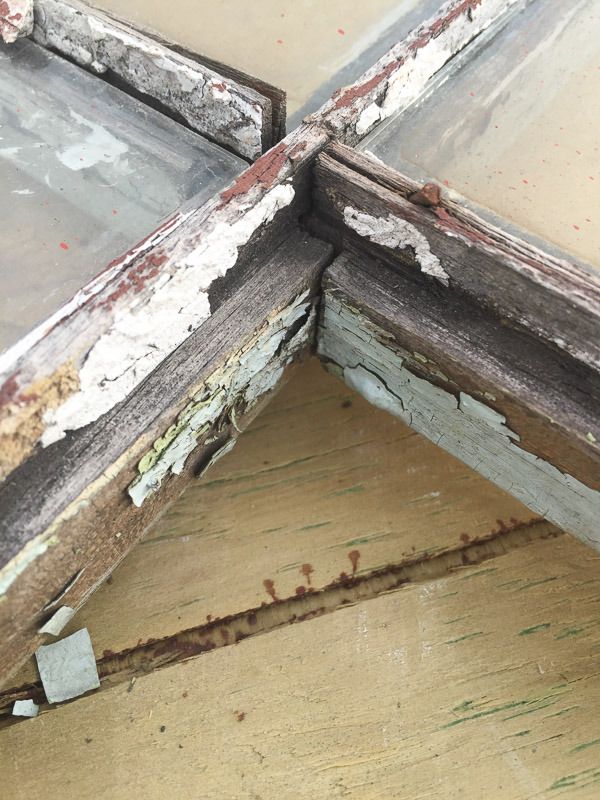
Any one that works with wood can really appreciate the work and extra effort put into this simple window.

Now the widows in the doors, well they were diffiniatlly made at a latter date, and not made for the door, but they kinda fit so they are just slapped together in the doors, poor fit and shortcut were taken where ever they could.
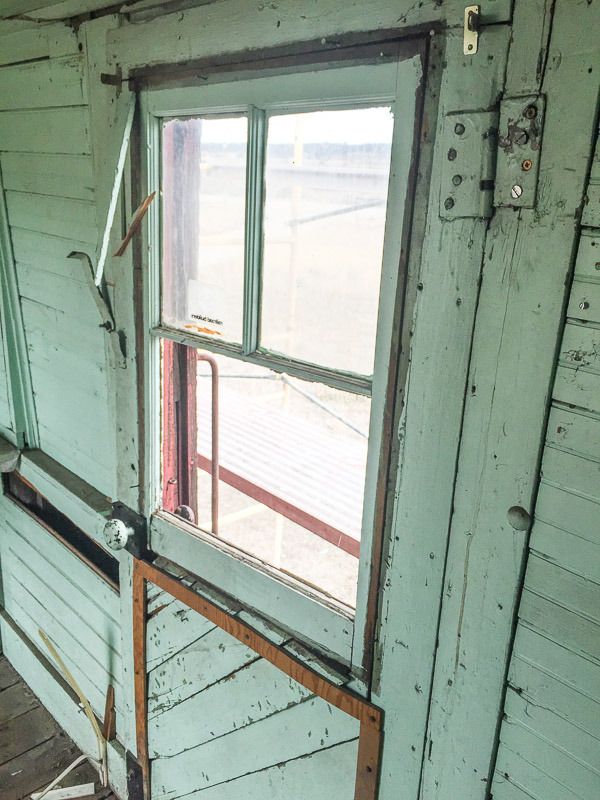
These will be replaced with the same quality as the side windows.

One more little step along the way to restoration.
Dave,

Like you I can appreciate the joinery in those windows. I like the offset tenons to allow for the dado fr the glass. It really is excellent work and given that he didn’t have a table saw with dado blade and or a router and table is even more impressive. This was likely done with hammer and chisel and block planes. Thanks for highlighting that for us wood workers.

Dave, . . . good to see you having fun. Rebuilding the window is a nice indoor winter job for someone.

Dave are you up to that type of craftsmanship?

Good luck , can’t wait to see how they turn out!

What wood were they made up of?

Hopefully you can get the same.

I’m no woodworker but I know and appreciate good craftsmanship when I see it. That’s some really fine work there.

So they cut the vertical support beams? From what you said, I take it that the car didn’t fare well with that “modification”. So are you going to try and add some kind of support back in?

@Sean Yup. I could do it. I have the skill set, the equipment, and the anal attentiveness to get it done. But that project got assigned to another guy that can do it also. I have faith in him getting it taken care of over the winter. Besides I have a lot on my table already.

@David Well we have discussed the thought of looking into that. The discussion yielded the decision not to try and scab together something. Reasoning: It was done way back in 1914, and yes the car does have a bit of “sway back” to her ( weather or not this has helped or hurt can’t be really determined, as a lot of old wood cars develop swaybackness, and just tightening the truss rods way up to remove the sag, may put an awful lot of added compression stress on the car), We (at this time) have no intention of running her up and down the rails, the floor and the undercarriage is sound and not in need of any major repair, she will never be loaded to much of any weight in her, and she has done OK for the last 100 years like she is, so no additional reinforcing will be done, beyond making sure that the siding on the inside walls are well secured.

I need to download some more pics of installing the brake wheel. Will show soon.

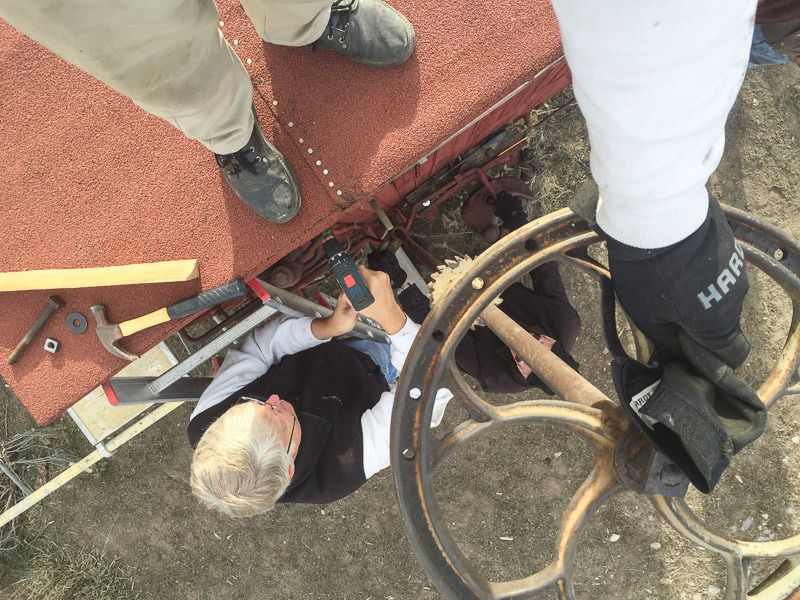
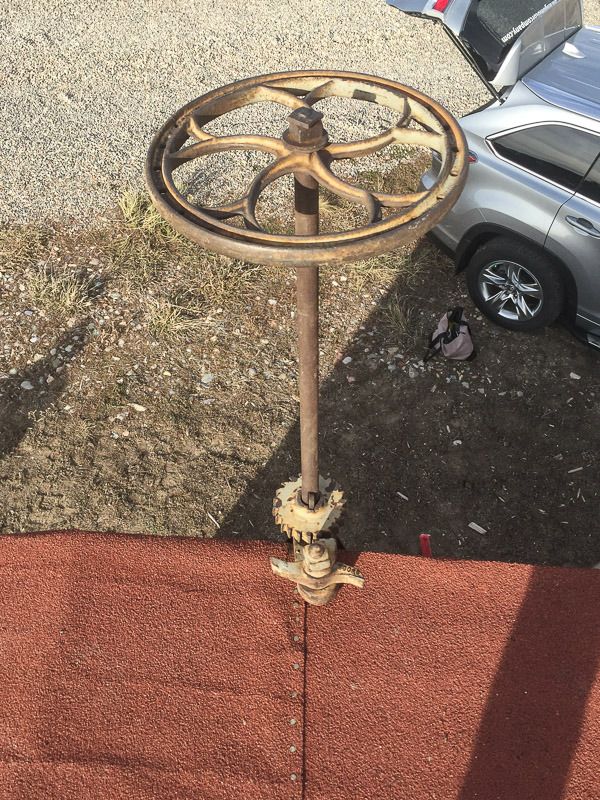
Stole some time and got some more pics edited. The Brake wheel was removed when we started on the new roof, and now that we have a new roof it was time to get it back on.

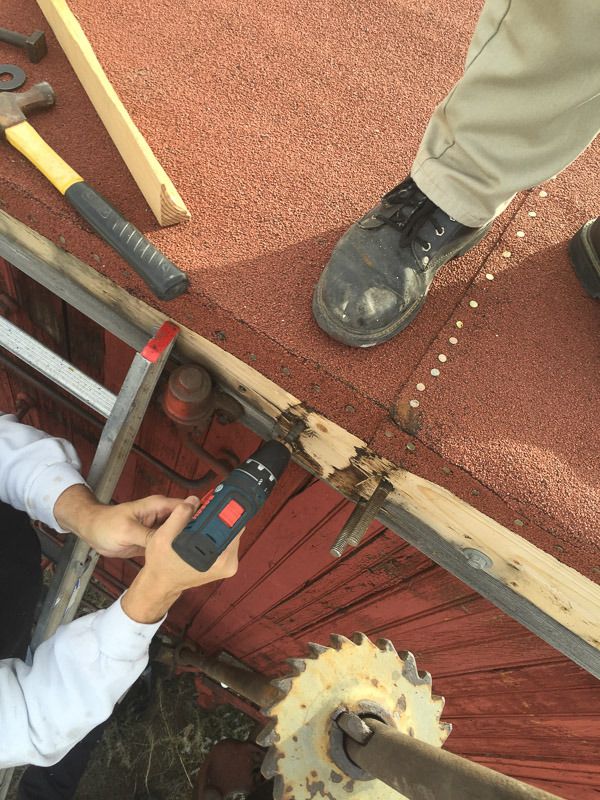
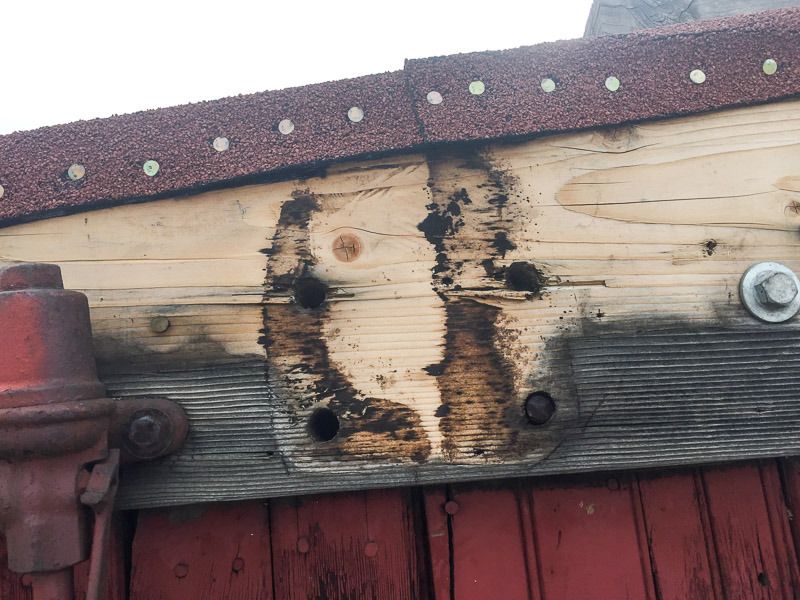
The brake wheel and shaft is attached to the end of the car and protrudes above the roof line with an 4 bolt bracket that also contains the ratchet and pawl to lock the brakes after tightening down. This is a “L” shaped bracket with the ratchet on top and the shaft running thru the bracket. The guys at the Georgetown Loop when they last fixed the roof they also replaced the soffit boards on the end of the car that held the brake to the car.

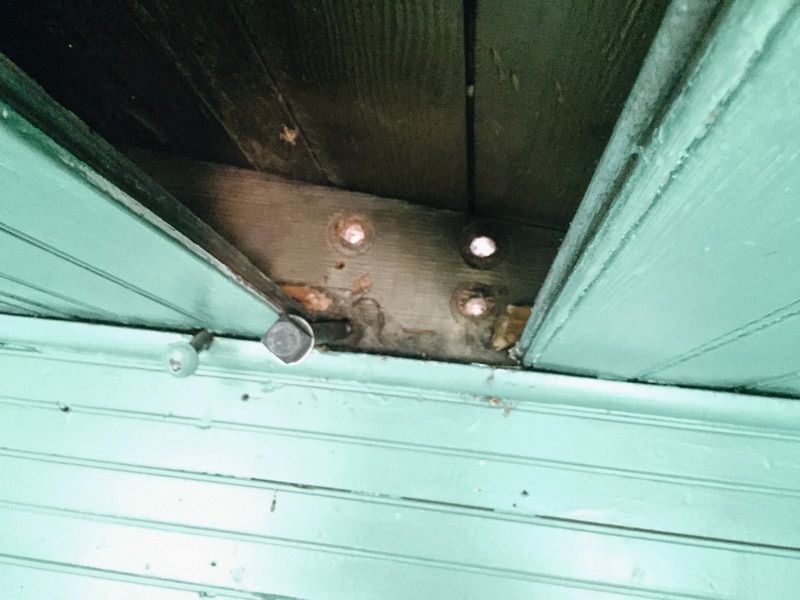
The carriage bolts to hold the bracket on passed thru from the inside, thru the top end sills and nuts on the outside. To get to the bolts we had to open up the ceiling boards . Carriage bolts typically have lost their grab at the bolt head due to the wood deteriorating around the square part, and often just turn when the nut is tightened.

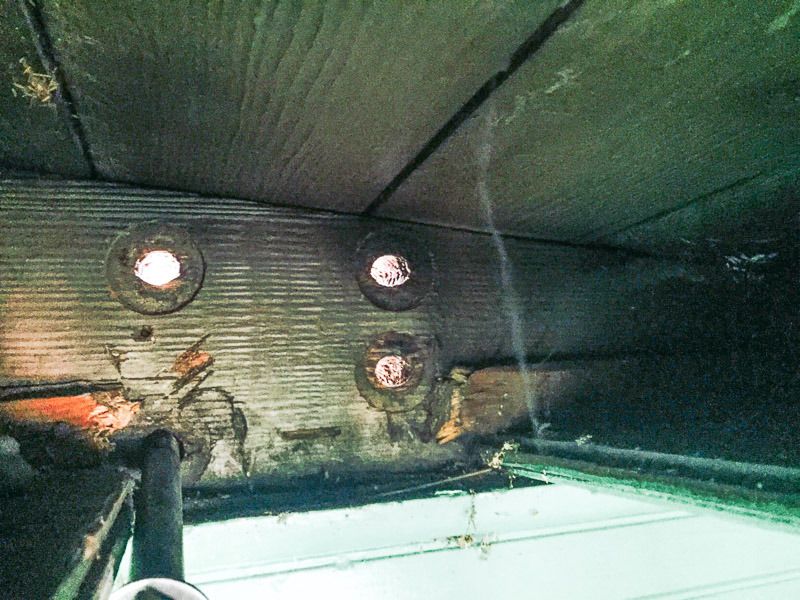
We noted that these same ceiling boards had been removed at a prior time, Our guess it at the time that the GL guys fixed the roof. We noted that the bolt holes were elongated so the bracket could be re-used with what was now a thinner roof.

Another view. Note that the bottom ( this is an original two layer roof car) roof boards run horizontal to the length of the car. Upon inspection, we believe that these are the original roof boards from when the car was built, as this car never made it to the “rebuilt” stage.

Because the new roof is thicker then the plywood one that we removed, of course the bolt holes didn’t line up. and we had to " Re form to meet factory specifications"

Note: The ratchet is held in place to the staff with a tapered key driven into a keyway. About 1/2" thick by about 2 1/2" long. No Key- No brakes. There was always a few spare keys kept in the caboose or engine tool box.

And the finished job.

Notice the flat locking nut on top of the brake wheel nut. We typically spot weld the lock nut to the threaded end of the shaft. For some reason, rail fans think that stealing brake wheels is cool to collect them. These originals are now getting rather hard to find, if you can at all.

Too bad we can’t attach the g scale brake wheels the same way. I have lost several off cars on the pike that are only glued on. And I can’t see where they are now laying!

Doug,

This is exactly what I did on my 1.5 inch scale 1903 wood gondola.

This car is 35 years old this year and still hauling revenue!

Doug Arnold said:

Too bad we can’t attach the g scale brake wheels the same way. I have lost several off cars on the pike that are only glued on. And I can’t see where they are now laying!

I glue my brake wheels onto the shaft, and I still lost one, shaft and all. I have no idea how it slid vertically out of the angle bracket. Maybe I have scale rail-fans steeling my brake-wheels too.

Thanks Dave, keep posting, that is just so cool.

Edit for that stinken spell checker

David, you might need to electrify thode brake wheels! Just a little jolt would do it!

Oh, so the taser idea has made its way from the build challenge thread over to this thread?

Doug Arnold said:

Too bad we can’t attach the g scale brake wheels the same way. I have lost several off cars on the pike that are only glued on. And I can’t see where they are now laying!

For Doug and others,

You definitely CAN attach brake wheels to your “G” stuff! I do it all the time. Use 1/16" diameter brass rod and put a 0-80 thread on the end exactly like the 1:!. Buy miniature hex head nuts from MicroMark, Micro-Fasteners, Inc. or Walthers. I use Walthers and buy them at my local hobby shop. 10 nuts for about $4.00. The dimension across the flats of these nuts is 3/32 or .093. If you go to a 0-72 thread, you could get the hex head flats down to 5/64! Painted black and 2 feet away. YOU will never see it!The 0-80 thread is made for 1/16 rod. Also flat washers are available too. A 0-80 threading die will cost you about $6.00-$10.00 Not a big deal. In fact, Jonathan Bliese fixed a broken brake wheel rod and then fastened the original Accucraft brake wheel to a AMS stock car for me about three years ago. :slight_smile:

Doug,

You want to try it?

Yea, I could do that. I just glue the things onto 1/16th rod. But I still cant fathom how the rod and wheel disappeared from one of my boxcars. Its not like I carry them upside down. I know, it musta just been sucked into that roving black hole that visits me from time to time. You know, when you go looking for something you know you have, but you cant find it. Then later, it just appears where it was supposed to be. But you know, you must have looked there several times for it, and it wasn’t there. That’s the roving black hole

Drove thru Silverton today, on my way up to and back from Grand Junction CO. There was only about 3FT of snow on the ground, and drifts to about 5+ around the SN Engine House. Way to much to get the bay doors open. Looks like most of the activity in Silverton is Snowed in for the season.

Dave Taylor said:

Drove thru Silverton today, on my way up to and back from Grand Junction CO. There was only about 3FT of snow on the ground, and drifts to about 5+ around the SN Engine House. Way to much to get the bay doors open. Looks like most of the activity in Silverton is Snowed in for the season.

Dave . . . I’ve bin thur once in the winter. Just before Xmas . . . . was lovely. Big Xmas tree stuck in a snow pile in the center of the main intersection . . . . loader scooping snow off the streets ( too much to plow ). I look forward to visiting again and lending a hand with a project.

Narrow Gauge Lover

aka Eric Burkholter

Durango Railroad Historical Society

Winter… Blah… But just got a link to a write up by Jay Wimmer, The sponsor of the Fall Steam Excursions on the C&T that we did a year ago.

http://www.chamasteam.com/images/chamasteam2014/CTT_225-CHAMASTEAM-ARTICLE.pdf

In Need of Research Help. Below is the meat n tatters.

DRHS Members:
We are working on a proposal to the State Historical Fund to restore the next set of four rail cars. Three are on the State Historical Registry, so they qualify for an application. However, D&RGW Reefer 39 is not. To be able to include it in this proposal we need to find some form of evidence, paper or photo, of this car on the Silverton Branch (Durango to Silverton) before the National Historic Landmark designation was given to D&RGW in 1976. Otherwise we will have to go through the lengthy process for a historical registry designation with the State, causing a big delay in this project.

We have already done the basic search through the Grandt Narrow Gauge Pictorial books and at the libraries in the Denver area (Denver Public Library, History Colorado, and Colorado RR Museum). We found photos of #34 and #54, but that won’t do. It has to be #39.

Please help by searching your own files and books for any photo or piece of paper with such evidence. Also, let me know of anyone in particular we should contact directly.

Thanks very much,
George Niederauer

Durango Railroad Historical Society
Box 654
Durango, CO 81302
www.drhs315.org

Any help with this will be greatly appreciated.

Thanks

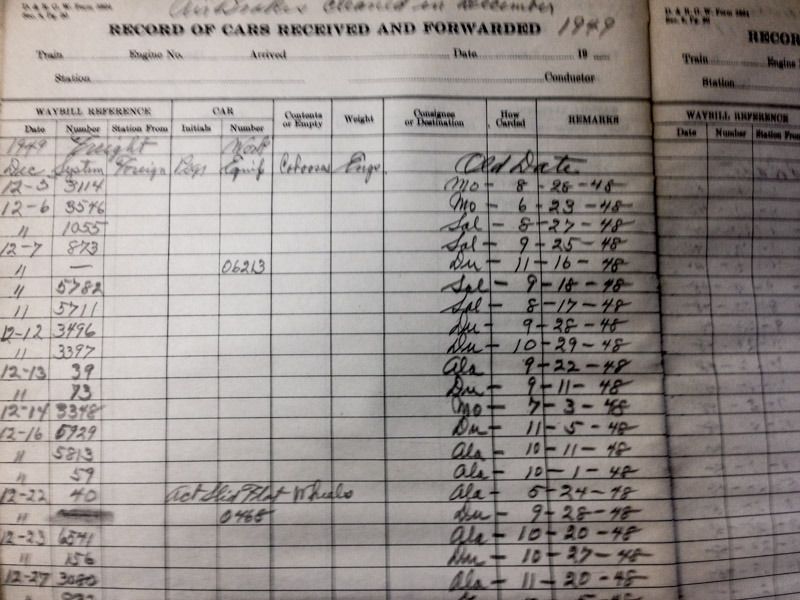
WAHOOO, Ask and you shall receive. We (DRHS) were just forwarded a copy of “Cars received” Log book from Dec of 1949 Showing that reefer 39 was in Durango on Dec 13th 1949. With this proof, we can now proceed with the grant process from the Colorado Historical Socity.